What you’ll need:
Available during the 14-day trial and on Advanced, Pro, and Enterprise plans. Base plan accounts can continue using the AI agent if it was activated previously.
Keep in mind:
Non-admin users can generate and preview AI agents, but only admins can create or activate them.
AI agents only reply to incoming messages and can’t start conversations.
You can create multiple AI agents in the same workspace. The number of active AI agents depends on your subscription plan. To learn more, check our AI agent limits article.
AI agents use the shared AI credits available in your account. If you run out of credits, AI agents stop responding until your credits renew or an admin purchases an additional AI credit package. To learn more, see our Kommo AI limits article.
This guide walks you through the different ways to set up AI agents in Kommo — using automatic generation or manual setup — so you can quickly create multiple agents for different teams, channels, or workflows.
Choose how to set up AI agents
Kommo offers two ways to set up AI agents:
Set up AI agents automatically – quickly generate an AI agent using your website or business information, then review and configure it in the agent settings.
Set up AI agents manually – build an AI agent from scratch or set up one through a supported integration.
Set up AI agents automatically
This setup flow is designed to help users quickly create and try an AI agent with minimal configuration. It automatically generates a ready-to-use agent using information you provided during onboarding (for example: industry, company name, subdomain, etc.).
This option is useful if you want to try the AI agent quickly and review or adjust the setup later.
Note: You can also use automatic setup during onboarding. To learn more, check our article.
To get started:
Go to AI agents → click Create my AI agent.
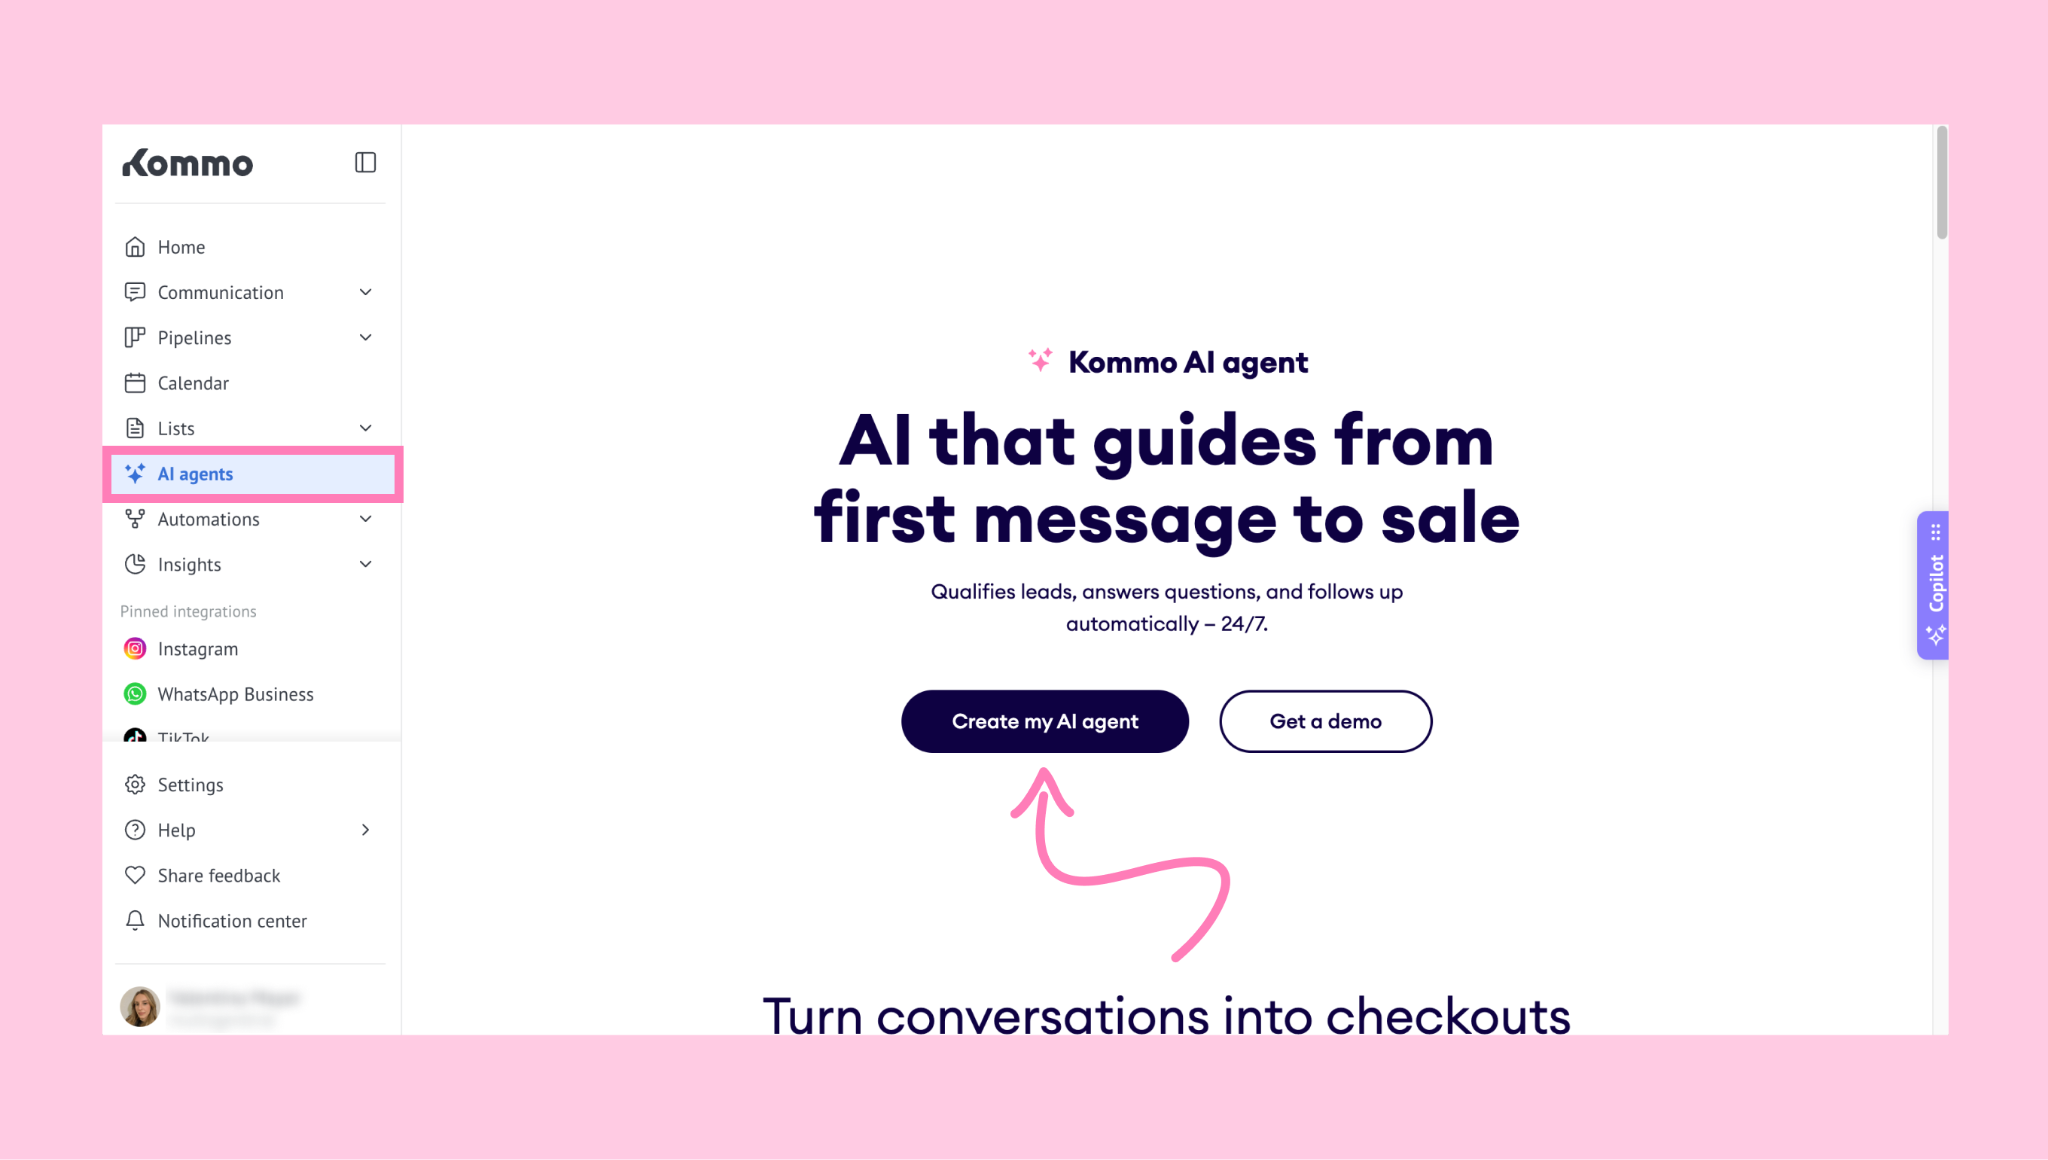
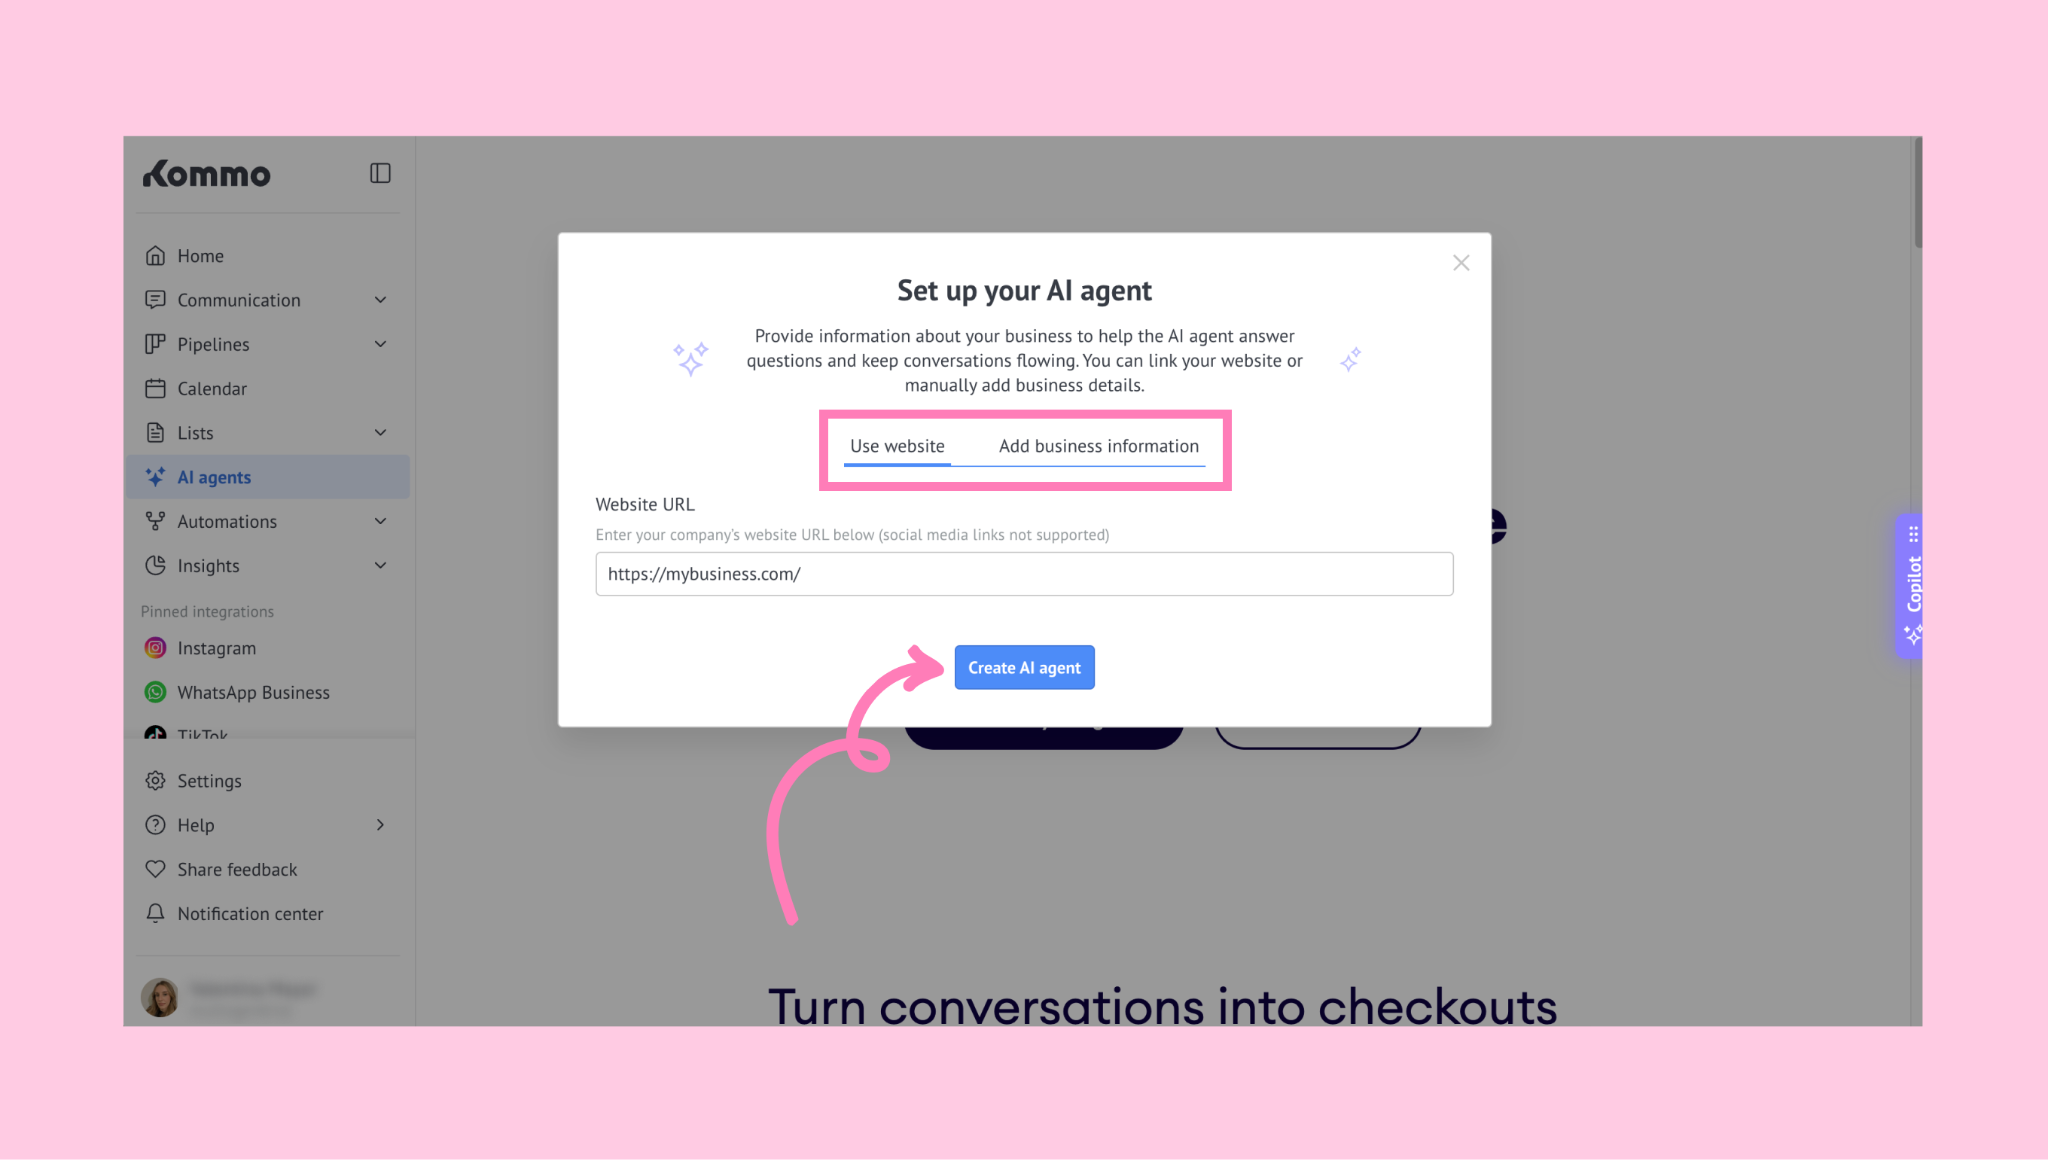
A modal window will open where you can choose one of these options:
Create an AI agent using your website URL
Create an AI agent adding your business information
Select your preferred method, complete the fields, and click Create AI agent.
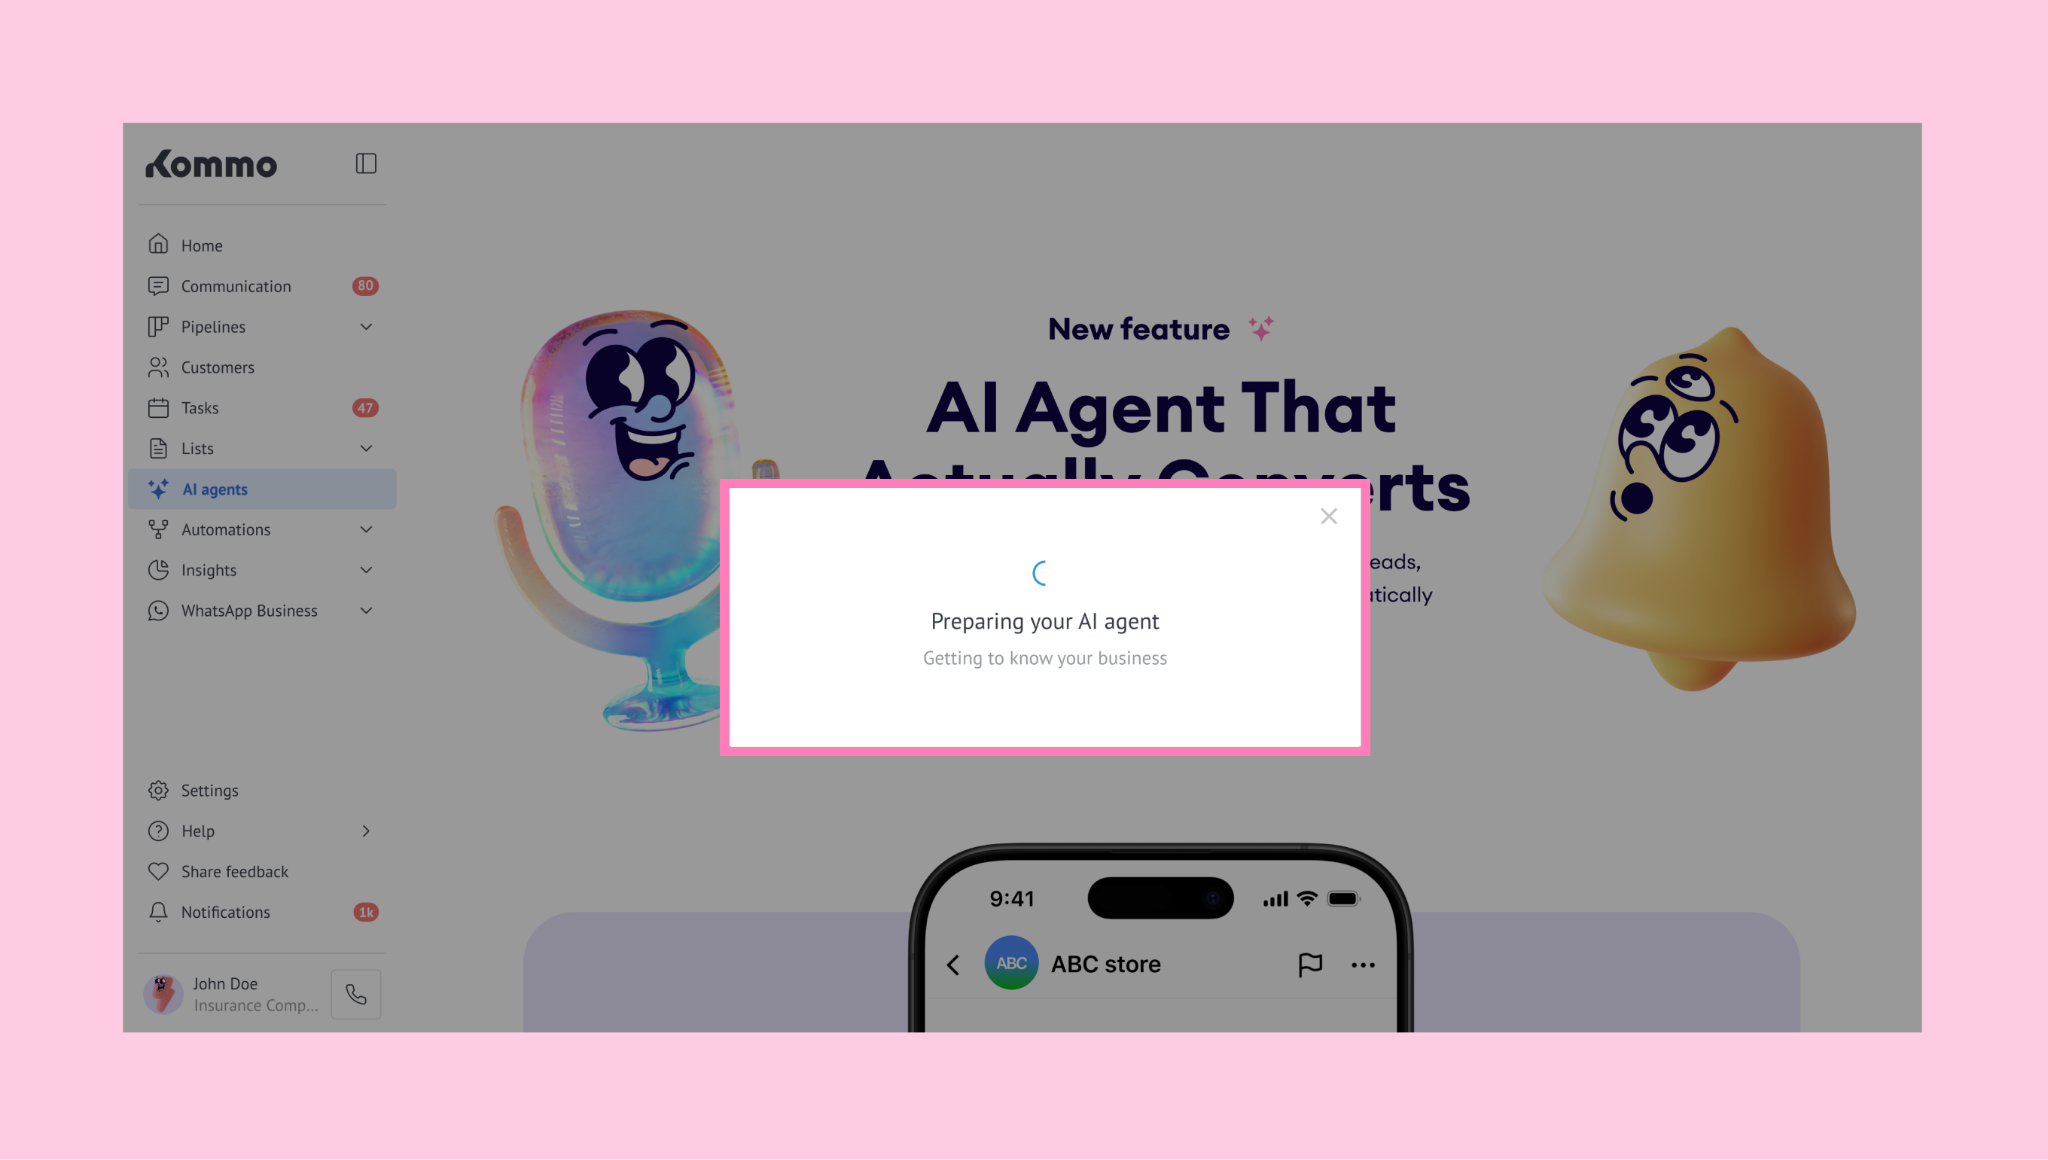
Wait while the AI agent is being generated.
You’ll see a preview of the generated agent. Test it by sending a message, and restart the preview at any time by clicking the Restart button.
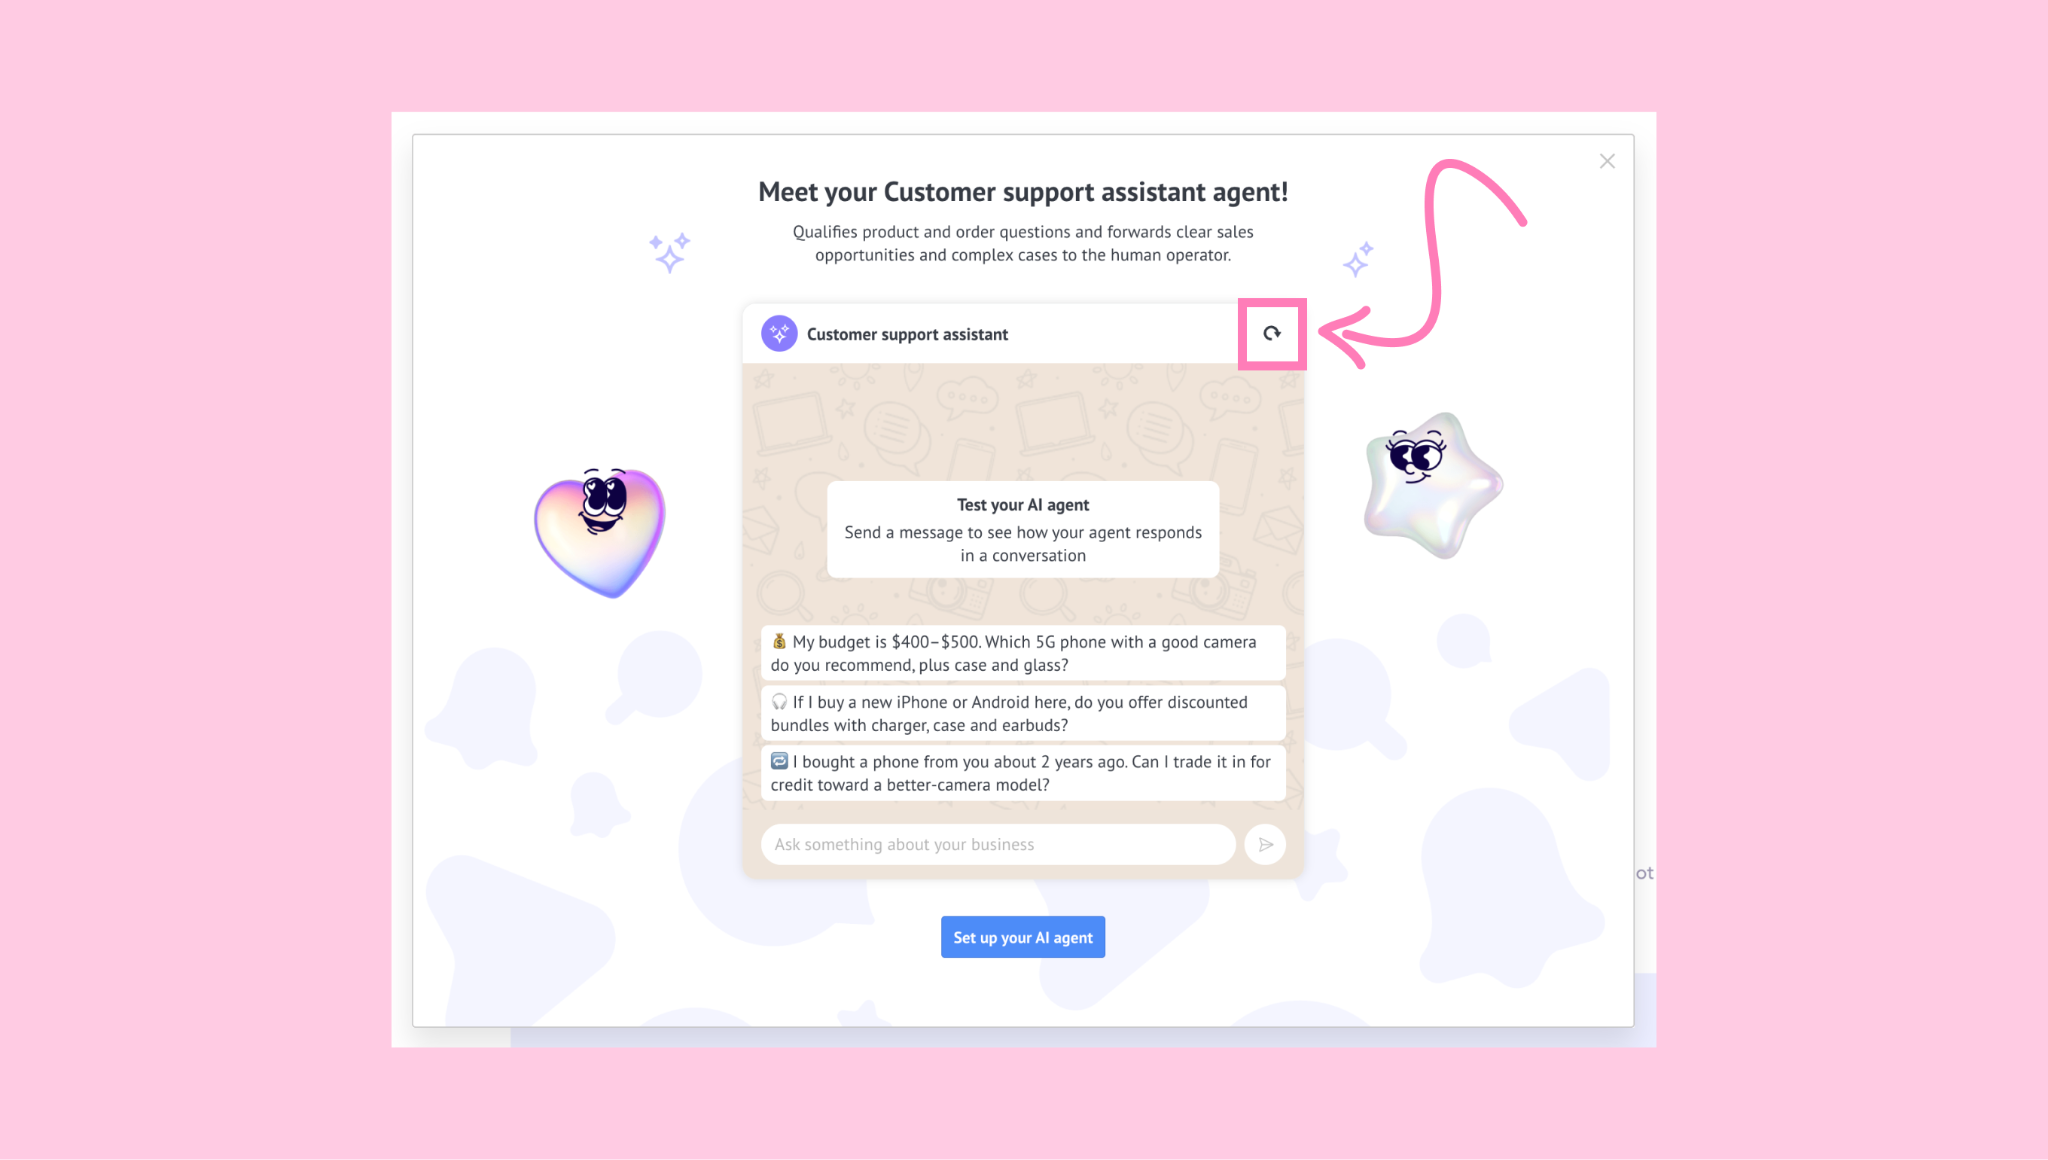
Then, click Set up your AI agent to continue.
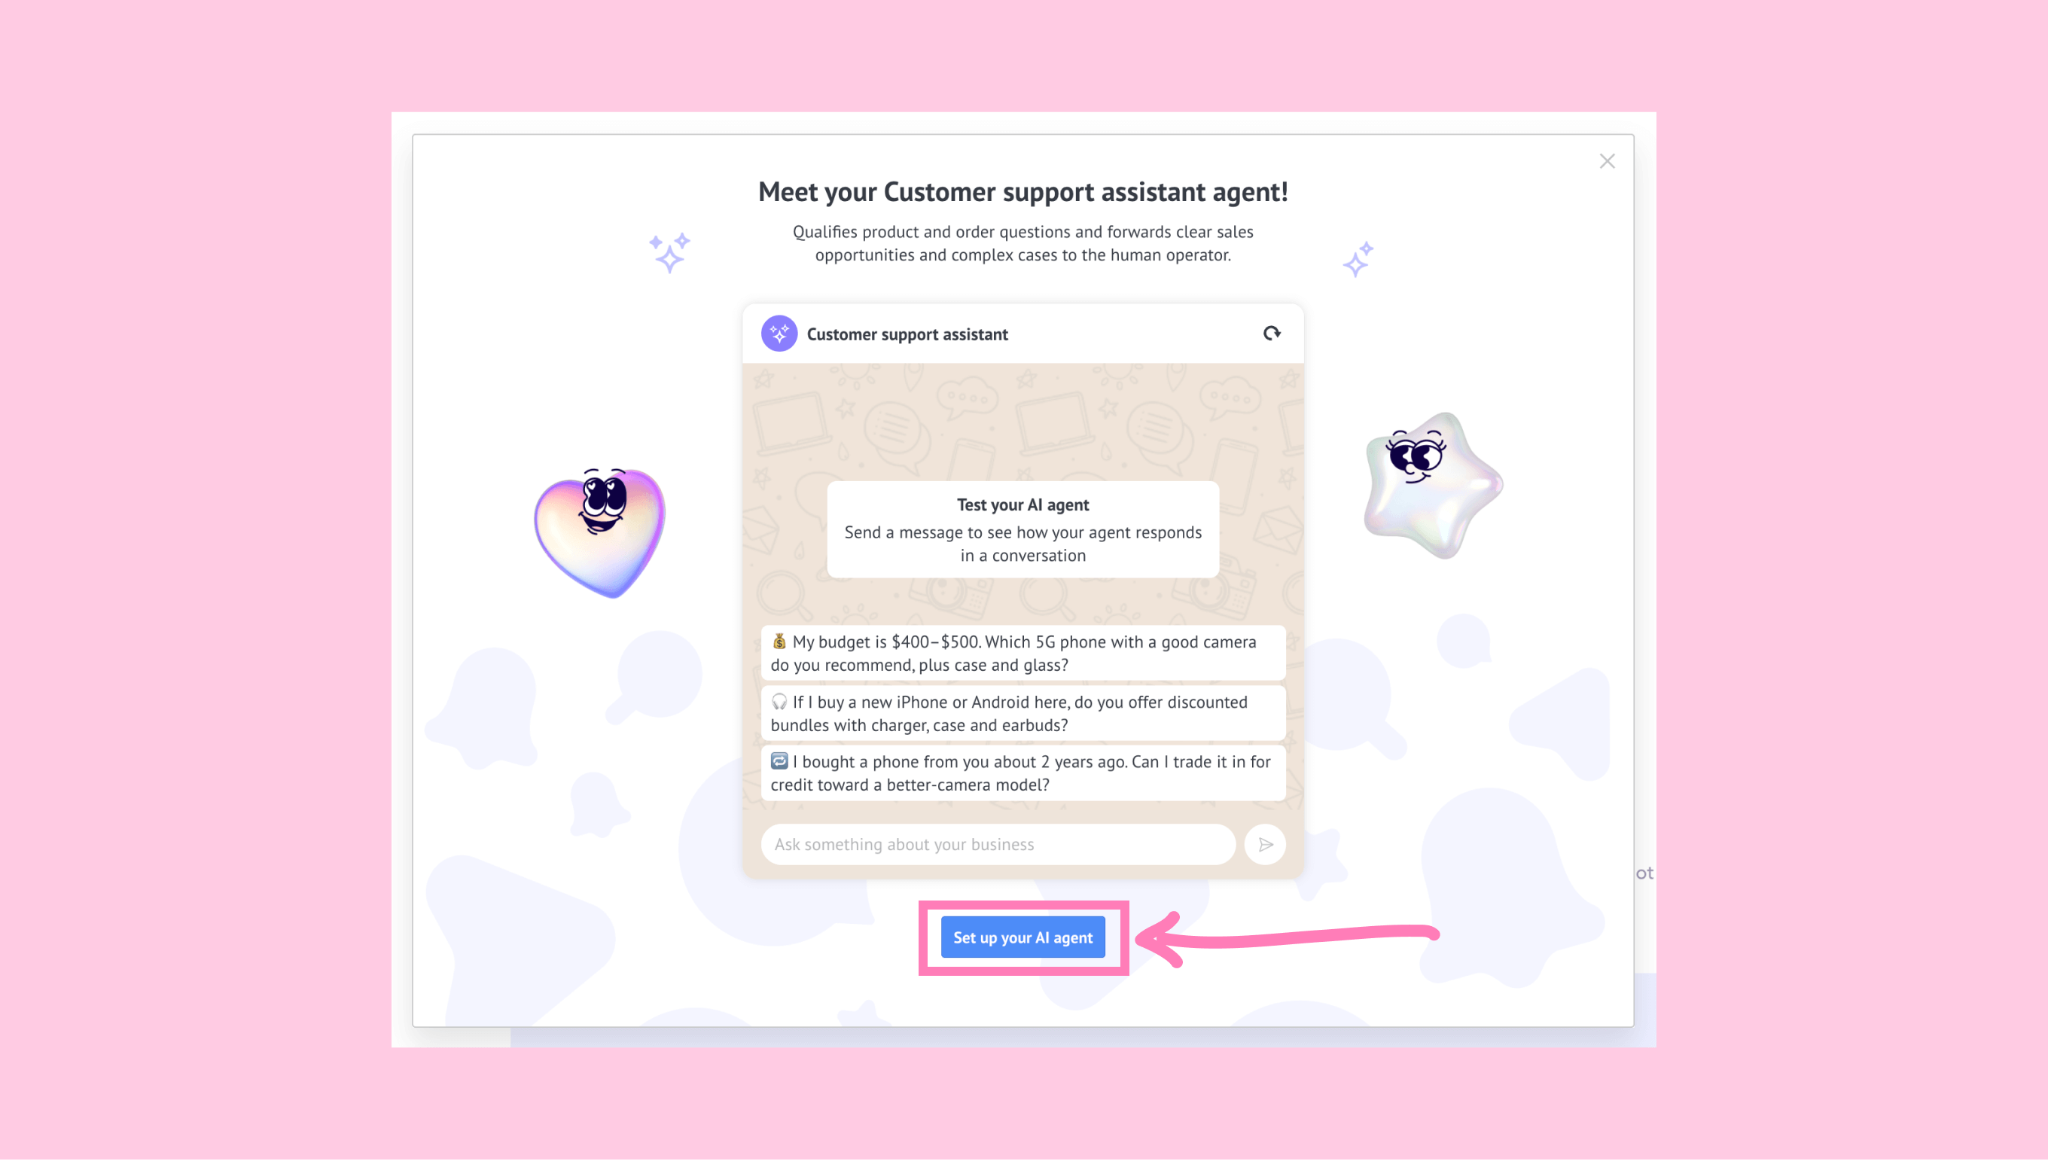
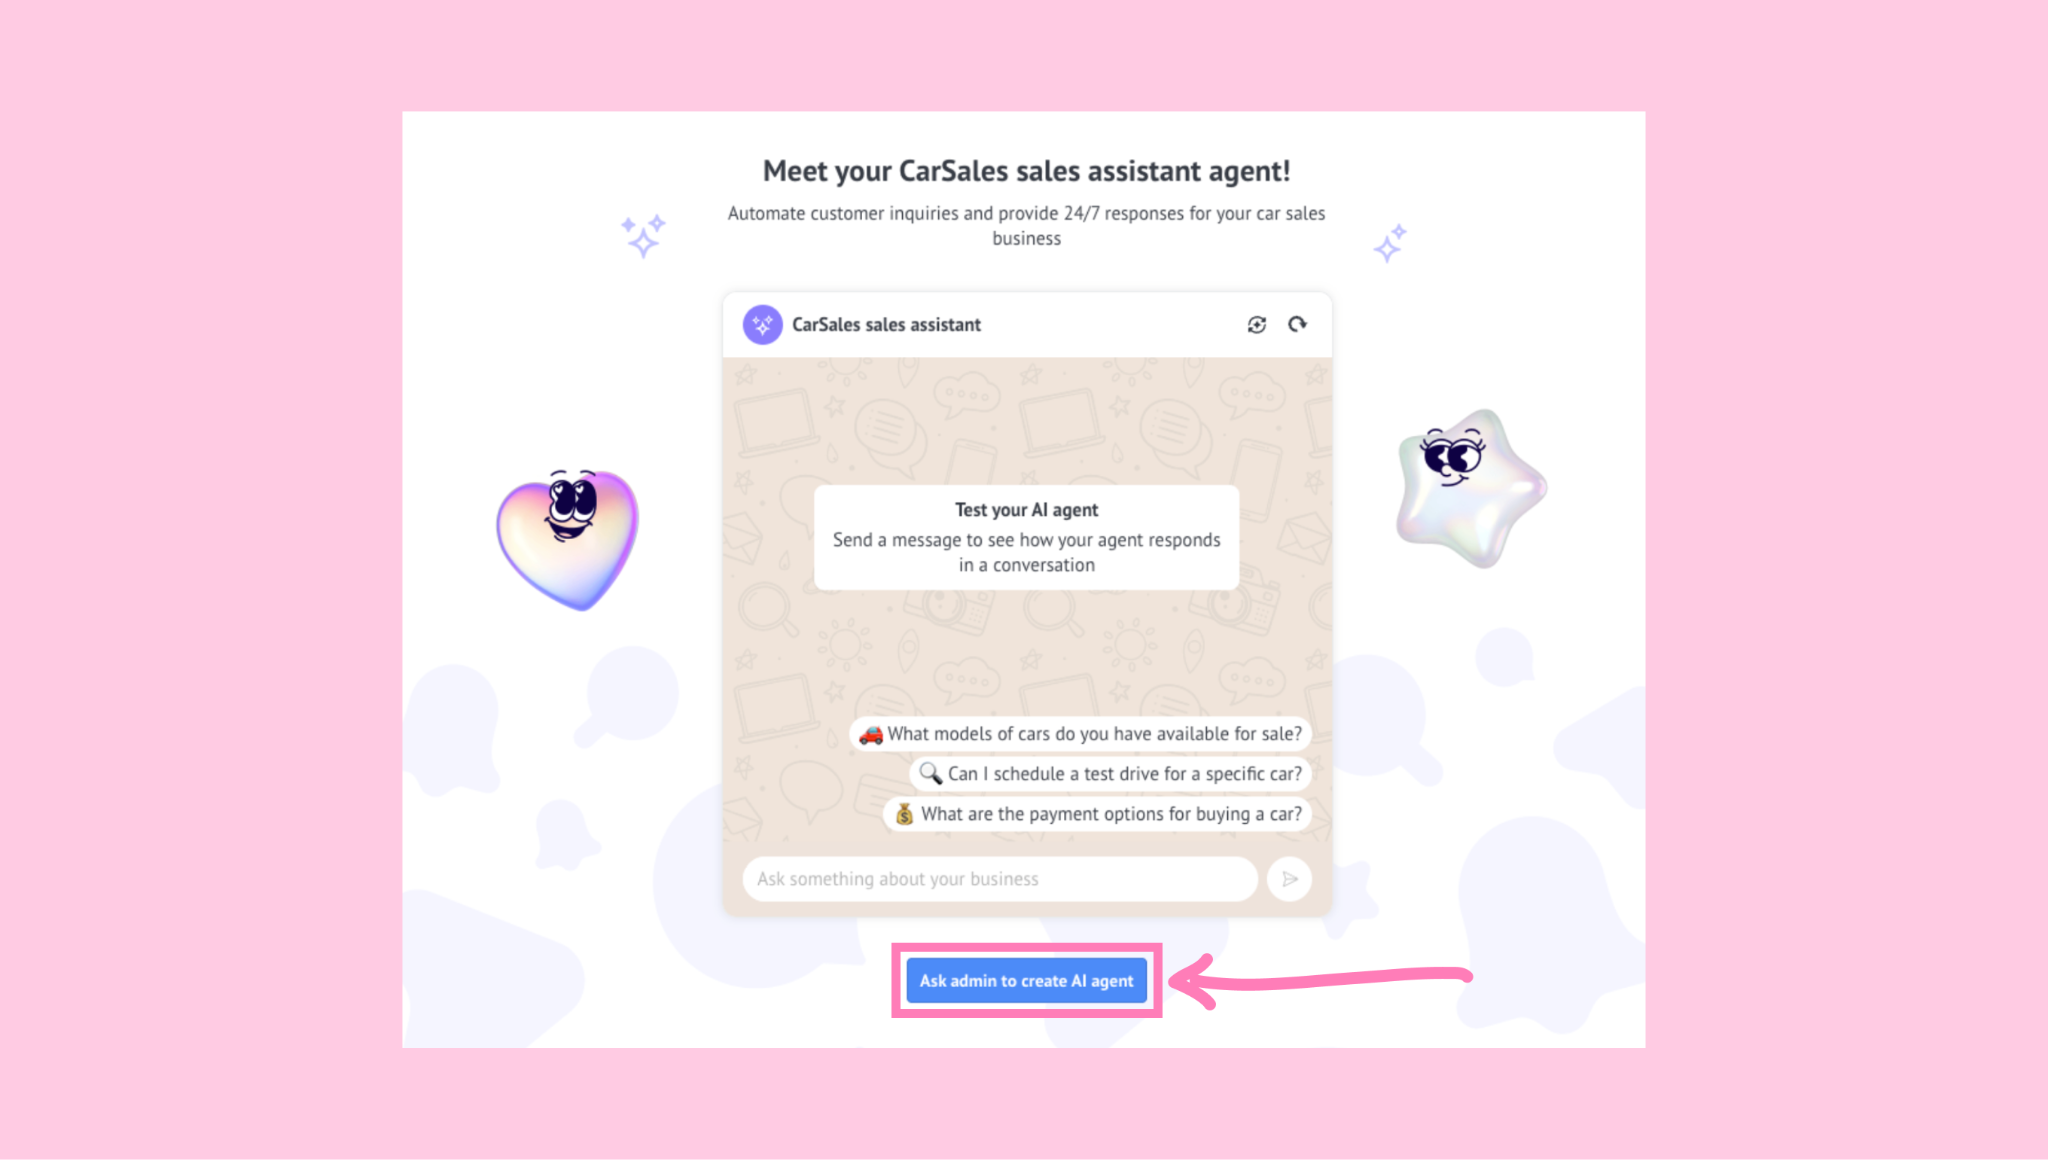
Note: Non-admin users can only generate and test the AI agent in preview mode. To continue, they’ll need to click Ask admin to create AI agent, which sends a request to an admin to review the generated agent and complete the setup.
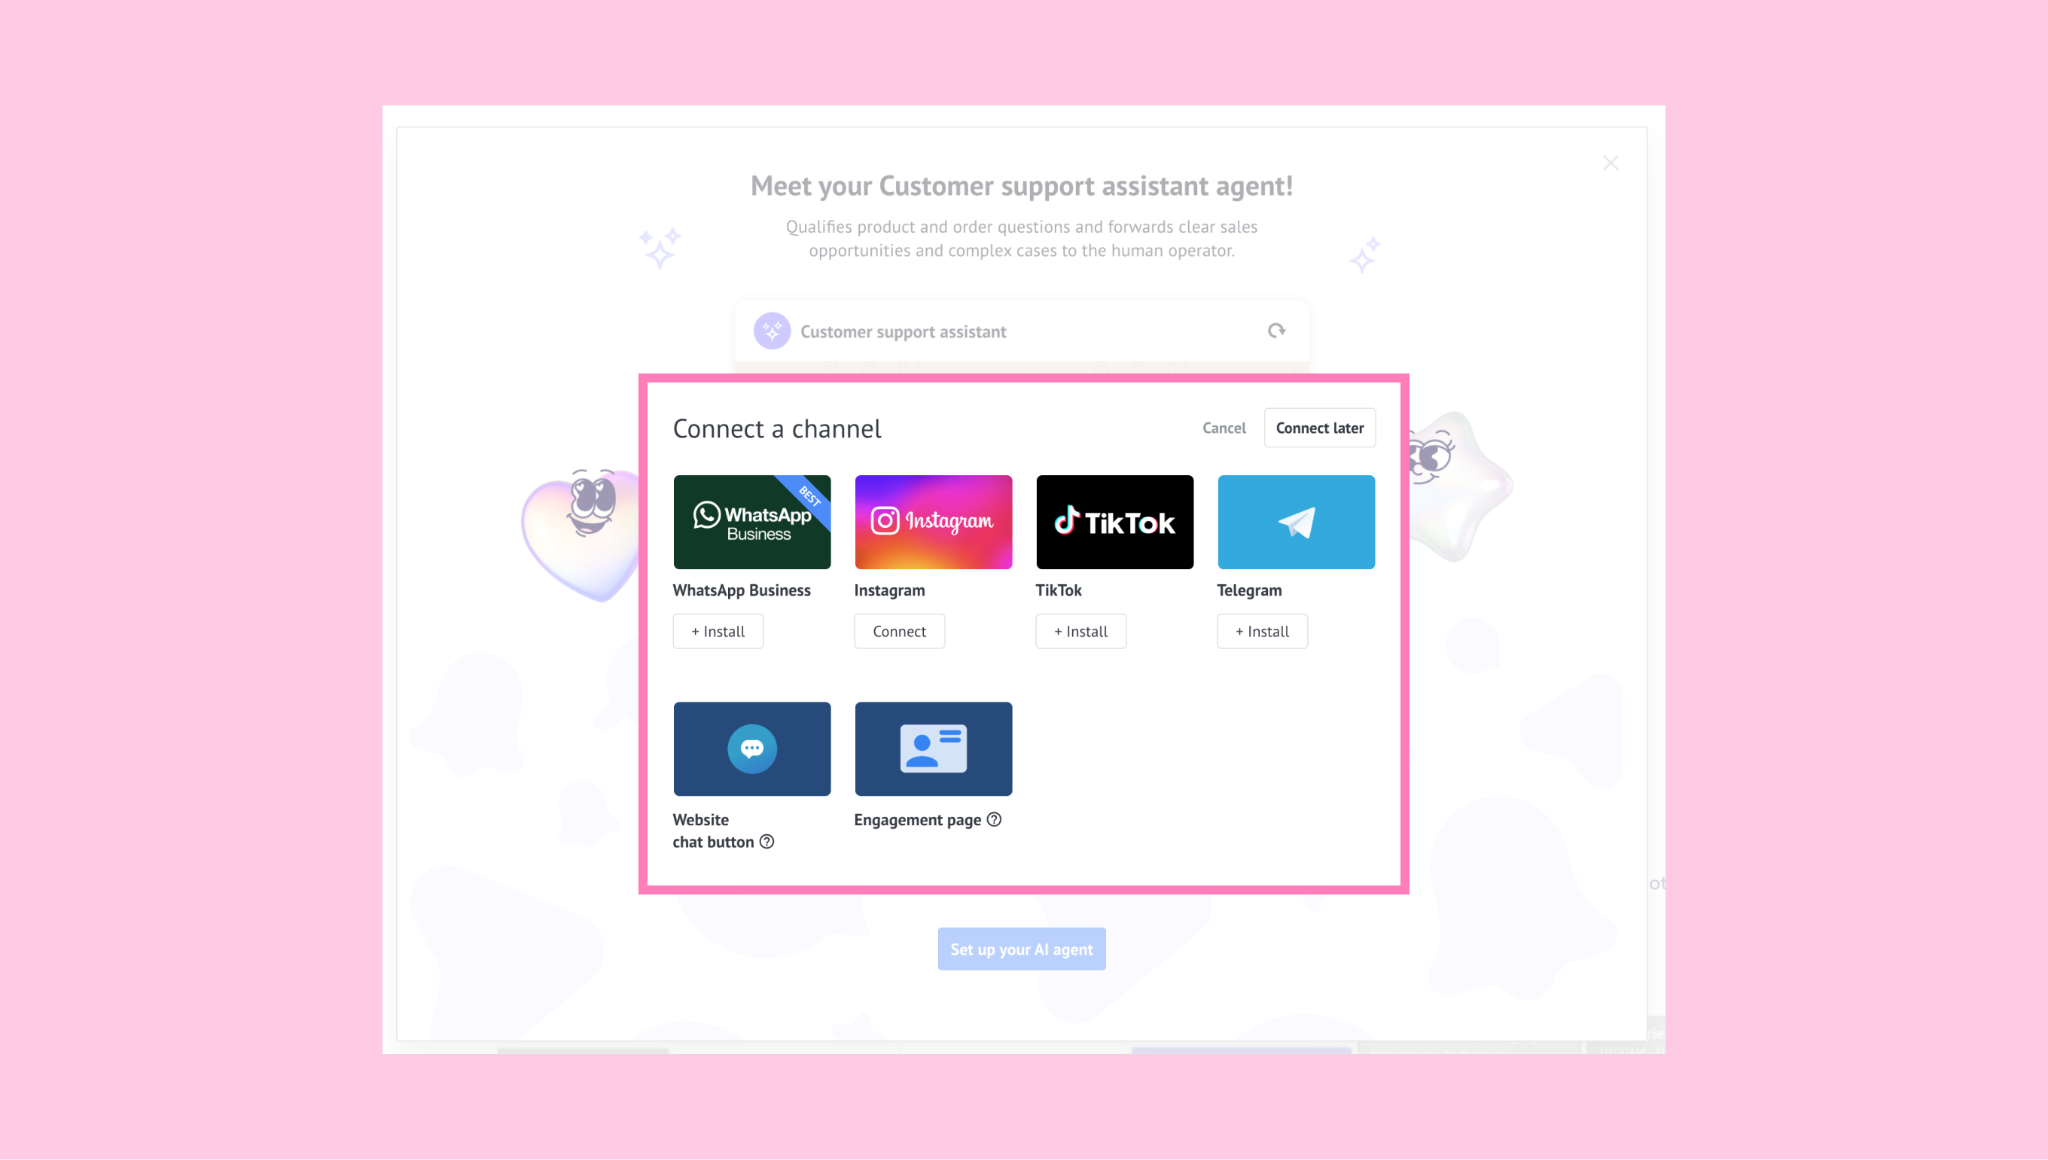
Connect at least one channel (for example: WhatsApp Business, Instagram, etc).
Then, select at least one pipeline stage where the AI agent should work.
A confirmation modal will appear to let you know the agent is active. You can review and adjust the generated settings in the AI agents section.
Important: You can skip this guided setup, but to continue setting up the AI agent later, you’ll need to connect a channel and activate the agent first.
Set up AI agents manually
To set up an AI agent manually, you can choose one of these options:
Set up from scratch
Go to AI agents → AI agent list section and click Add a new agent.
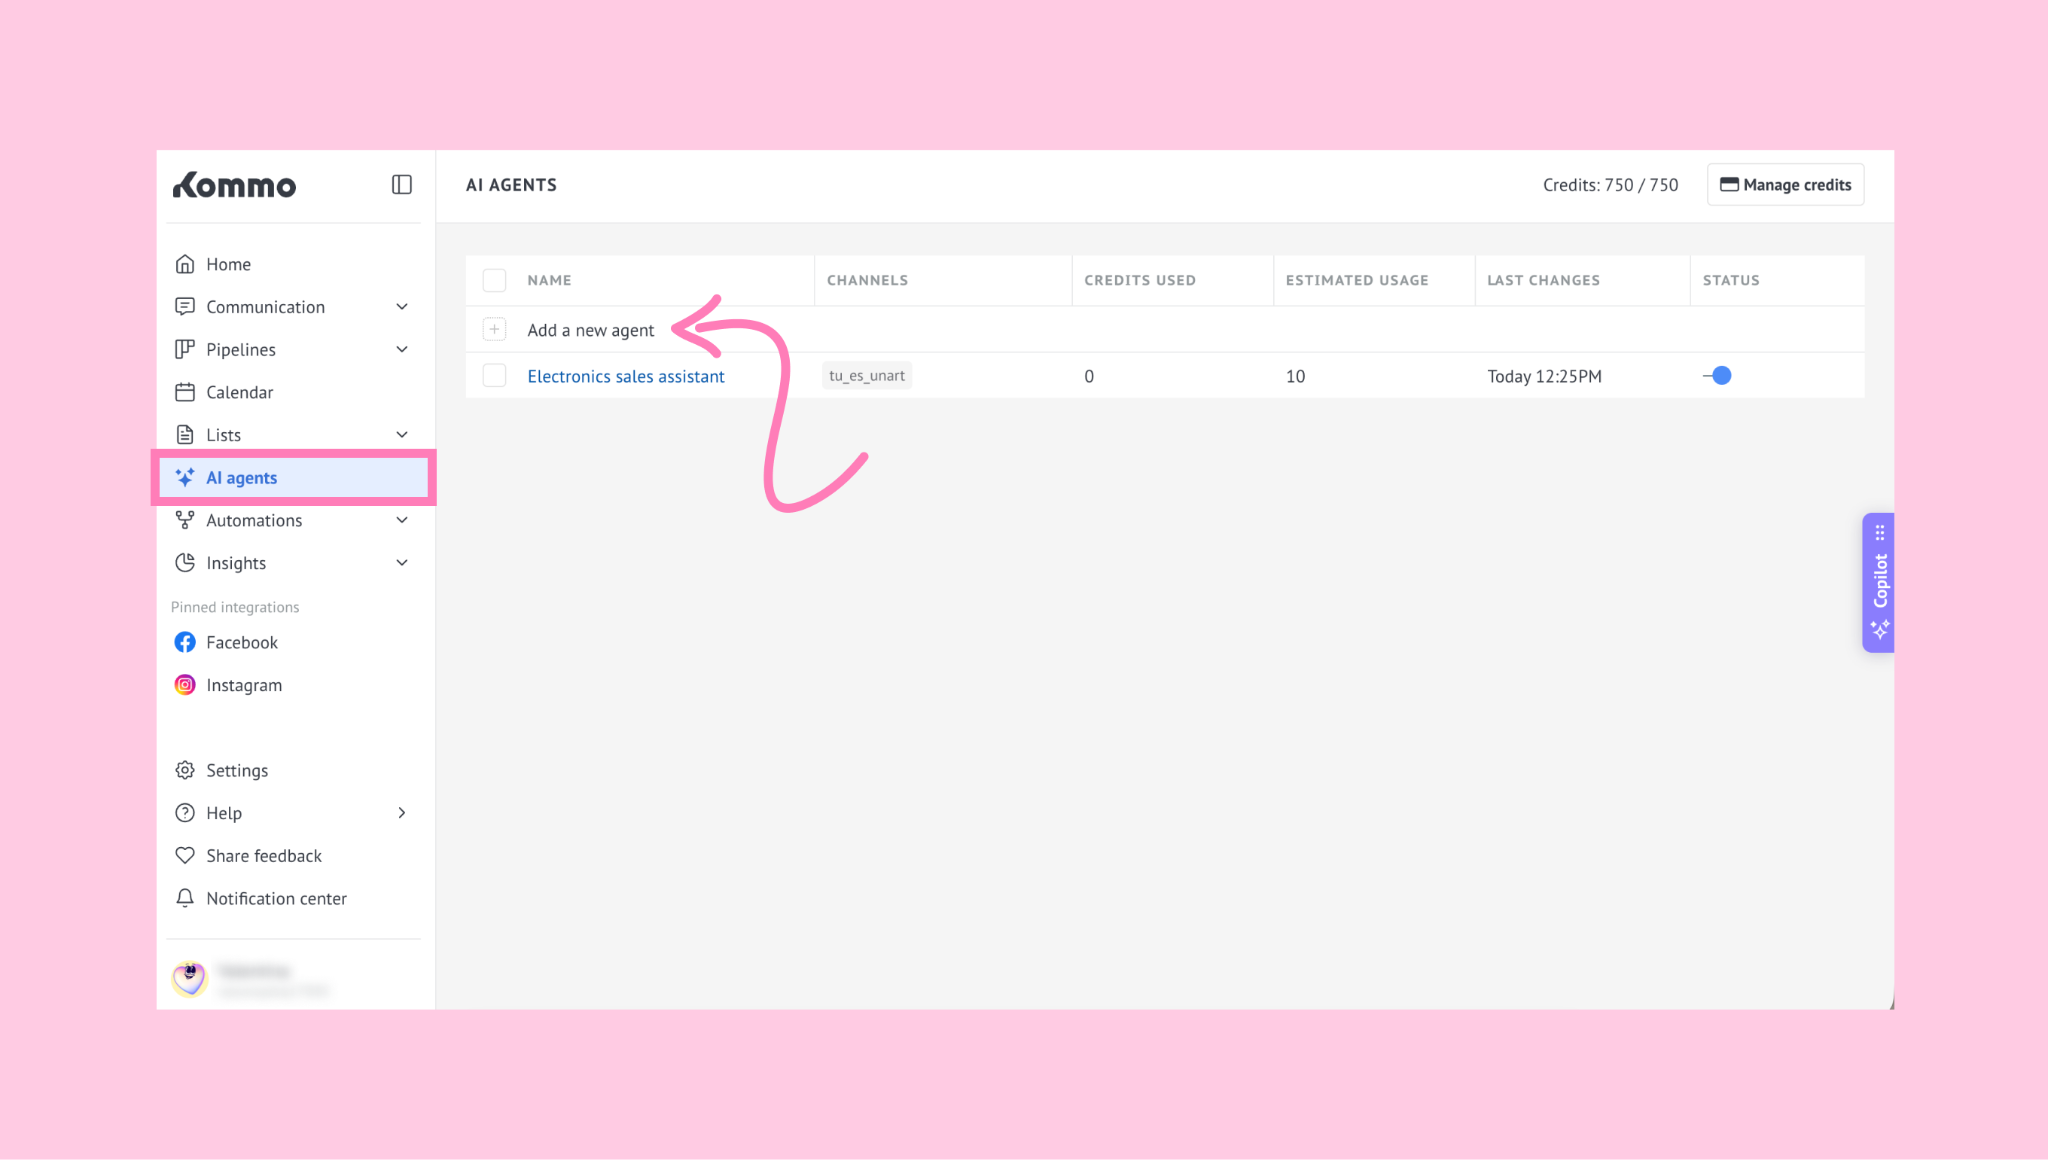
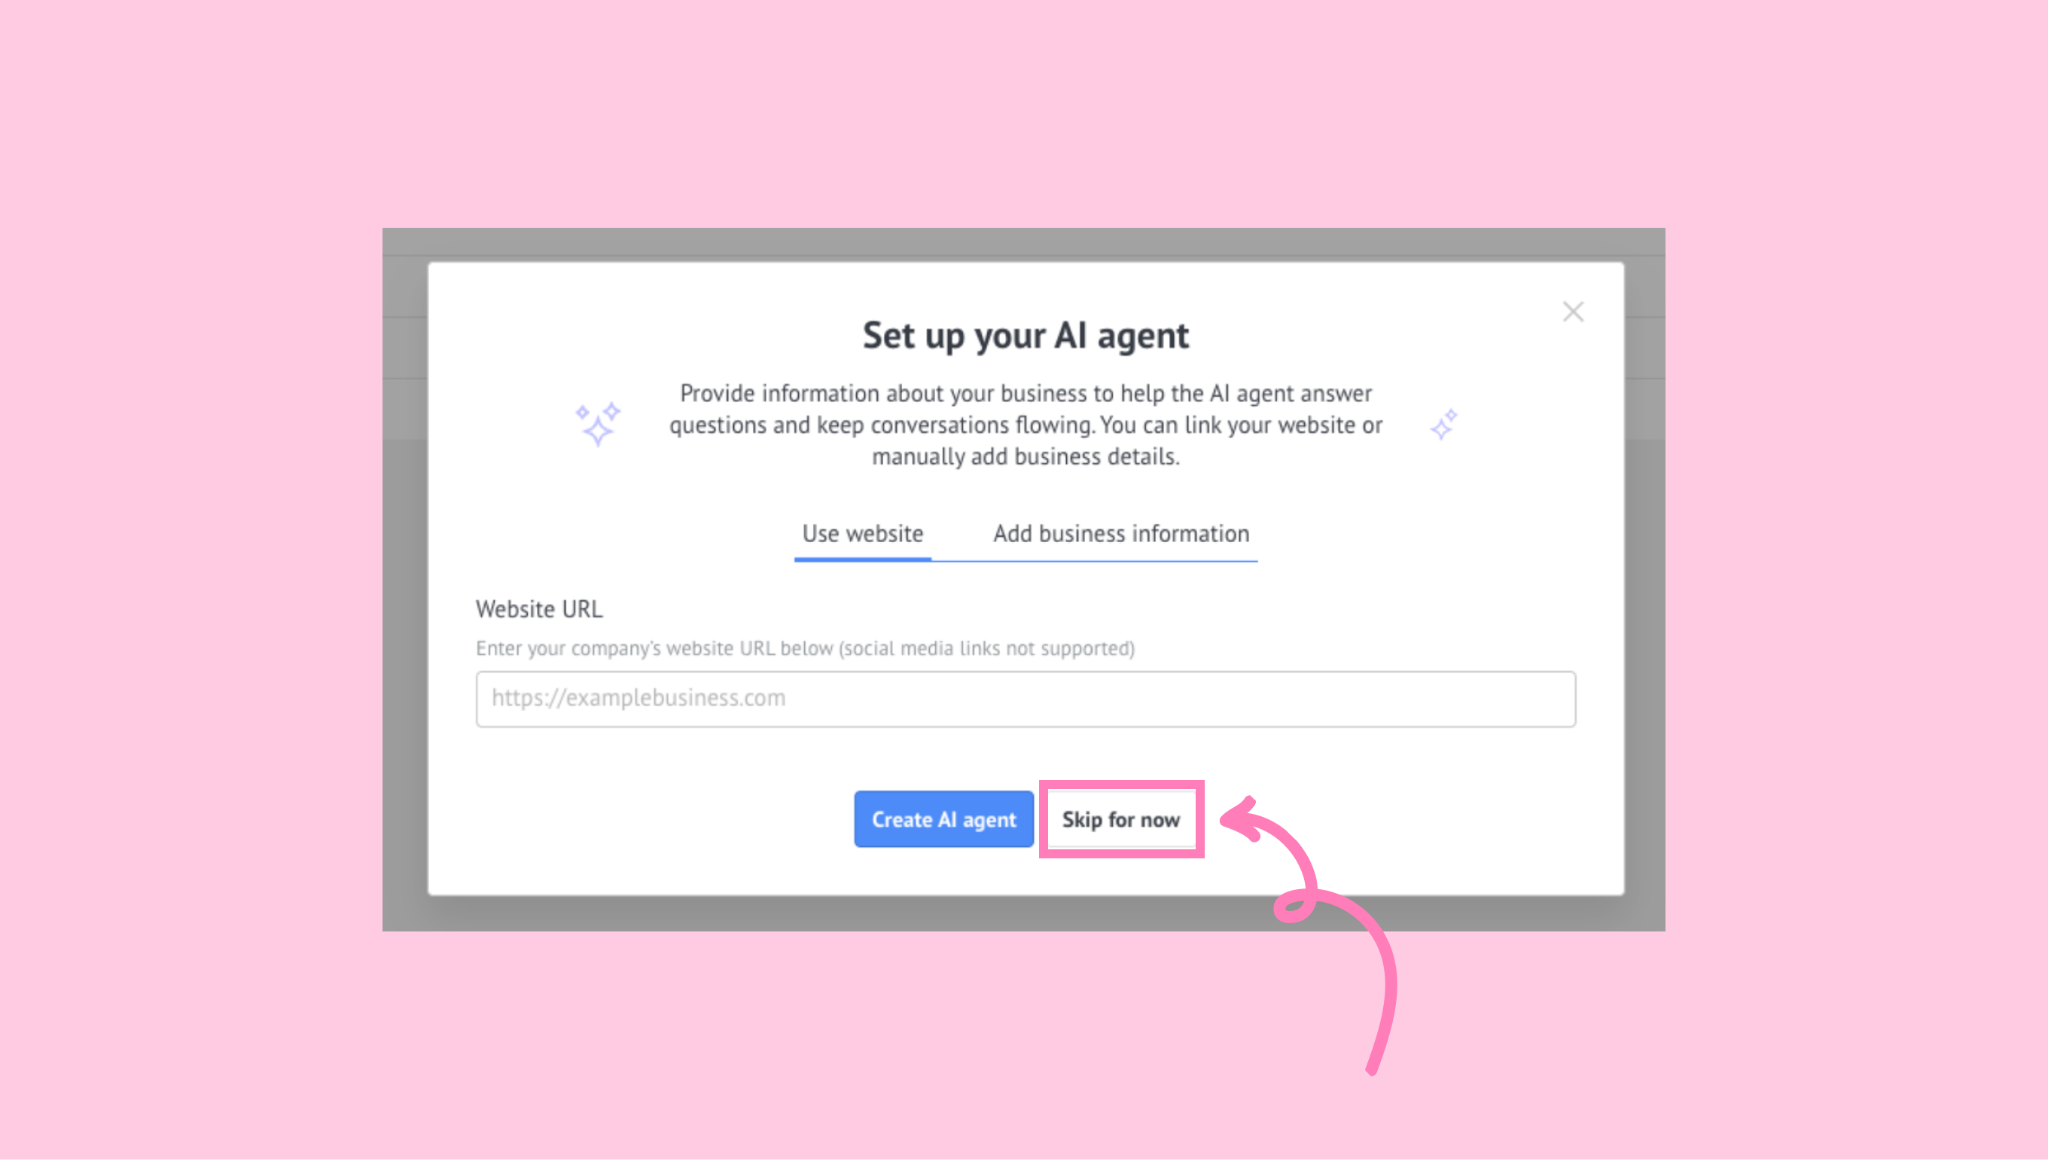
A modal window will open where you can create an AI agent automatically or skip this step. Click Skip for now to start setting up your AI agent manually.
Once in the AI agent builder, go to the Sources tab and click +Add new knowledge source to train the AI agent.
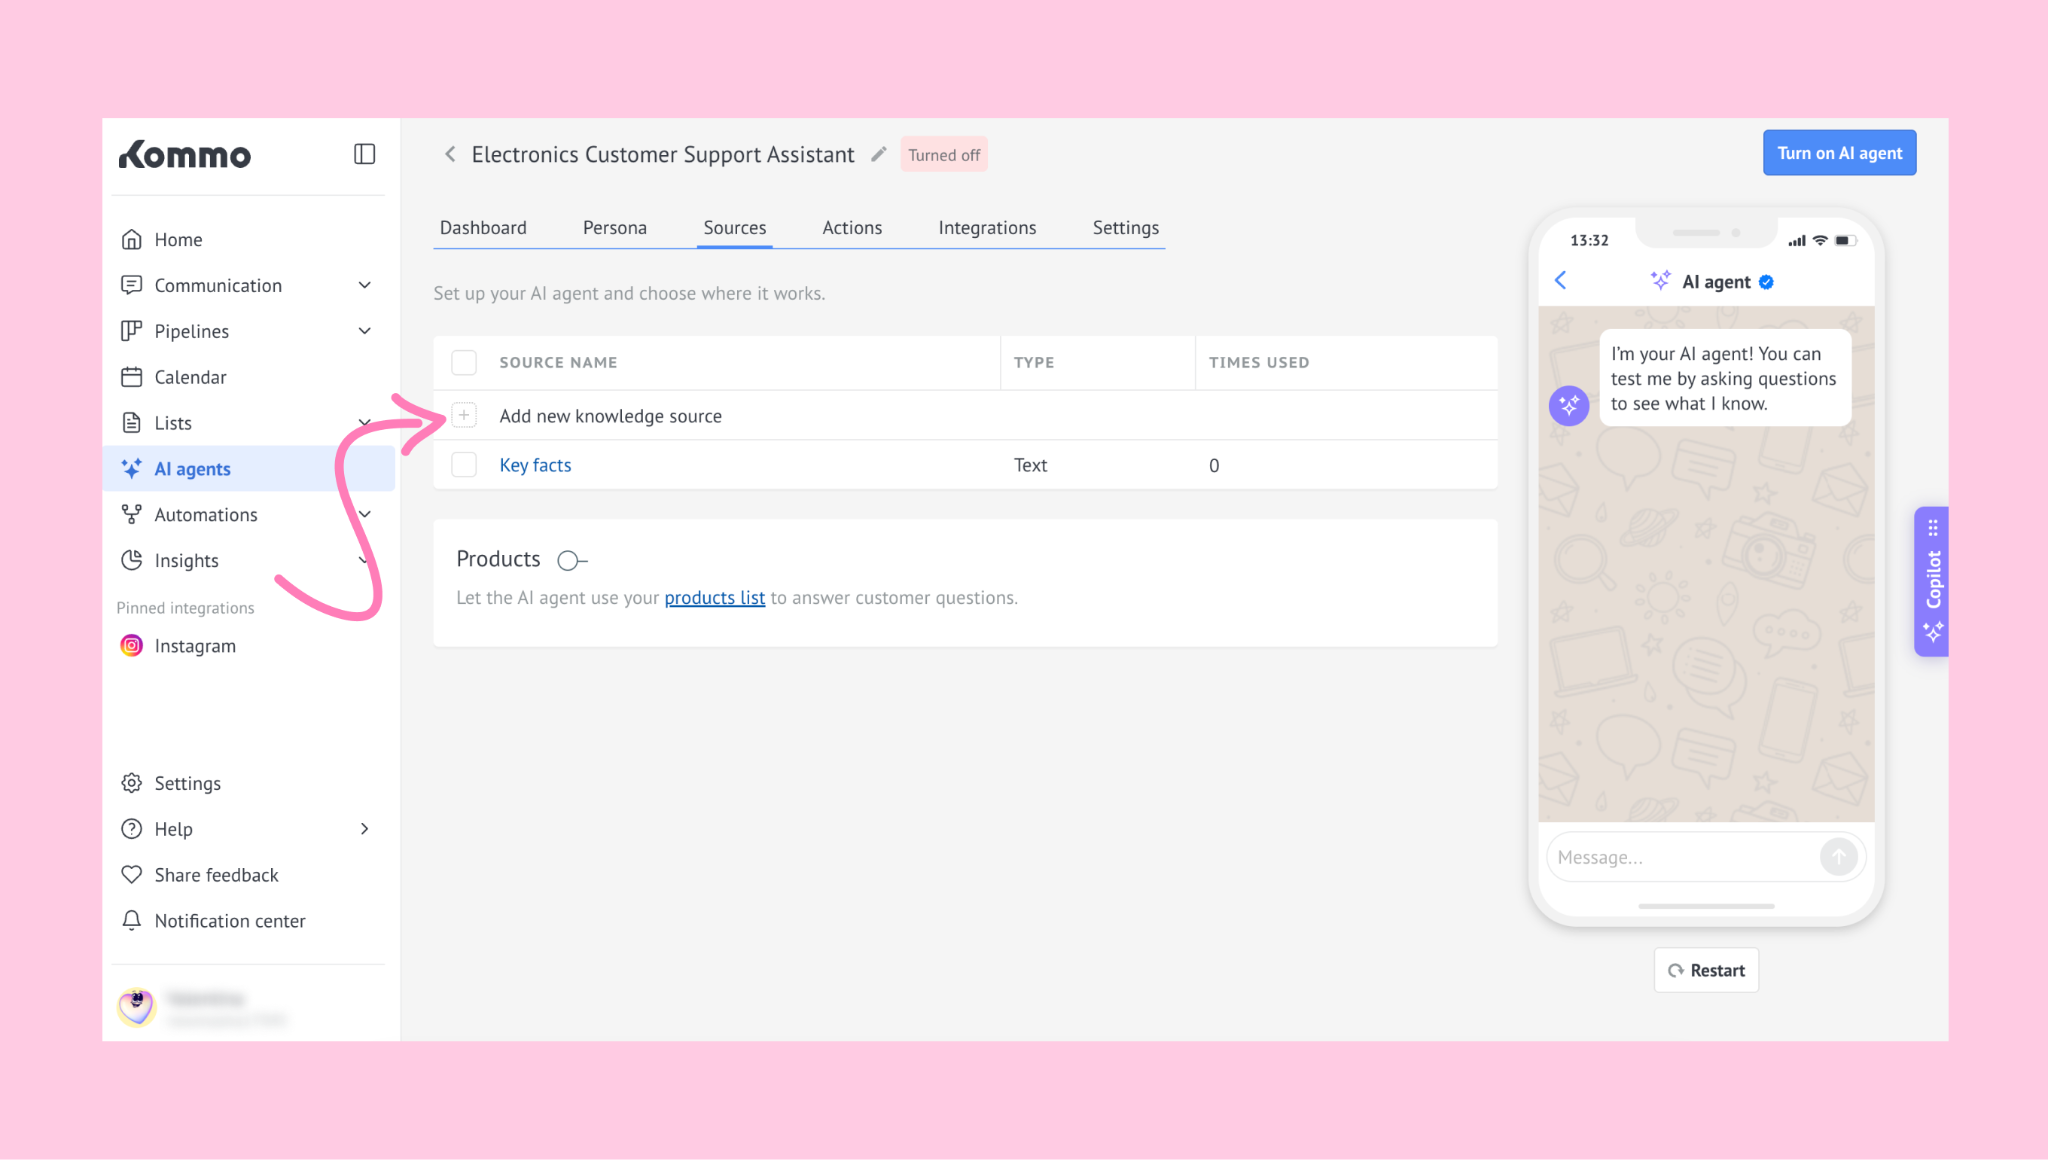
For detailed instructions on adding and managing knowledge sources, see our knowledge sources article.
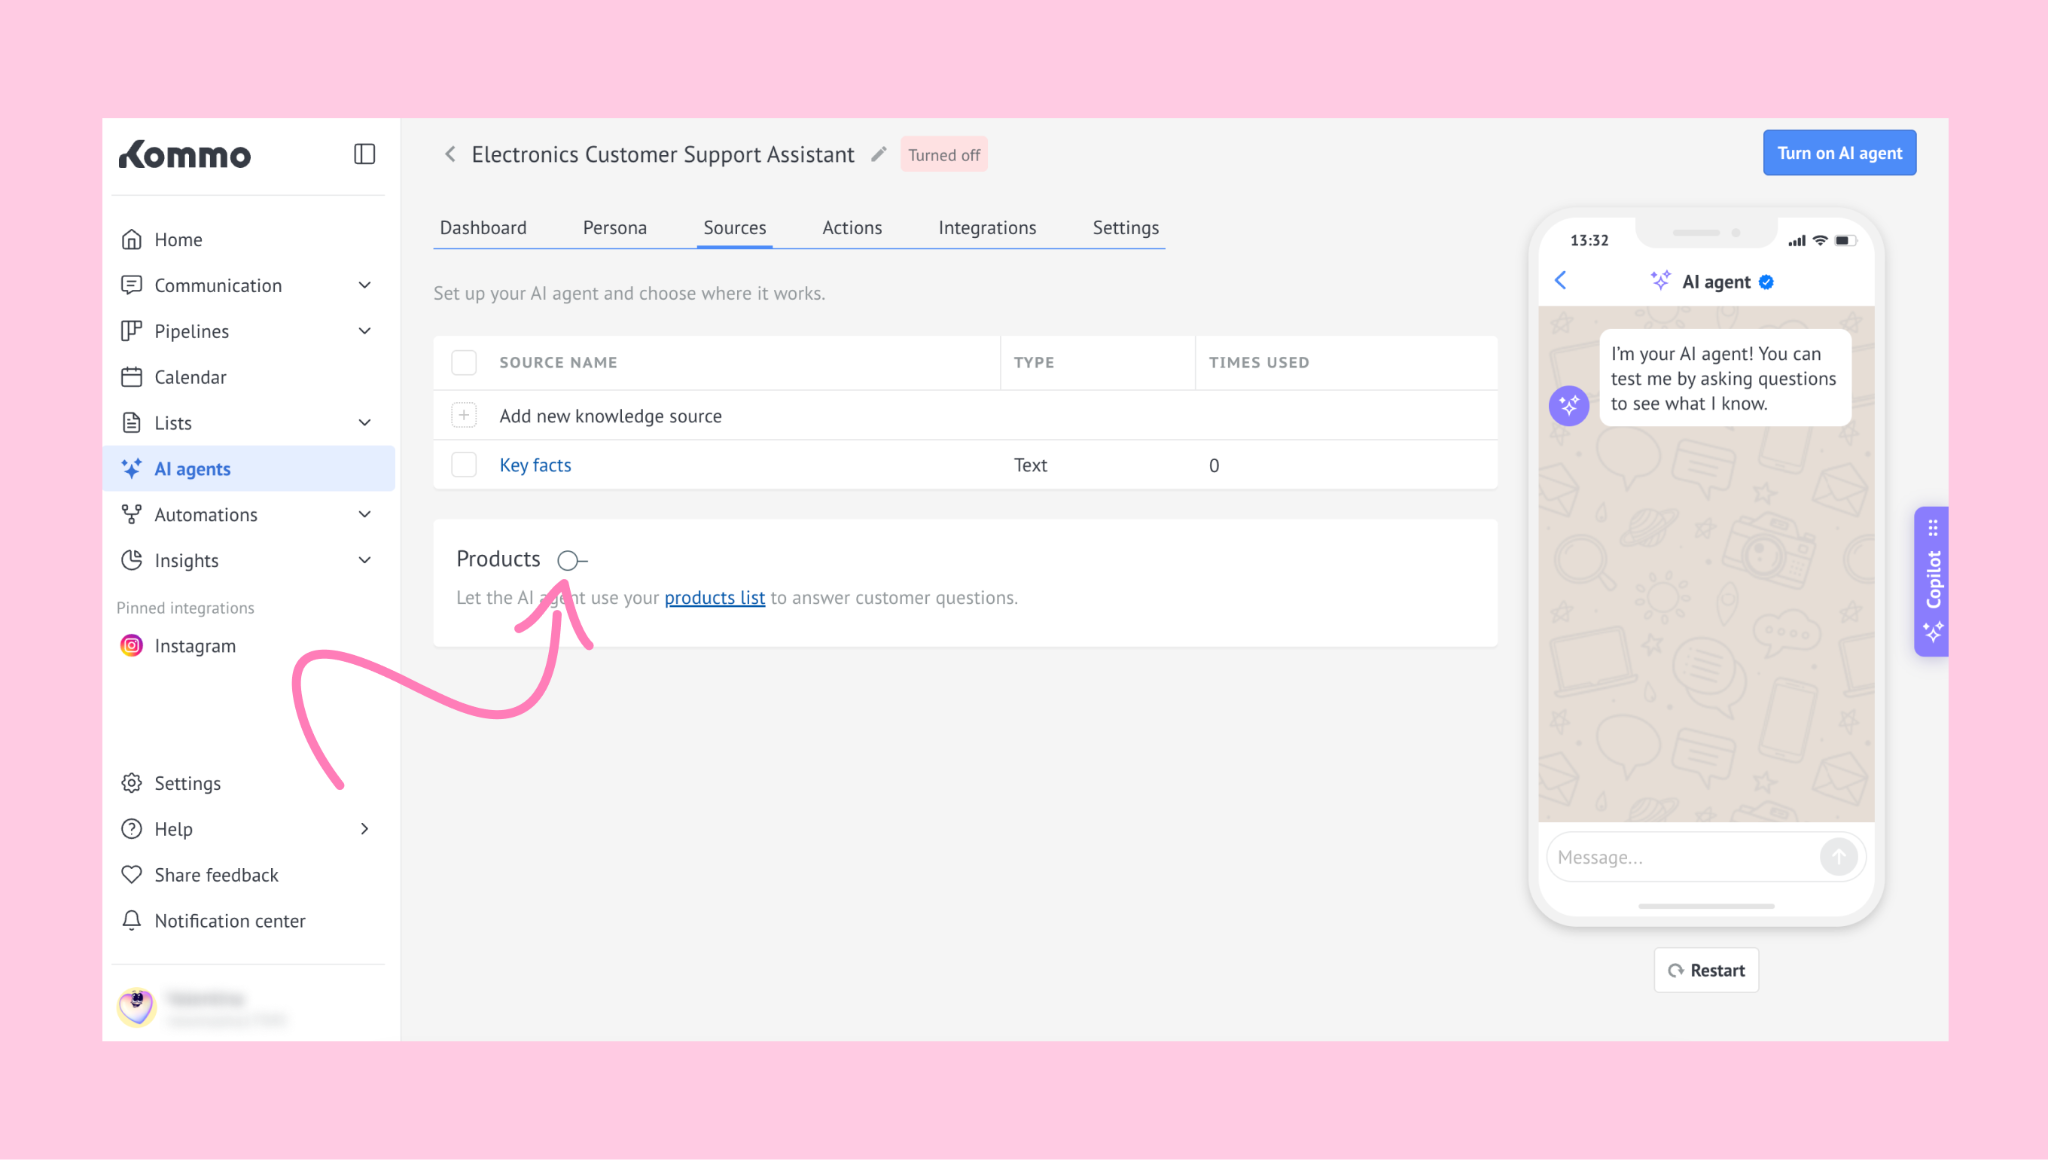
After adding all sources, switch the Products toggle to let the AI agent access your product catalog information.
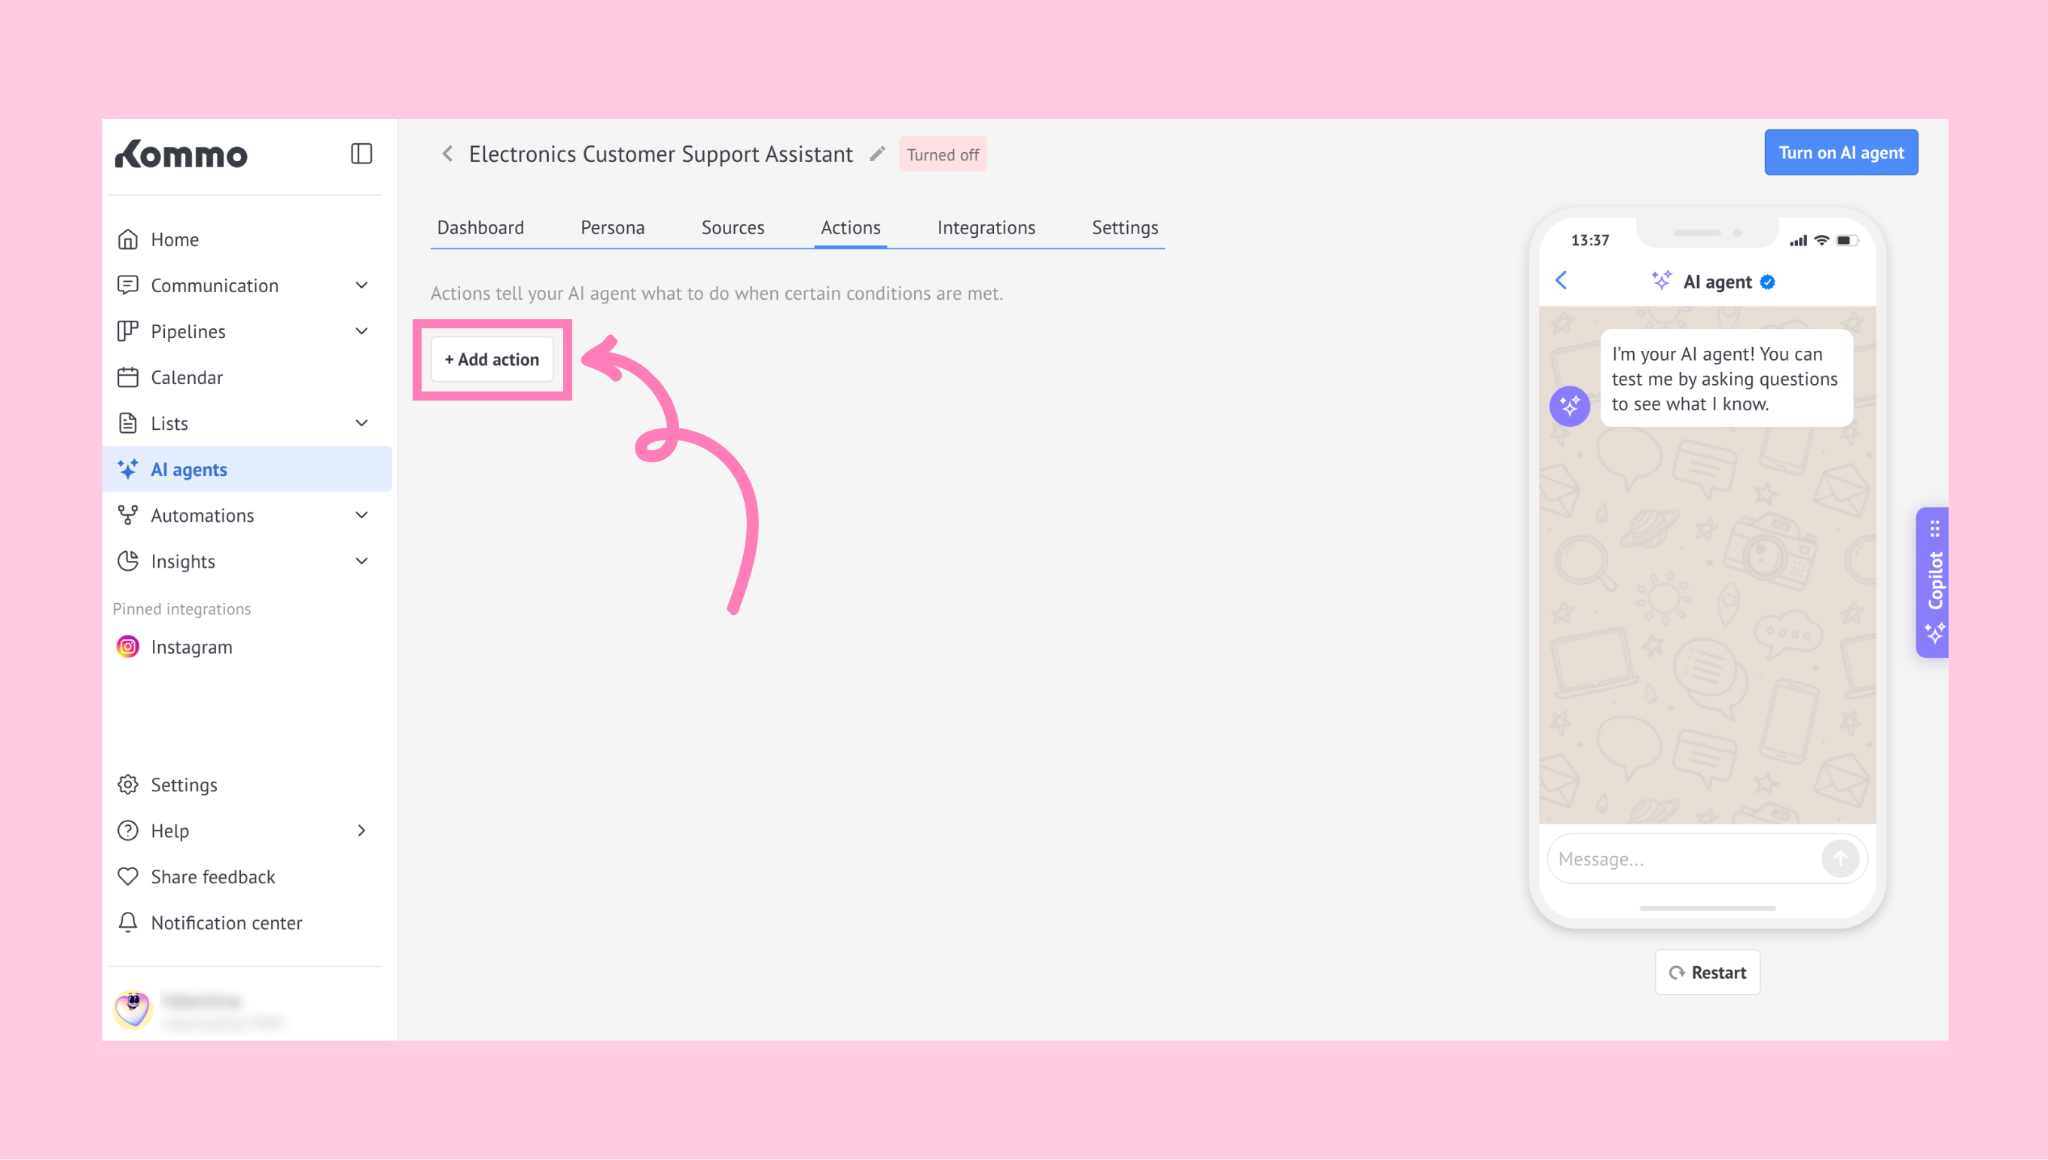
In the Actions tab, you can set the AI agent to perform tasks based on conditions. Each agent supports up to 20 Actions. Click + Add action to create one.
Each Action consists of three parts: WHEN (conditions), DO (actions to execute), and More (additional rules).
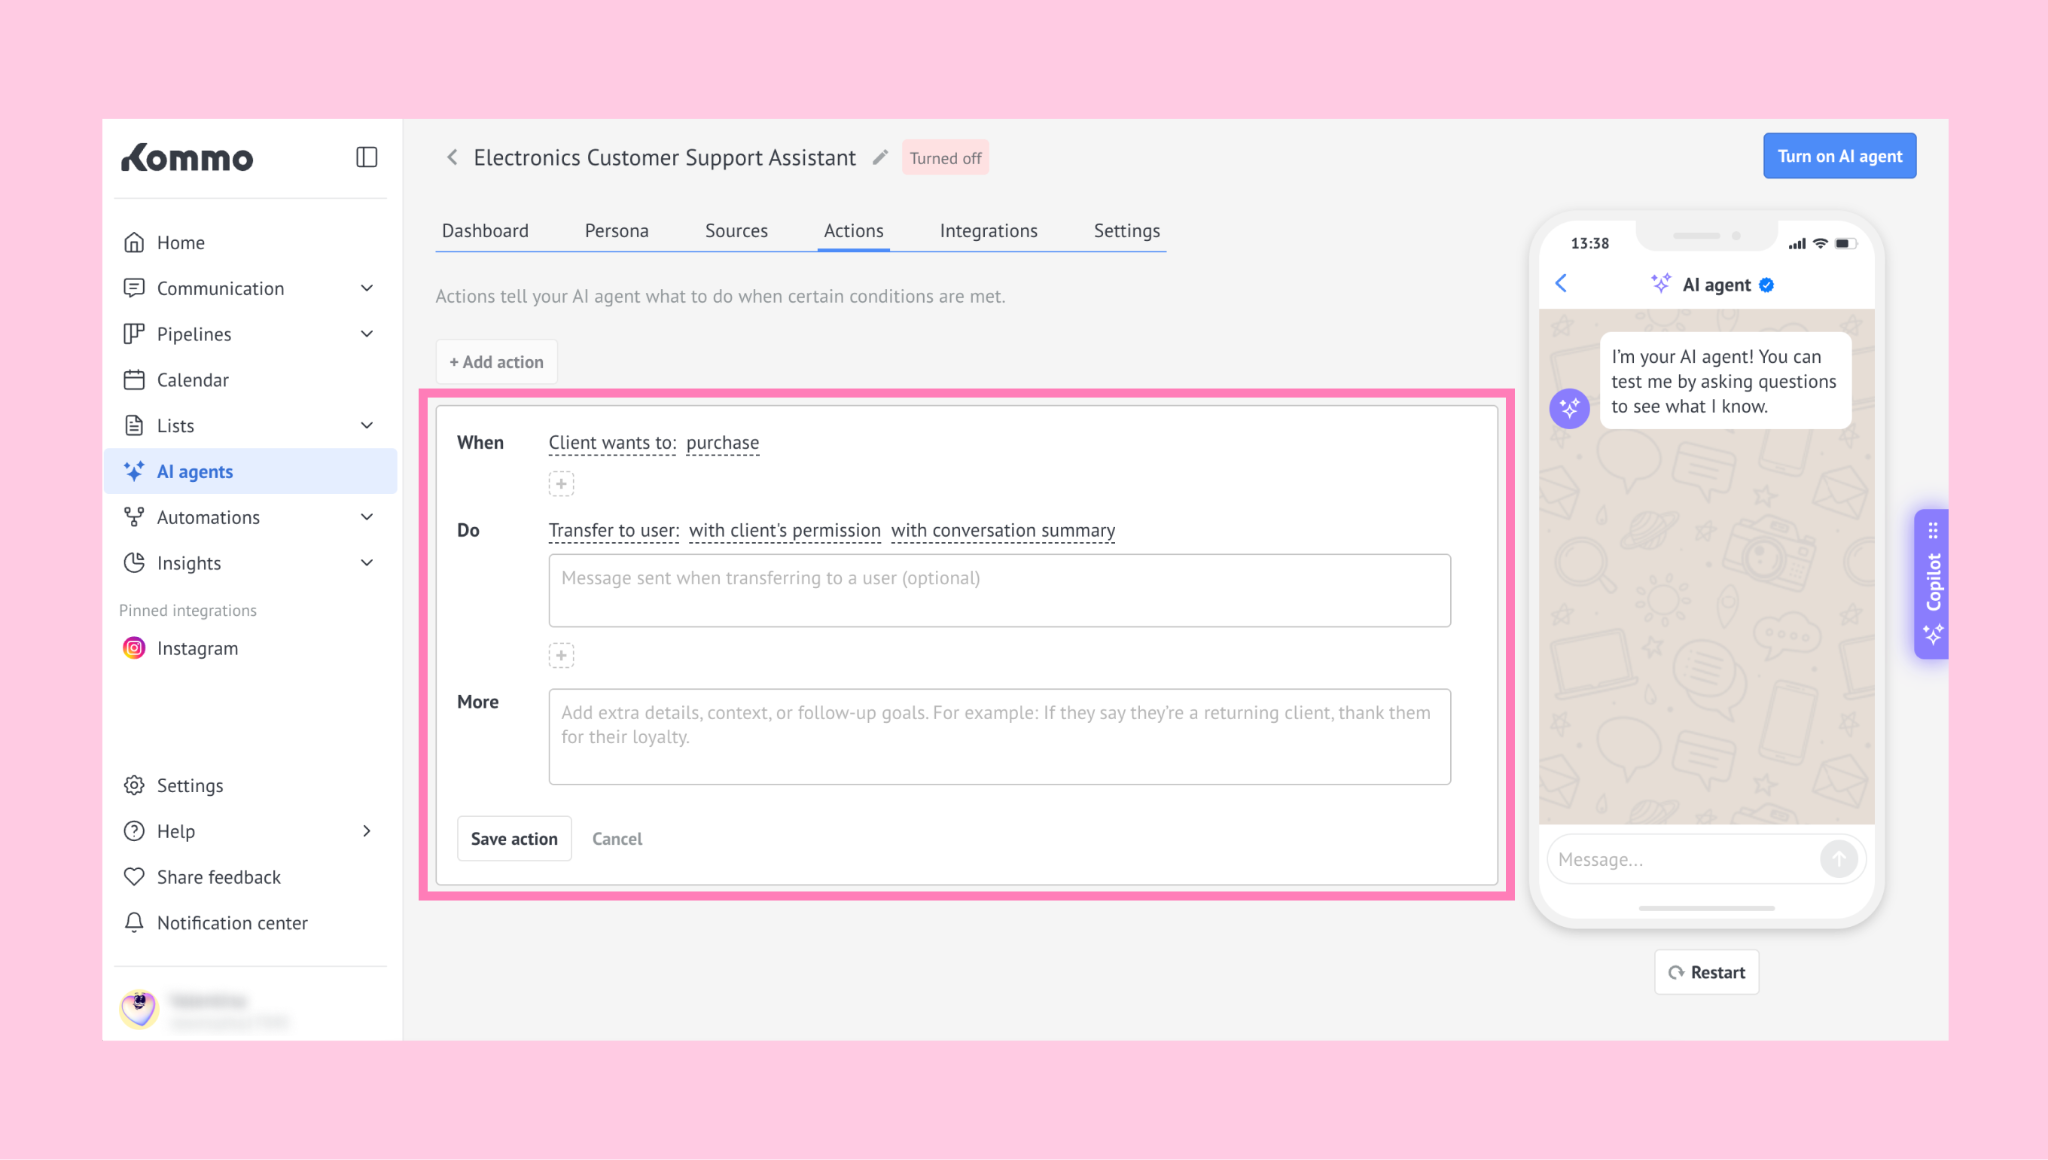
WHEN: Trigger conditions
An Action can have up to 5 WHEN conditions. You can choose from suggested options or create your own by typing and saving a custom option in any WHEN field
The conditions include:
Client wants to (Choose from purchase, get support, get a refund, speak to a human agent, or custom input)
Client asks about (Choose from availability, delivery time, price, refund policy, order status, troubleshooting, or custom input)
Client sentiment is (Choose from frustrated, confused, happy, neutral, sad, or custom input)
Client provides their (Choose from email, phone, name, address, or custom input)
Incoming message contains (Choose from greeting, profanity, url / link, or custom input)
First time handling a client message – Runs the action the first time the AI agent handles a message from the client.
Message is received during specific hours (Set up working hours)
Client hasn’t responded in: (Set a waiting time up to 24 hours) – available only in active chats within the 24-hour window, not available on the Base plan, with a waiting time from 1 minute to 23 hours 59 minutes after the client’s last message.
You can also define a custom WHEN condition by clicking the WHEN field, entering your desired condition manually, and pressing Enter:
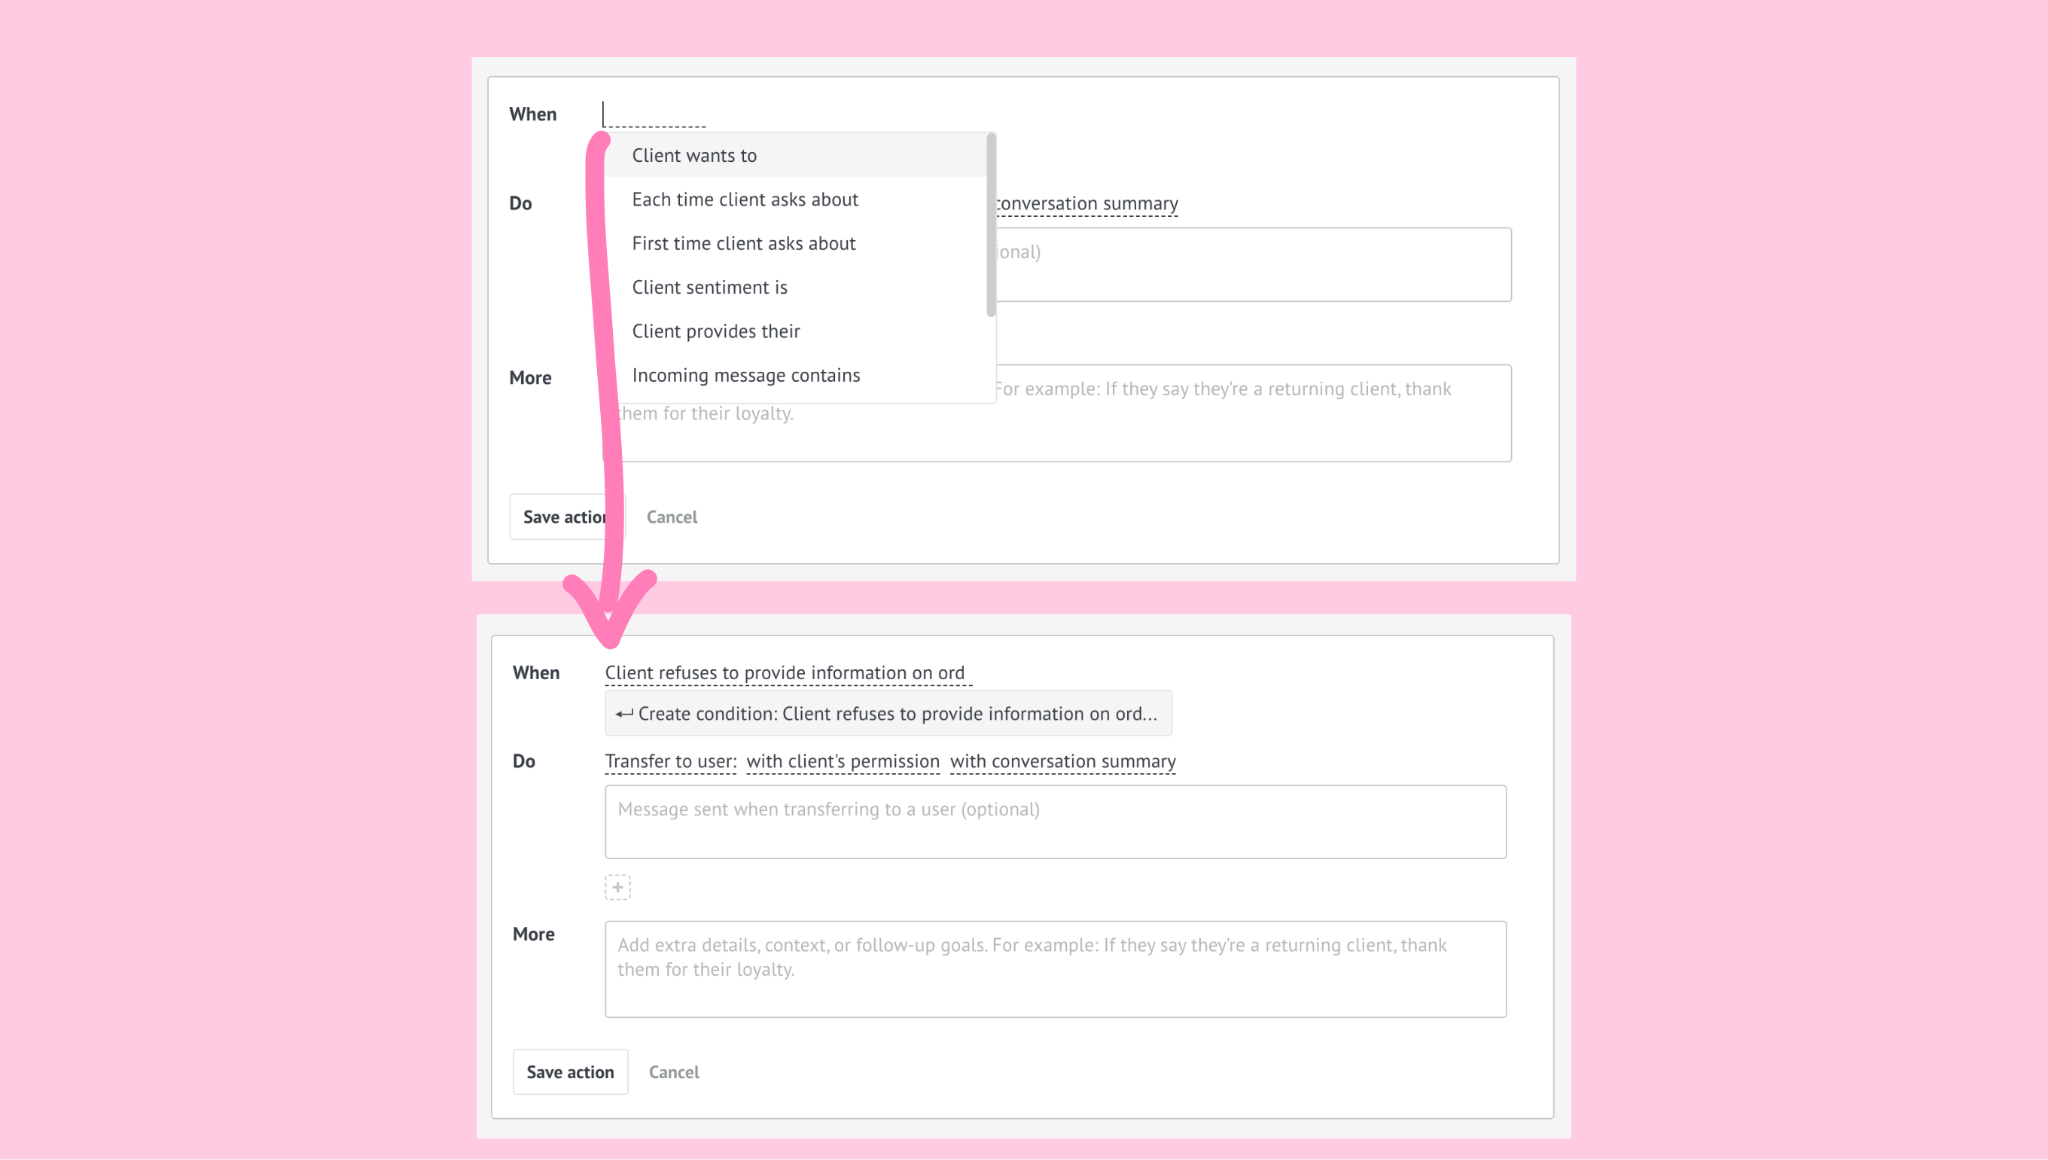
Note: The AI will attempt to interpret your condition, but it may not complete it accurately.
DO: The AI’s response
If the WHEN conditions are met, the agent executes the listed DOs. The agent always sends a text reply to the lead and can perform up to 5 additional DOs selected from a preset list.
The preset list includes:
Transfer to user
Always use this exact message
Always reply with this specific information
Always bring up this topic
Answer using knowledge base source
Ask for client's
Don't mention
Attempt to bring up this topic
Add task
Set field
Manage tags
Create appointment in Calendar
Start bot
Change lead stage to
Change responsible user in
Send file
Do not reply
The AI executes DOs in a logical order. For example: If a DO says “ask for contact details” and another says “thank you for contact details”, the AI will wait until the user shares their info before saying thanks.
The AI will try to understand the intent behind custom inputs, but it may not always work as expected.
You can decide if all WHEN conditions must be met, or any condition is enough to trigger the DOs.
Note: To delete a WHEN or a DO, hover over it and click the trash bin icon.
More: Extra instructions
Use the more field to add any extra guidance the AI agent should follow as it carries out the action. This is where you can fine-tune how the agent behaves when a situation needs a bit more clarity or checks.
You can add rules like:
continue only when the client has shared the information you need
pause the action if a question wasn’t answered
ask for clarification when a message isn’t clear
These instructions help the AI agent handle specific cases more accurately and follow the action the way you intended.
Important: Instructions based on system logic (for example, checking whether a lead has a specific tag) aren’t interpreted correctly by the AI agent and shouldn’t be added here.
In the Persona tab, you can customize how the AI agent communicates:
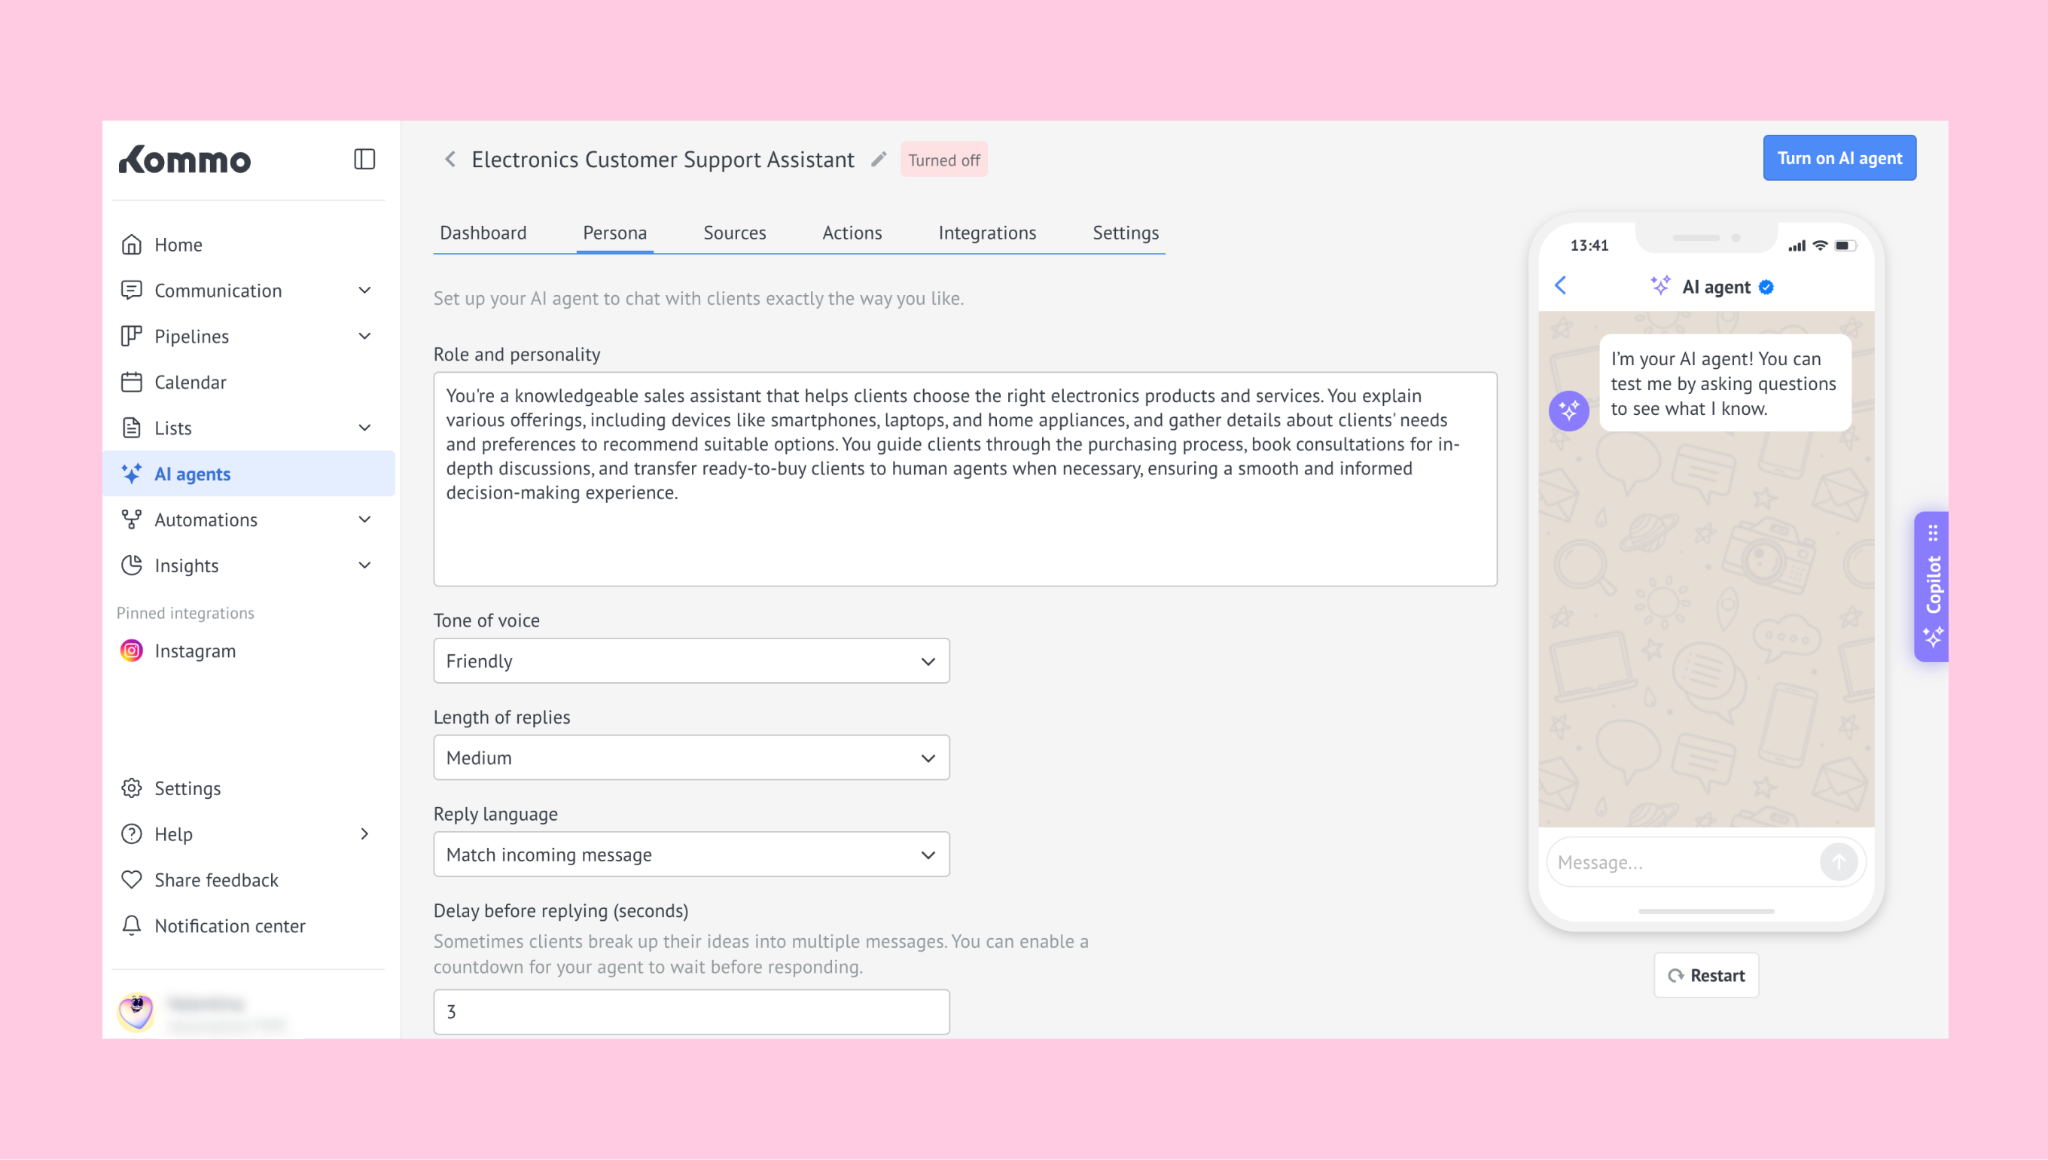
To do so, adjust the following fields:
Role and personality
Set the agent’s overall persona, like “A sales manager who recommends the best products.” Use this field for a general tone and purpose (max 1500 characters). To learn how to write effective instructions, check the examples in the available AI agent templates.Tone of voice
Casual – relaxed and informal
Friendly – cheerful and highly informal
Professional – polite and formal
Length of replies
Short: 100–200 characters
Medium: 150–250 characters
Long: 200–300 characters
The AI agent might adjust automatically based on the situation.
Reply language
The AI agent supports all languages but works best with Kommo's system languages: English, Spanish, Portuguese, Turkish, Indonesian, and Russian. You can set the reply language manually or let the AI agent detect it automatically. If the lead's language can’t be clearly identified, the AI agent will default to one of the supported system languages.Delay before replying
Set how long the agent waits before replying (default: 600 seconds, range: 1–86,400). This helps avoid interrupting users who send multiple short messages in a row and allows them to complete their thoughts before the AI agent replies.Guidelines
Add specific rules for how the agent should communicate. Up to 50 lines, 300 characters each.
Click Save to save all your changes.
Set up via integration
E-commerce businesses can connect multiple platforms to a single AI agent in Kommo to automate chats and handle store inquiries.
Here's how to set up the integration using Shopify as an example:
Click the Integrations tab. Click Install in the Shopify box.
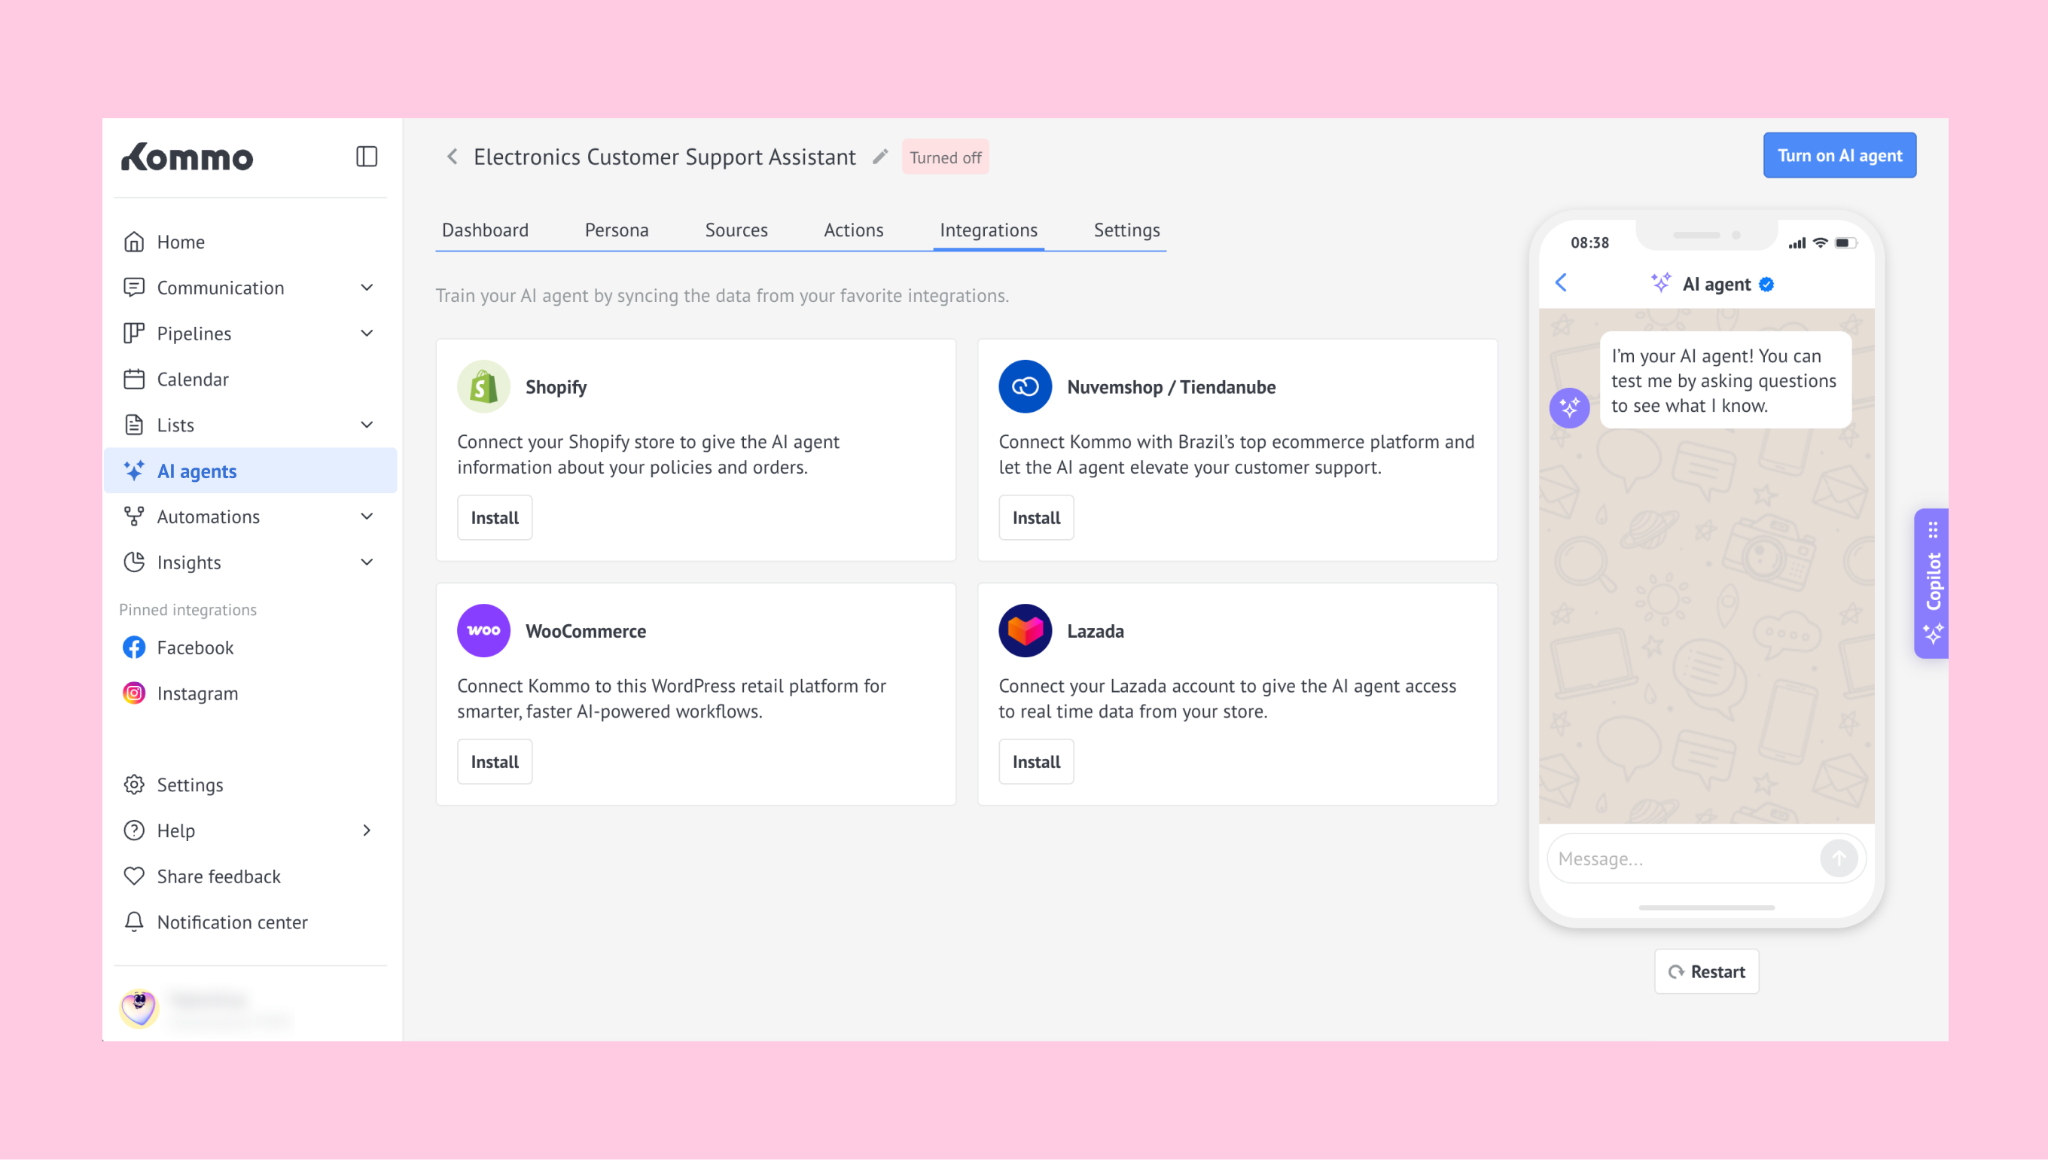
Note: To install the Kommo integration in Shopify, you need Shopify Point of Sale (POS).
This step depends on your current Shopify setup. If your Shopify store is already connected, you can skip this step.
Click Install.
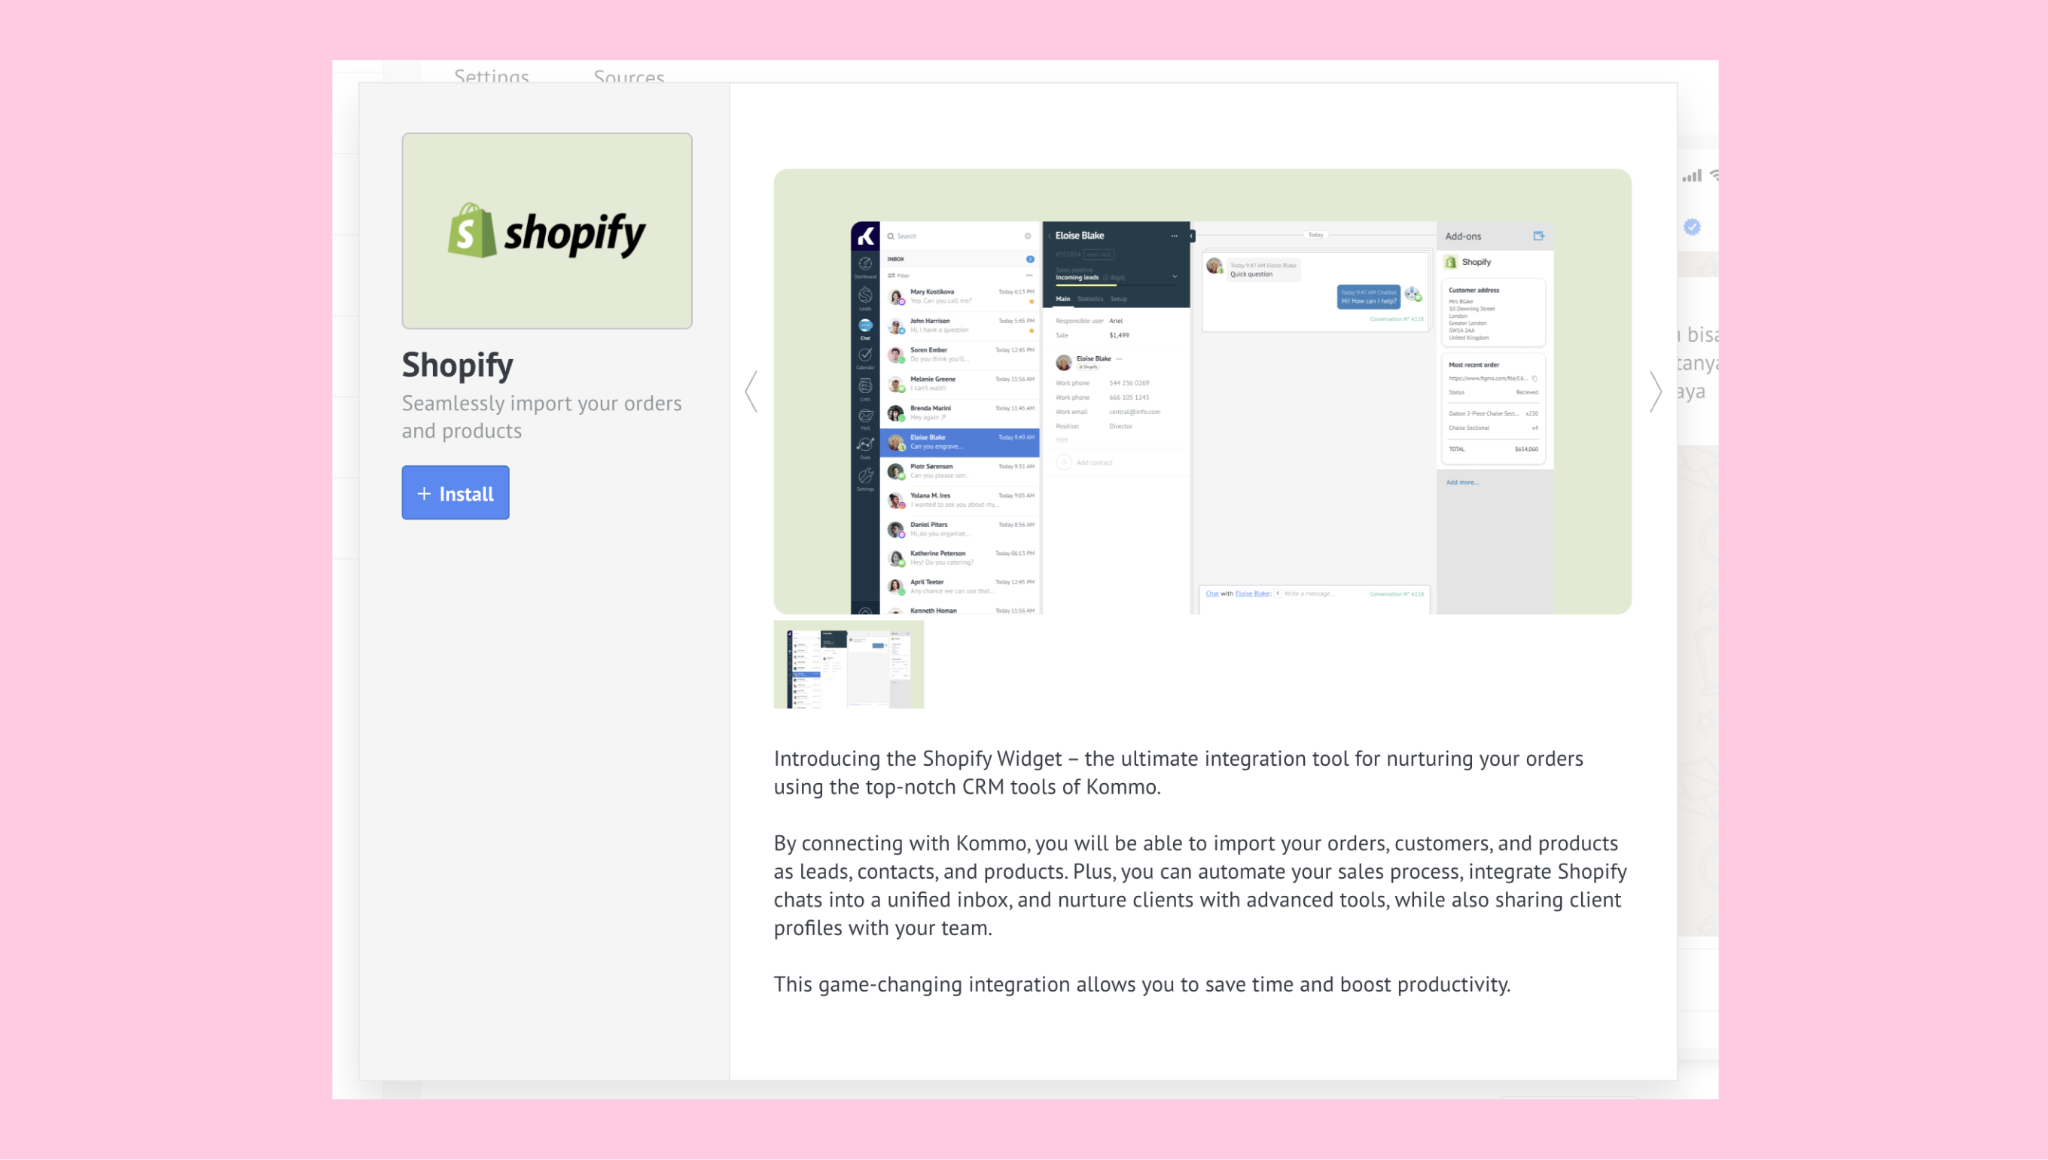 The following modal window will open: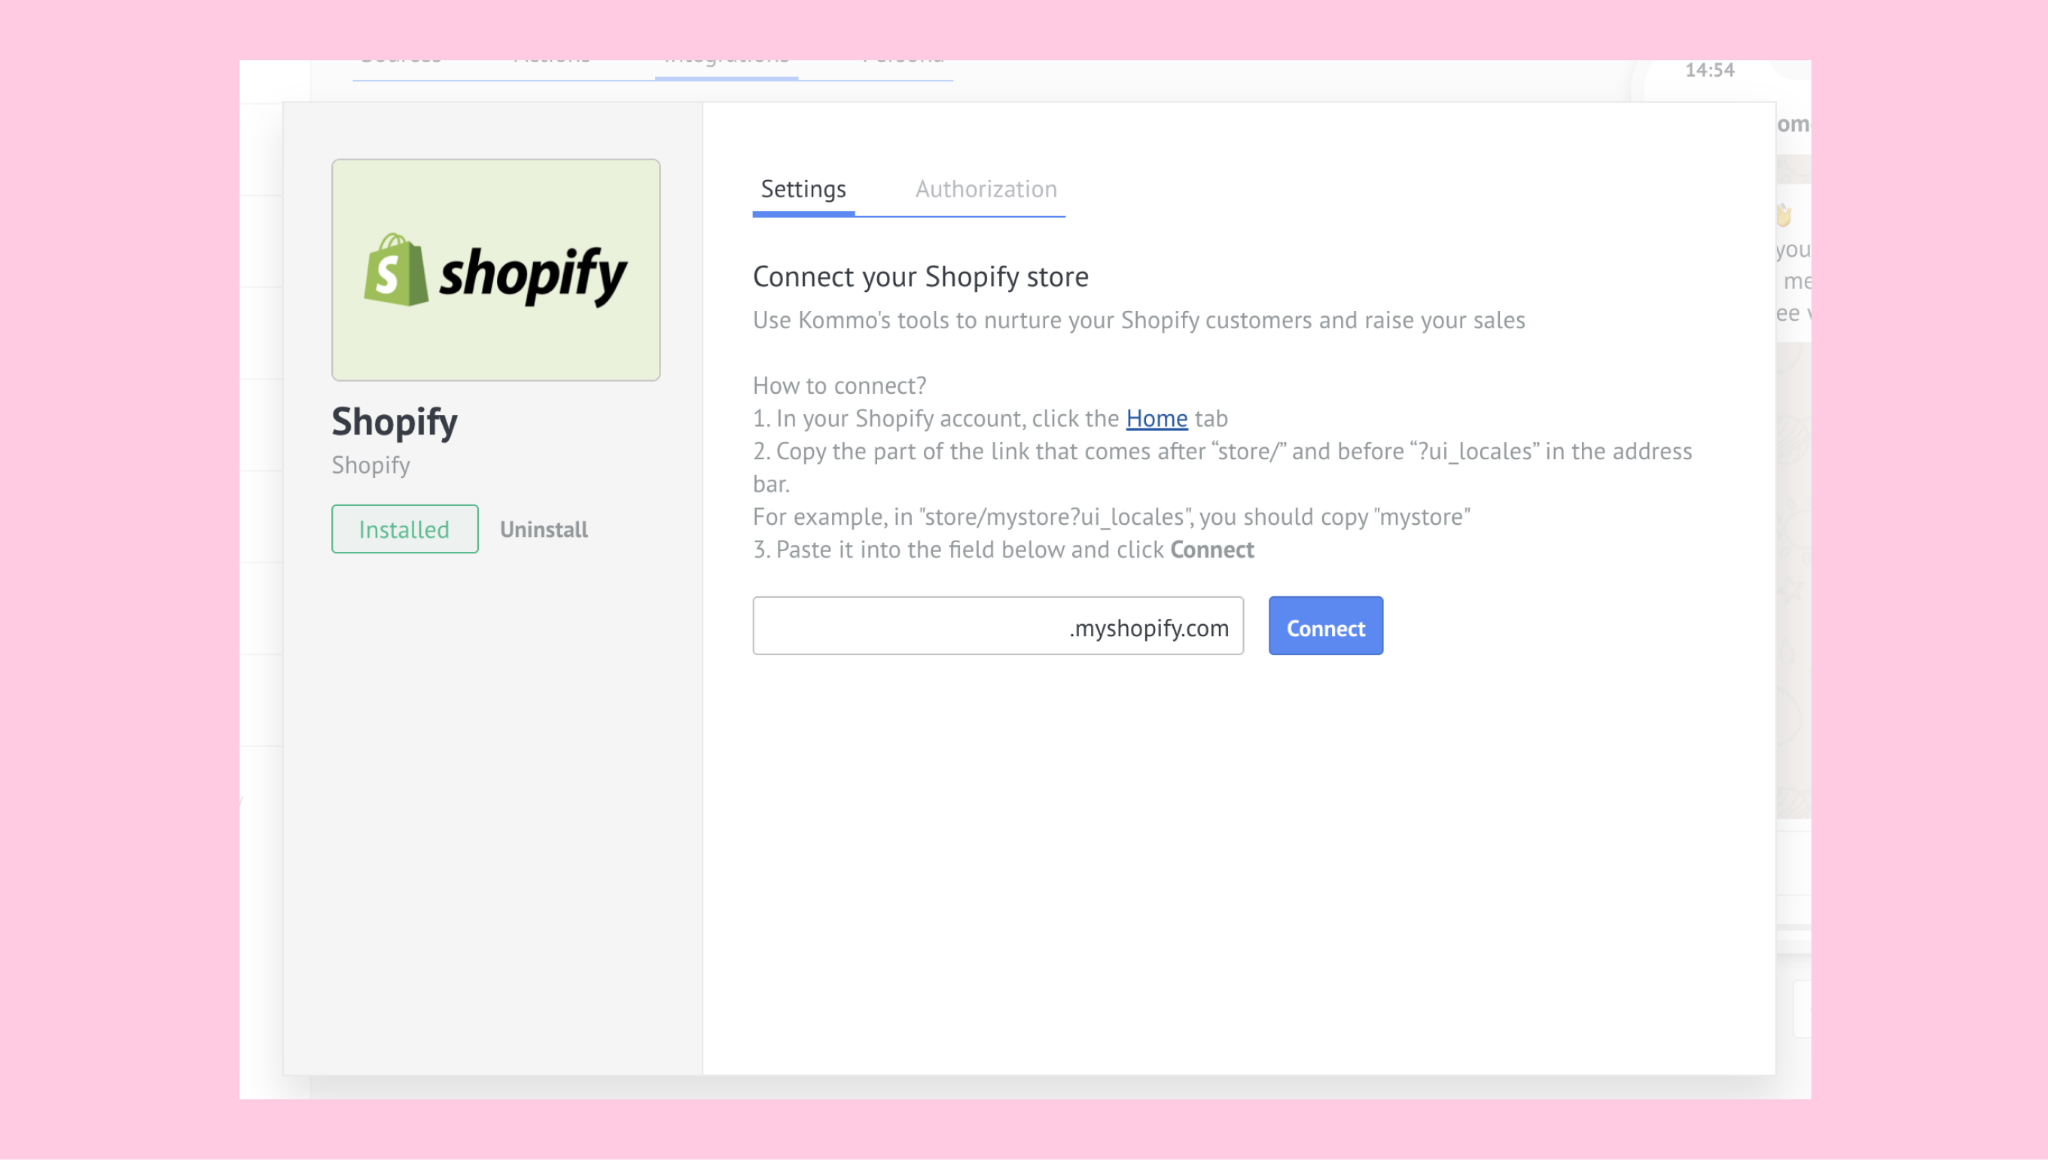
Go to your Shopify store settings. Copy the domain listed under your store name (e.g., 9bb49f-c6.myshopify.com) and paste it into the integration modal window. Click Connect to complete the integration.
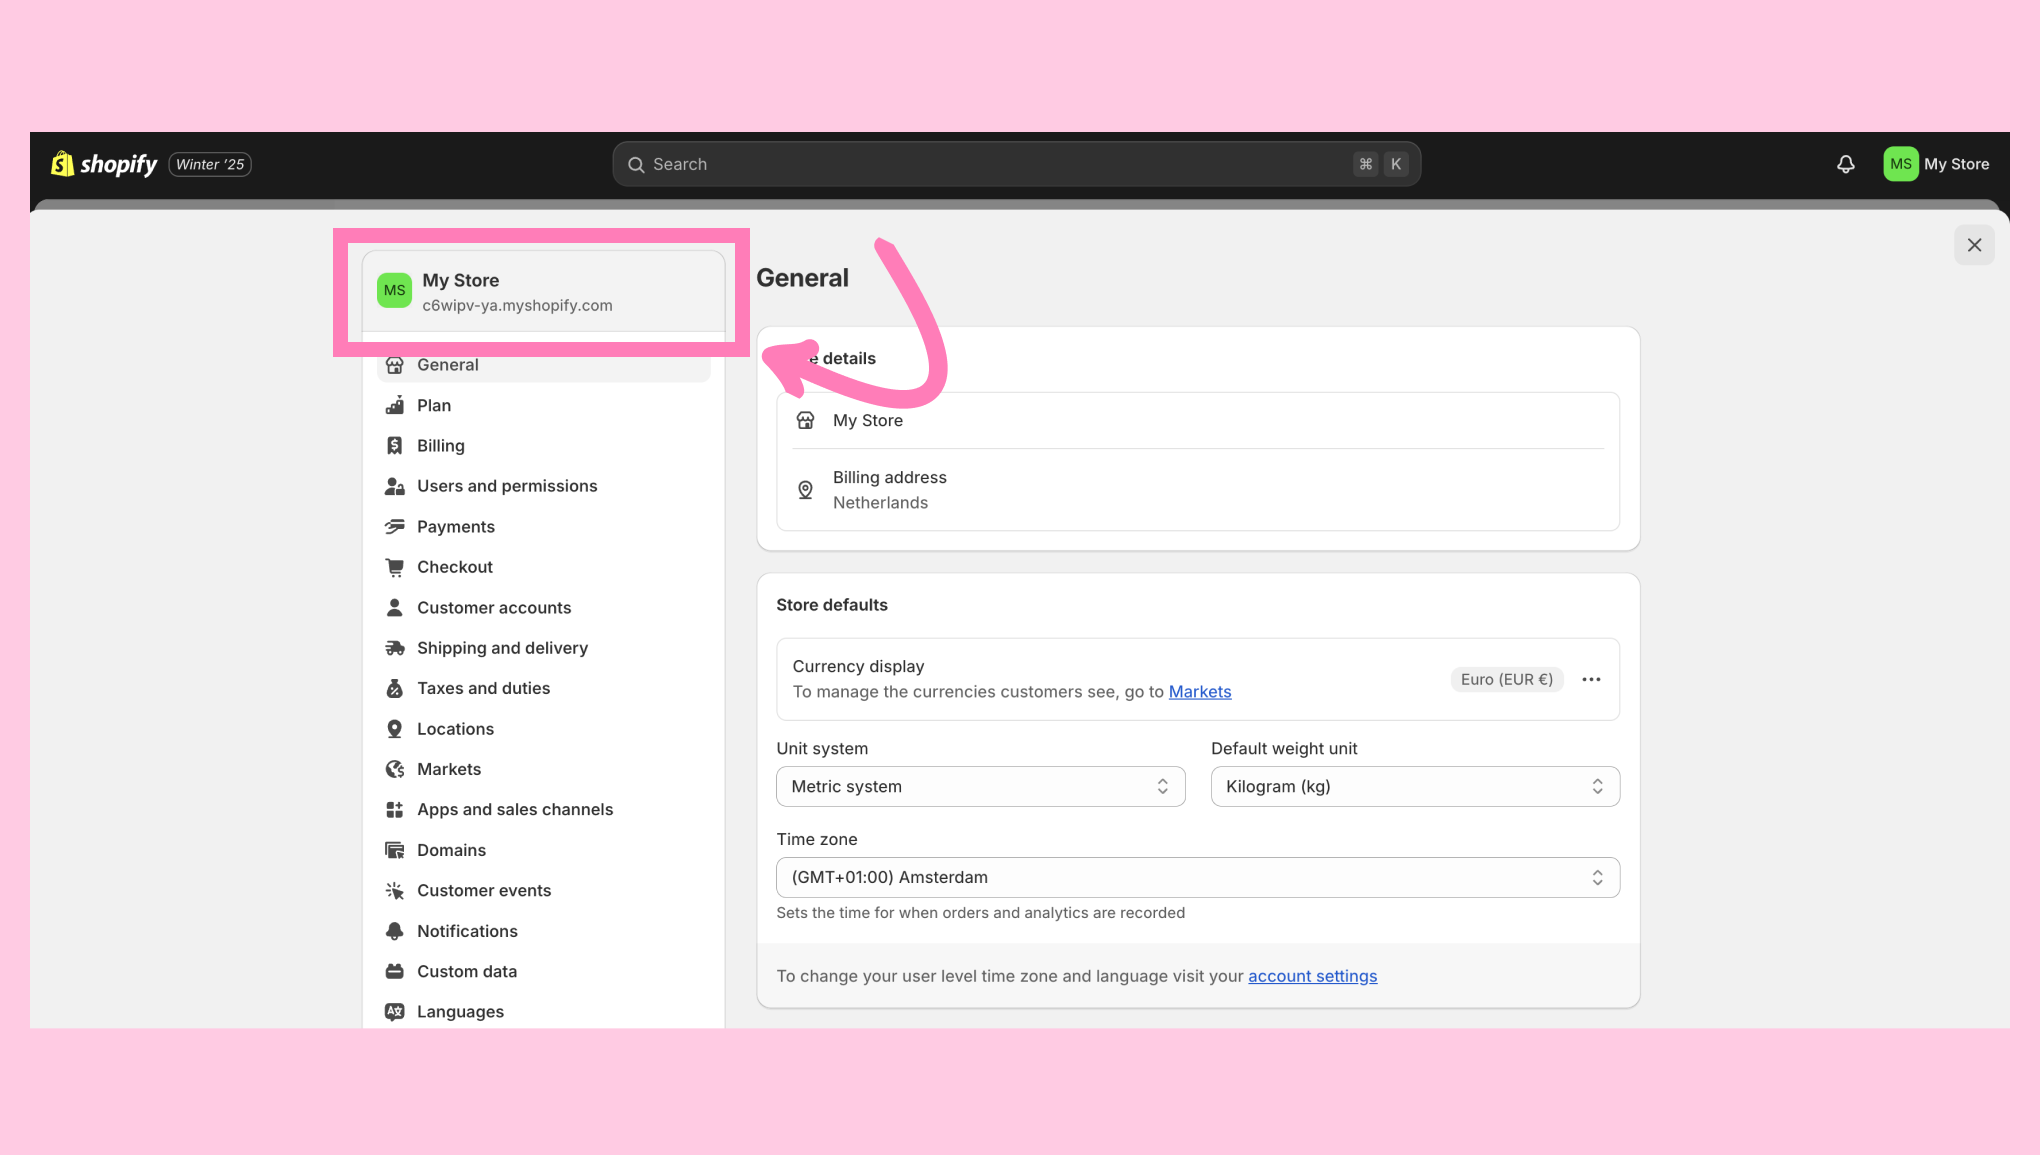
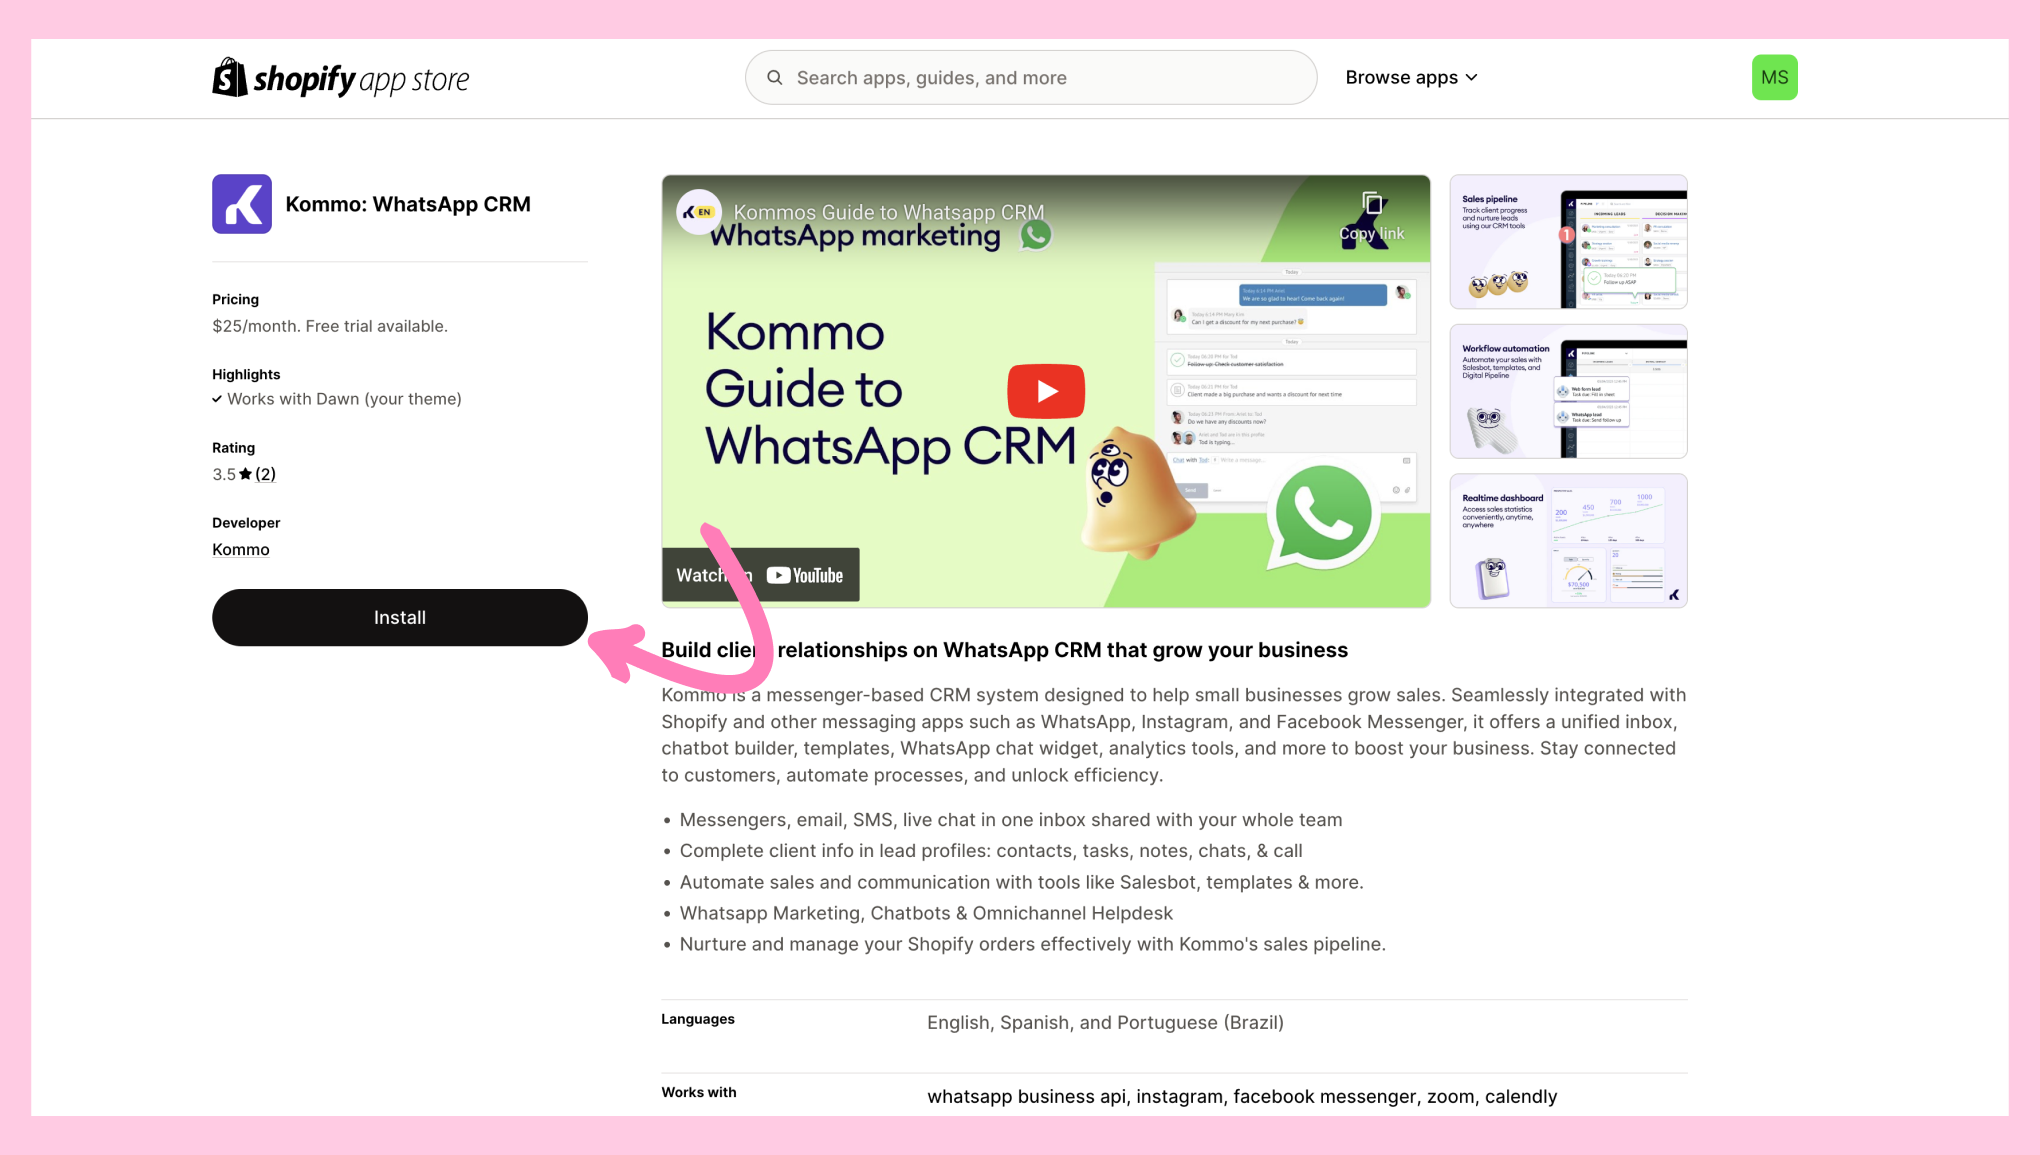
Open Shopify. Go to Apps > Shopify App Store.
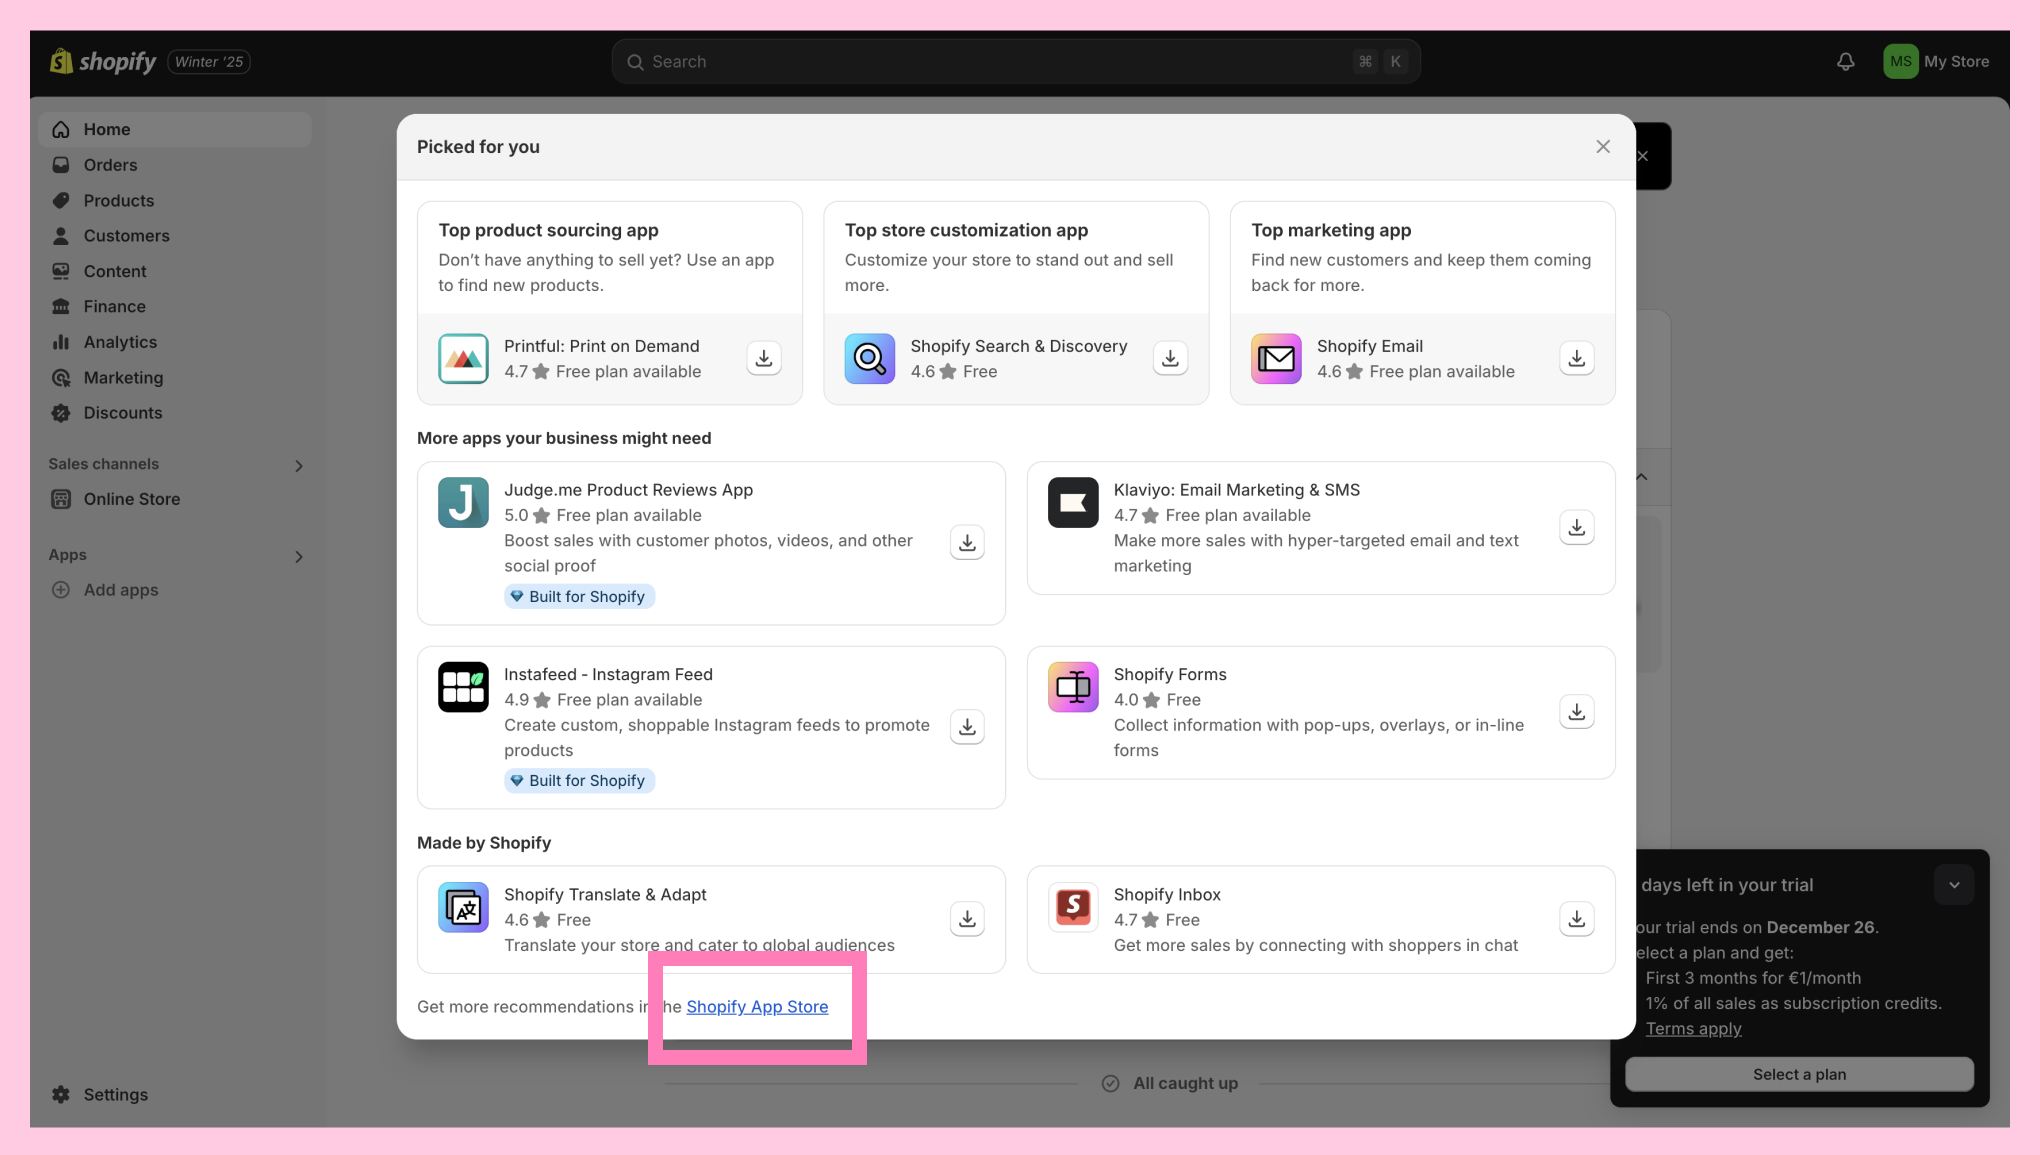
Search for Kommo and click Install.
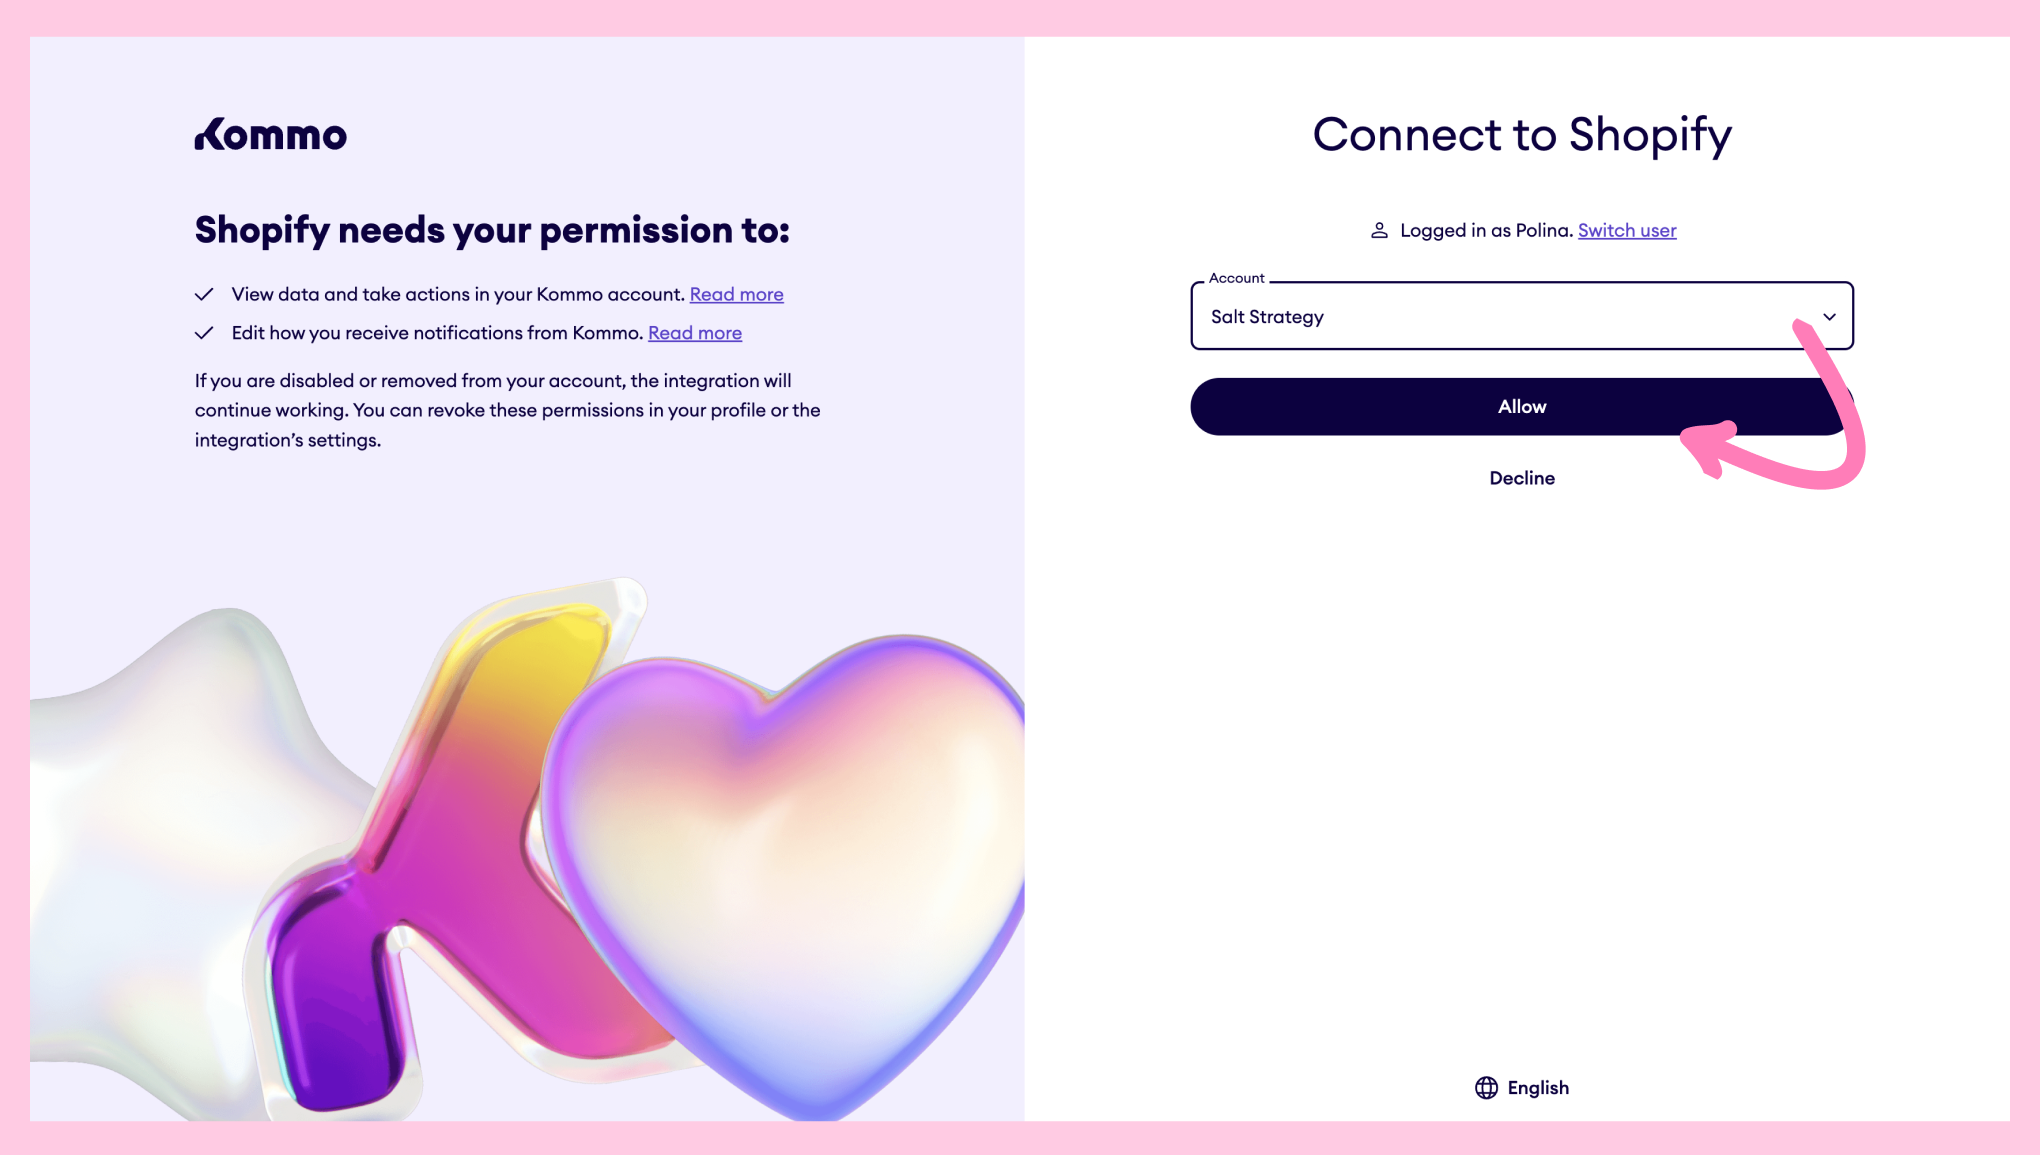
Log into your Kommo account and allow permissions.
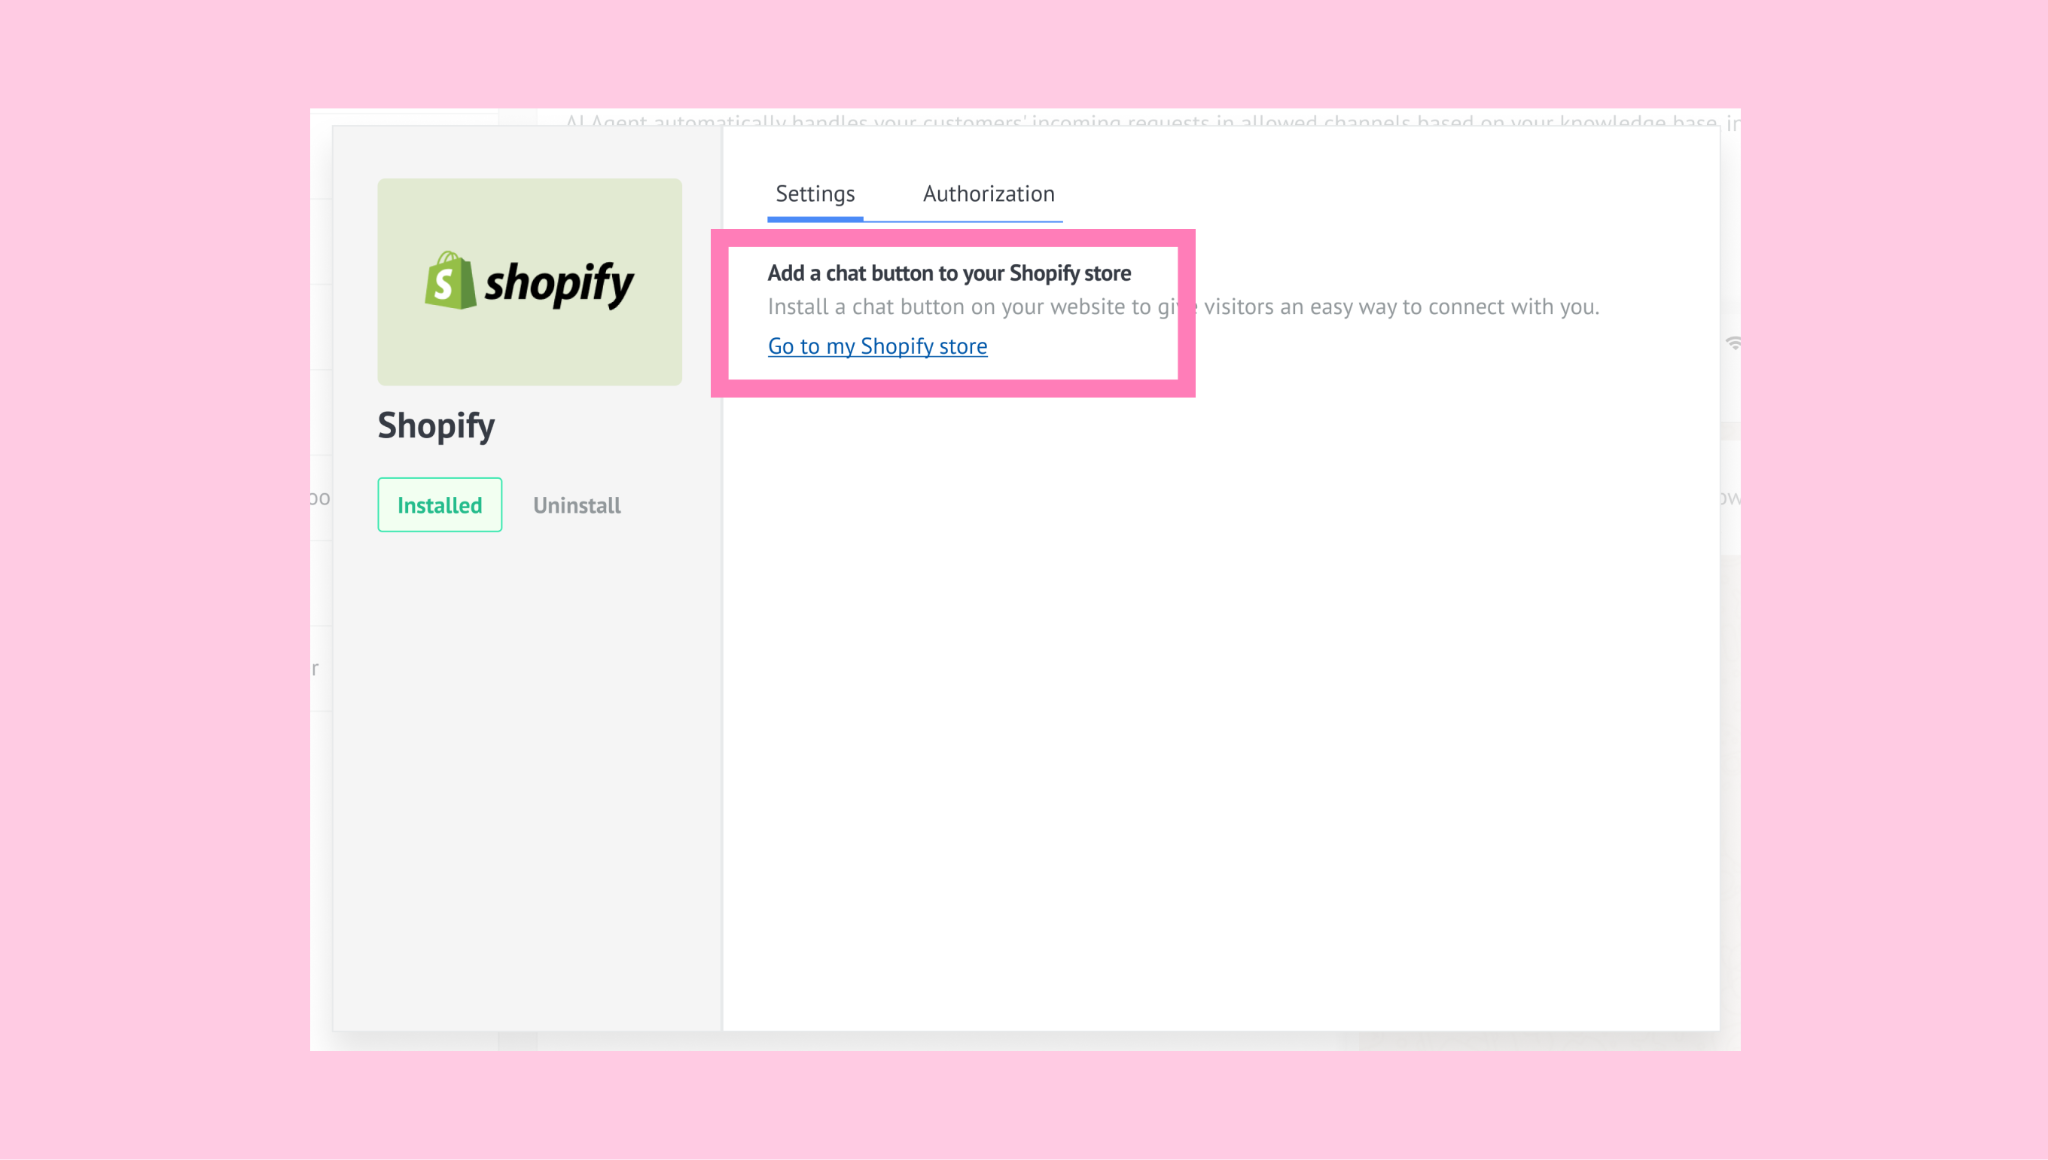
Go back to Kommo and click Go to my Shopify store to continue the set up.
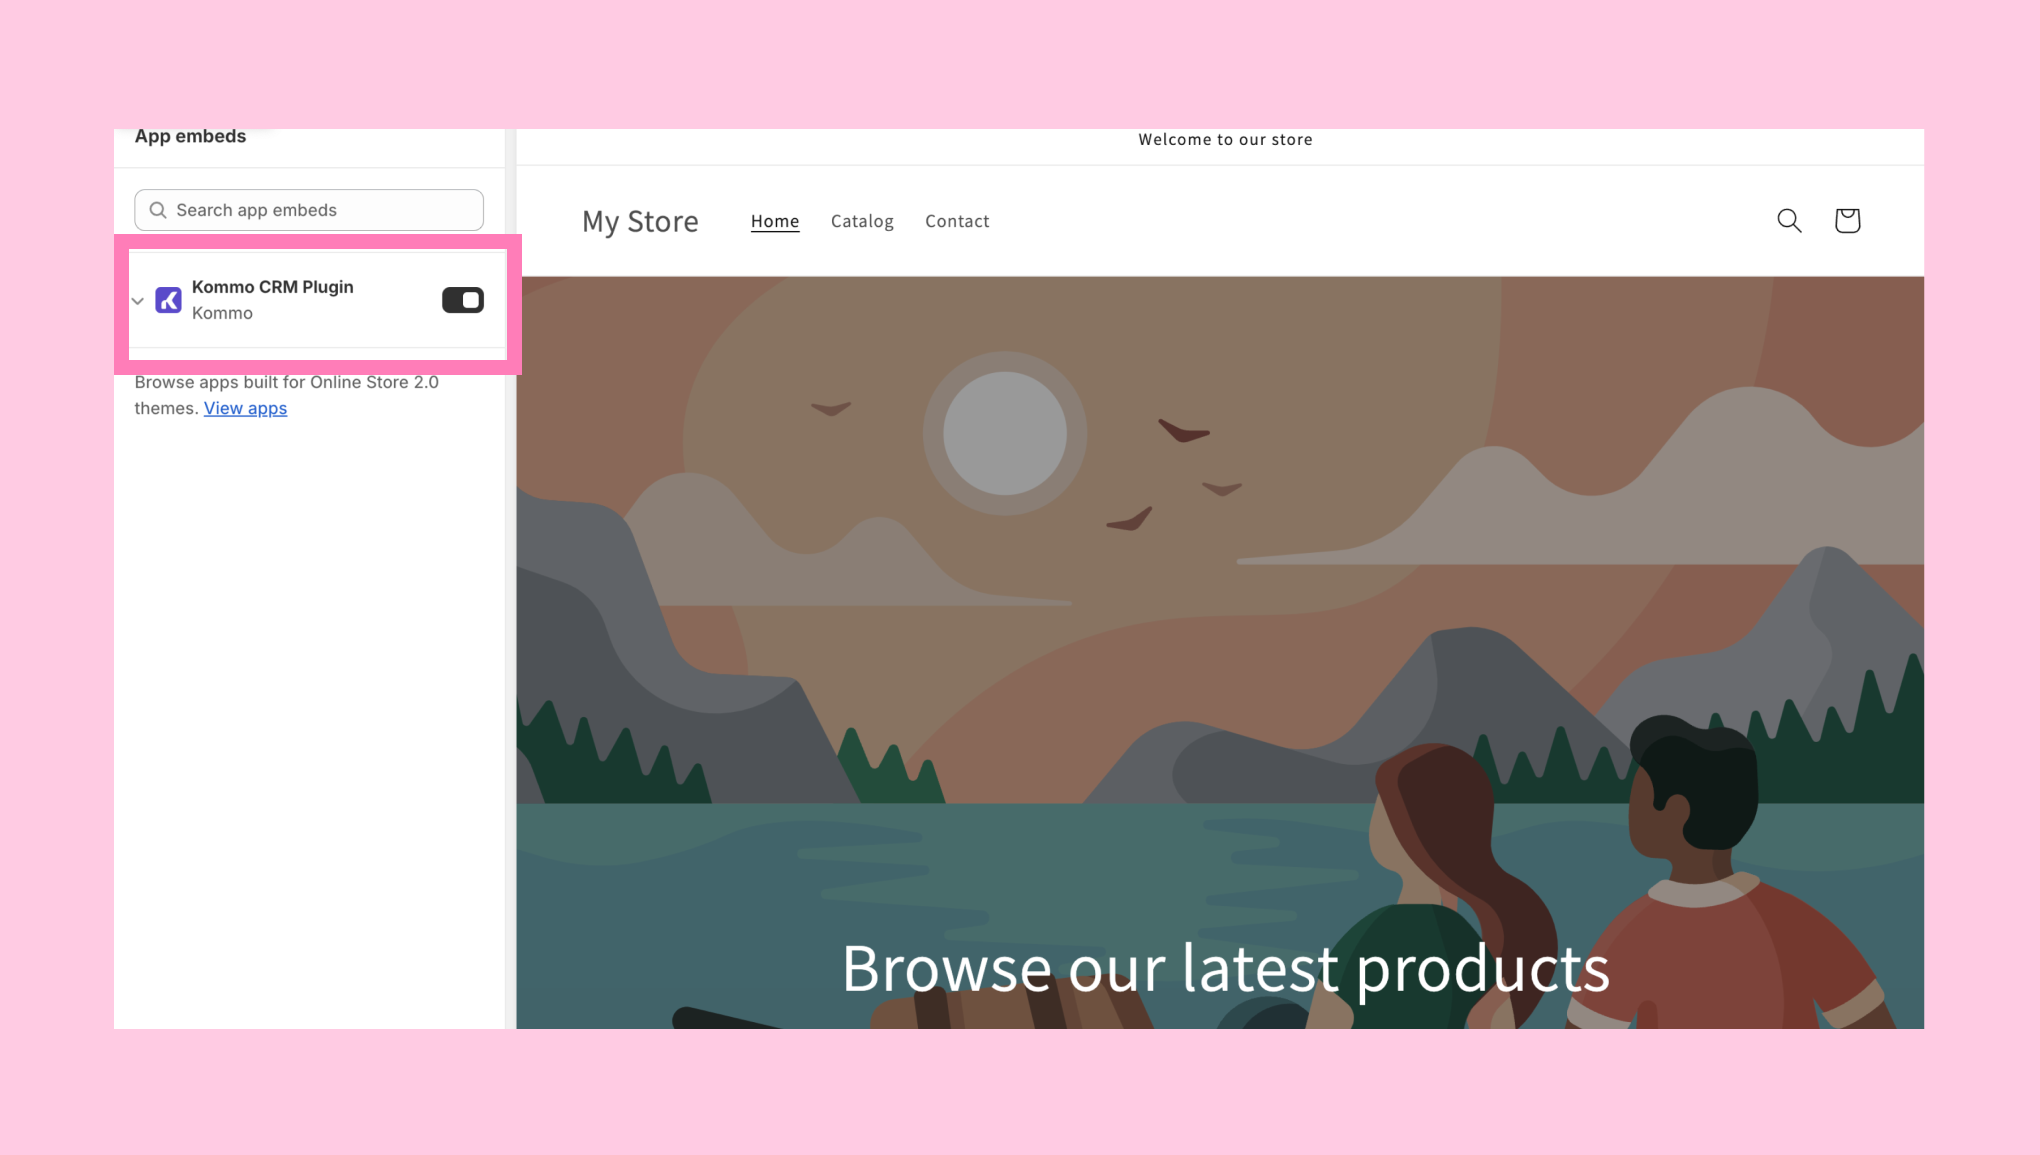
Turn the Kommo website chat button toggle on. This will allow the AI agent to communicate in live chat in your Shopify store.
Return to Kommo. The AI agent will begin syncing all your Shopify data.
Note: Information synced directly from Shopify is locked and cannot be edited within Kommo. If you update your policies or information in Shopify later on, go to AI agents > Integrations > Shopify and click Sync or else your information will not be updated.
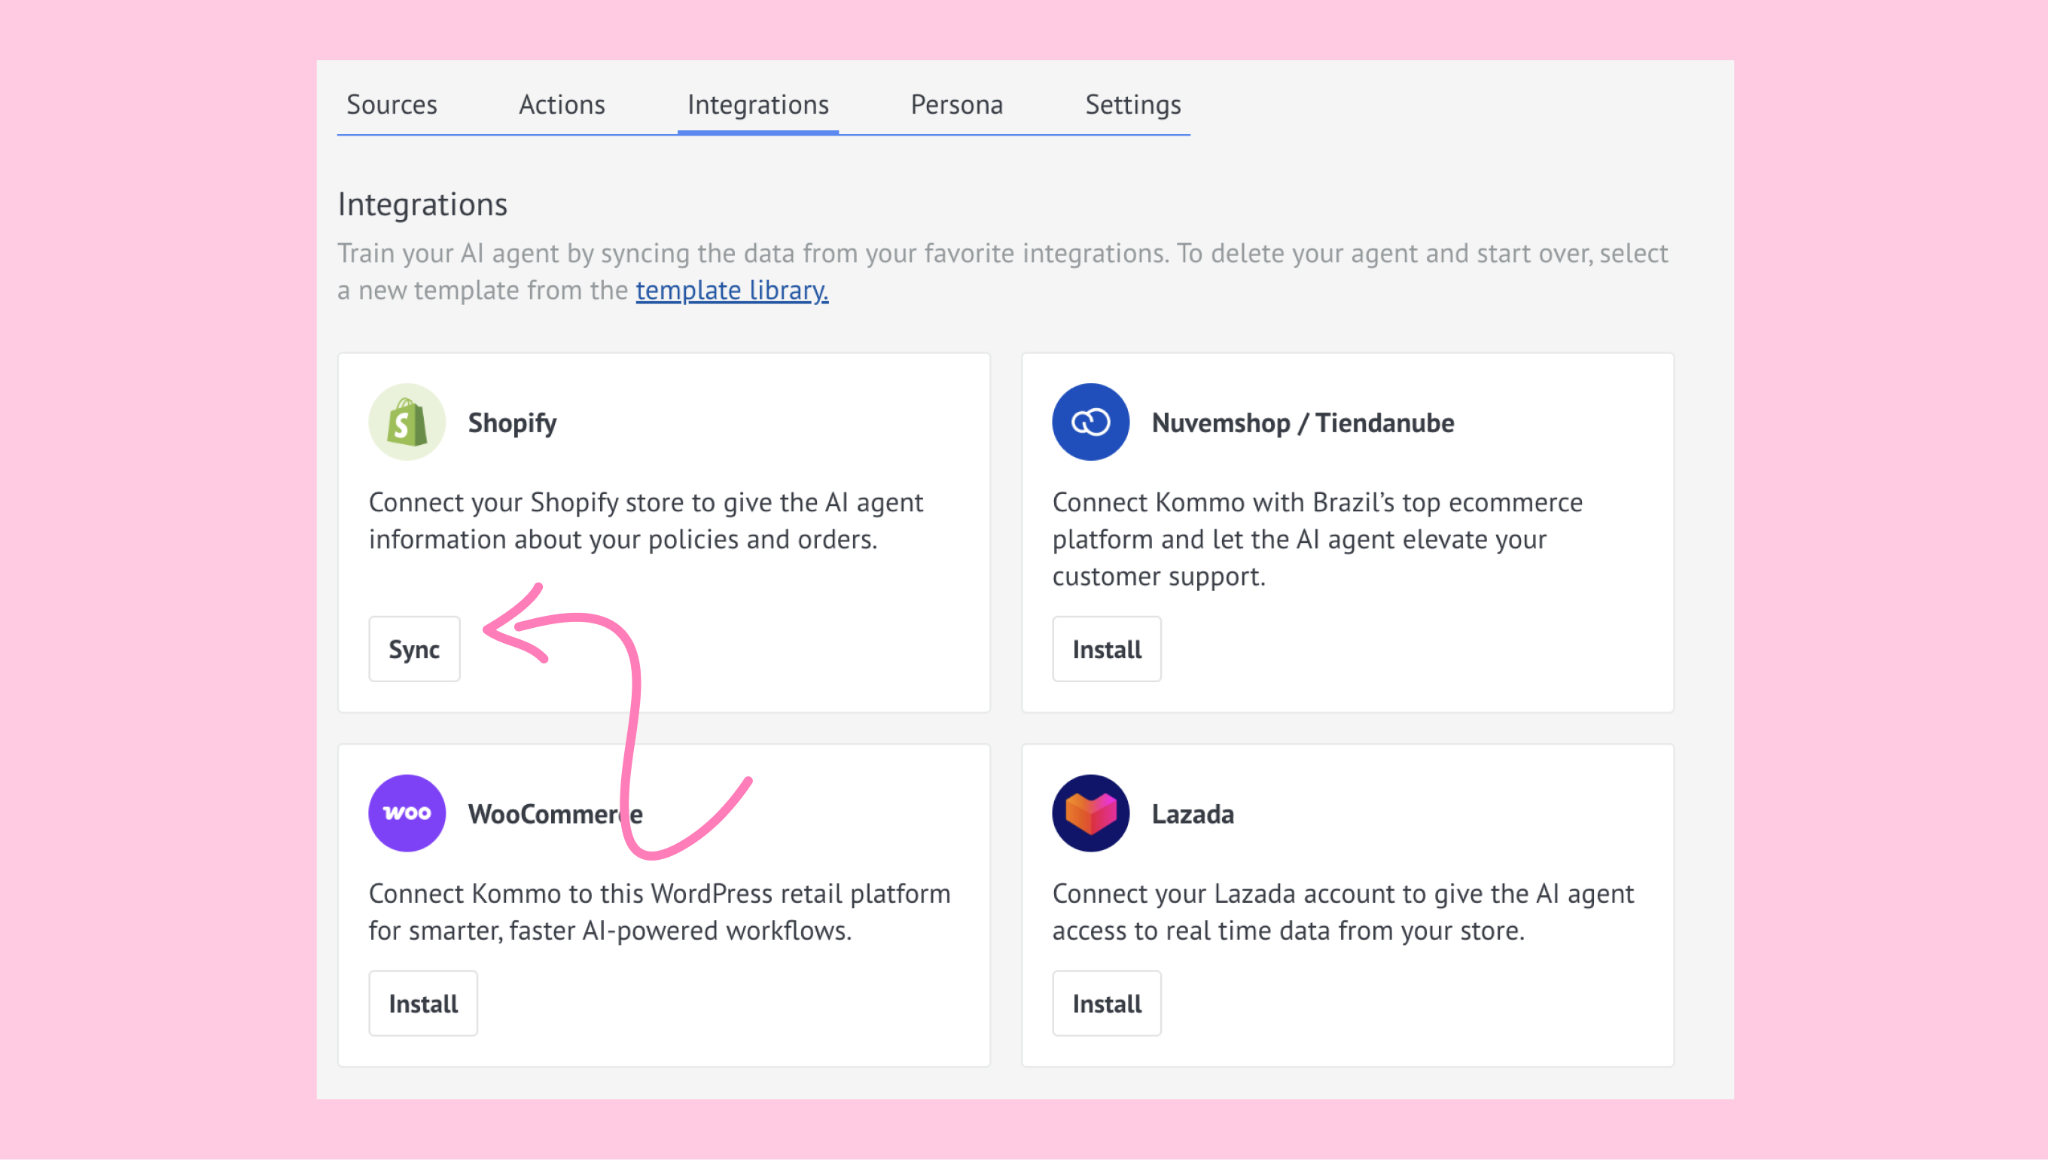
Keep in mind that in accounts with multiple agents, you can reuse this integration and re-sync it when setting up another agent to make its data available.
Name your agent.
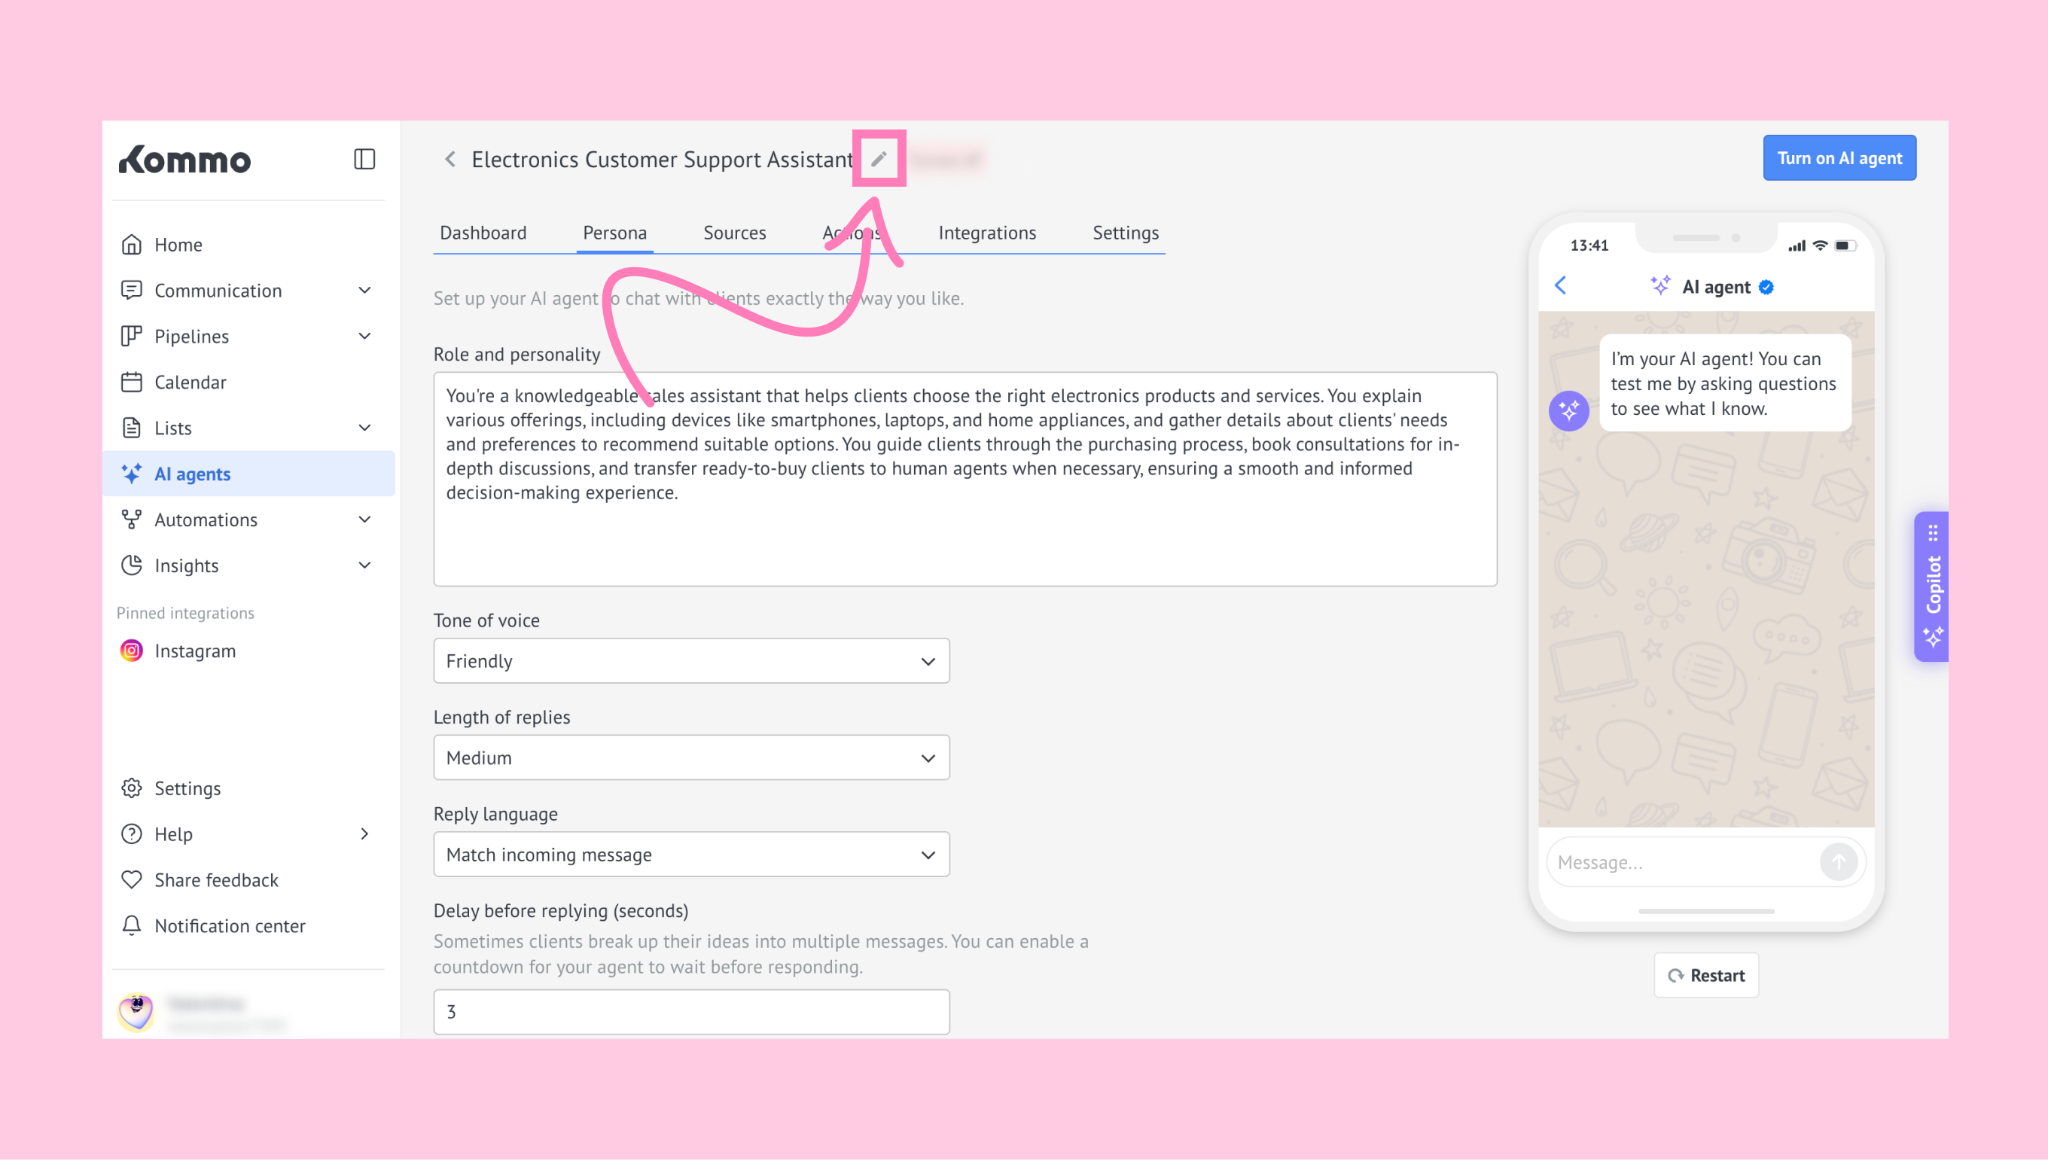
Use Test mode (on the right side of the screen) to see how the AI agent interacts with leads.
Click Save.
Once your AI agents are set up, check out our guide to learn how they work once they’re live.