What you’ll need:
Any Kommo plan (Base, Advanced, Pro, Enterprise, or a 14-day trial).
Admin or Owner access to add and manage knowledge sources.
Keep in mind:
Knowledge sources are required for features like AI reply suggestions and the Kommo AI agent.
Supported languages include English, Indonesian, Portuguese, Russian, Spanish, and Turkish.
Only text is supported in this feature.
Replies are generated only when relevant information is available in your knowledge sources.
In this article, you’ll learn how to set up and manage AI knowledge sources effectively.
What are AI Knowledge sources?
AI knowledge sources are the information Kommo uses to generate replies across its core AI features. They store details about your products, services, policies, and FAQs, so responses stay accurate and aligned with your business.
They power features like:
AI reply suggestions — generates responses directly in chats, helping you reply faster while keeping your tone consistent
Kommo AI agent — responds to common questions automatically, guides clients to the right resources, and provides 24/7 support
By setting up your knowledge sources, you ensure all AI-generated responses are based on your business information and stay consistent across conversations.
How AI knowledge sources work?
For AI reply suggestions
To add a knowledge source:
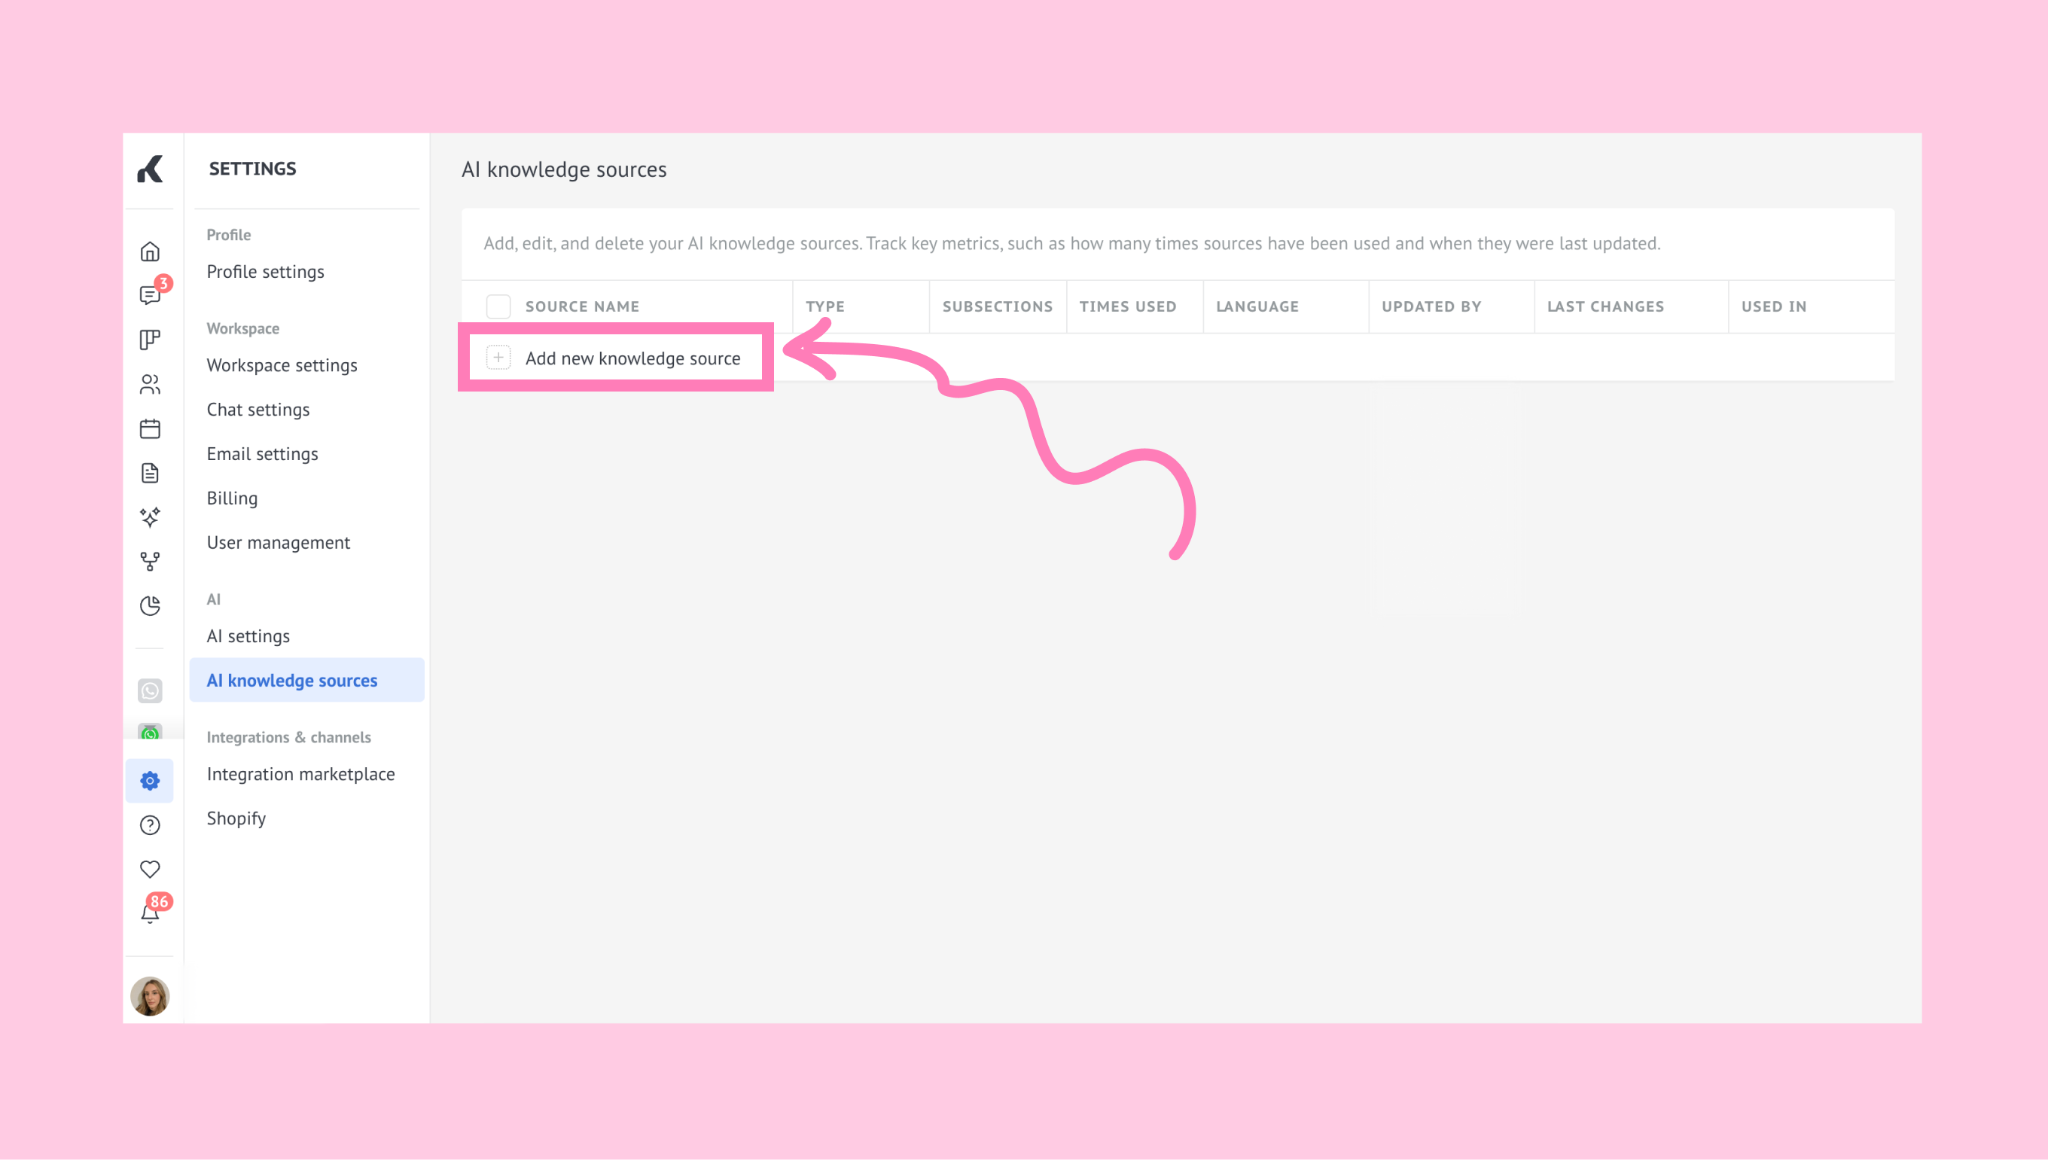
In the AI Knowledge sources section, click + Add new knowledge source.
A modal window will appear with three ways to add information:
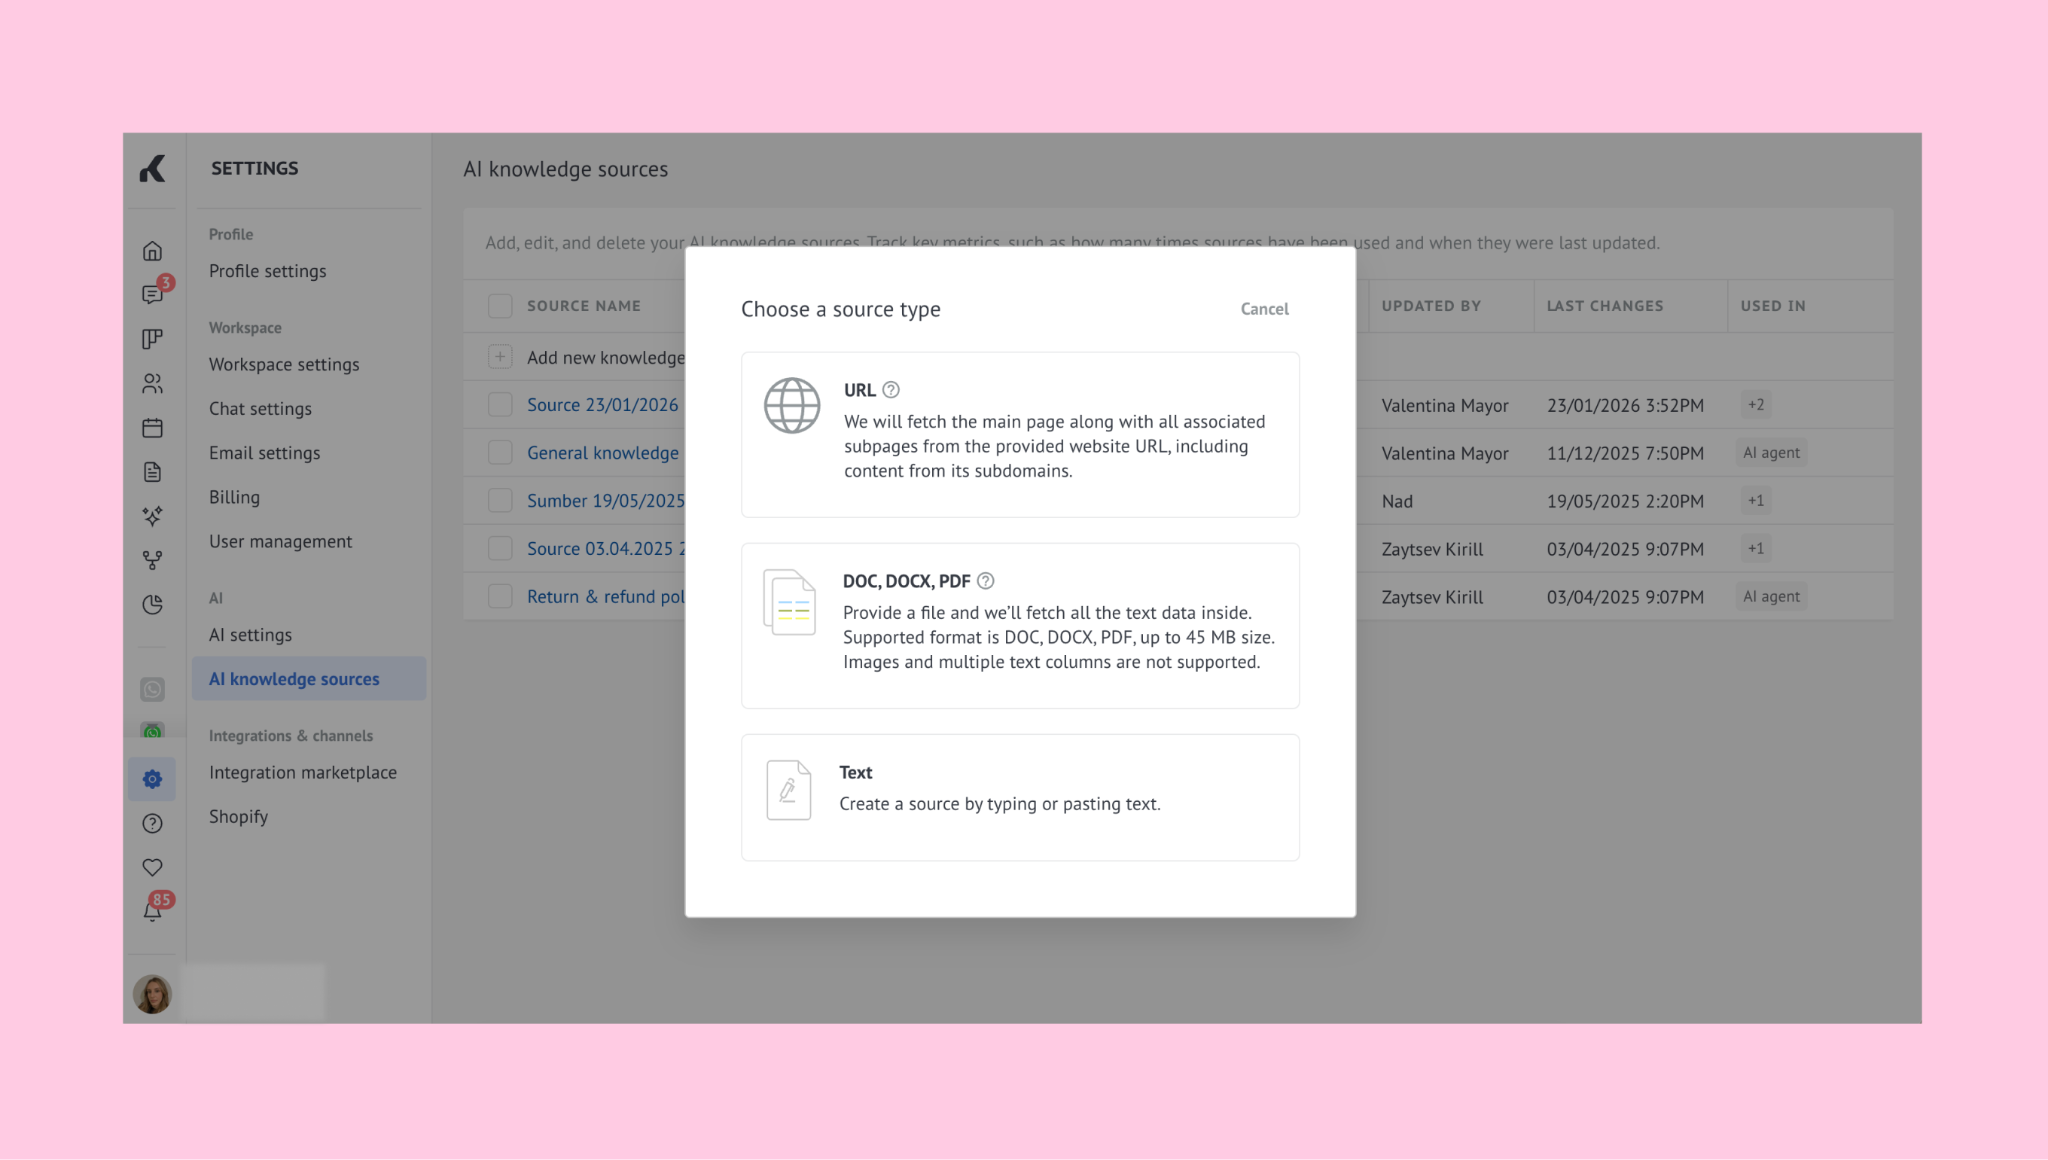
A) Add a URL:
Select URL as the source type.
Paste the link with the information you want to use (e.g. your website or help center).
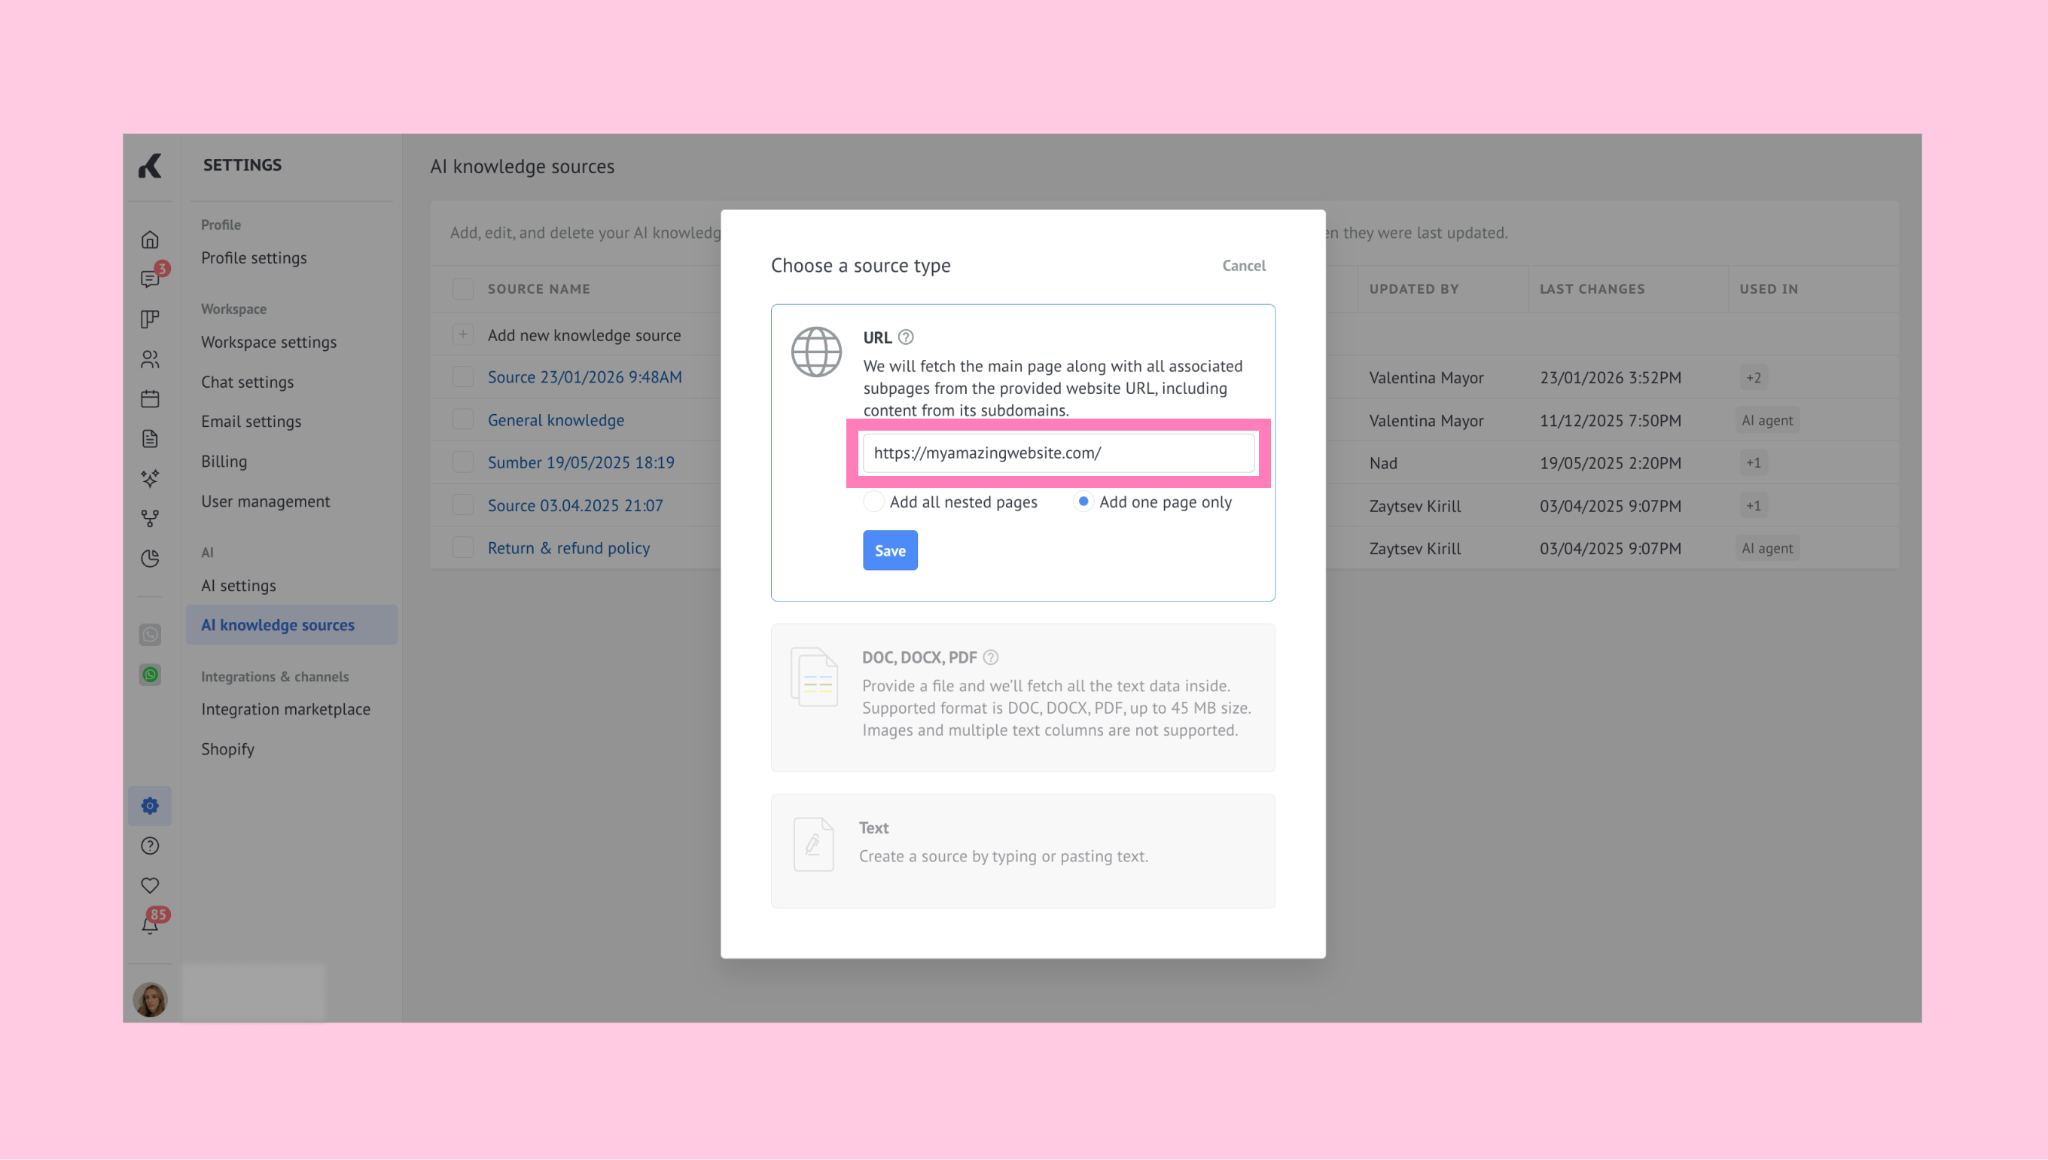
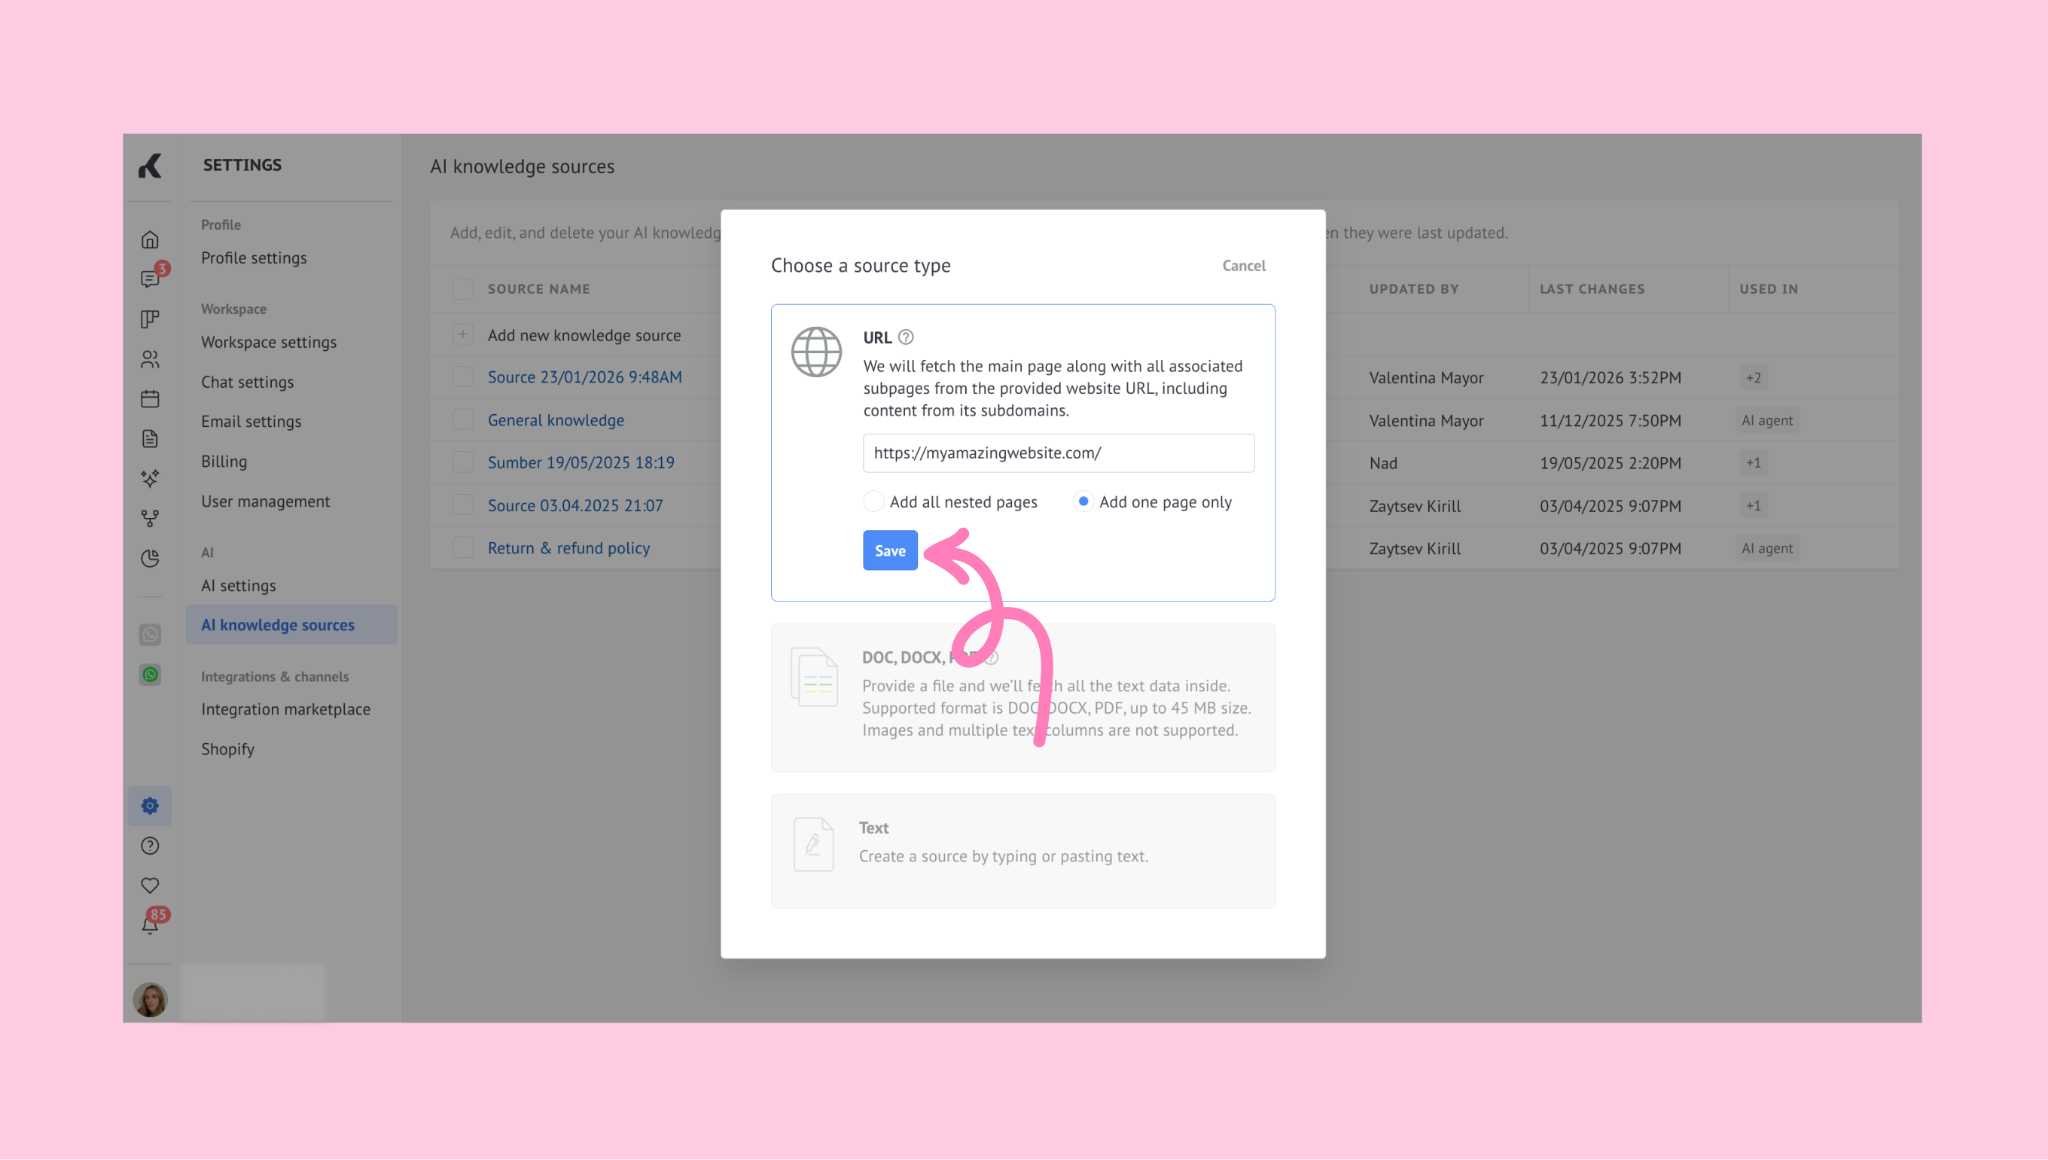
Choose whether to include a single page or all nested pages, then click Save.
Important: A single URL can include up to 1500 pages, depending on accessibility. Some pages may not be available for parsing, such as those requiring login, CAPTCHA verification, or dynamic content.
B) Upload a file
Select DOC, DOCX, or PDF as the source type.
Choose the file language.
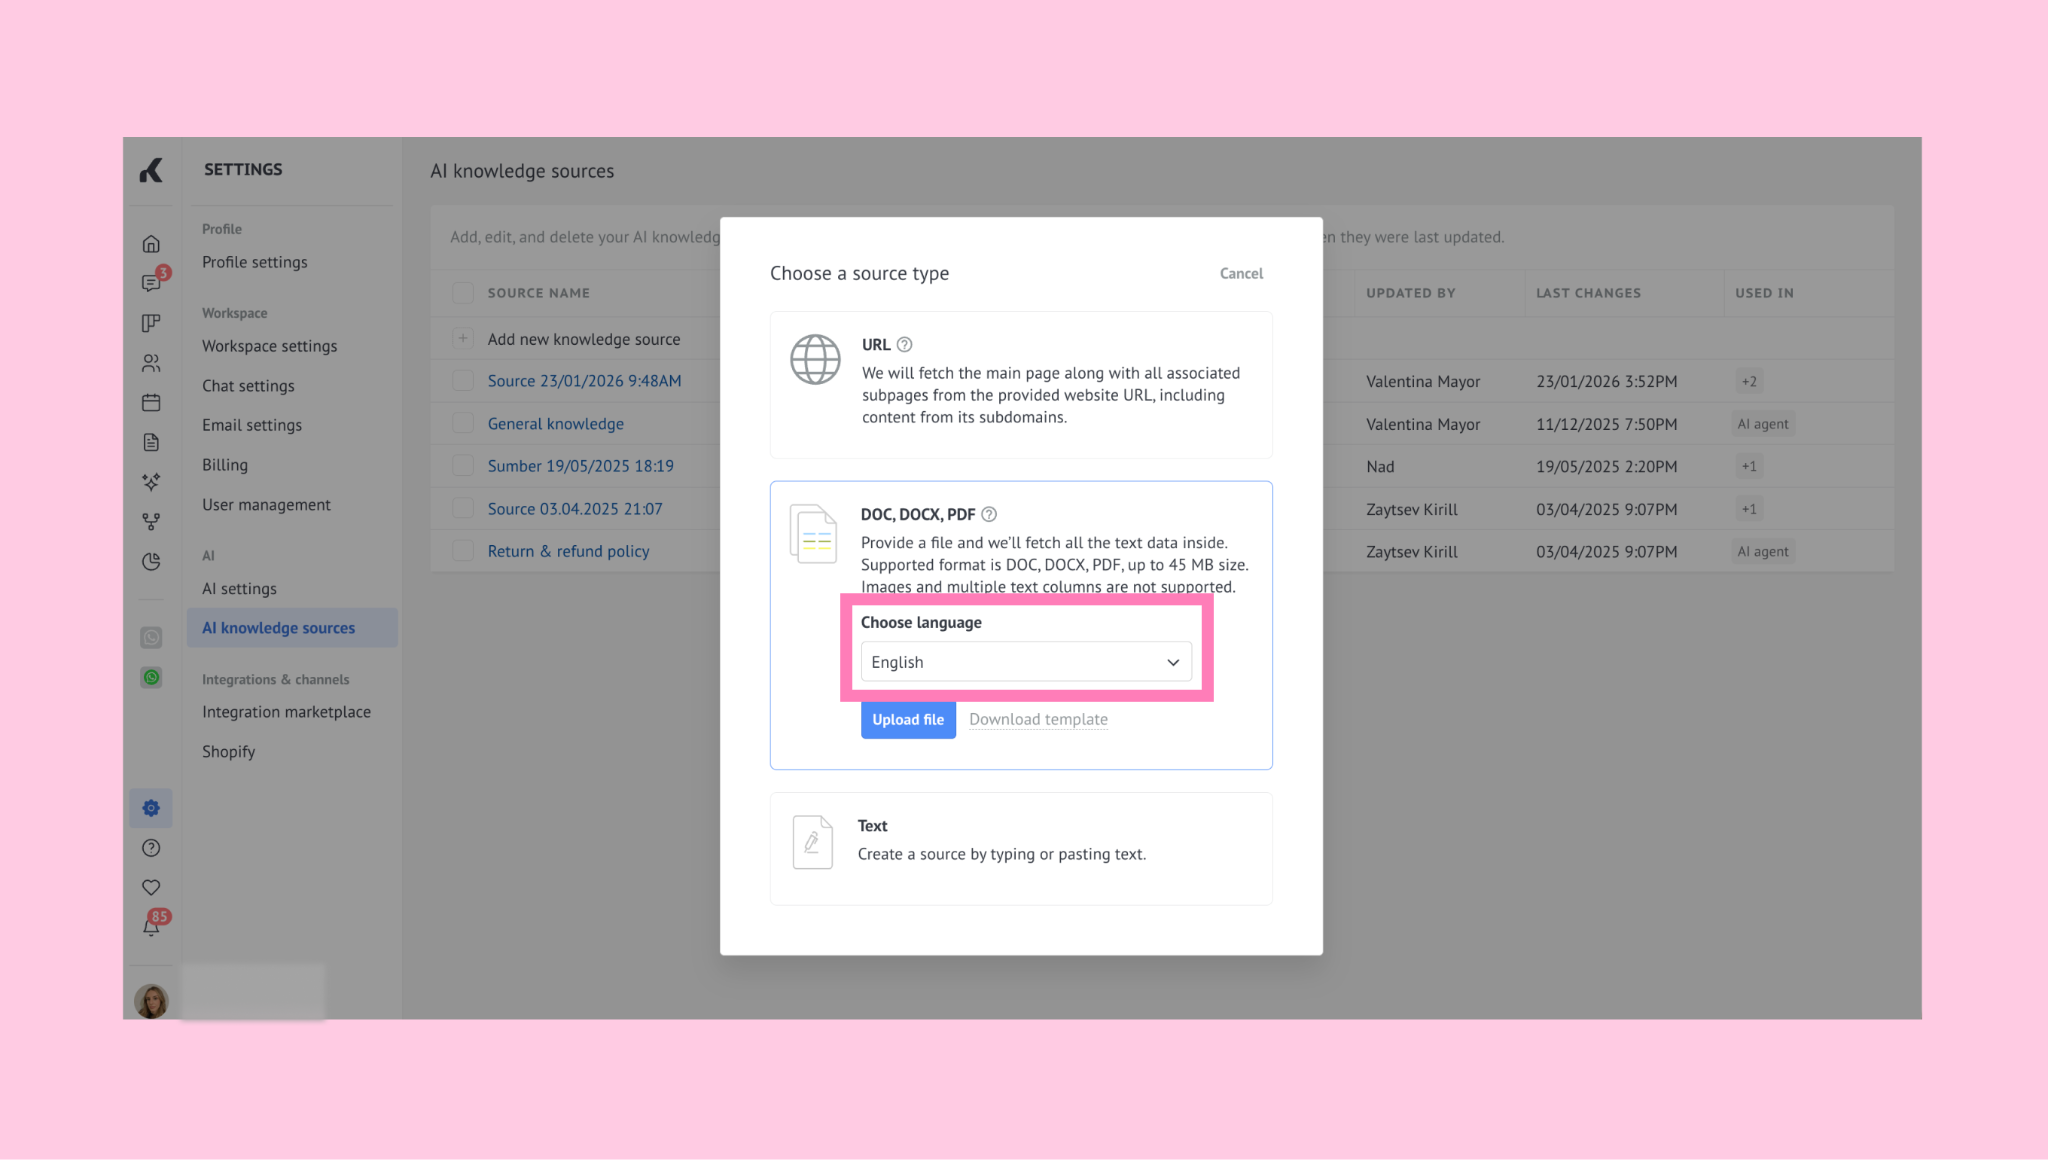
Supported languages include English, Indonesian, Portuguese, Russian, Spanish, and Turkish.
Click Upload file and select your file.
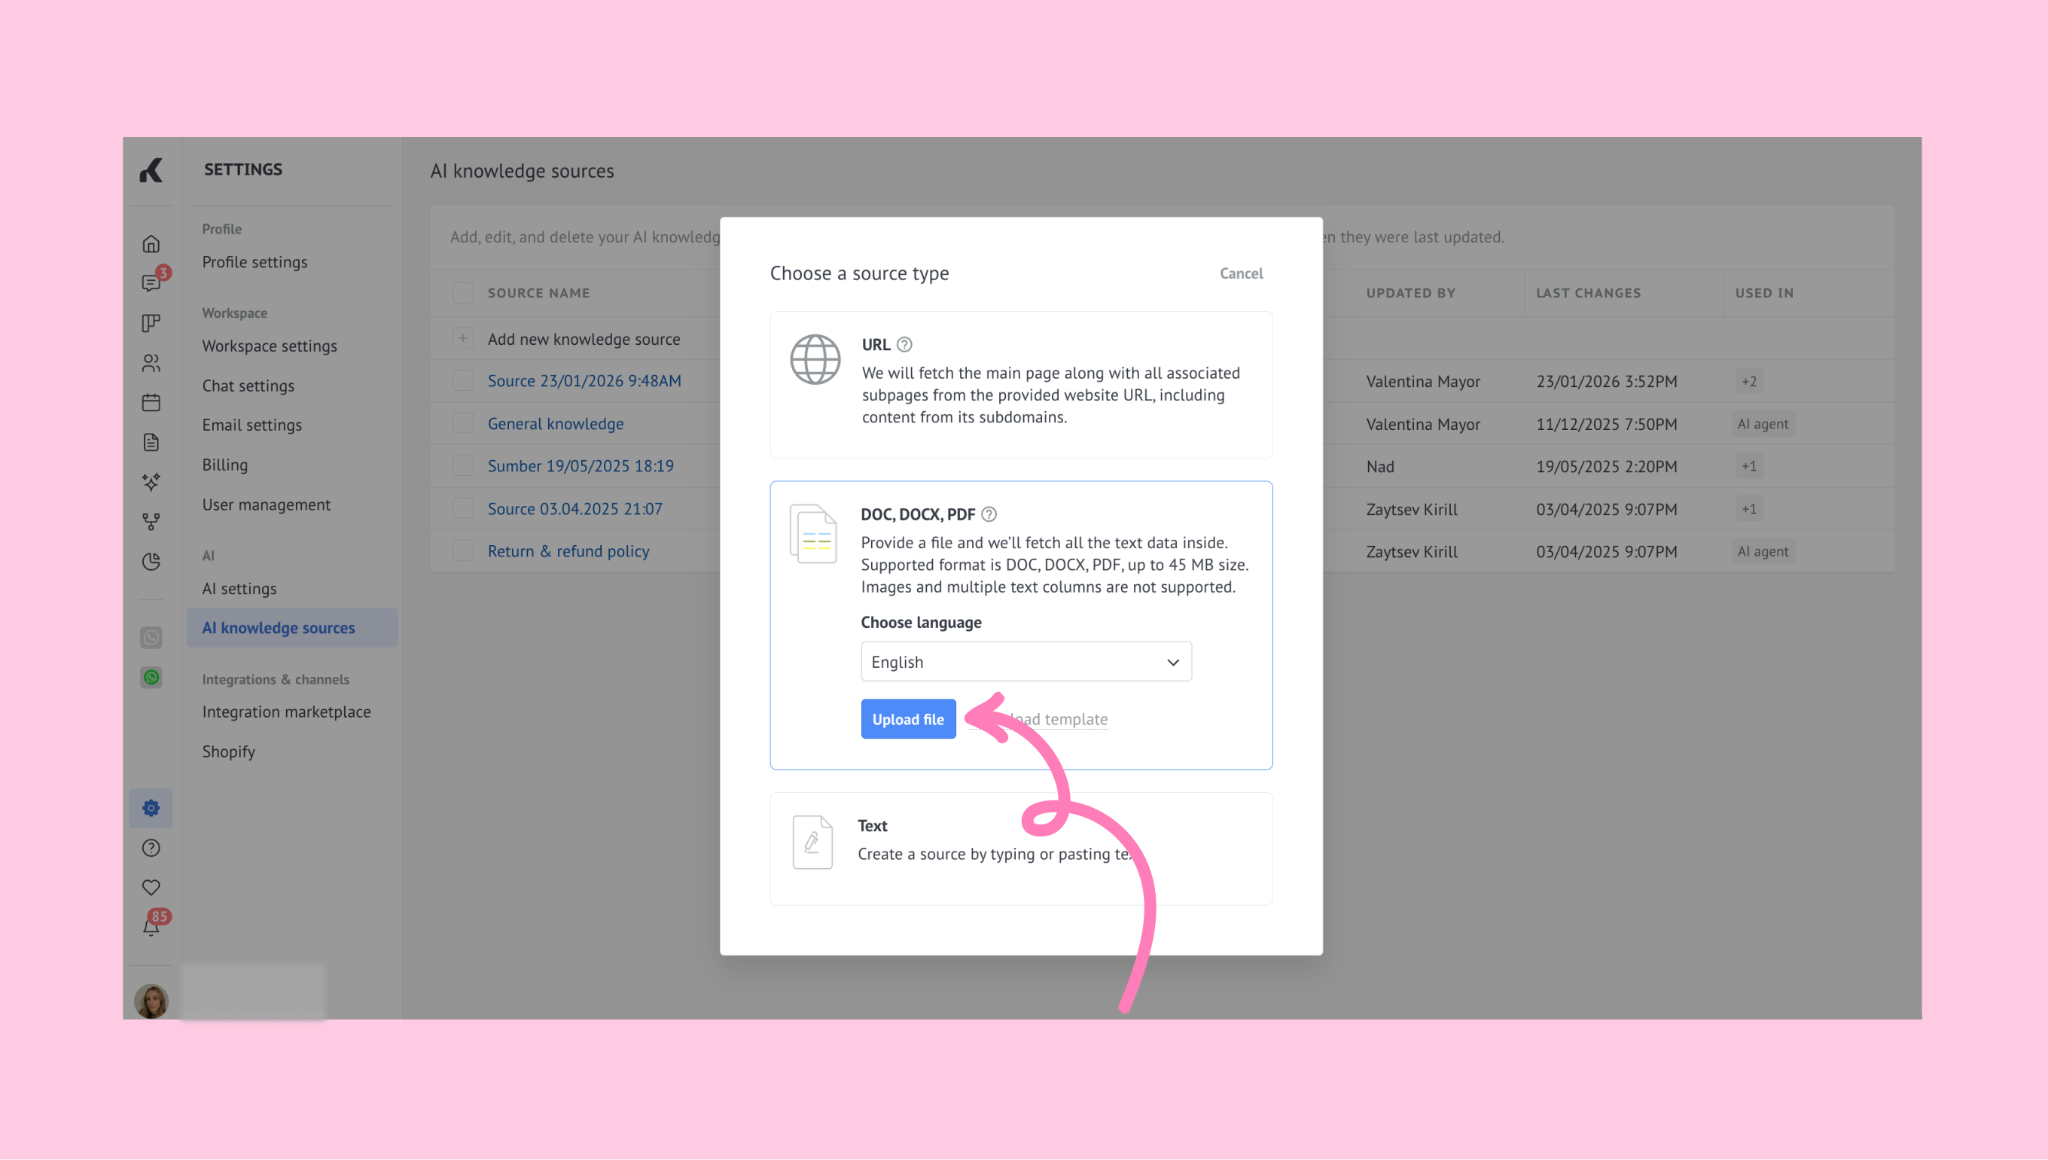
Note: Only PDF, DOC, and DOCX files are supported, with a maximum size of 45 MB.
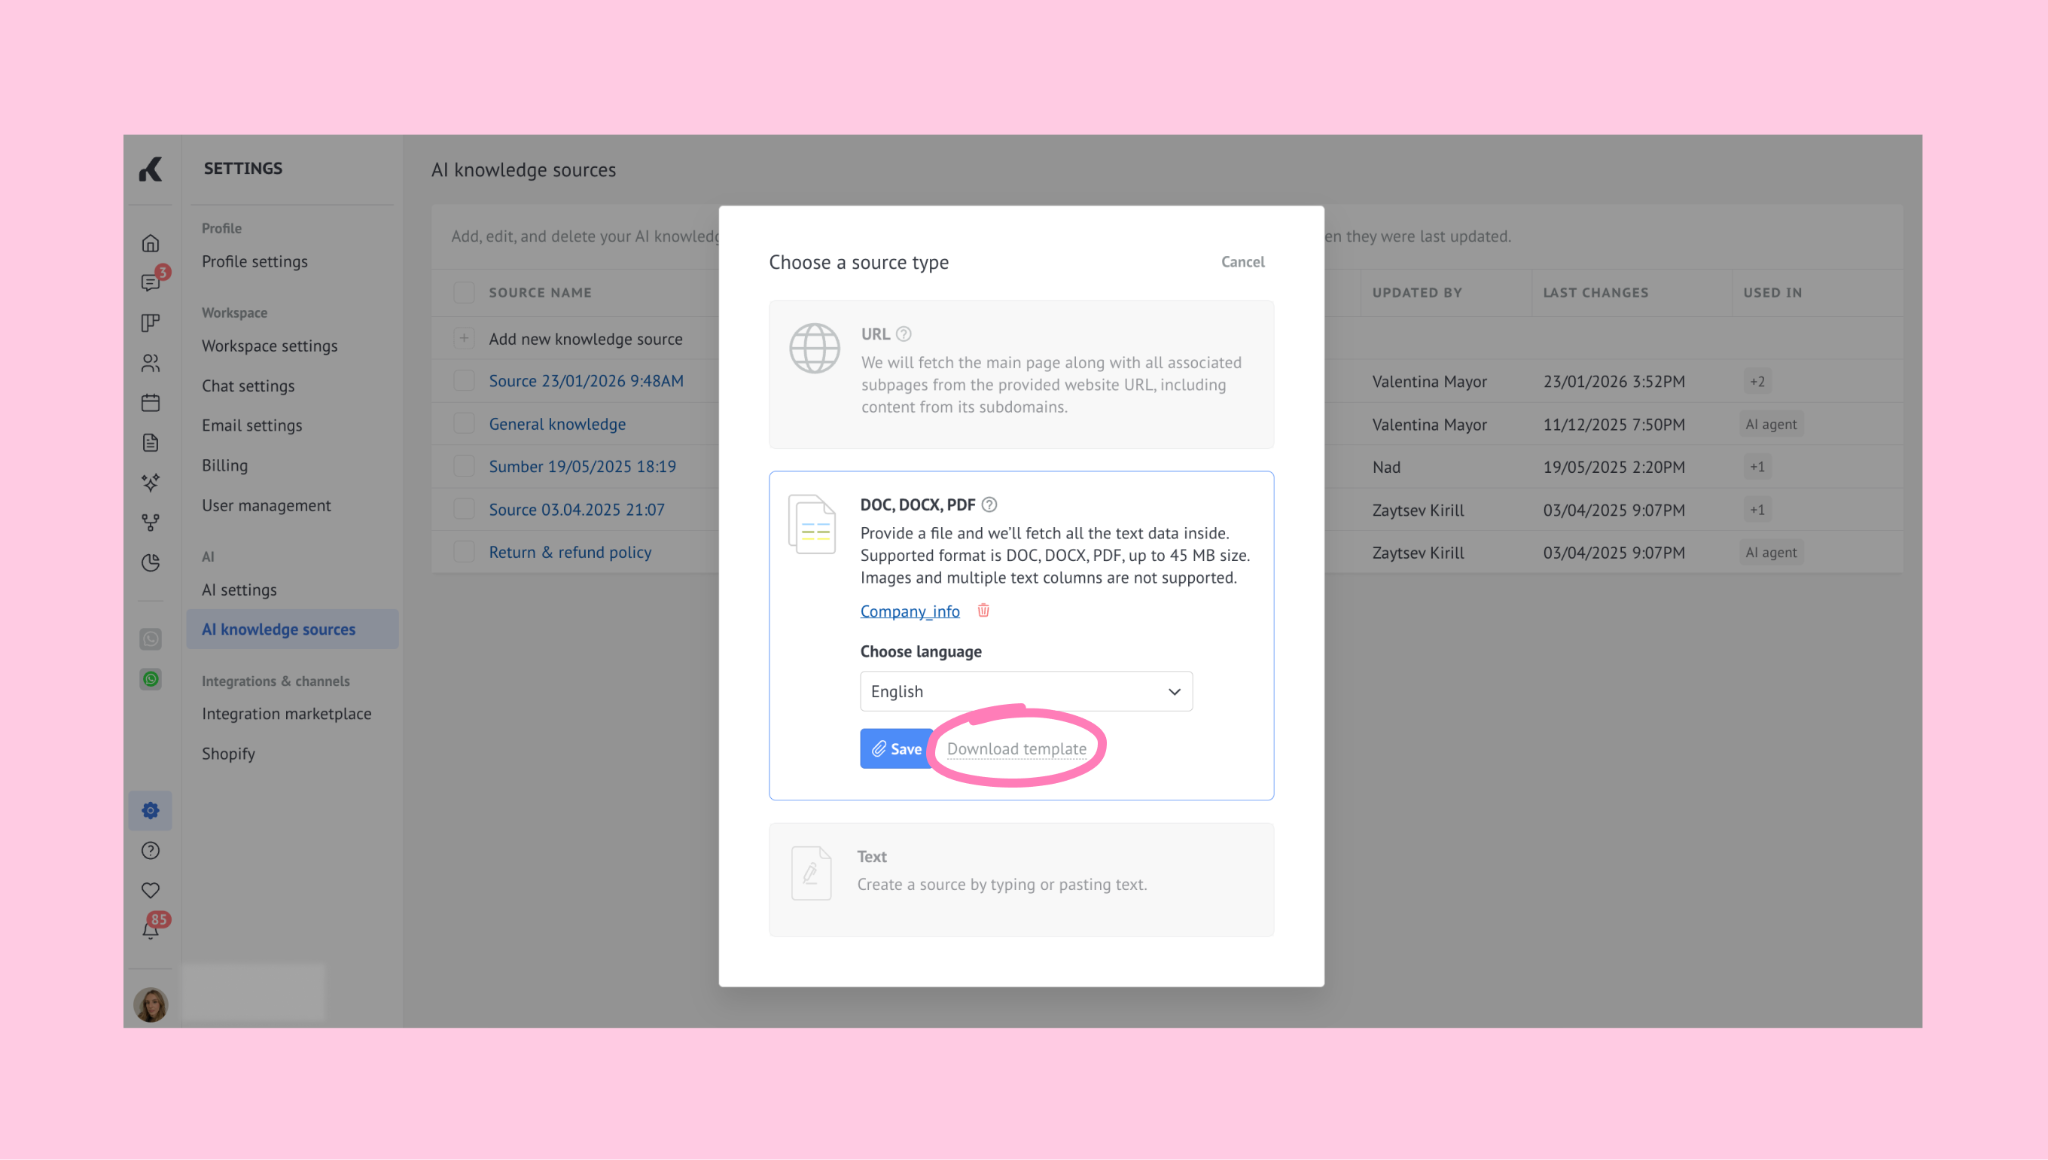
If you don’t have content ready, you can use the built-in template. Click Download template, replace the sample information with your own, or use it as-is to see how responses are generated.
Once your file is uploaded, click Save.
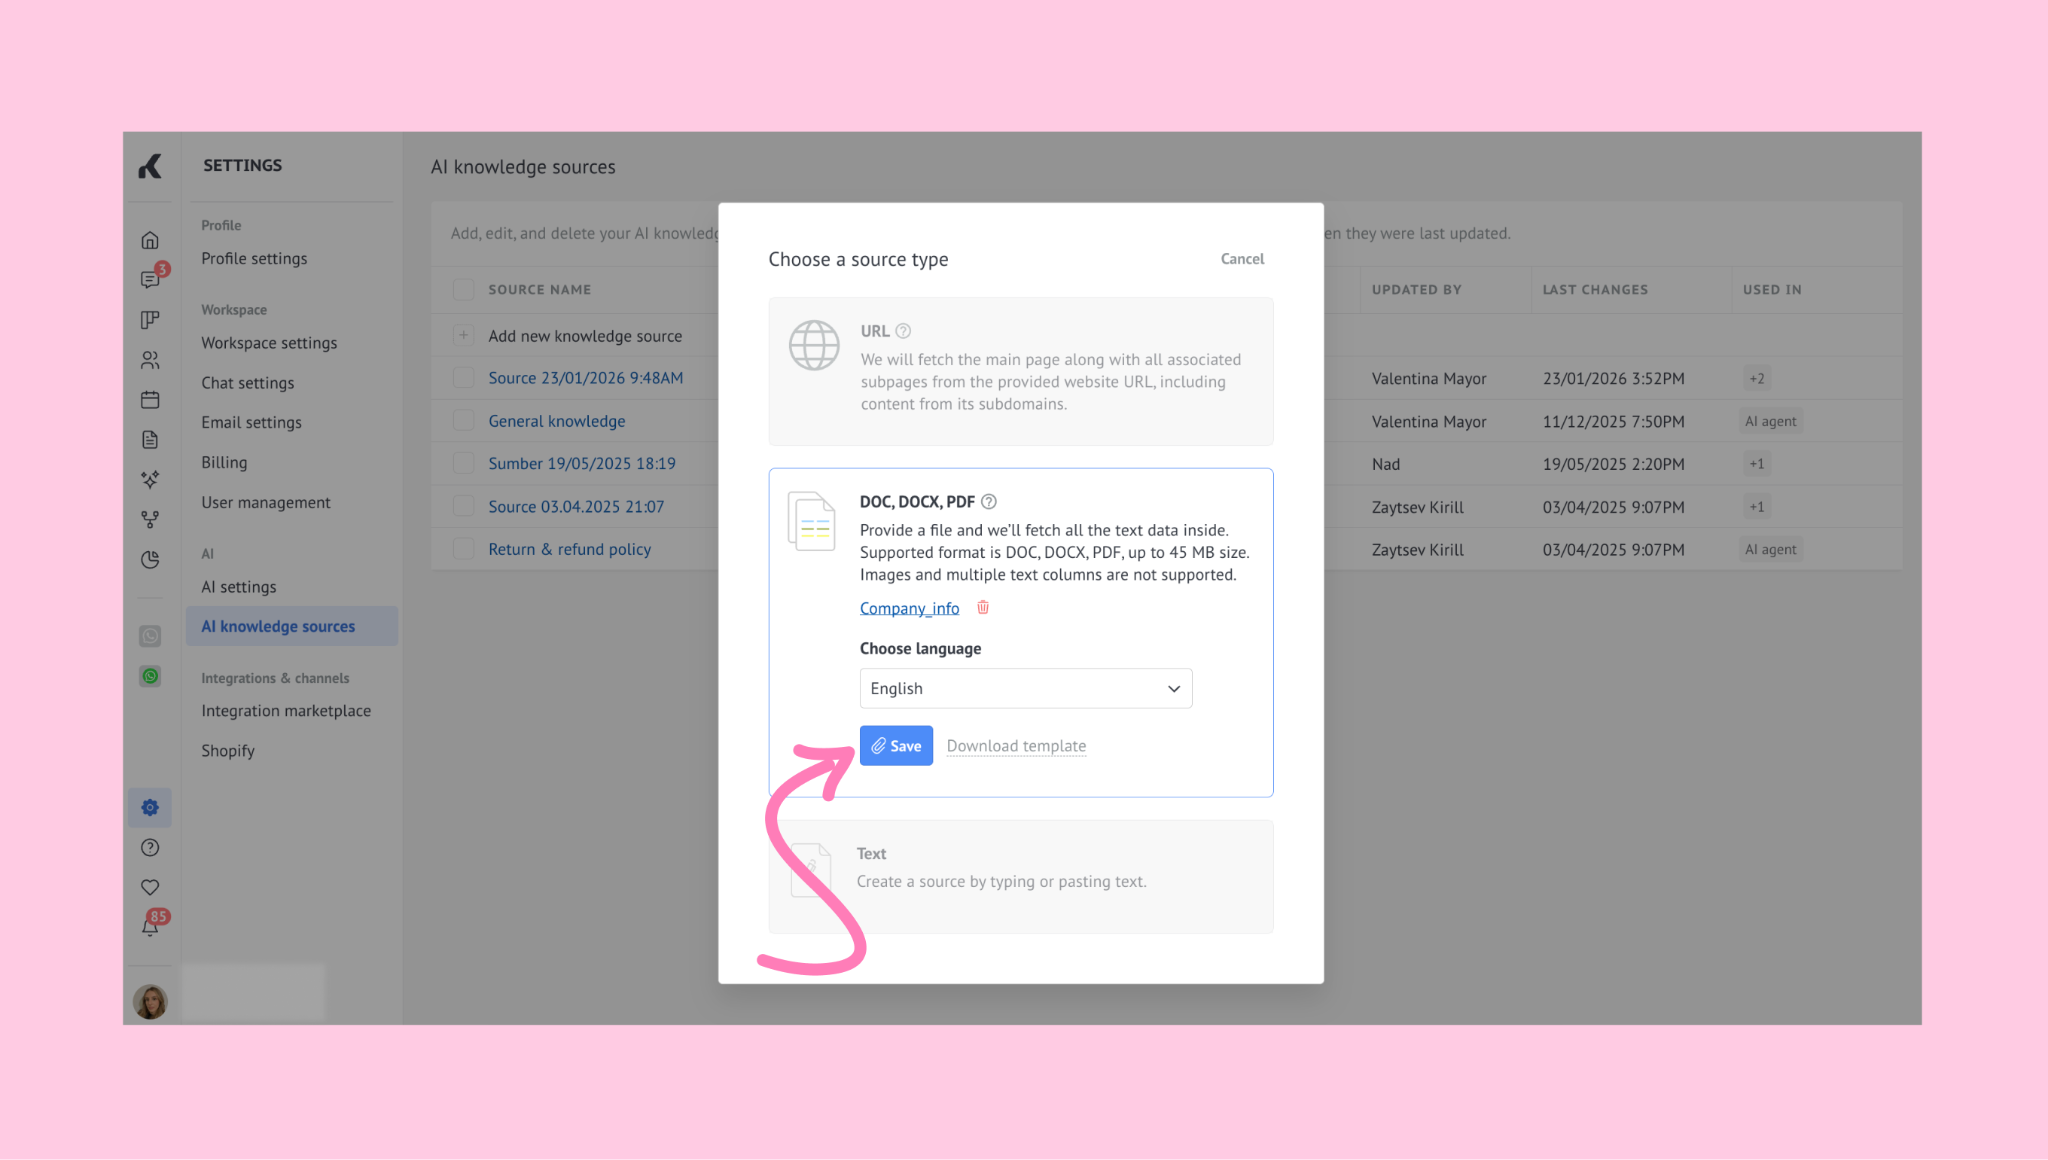
Important: Uploading and processing time depends on file size and may take up to a few hours for larger files.
You can rename the source or keep the default name to help you organize and find it later.
C) Add text manually
Select Text as the source type.
Name your source and choose the language.
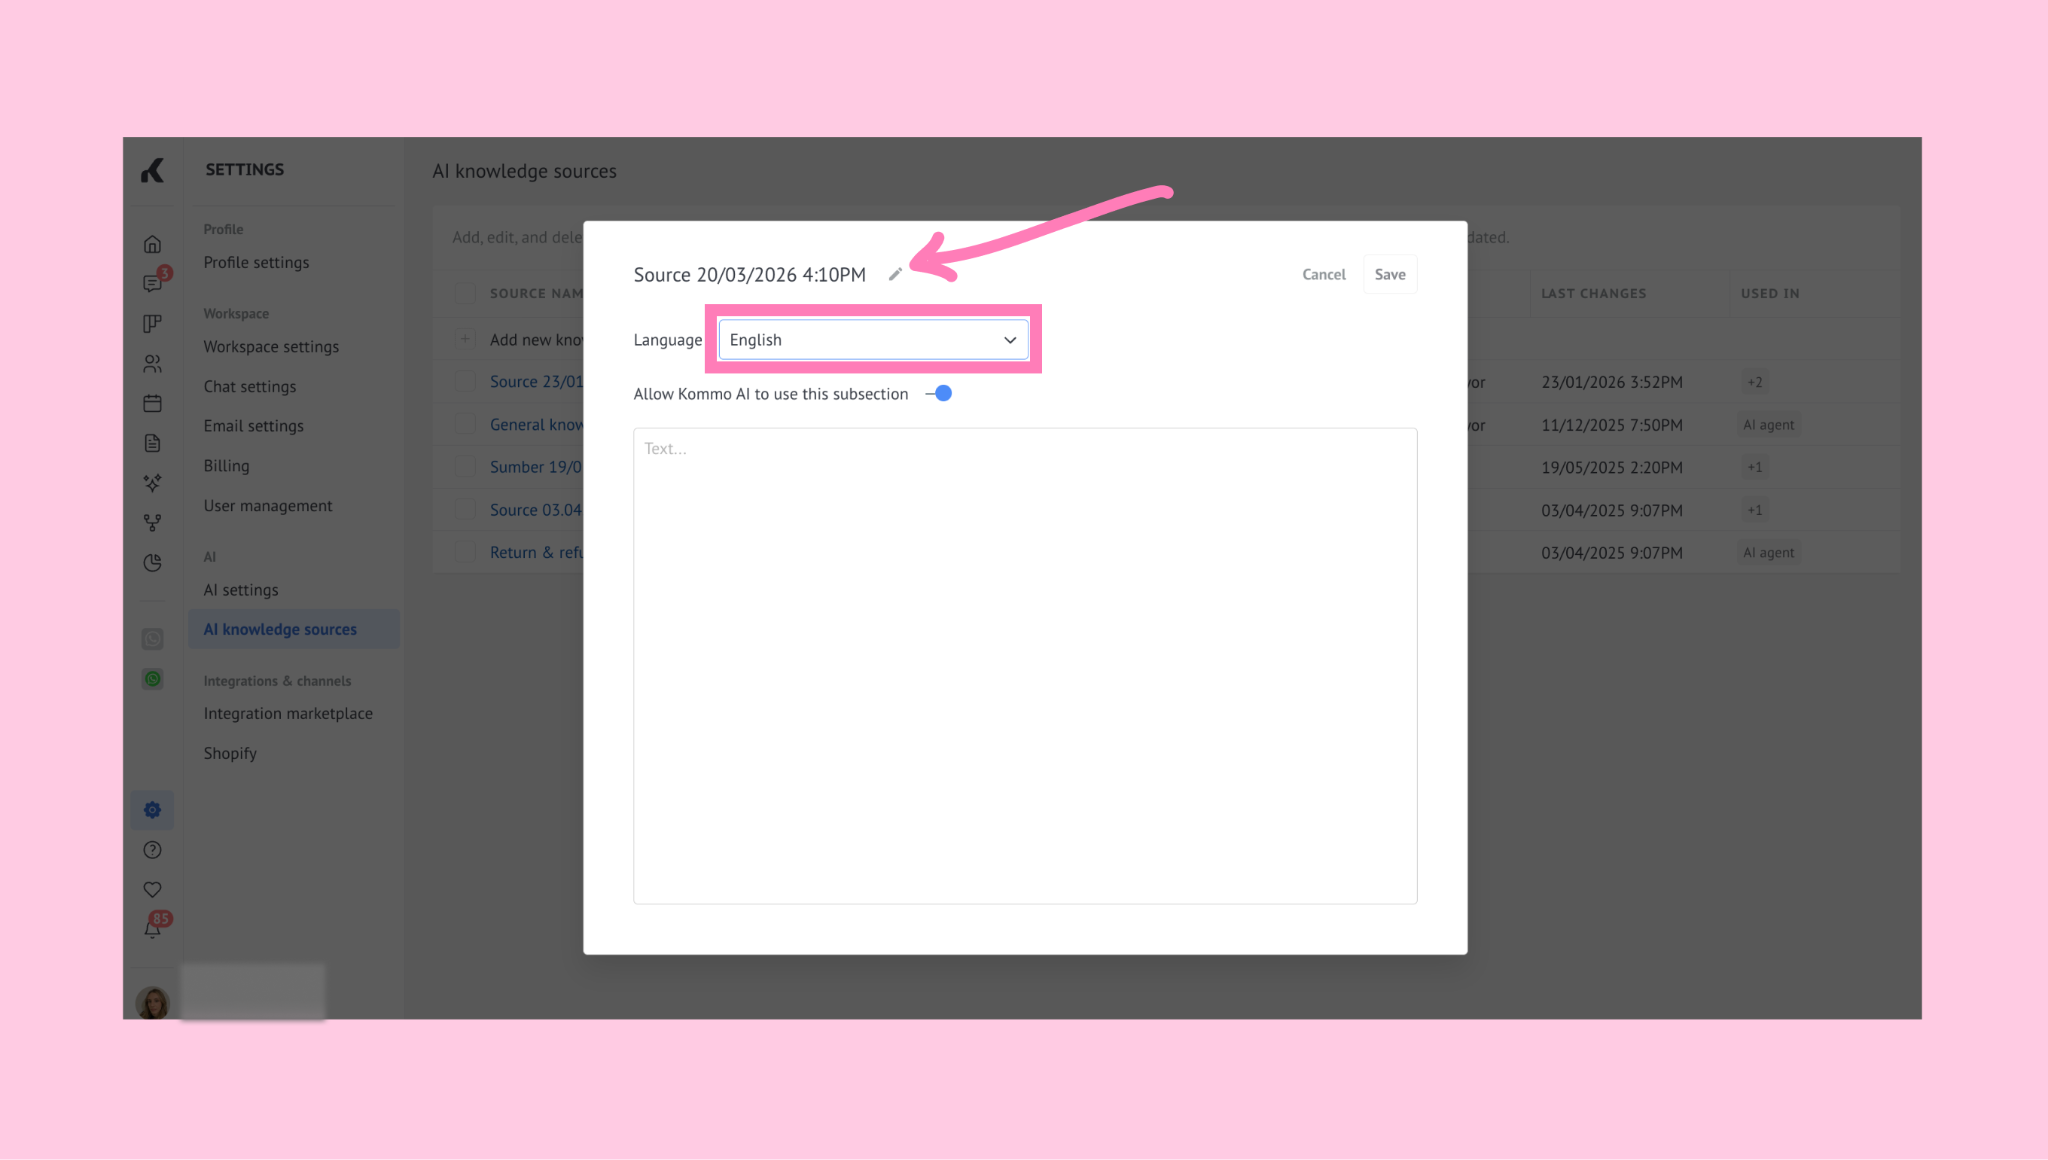
The supported languages are English, Indonesian, Portuguese, Russian, Spanish, and Turkish.
Enter your content and click Save.
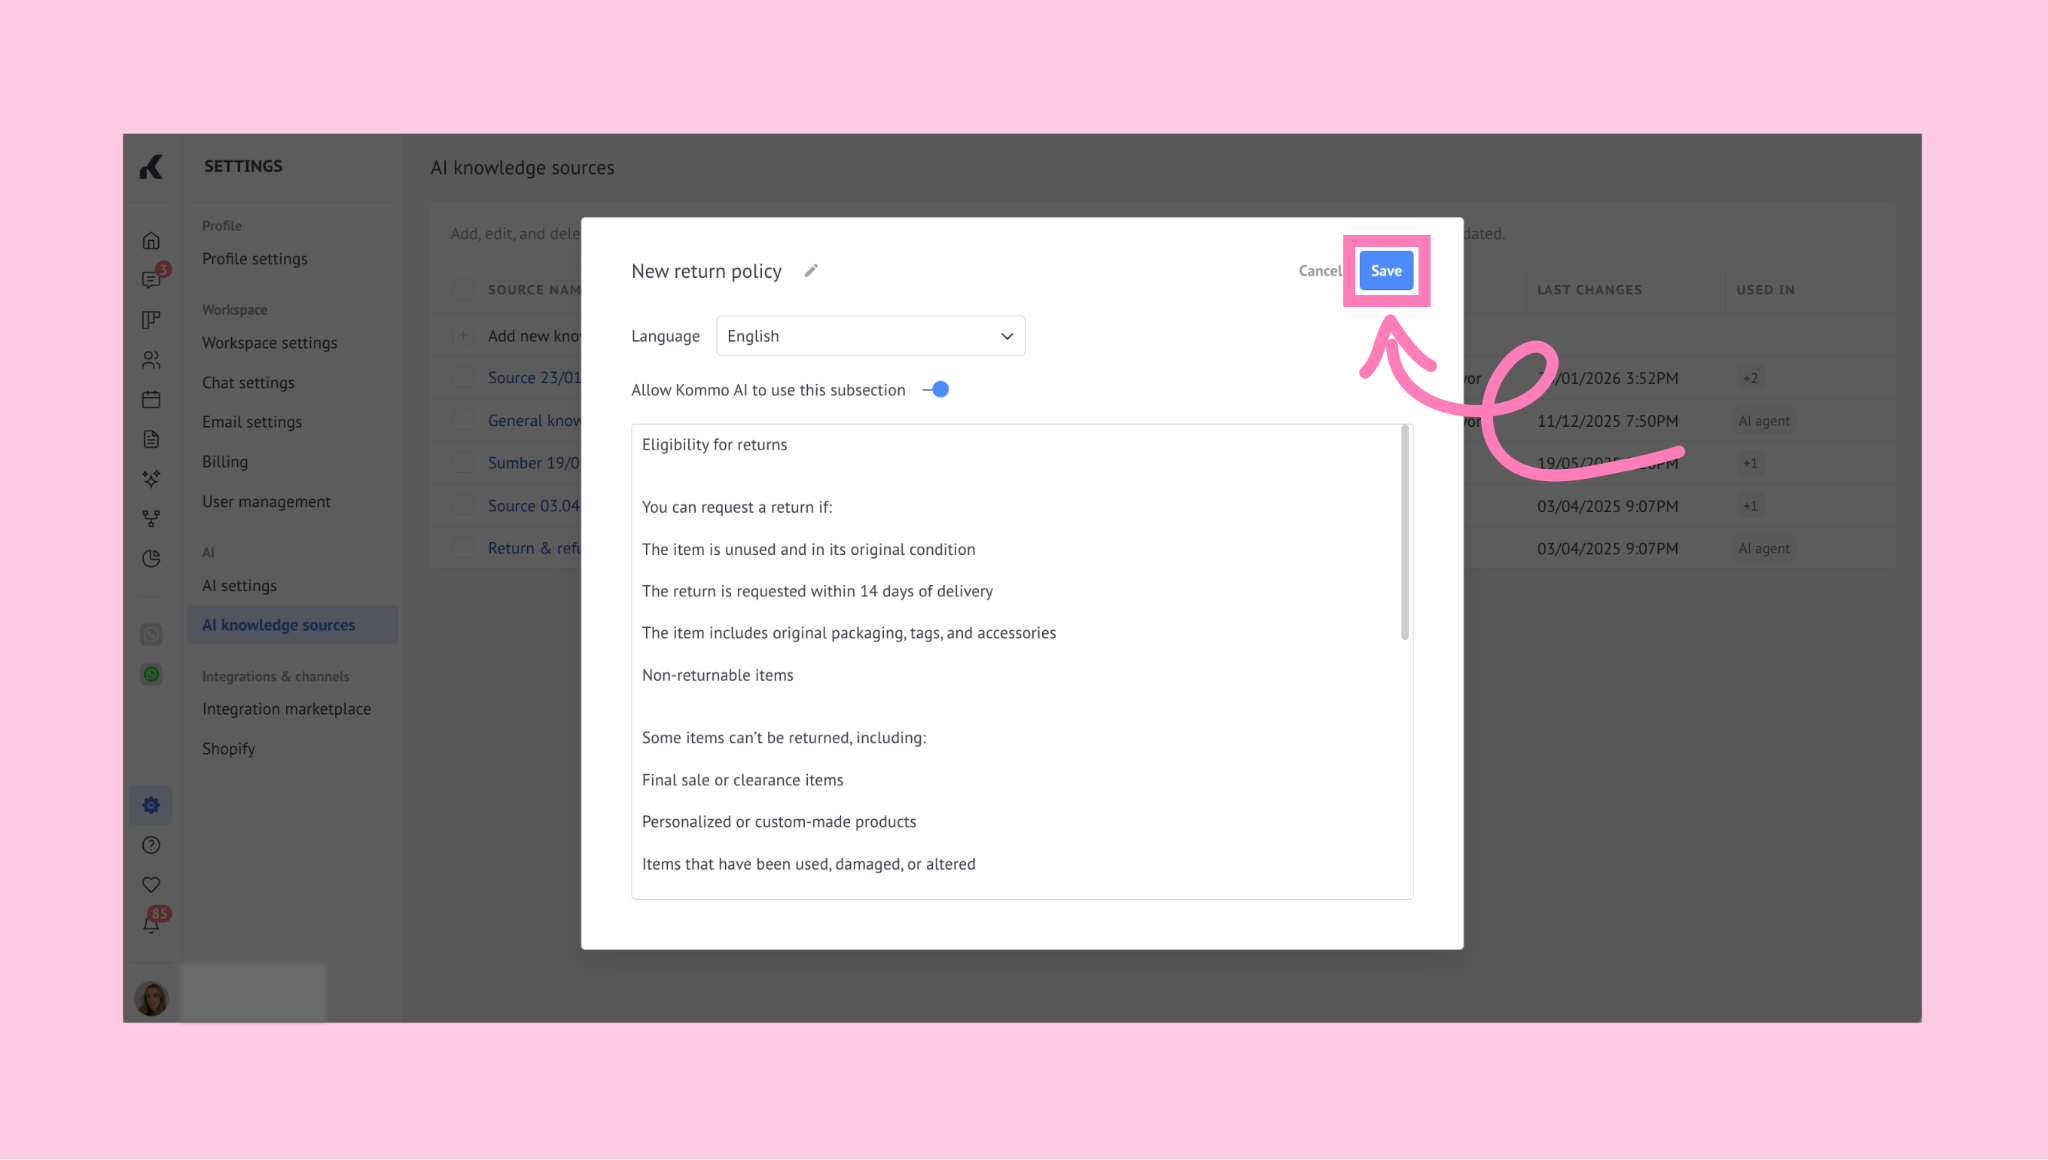
Important: You won’t be able to save the source without adding text.
Manage AI knowledge sources
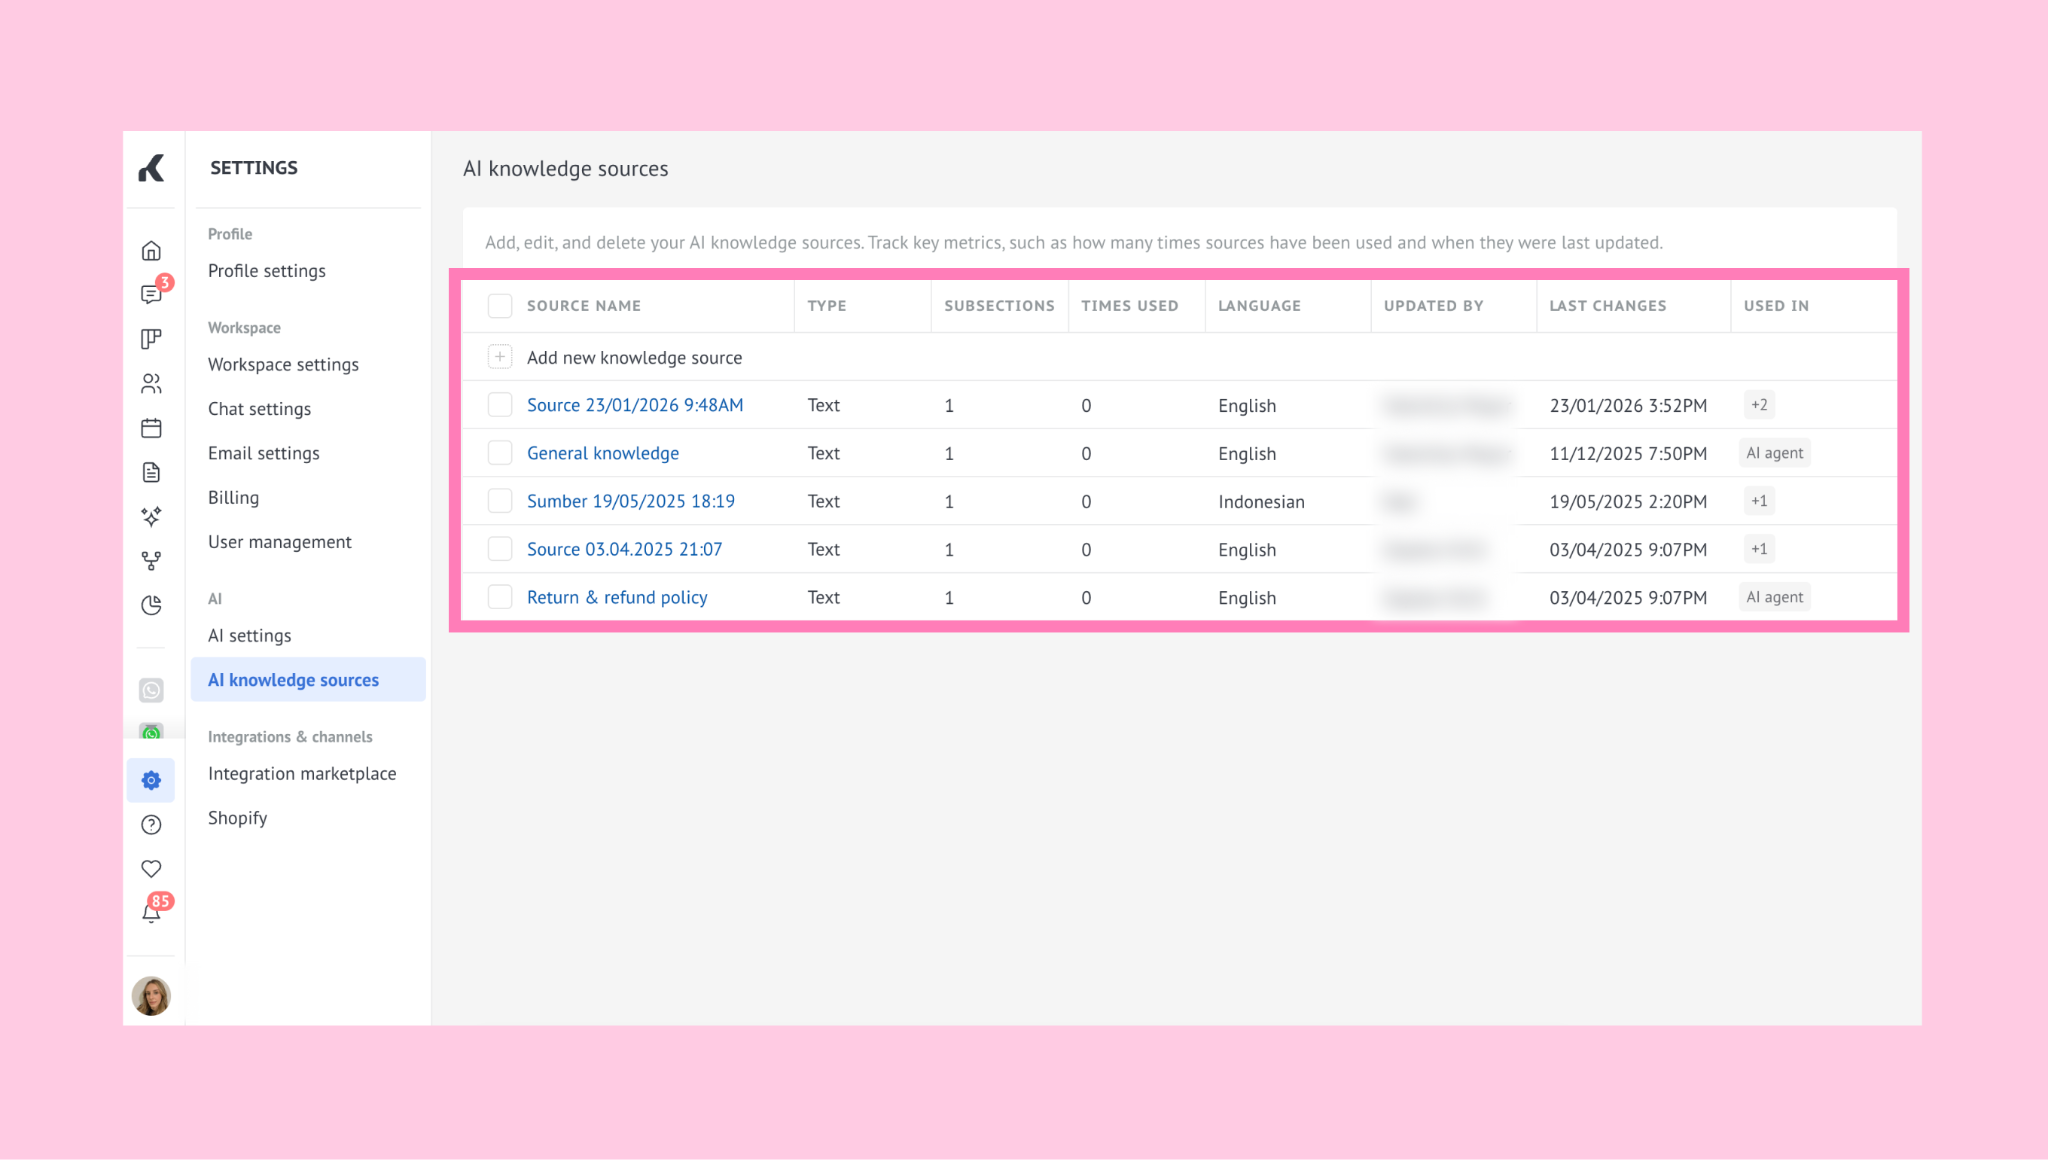
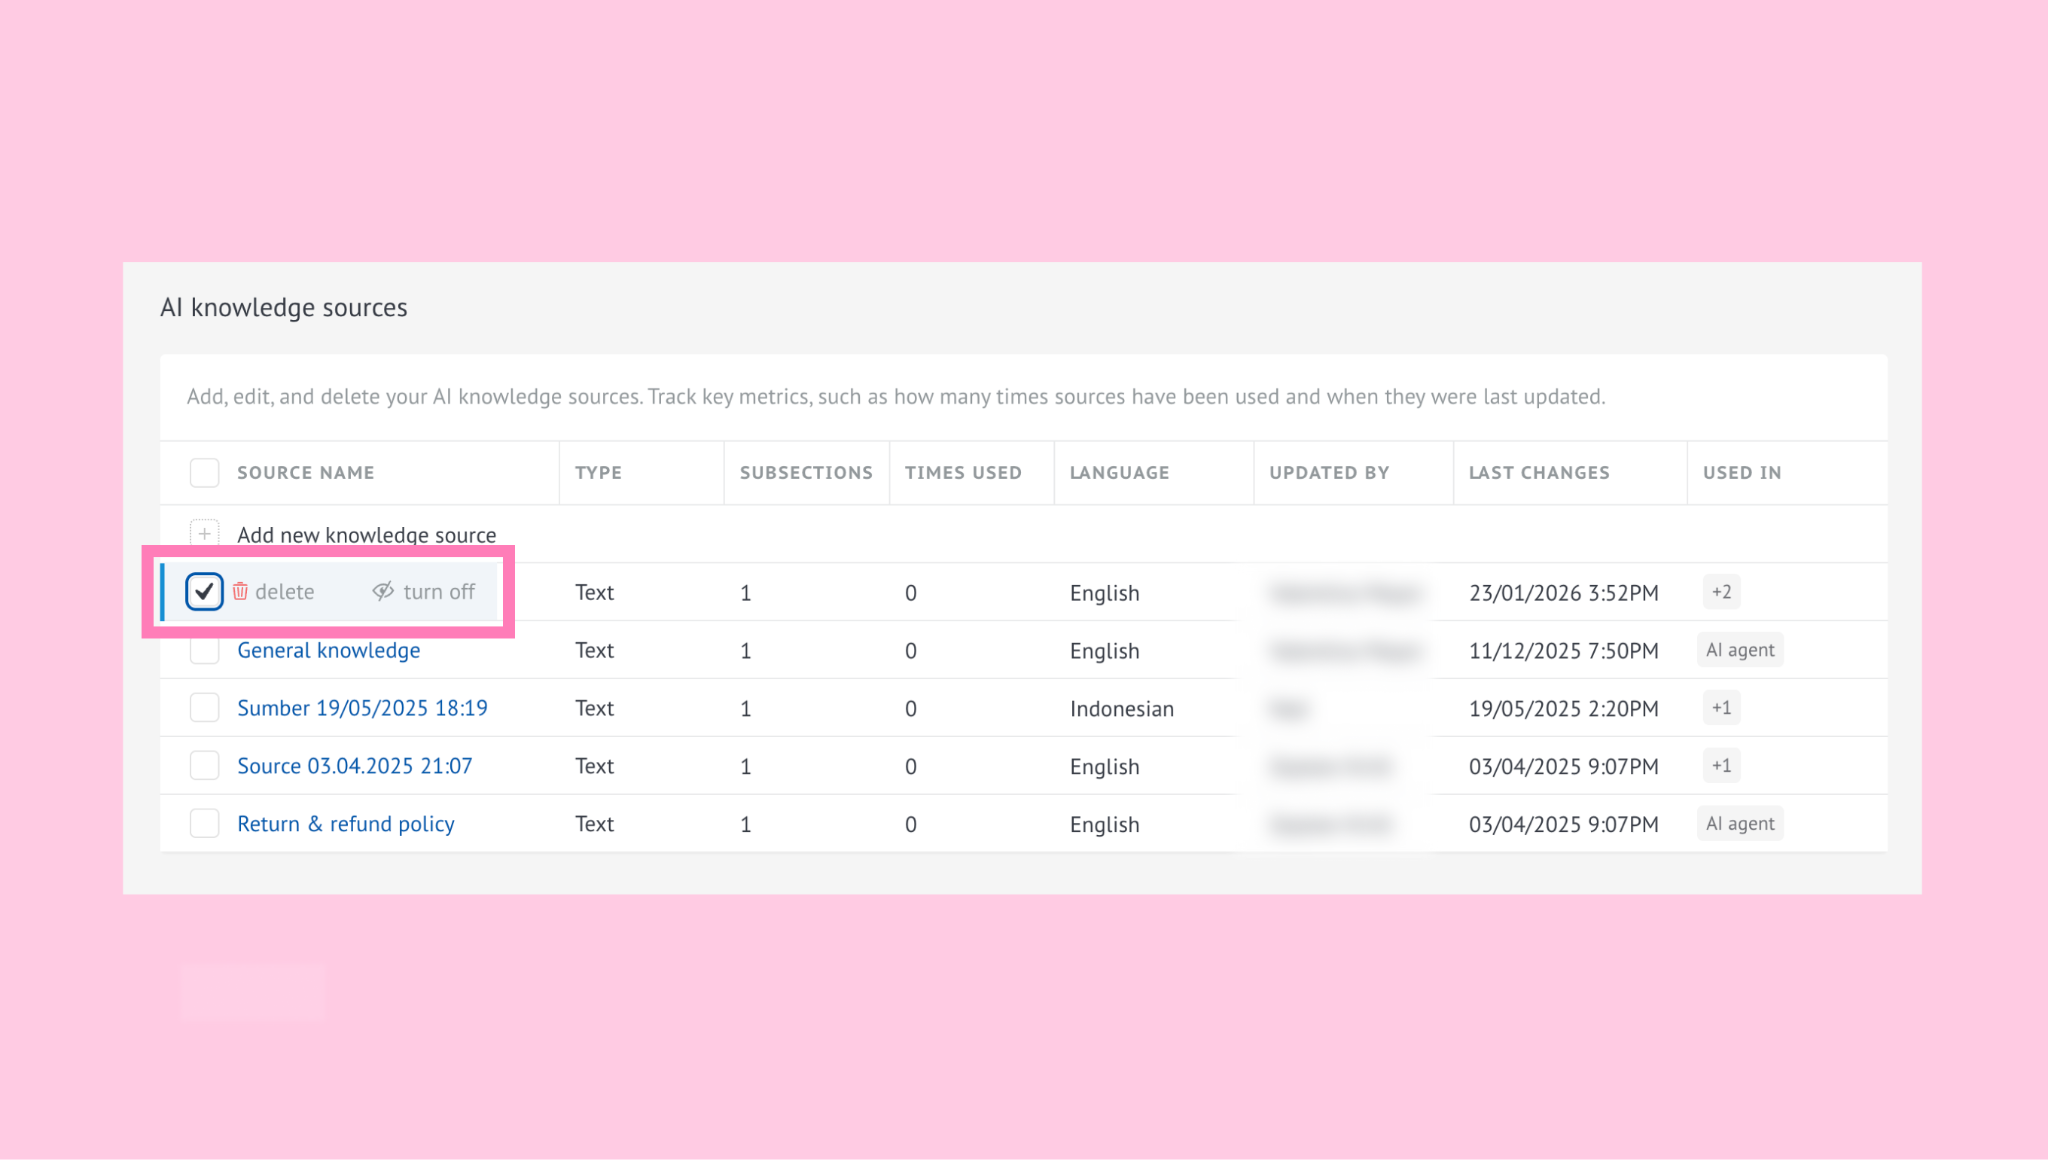
Once added, all your sources will appear in the AI Knowledge sources section.
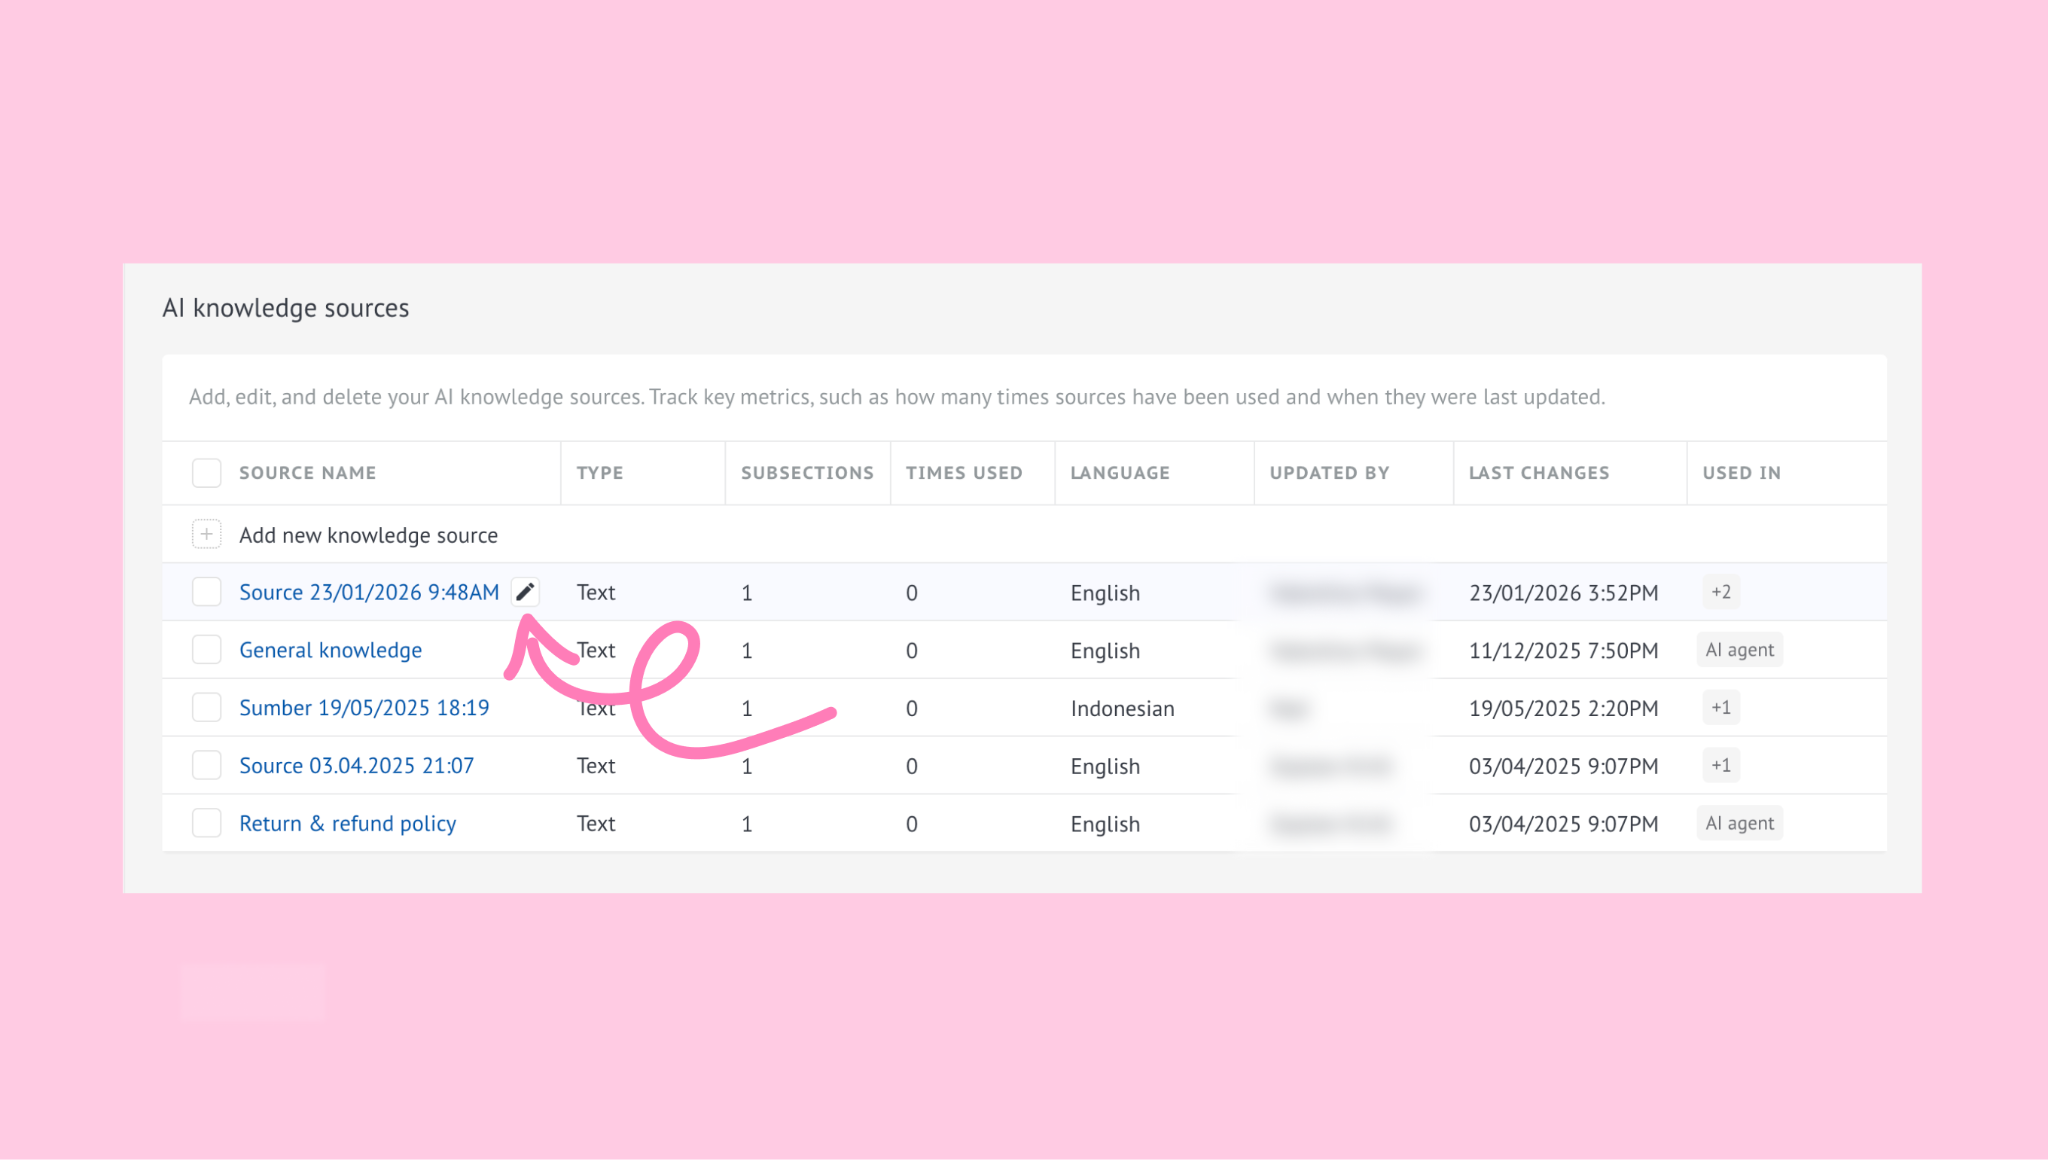
You can edit any source at any time by clicking the pencil icon.
Kommo AI only uses active sources when generating replies, so you can disable or delete any information that’s outdated or shouldn’t be shared with clients.
To disable or delete a source, select it and click the turn off or delete button.
Once AI reply suggestions is enabled and you’ve added at least one knowledge source, the feature is ready to use.
Kommo AI will analyze incoming messages and generate replies based on your knowledge sources.
Important: If no relevant information is found, Kommo AI won’t generate a reply. Messages over 25,000 characters also can’t be processed.
For the Kommo AI agent
Follow these steps to add a knowledge source:
Go to AI agent → Sources tab.
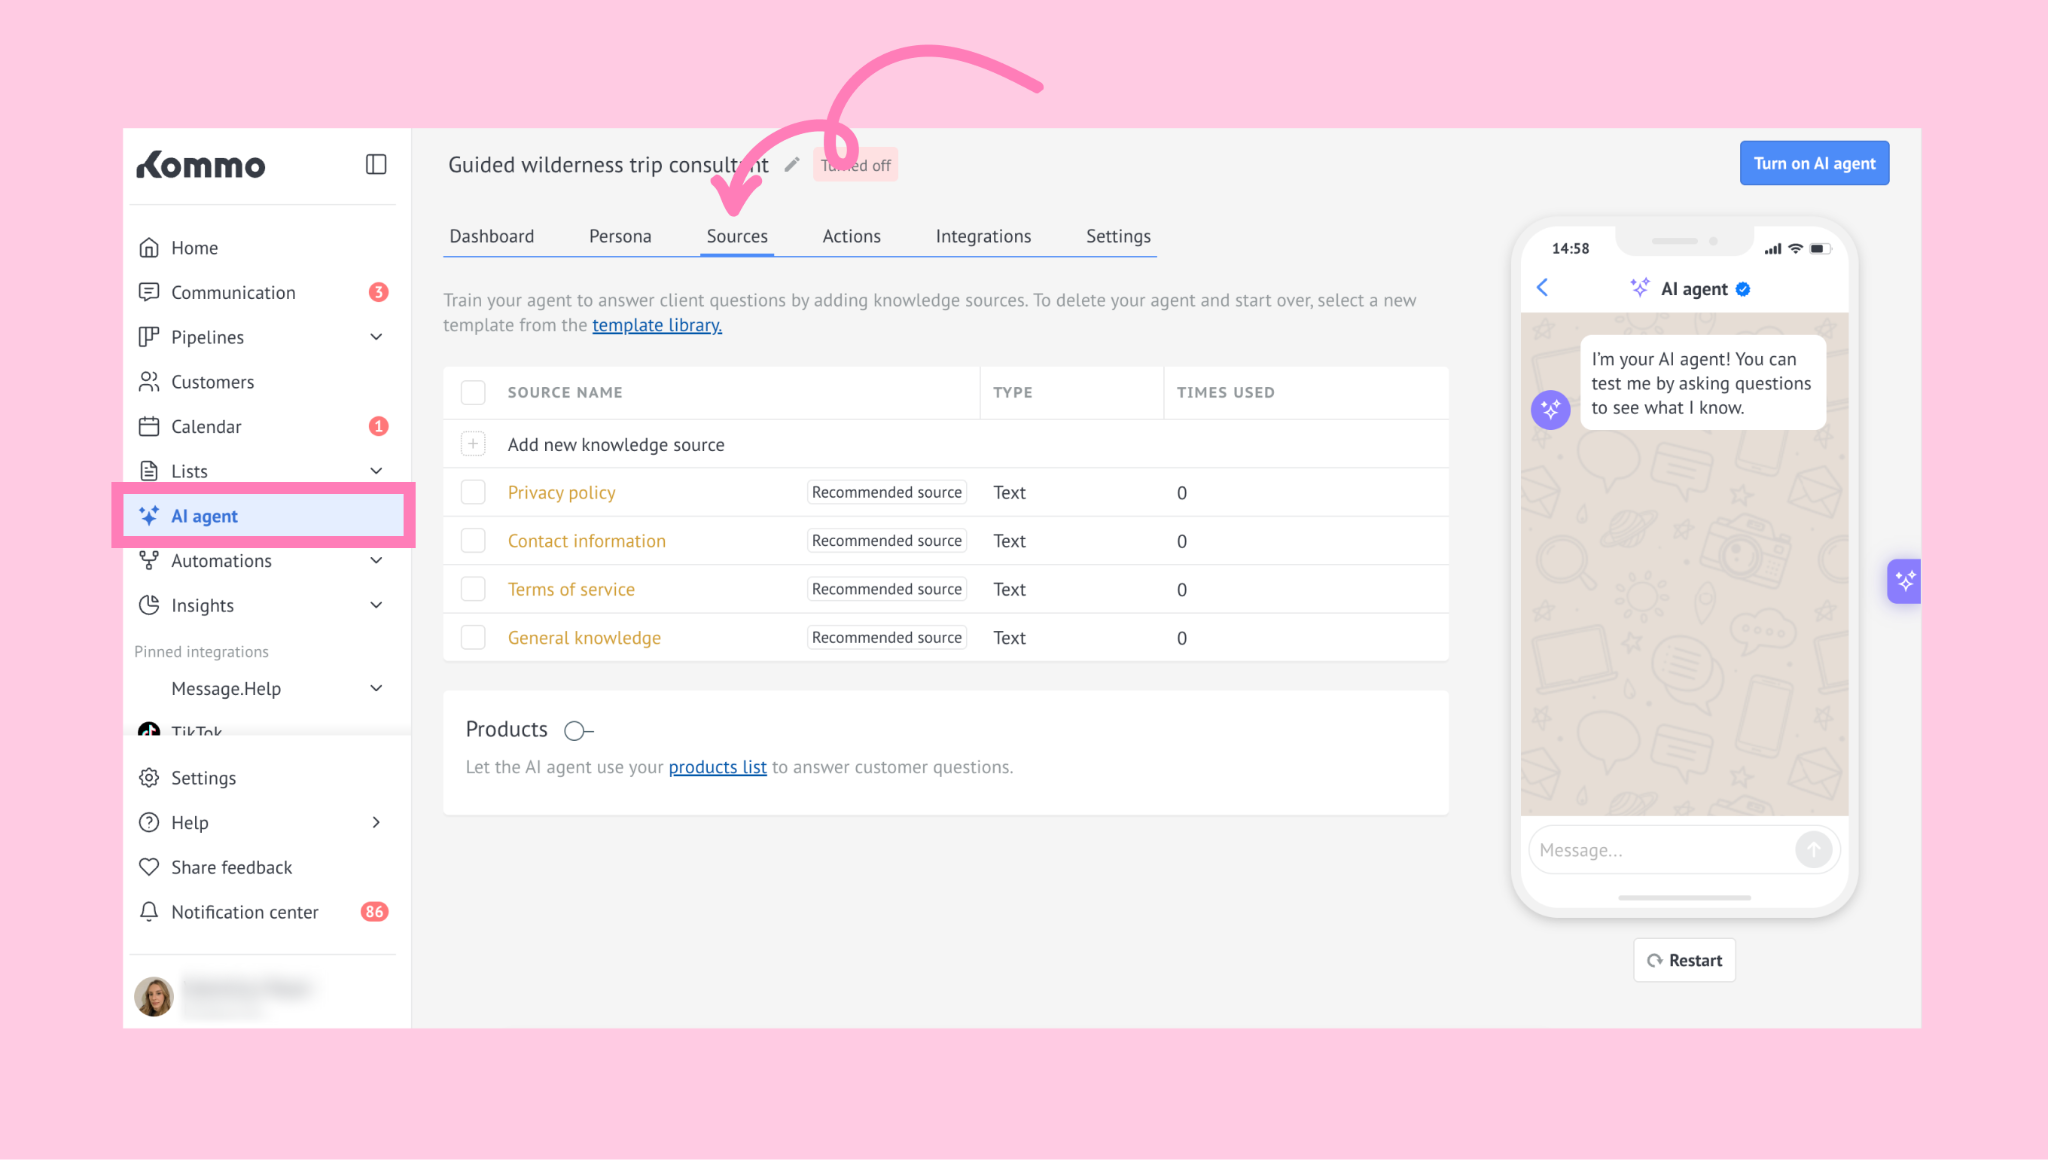
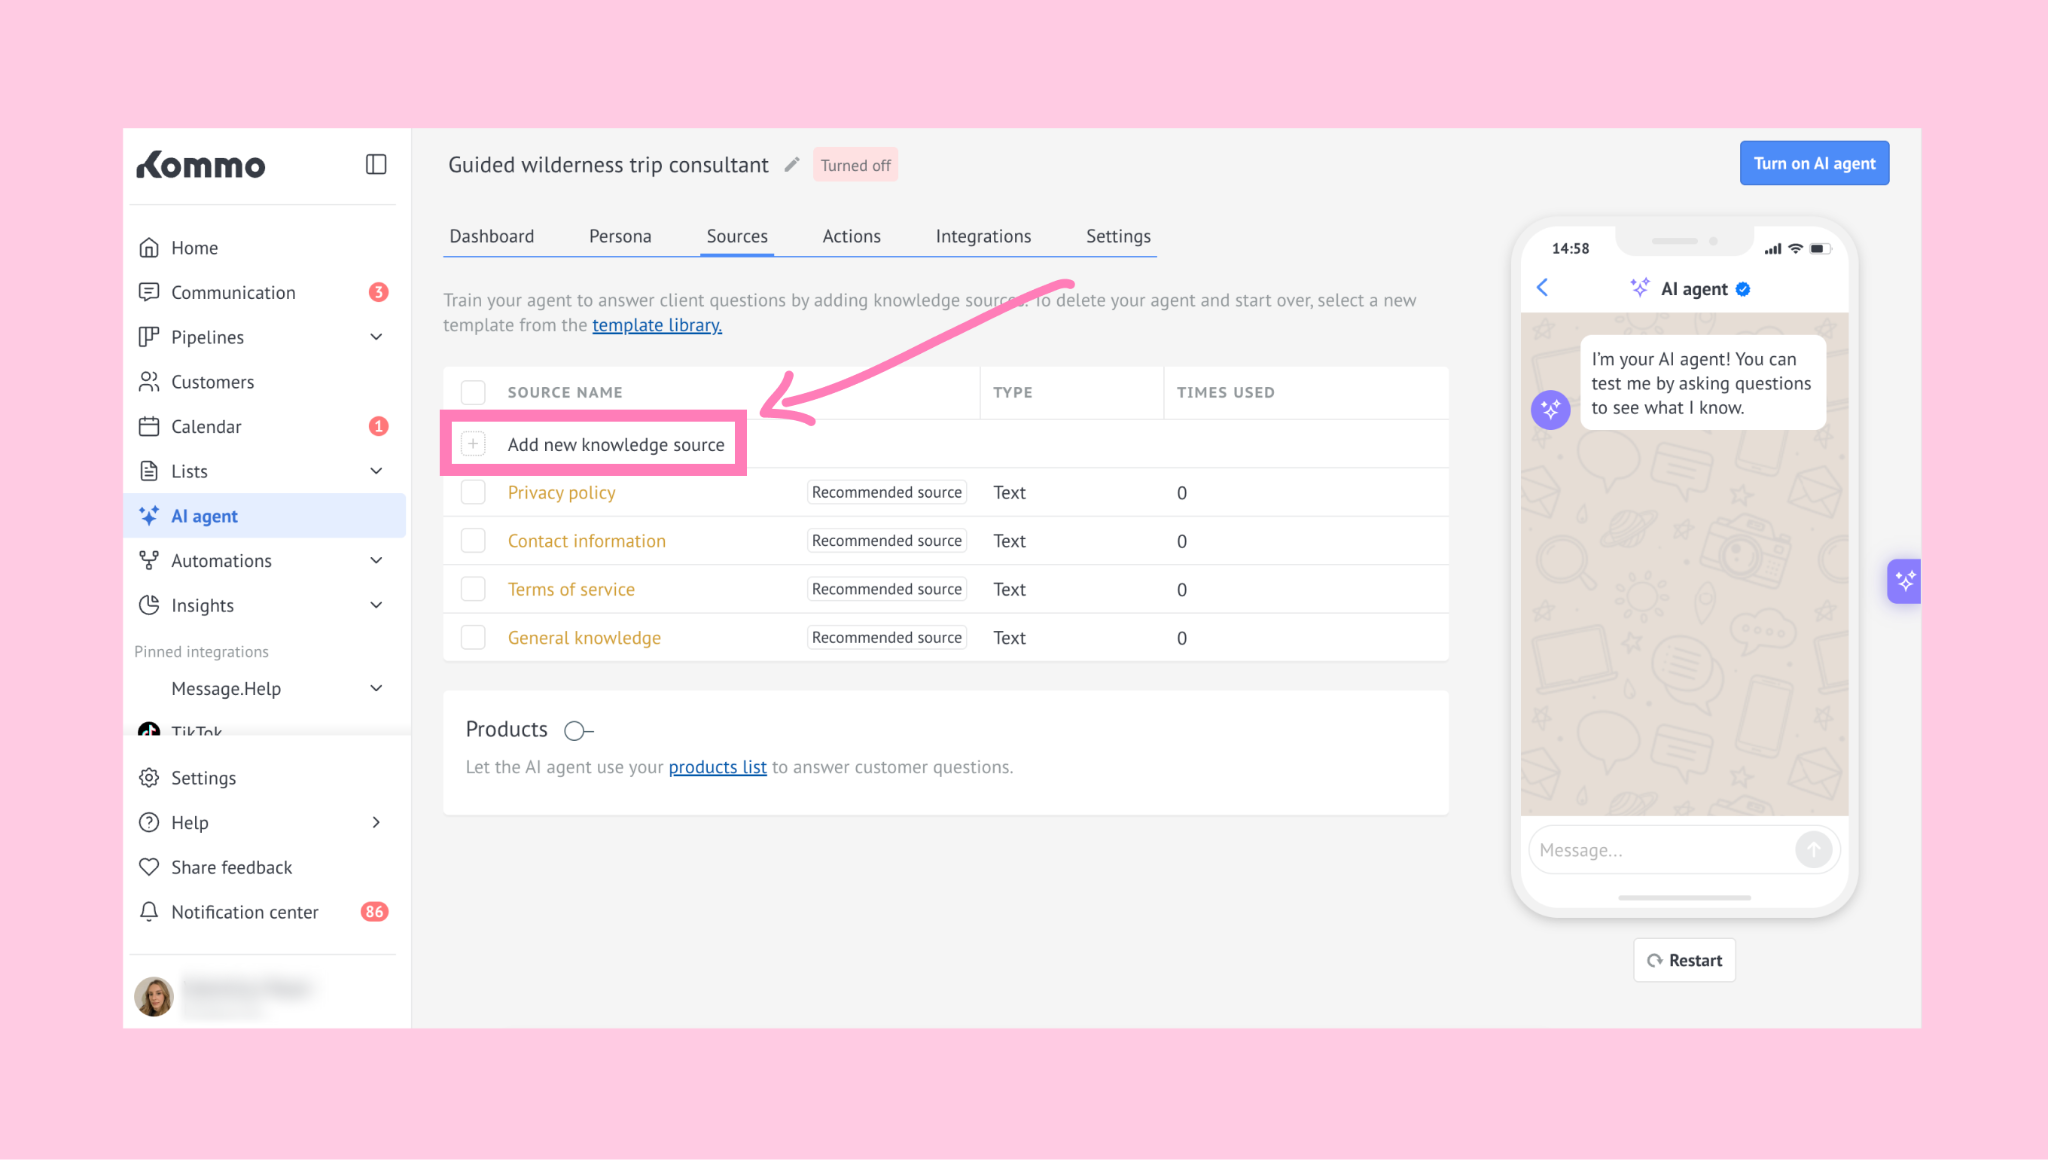
Click + Add new knowledge source.
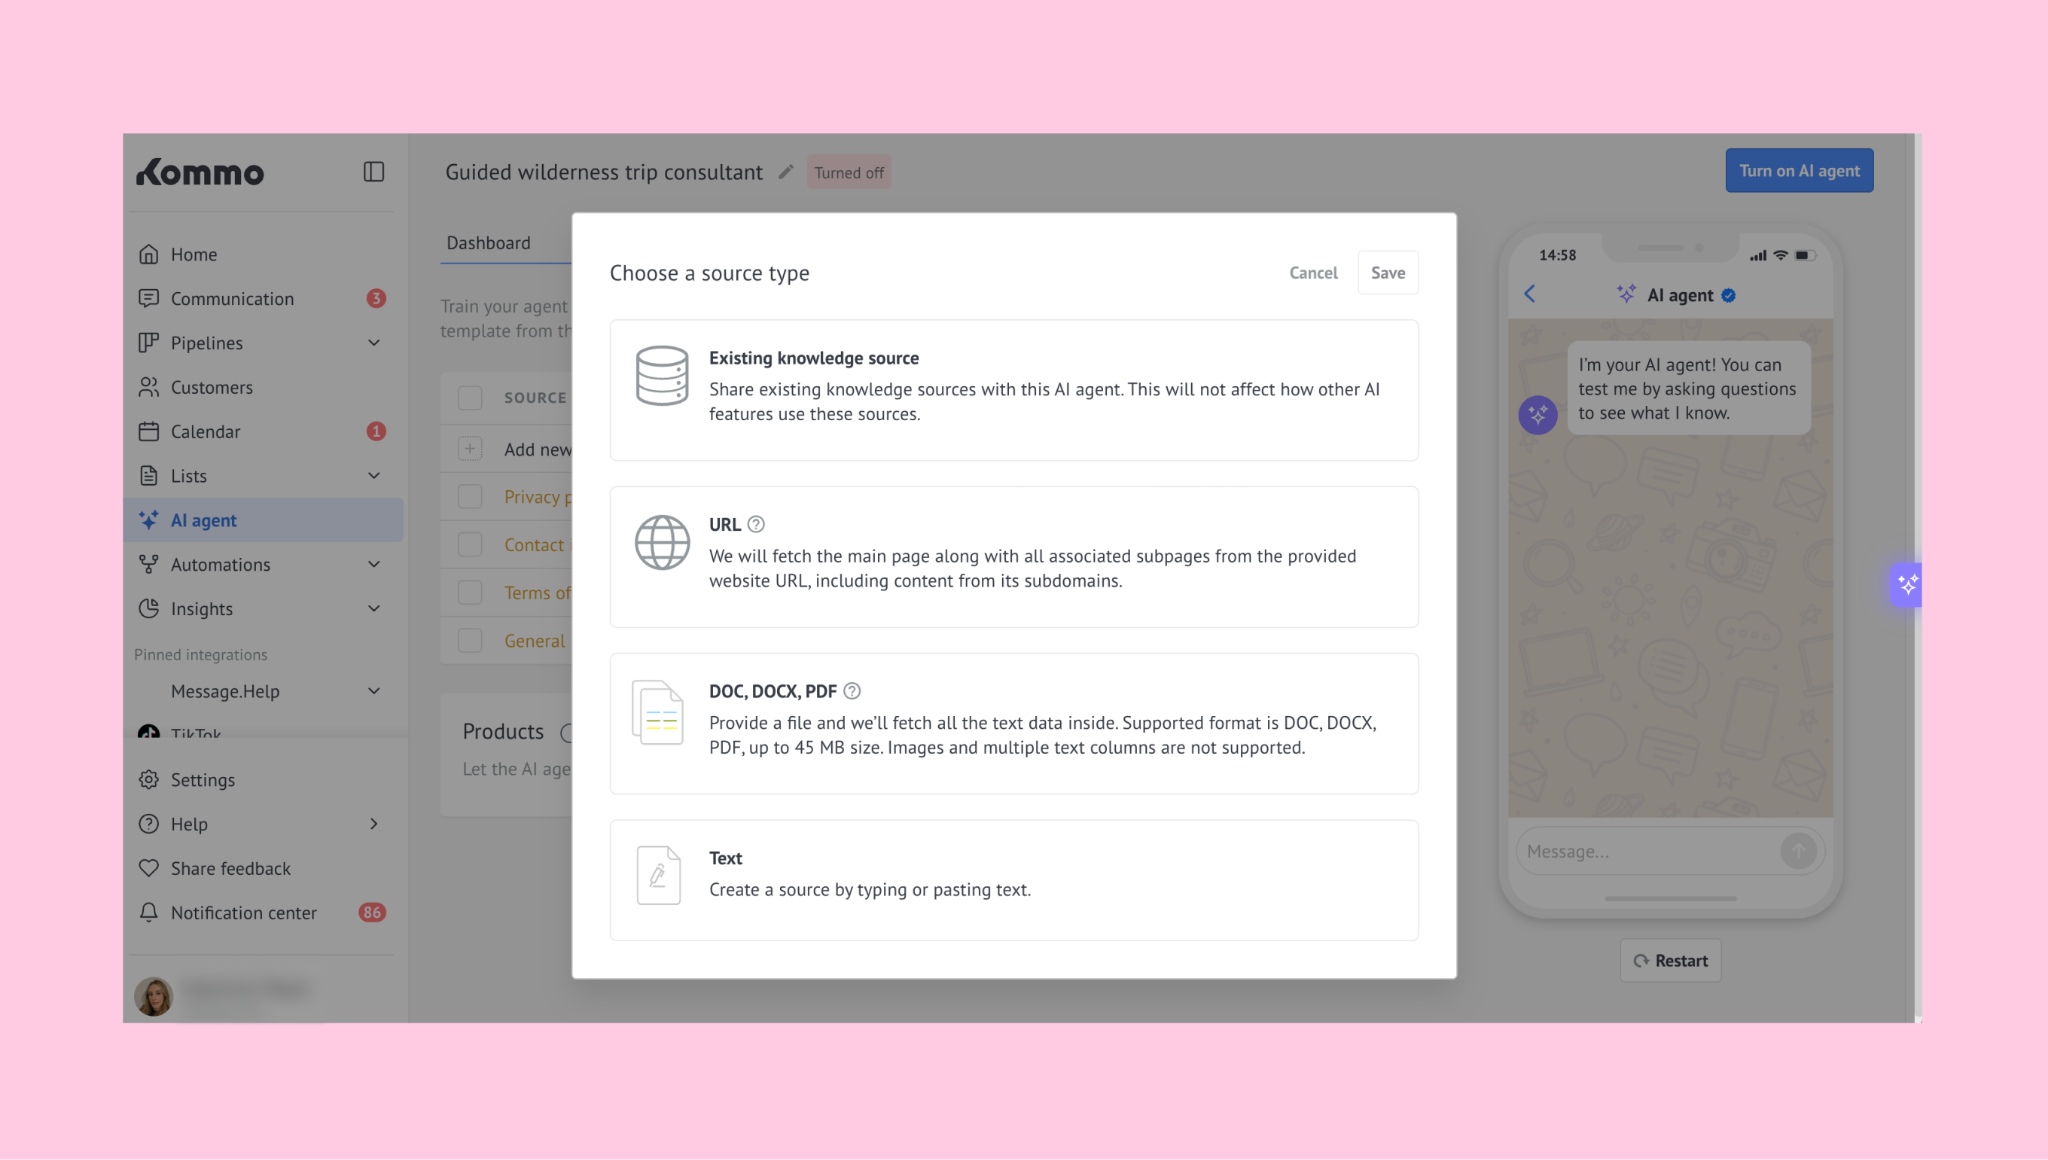
A modal window will open. Choose the source type you want to add:
URL
DOC, DOCX, PDF
Text
Existing knowledge source — reuse a knowledge source that already exists in your account.
To add a URL, file or text knowledge source, follow the same steps described in the sections above.
Connect an existing knowledge source
Select Existing knowledge source as the source type.
You’ll see a list of AI knowledge sources already available in your account. Select the sources you want the AI agent to use.
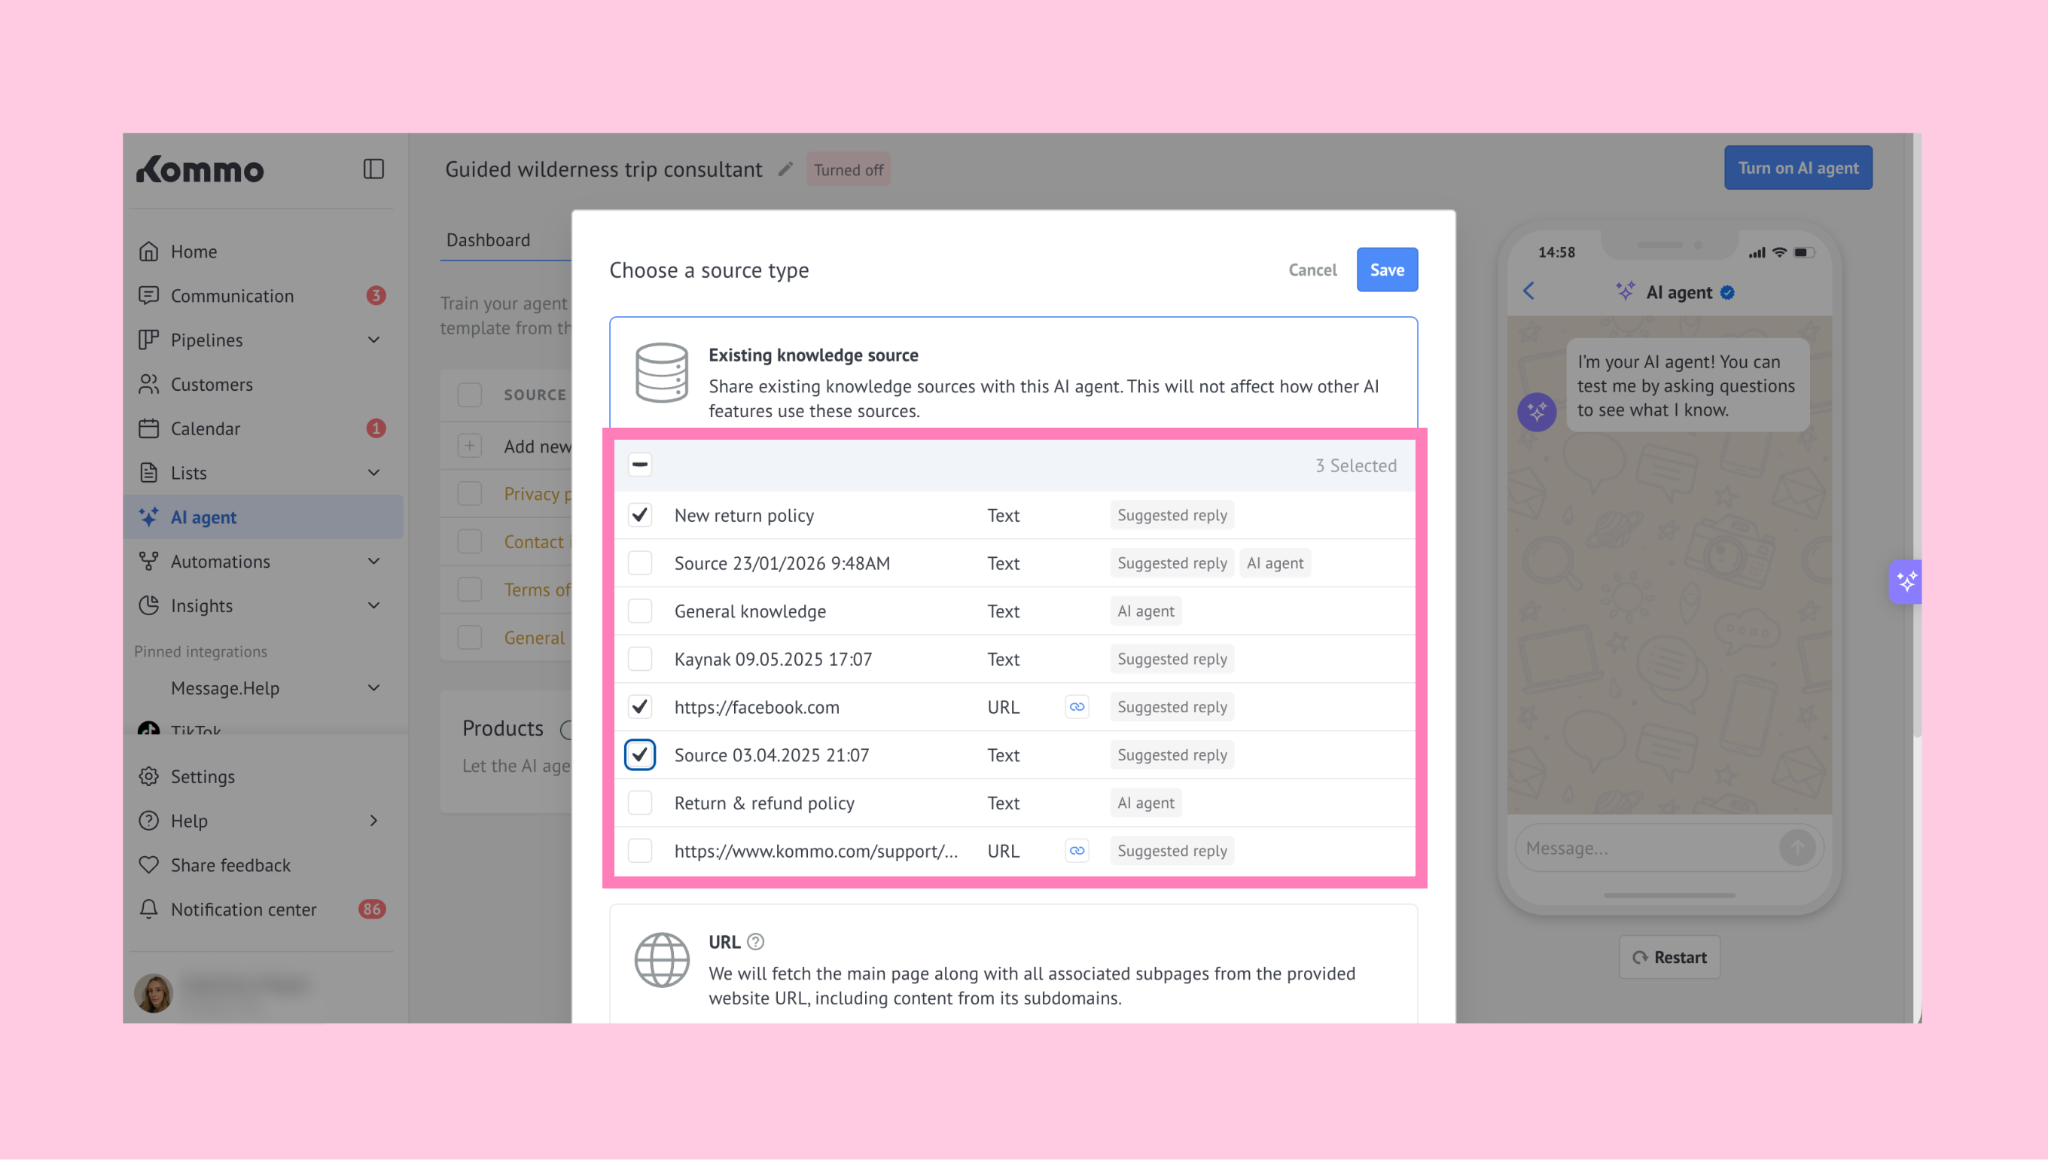
Note: Adding an existing knowledge source to the AI agent does not affect other AI features.
Once you’ve added the sources, click Save.
To learn more about setting up the AI agent, check our AI agent setup article.
Manage the AI agent sources
Once you’ve added a source, it will appear in the Sources tab.
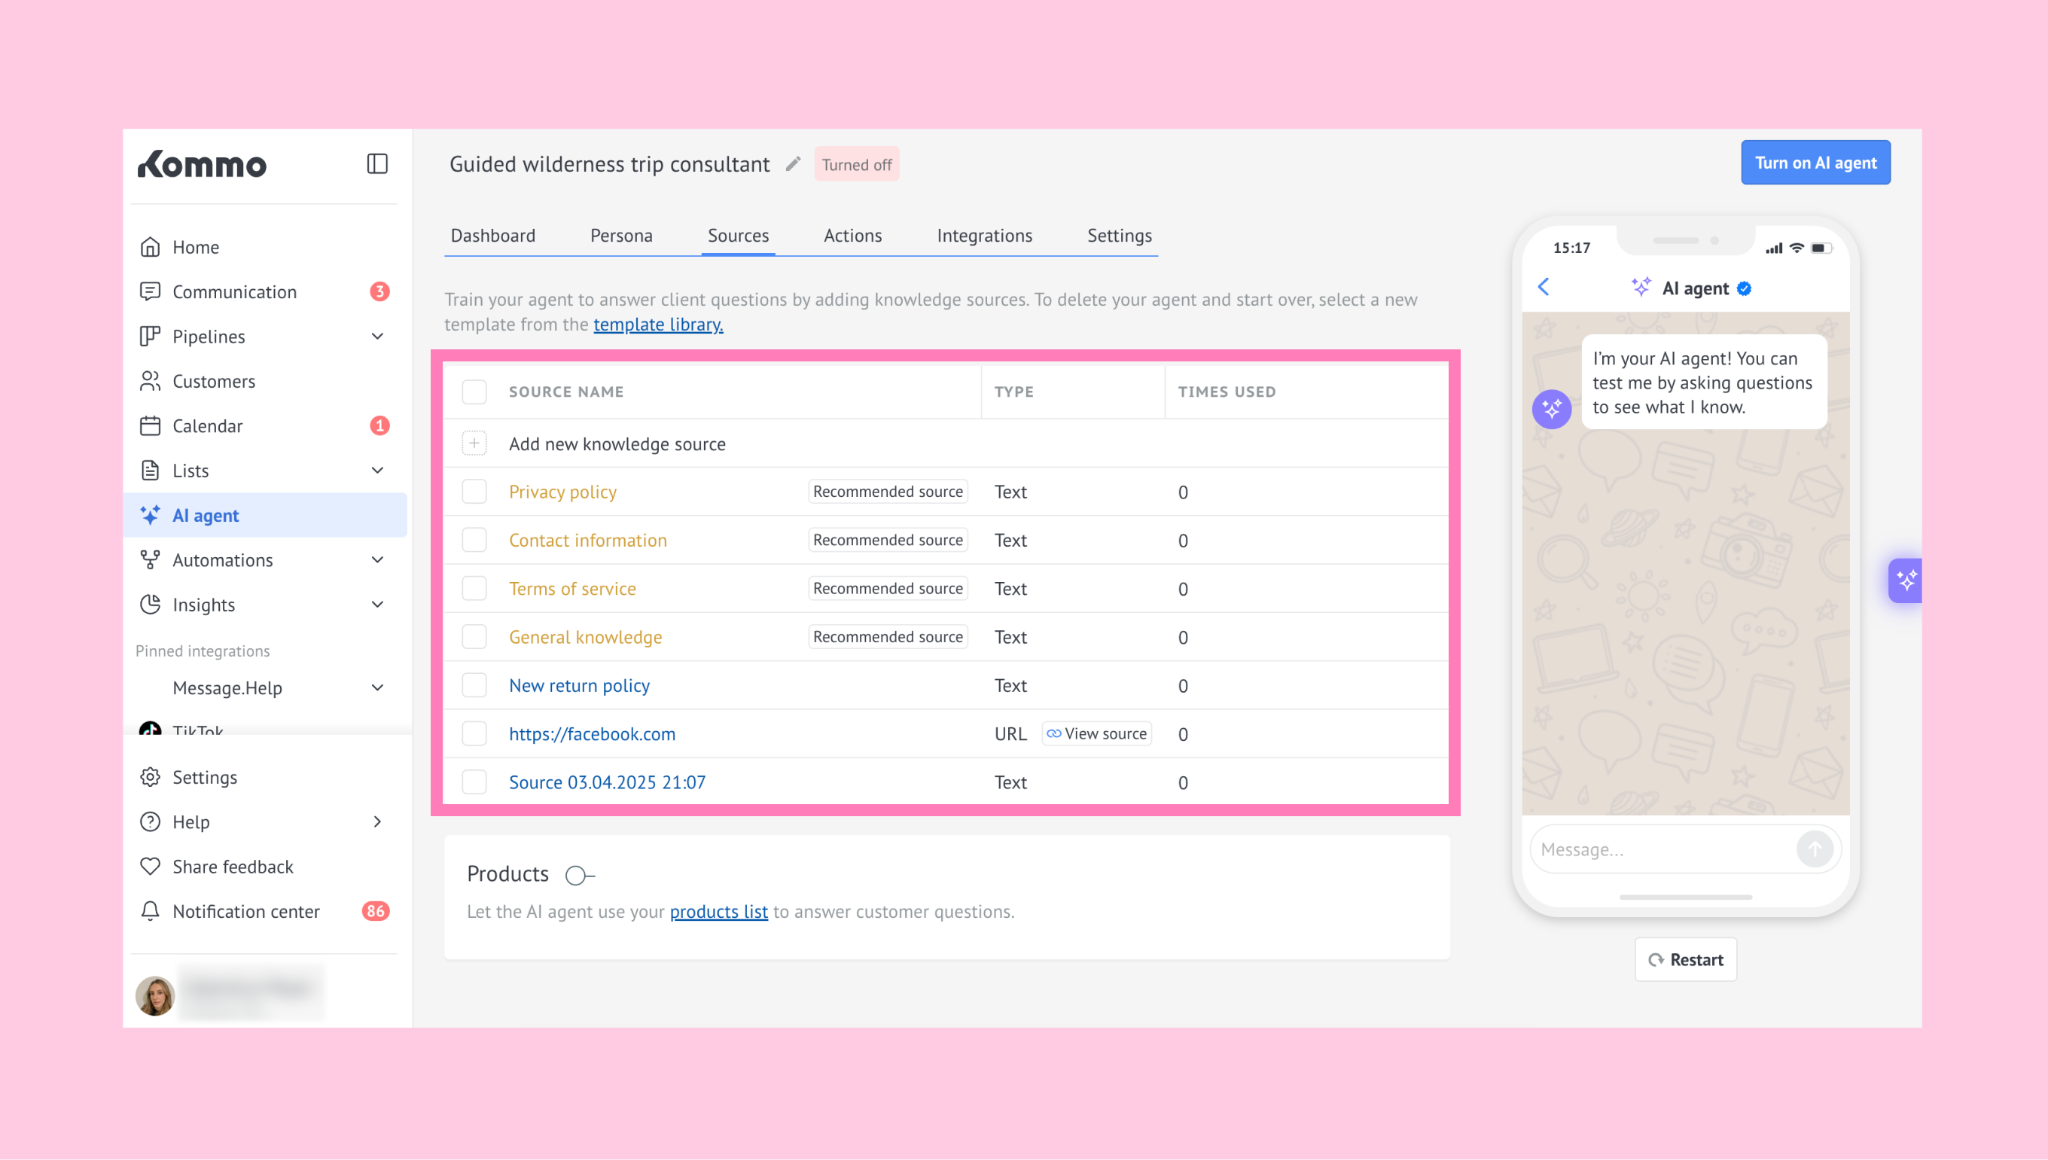
Click the source name to edit it.
To manage a source, select it. You can:
Delete it
Turn it off
Unlink it (only for sources added through Existing knowledge source)
Note: Unlinking keeps the original knowledge source in your account, but removes it from the AI agent.
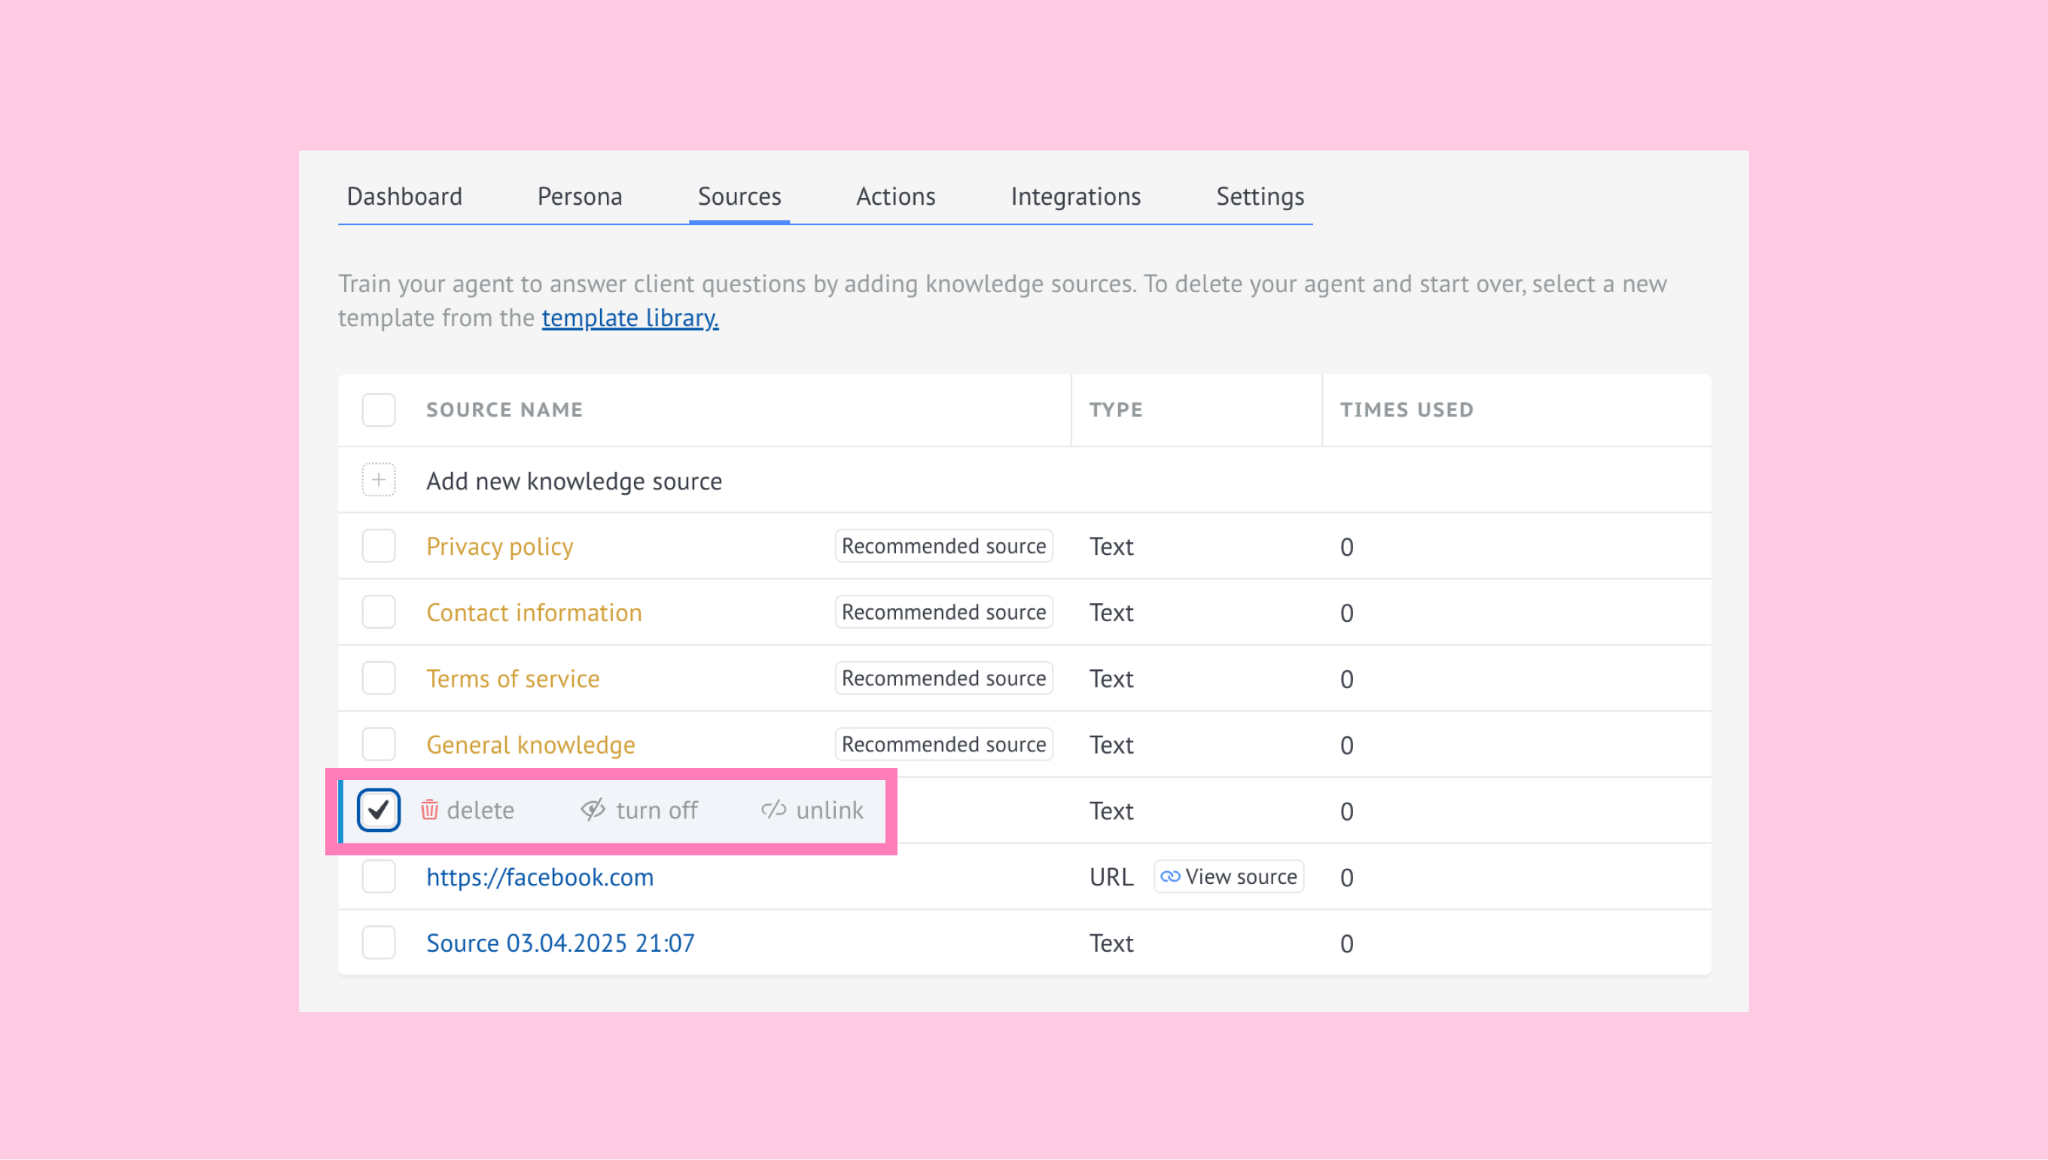
Note: Only sources enabled in this tab are used when the AI agent replies to clients.