What you’ll need:
Admin access in Kommo
A valid payment method:
Brazil: Credit card or Pix (payments accepted in BRL, installments are available for credit card payments)
Other countries: Card or PayPal (payments accepted in USD)
Keep in mind:
The minimum subscription period is 6 months
Discounts are available for 9-, 12-, and 24-month plans
Subscriptions apply to the entire workspace — all users share the same plan
Subscription auto-renewals are enabled by default for all payment methods except Pix
Auto-renewal payments can be disabled at any time
Each subscription includes a limited number of AI credits. Additional AI credits can be purchased separately
If you want to pay in your local currency, contact a local Kommo partner
Pricing and payment options vary by region
Important: Some features described in this article may not be available yet. They will be released soon.
Kommo offers four plans – Base, Advanced, Pro, and Enterprise. Each plan includes different features and limits. Plans are charged per seat, and the number of seats also affects your plan limits – the more seats you have, the higher the limits.
By choosing the right plan and number of seats, you can create a subscription that fits your business best.
Important: Starting September 1, 2026, Kommo will introduce regional pricing for the Base and Advanced plans. New users and existing users who switch plans after this date will be charged based on the new price for their Billing country. If you keep your current plan, your subscription price will stay the same.
In this step-by-step guide, you’ll learn how to purchase your first Kommo subscription, upgrade your plan, add seats, renew your subscription, and check or change your Billing country.
Billing page
On June 1, 2026, Kommo introduced a new billing page. Now you can see all the details and manage your subscription more easily.
To open the billing page, go to Settings and select Billing. 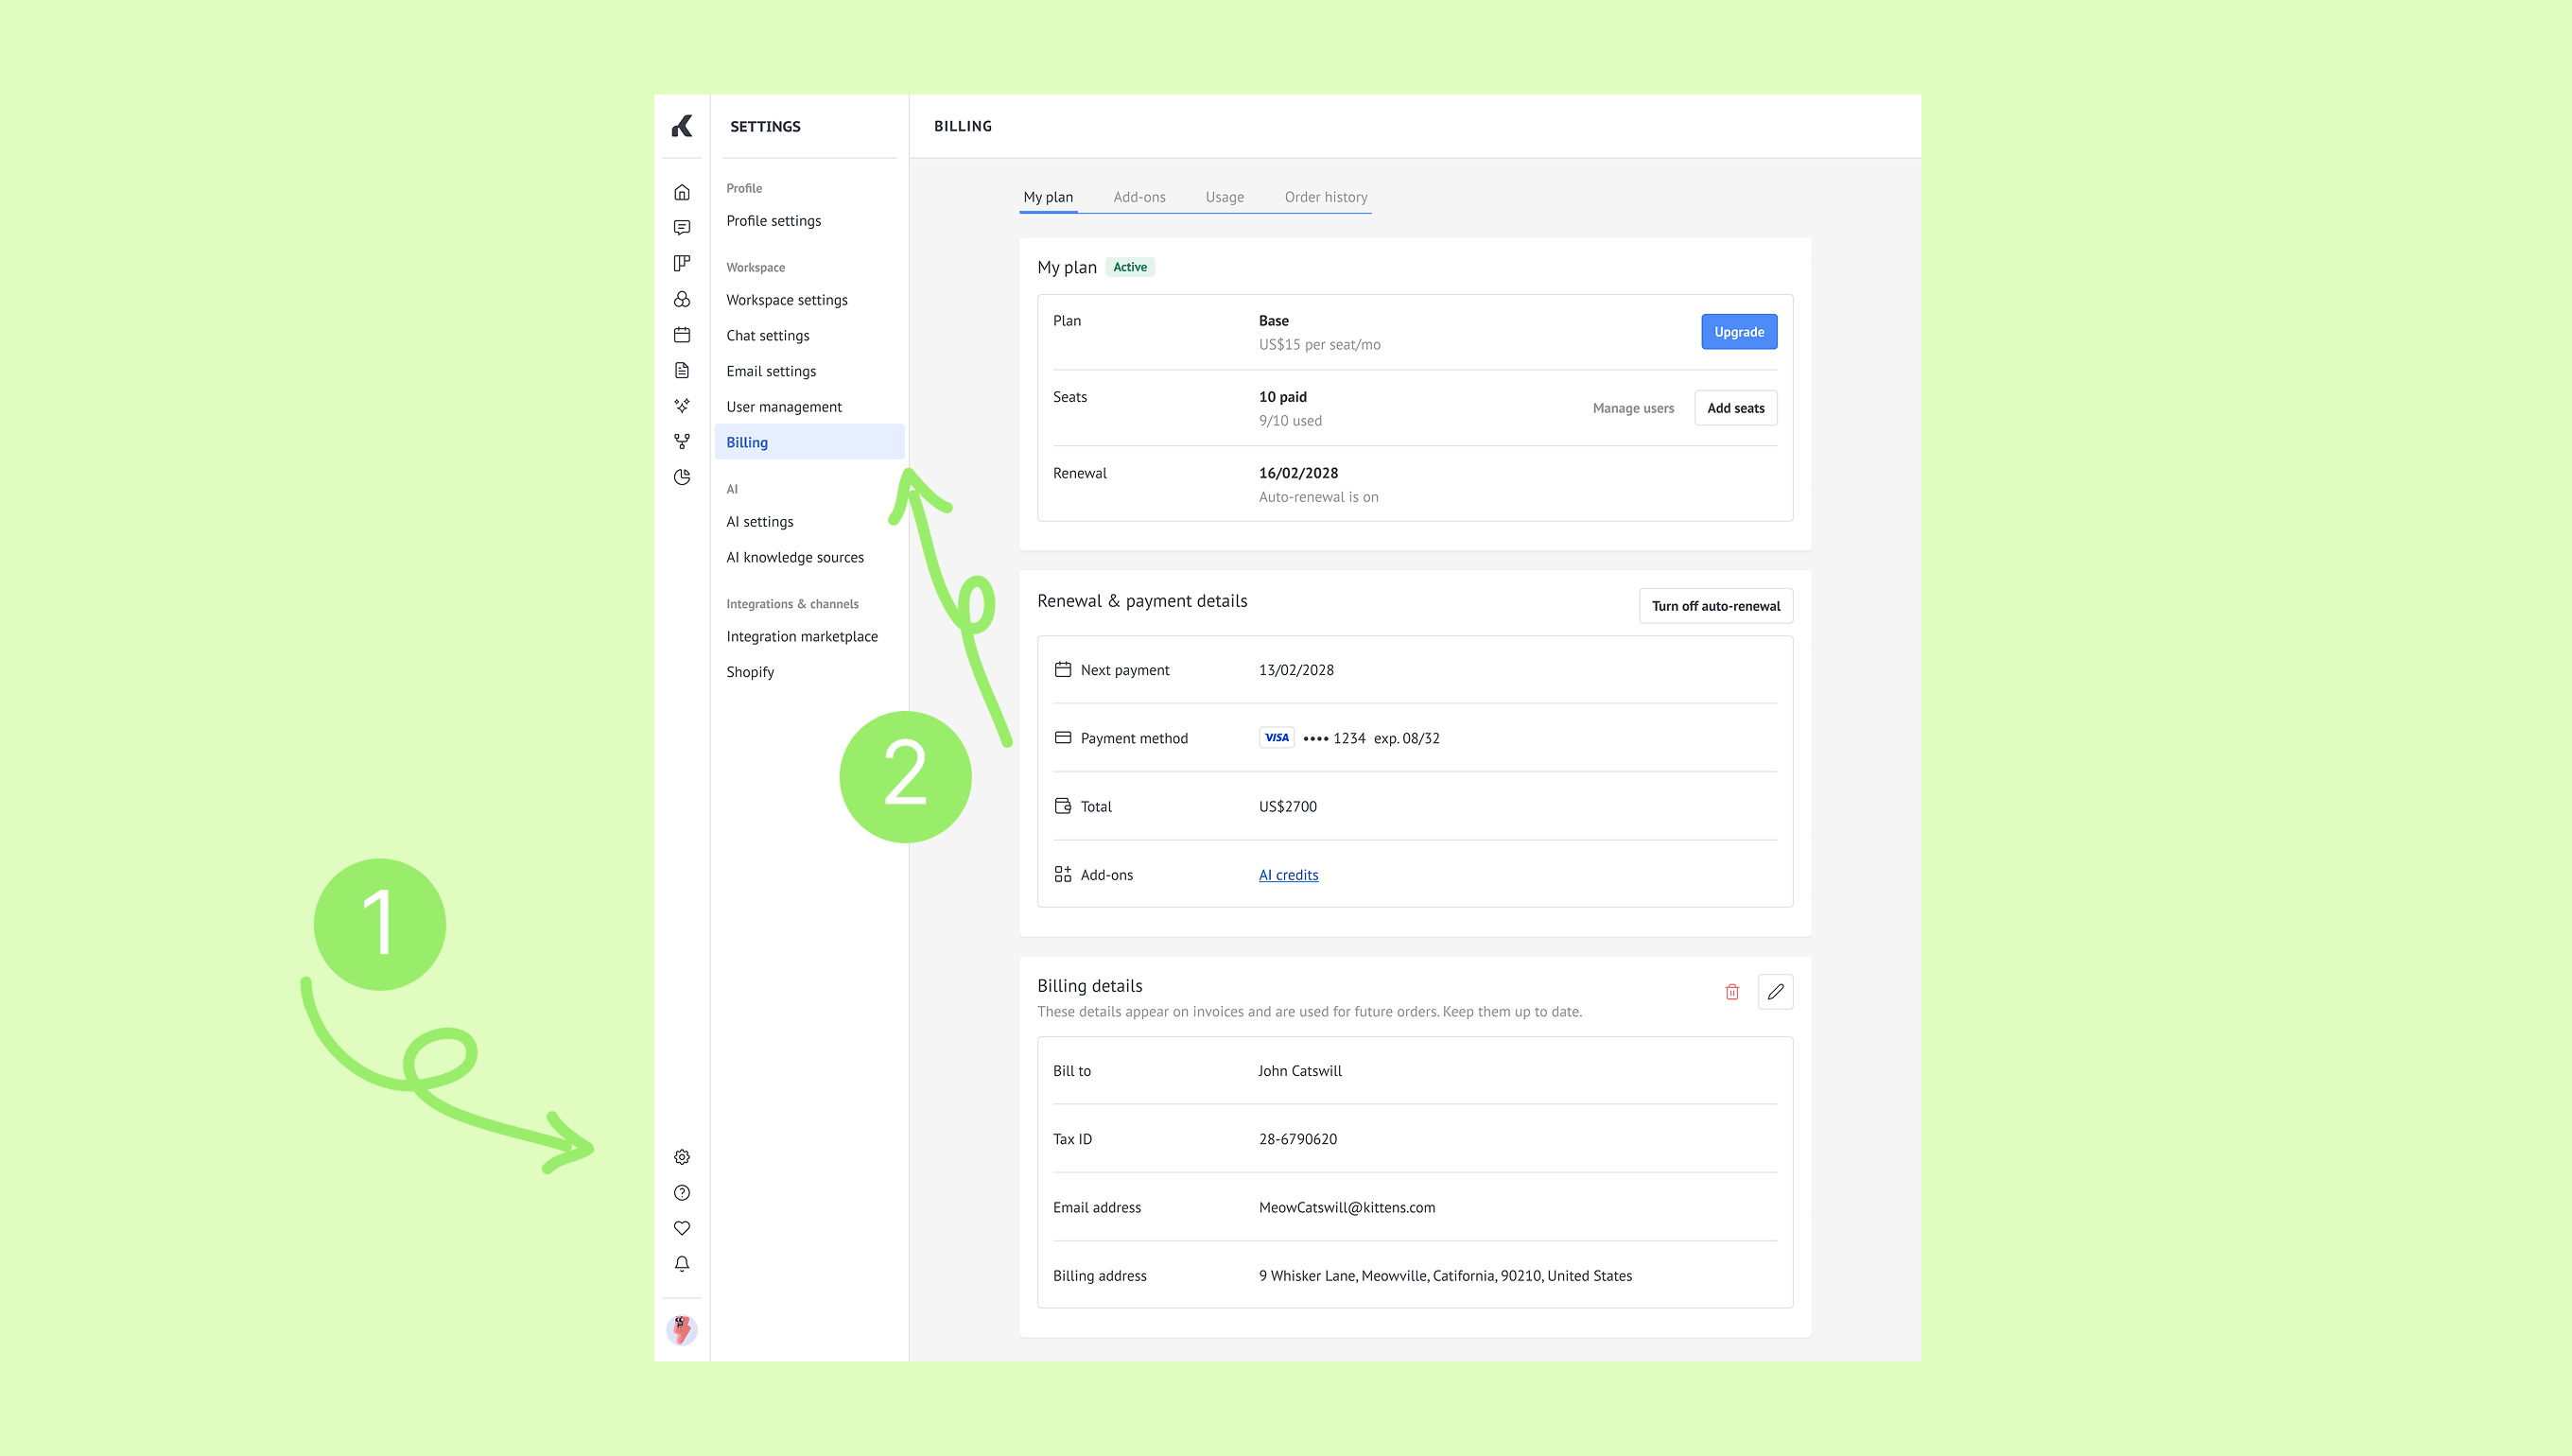
The billing page has 4 tabs:
My plan – See your current plan, number of seats, and renewal date. You can also view and manage your payment information here.
Add-ons – See all available add-ons and purchase the ones you want.
Usage – Track how much of your plan limits you’ve used. Learn more about Kommo plan limits here.
Order history – View all your purchases and download invoices.
Purchase your first Kommo subscription
Go to Settings → Billing, click Explore plans.
.png)
Select the plan.
.png)
Choose the subscription period, add number of seats, then click Continue.
.png)
Enter your payment and billing information:
For countries other than Brazil:
Choose a payment method.
Enter your billing details. Click Continue.
.png)
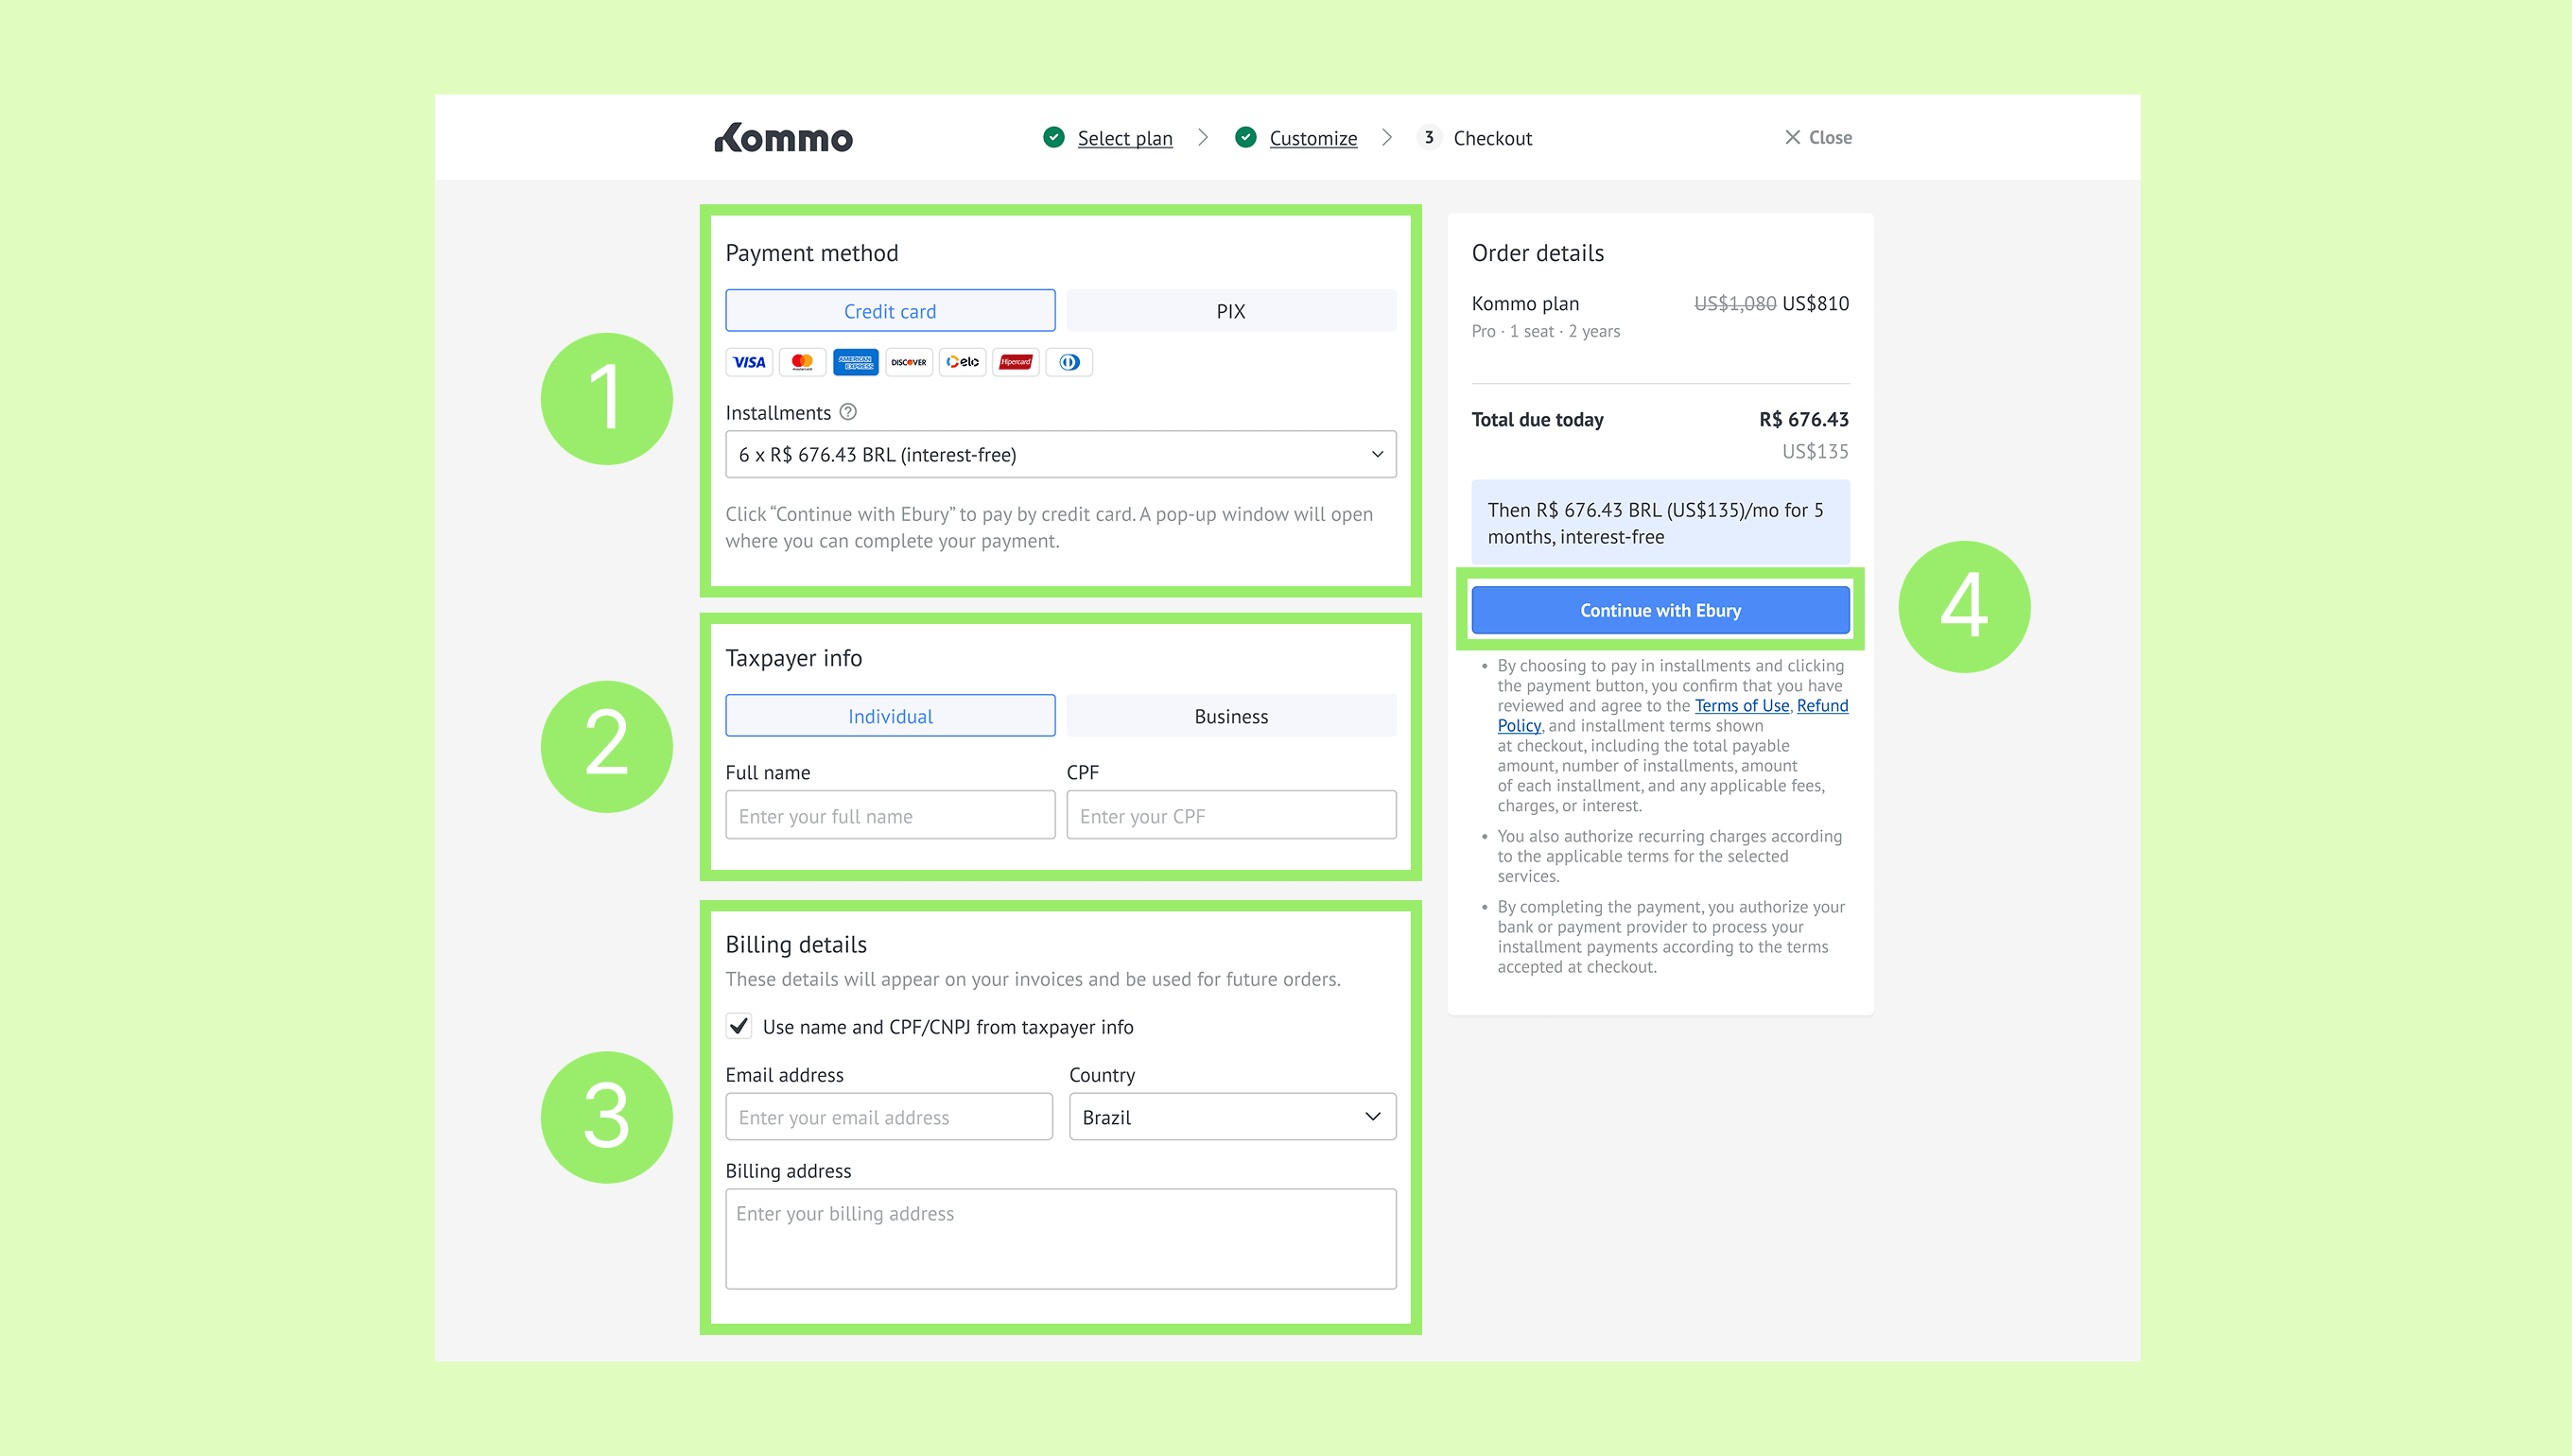
For Brazil:
Choose a payment method and select the number of installments, if needed.
Enter your taxpayer details.
Add your billing details. Your invoice name and CPF/CNPJ are copied from your taxpayer details automatically.
To use different billing details, uncheck Use name and CPF/CNPJ from taxpayer info and enter them manually.
Click Continue with Ebury.
Complete your payment.
Note: After your payment is completed, Kommo saves your payment and billing details in your workspace for future purchases. You can remove your saved payment details by turning off auto-renewal payments. You can also update or delete your billing details in Settings → Billing → My plan.
Upgrade your plan
Use this option to unlock higher limits or advanced features.
Go to Settings → Billing, and on the My plan tab, click Upgrade.
.png)
Select the plan you want to upgrade to. Click Upgrade.
.png)
Check the order details, click Continue.
.png)
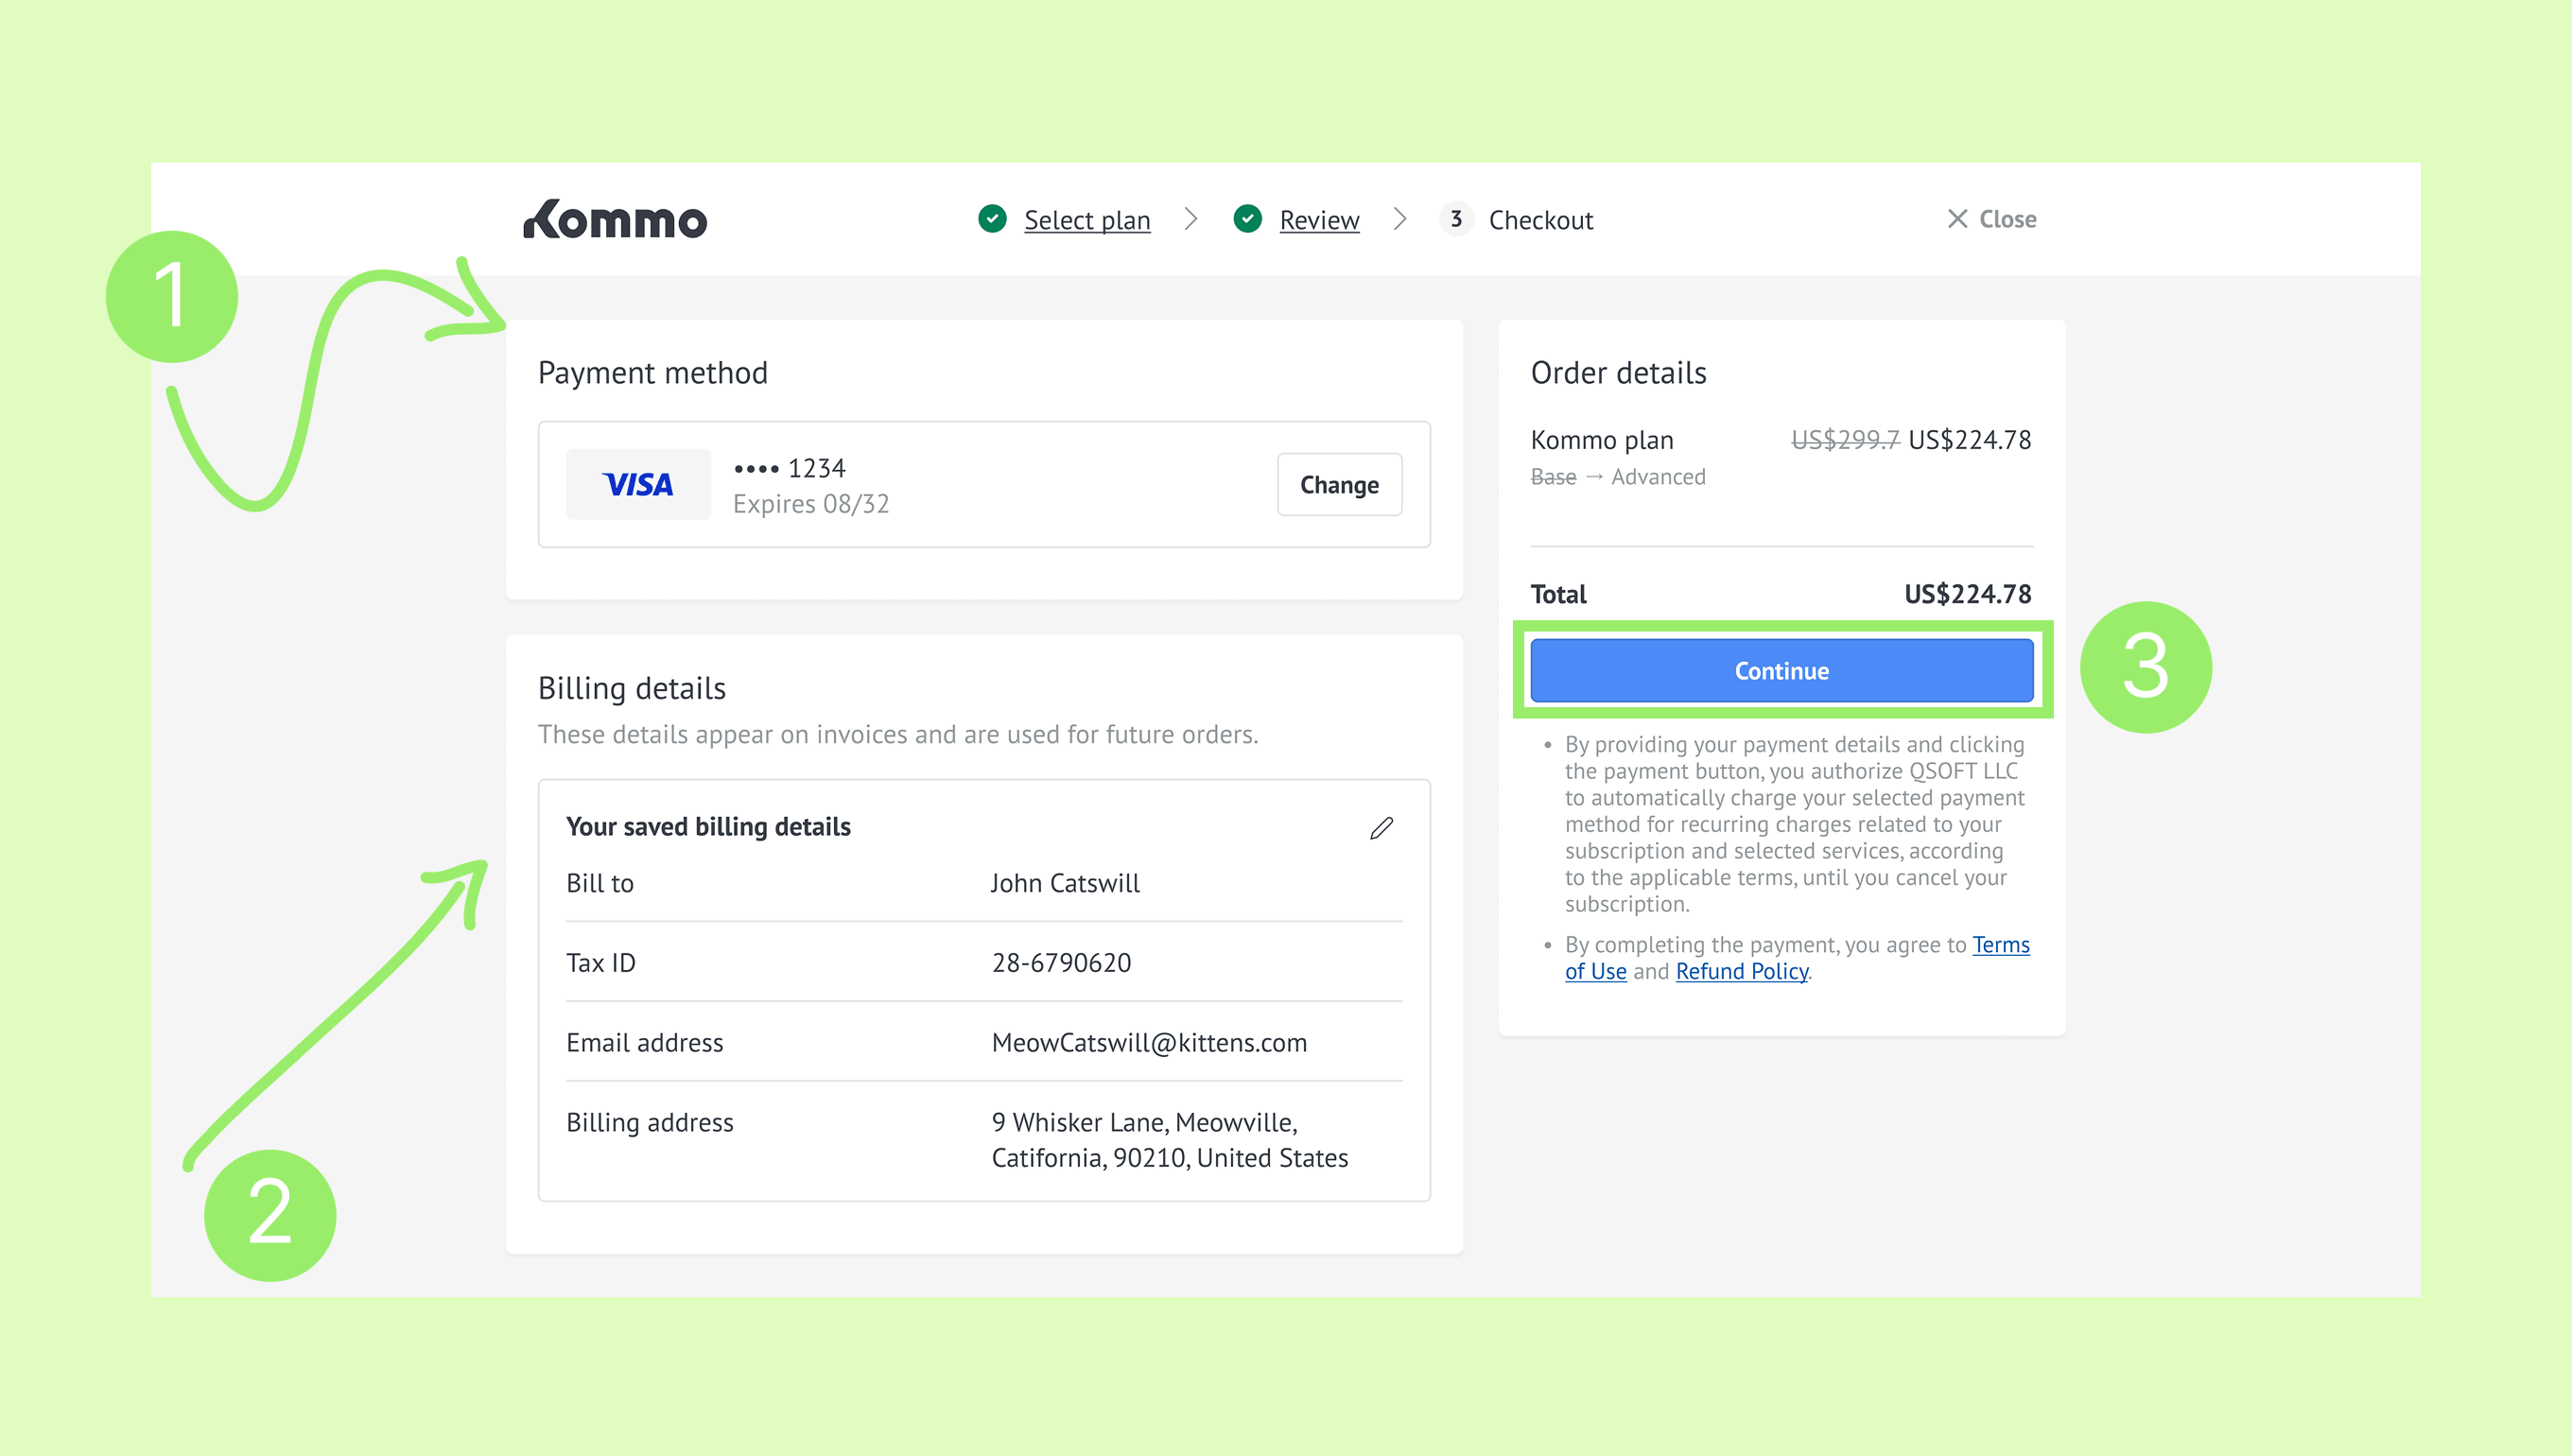
Review your saved payment method and payment details. To use another payment method or enter new details, click Change.
Review your saved billing details. To update them, click the pencil icon, make your changes, and save them.
Click Continue and complete the payment.
Note: Seat pricing is prorated based on the remaining subscription period. To reduce the number of seats, contact Kommo support.
How to check and change your Billing country
When you purchase your first subscription or upgrade your current plan, Kommo automatically detects your location and saves it as your Billing country. Learn more in Compare Kommo plans.
To check or change your Billing country:
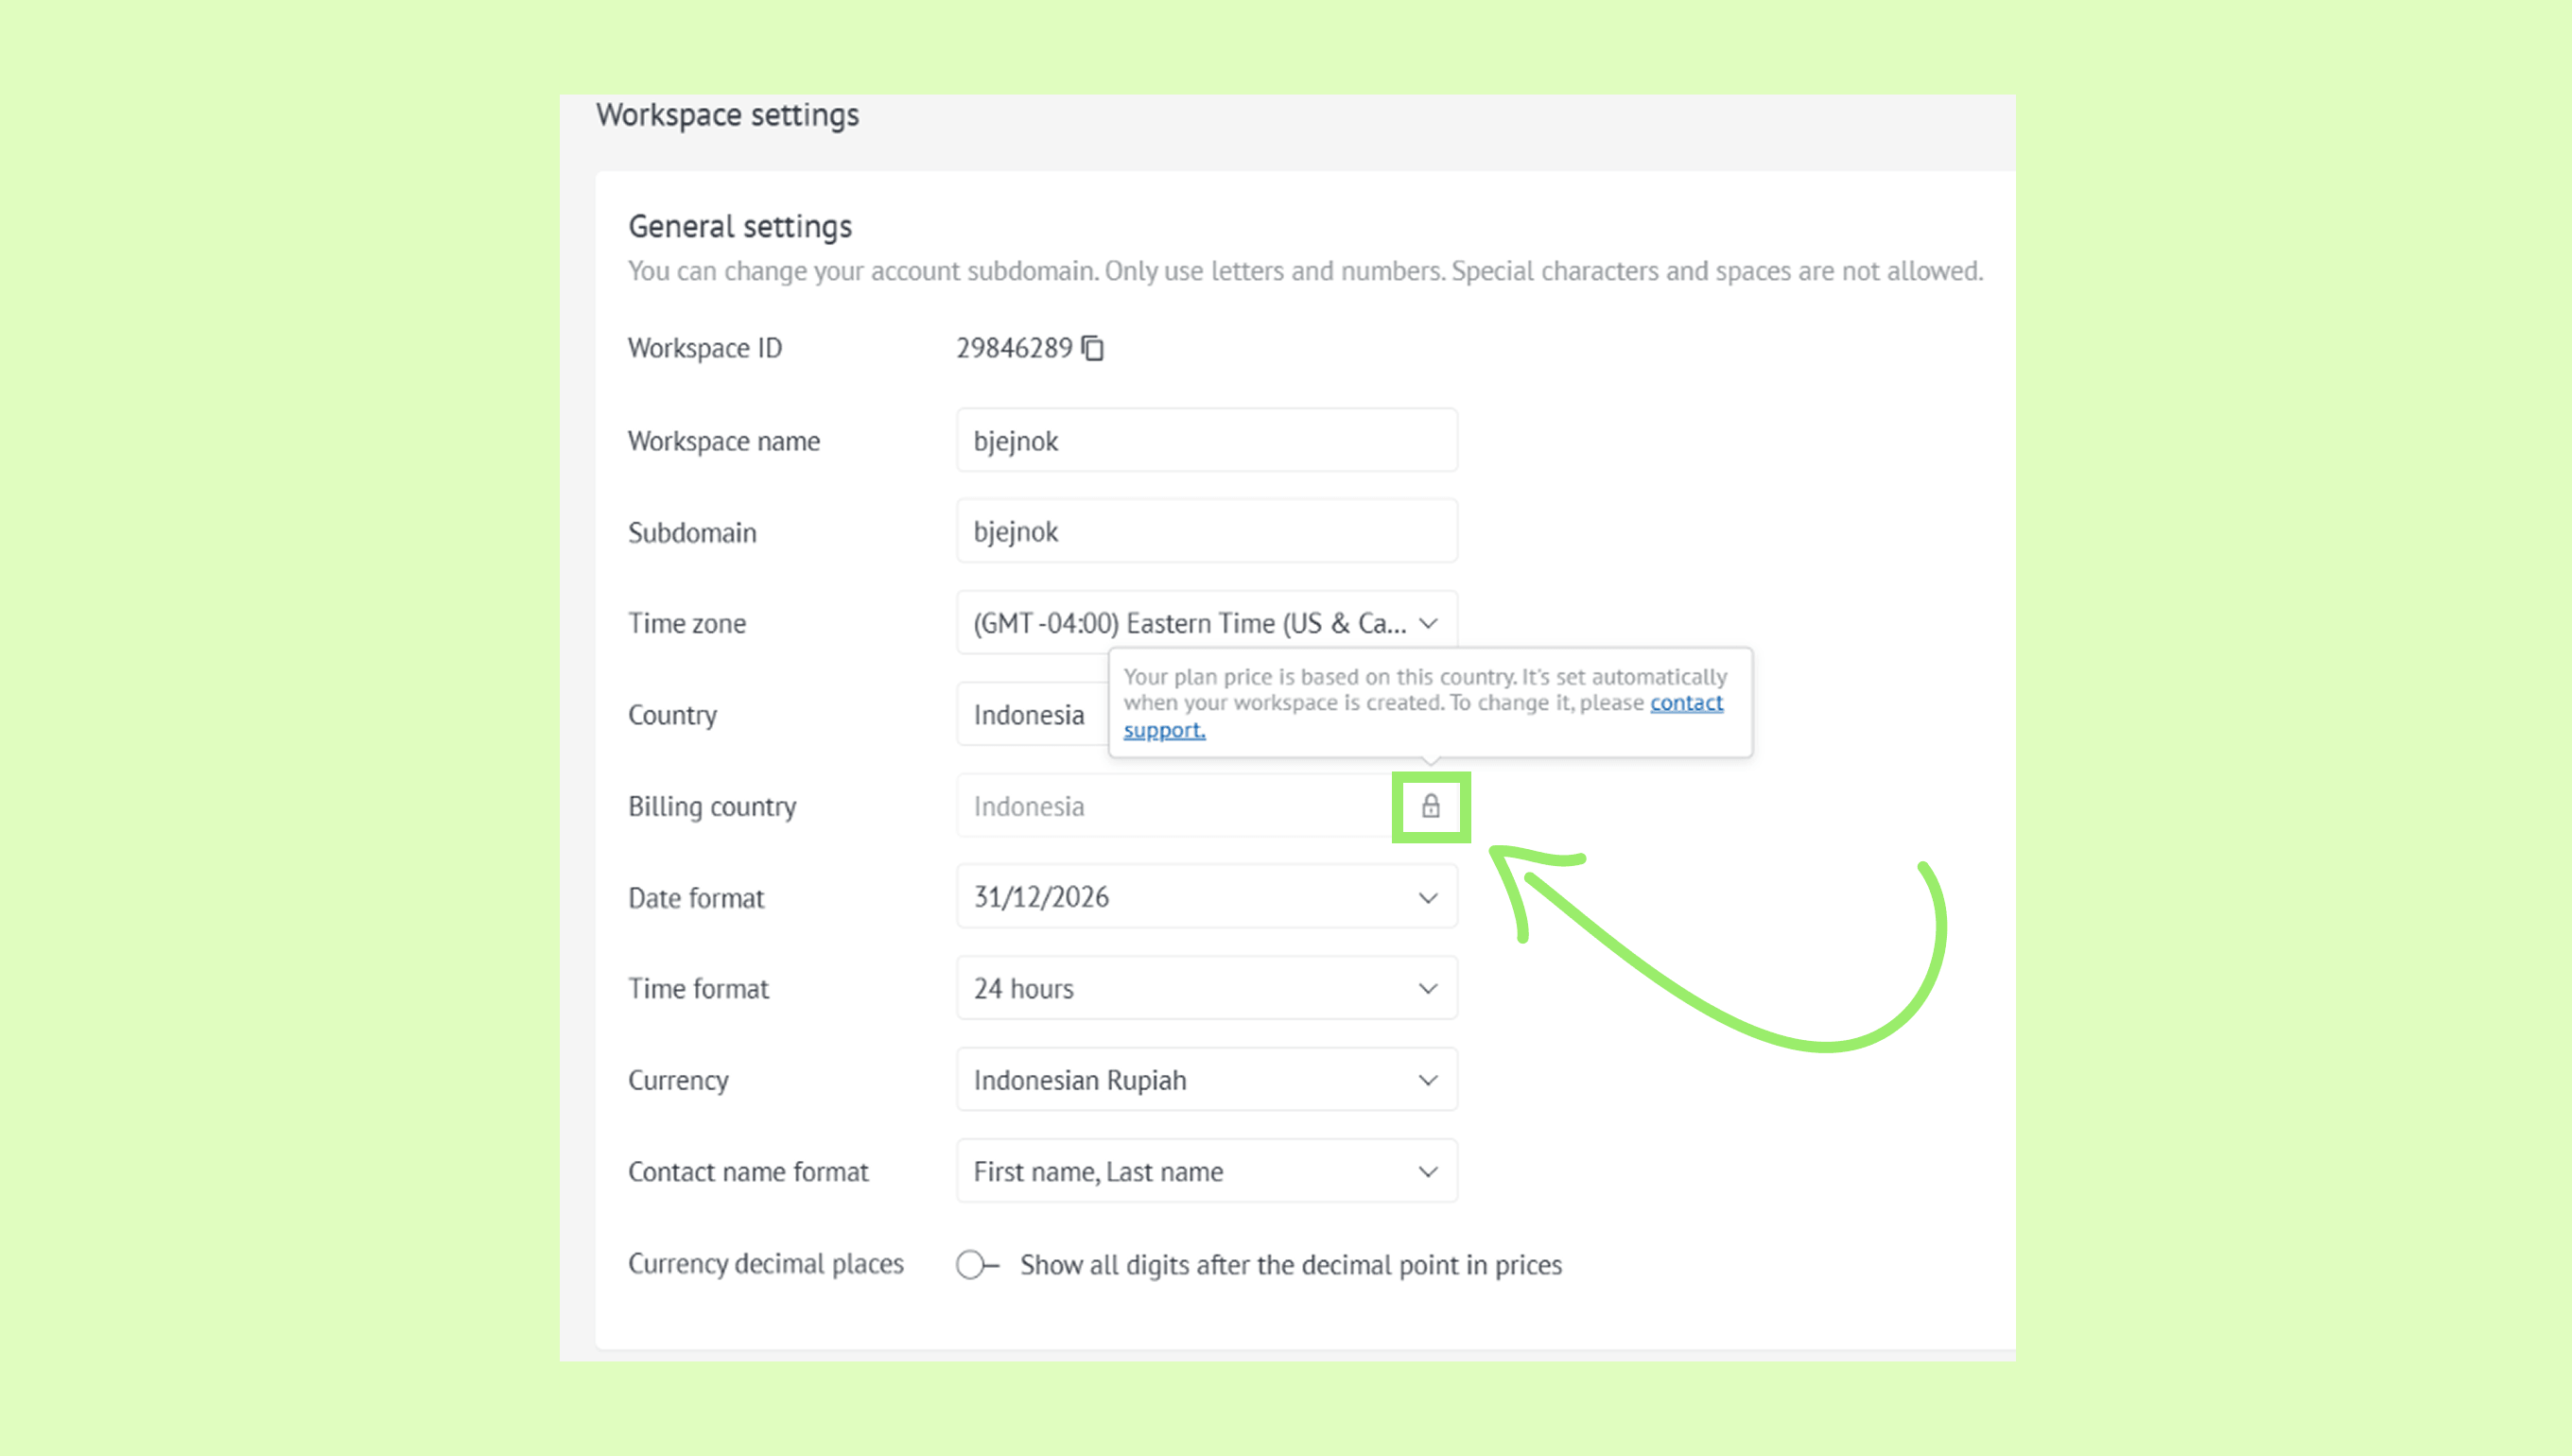
Go to Workspace settings.
Find the Billing country field and check the country shown there.
.png)
If the country is incorrect, hover over the lock icon next to the field. In the tooltip that appears, click Contact support.
In the Support chat, explain which country should be set, then click Send.
Note: Your Billing country is used to determine which regional price applies to your Kommo subscription. It does not have to match the country in your billing details, which is used for invoice information.
Request Enterprise plan
In Kommo, the Enterprise plan is designed for companies looking for a flexible, scalable solution. It can be fully customized to match your business needs and requirements.
To request the Enterprise plan:
Go to Settings → Billing, click Upgrade.
Select the Enterprise plan, click Talk to us.
.png)
Fill in your contact details, click Request a call. Our team will contact you shortly.
.png)
Add seats to your current plan
Add seats when your current user limit no longer meets your team’s needs:
Go to Settings → Billing, and on the My plan tab, click Add seats.
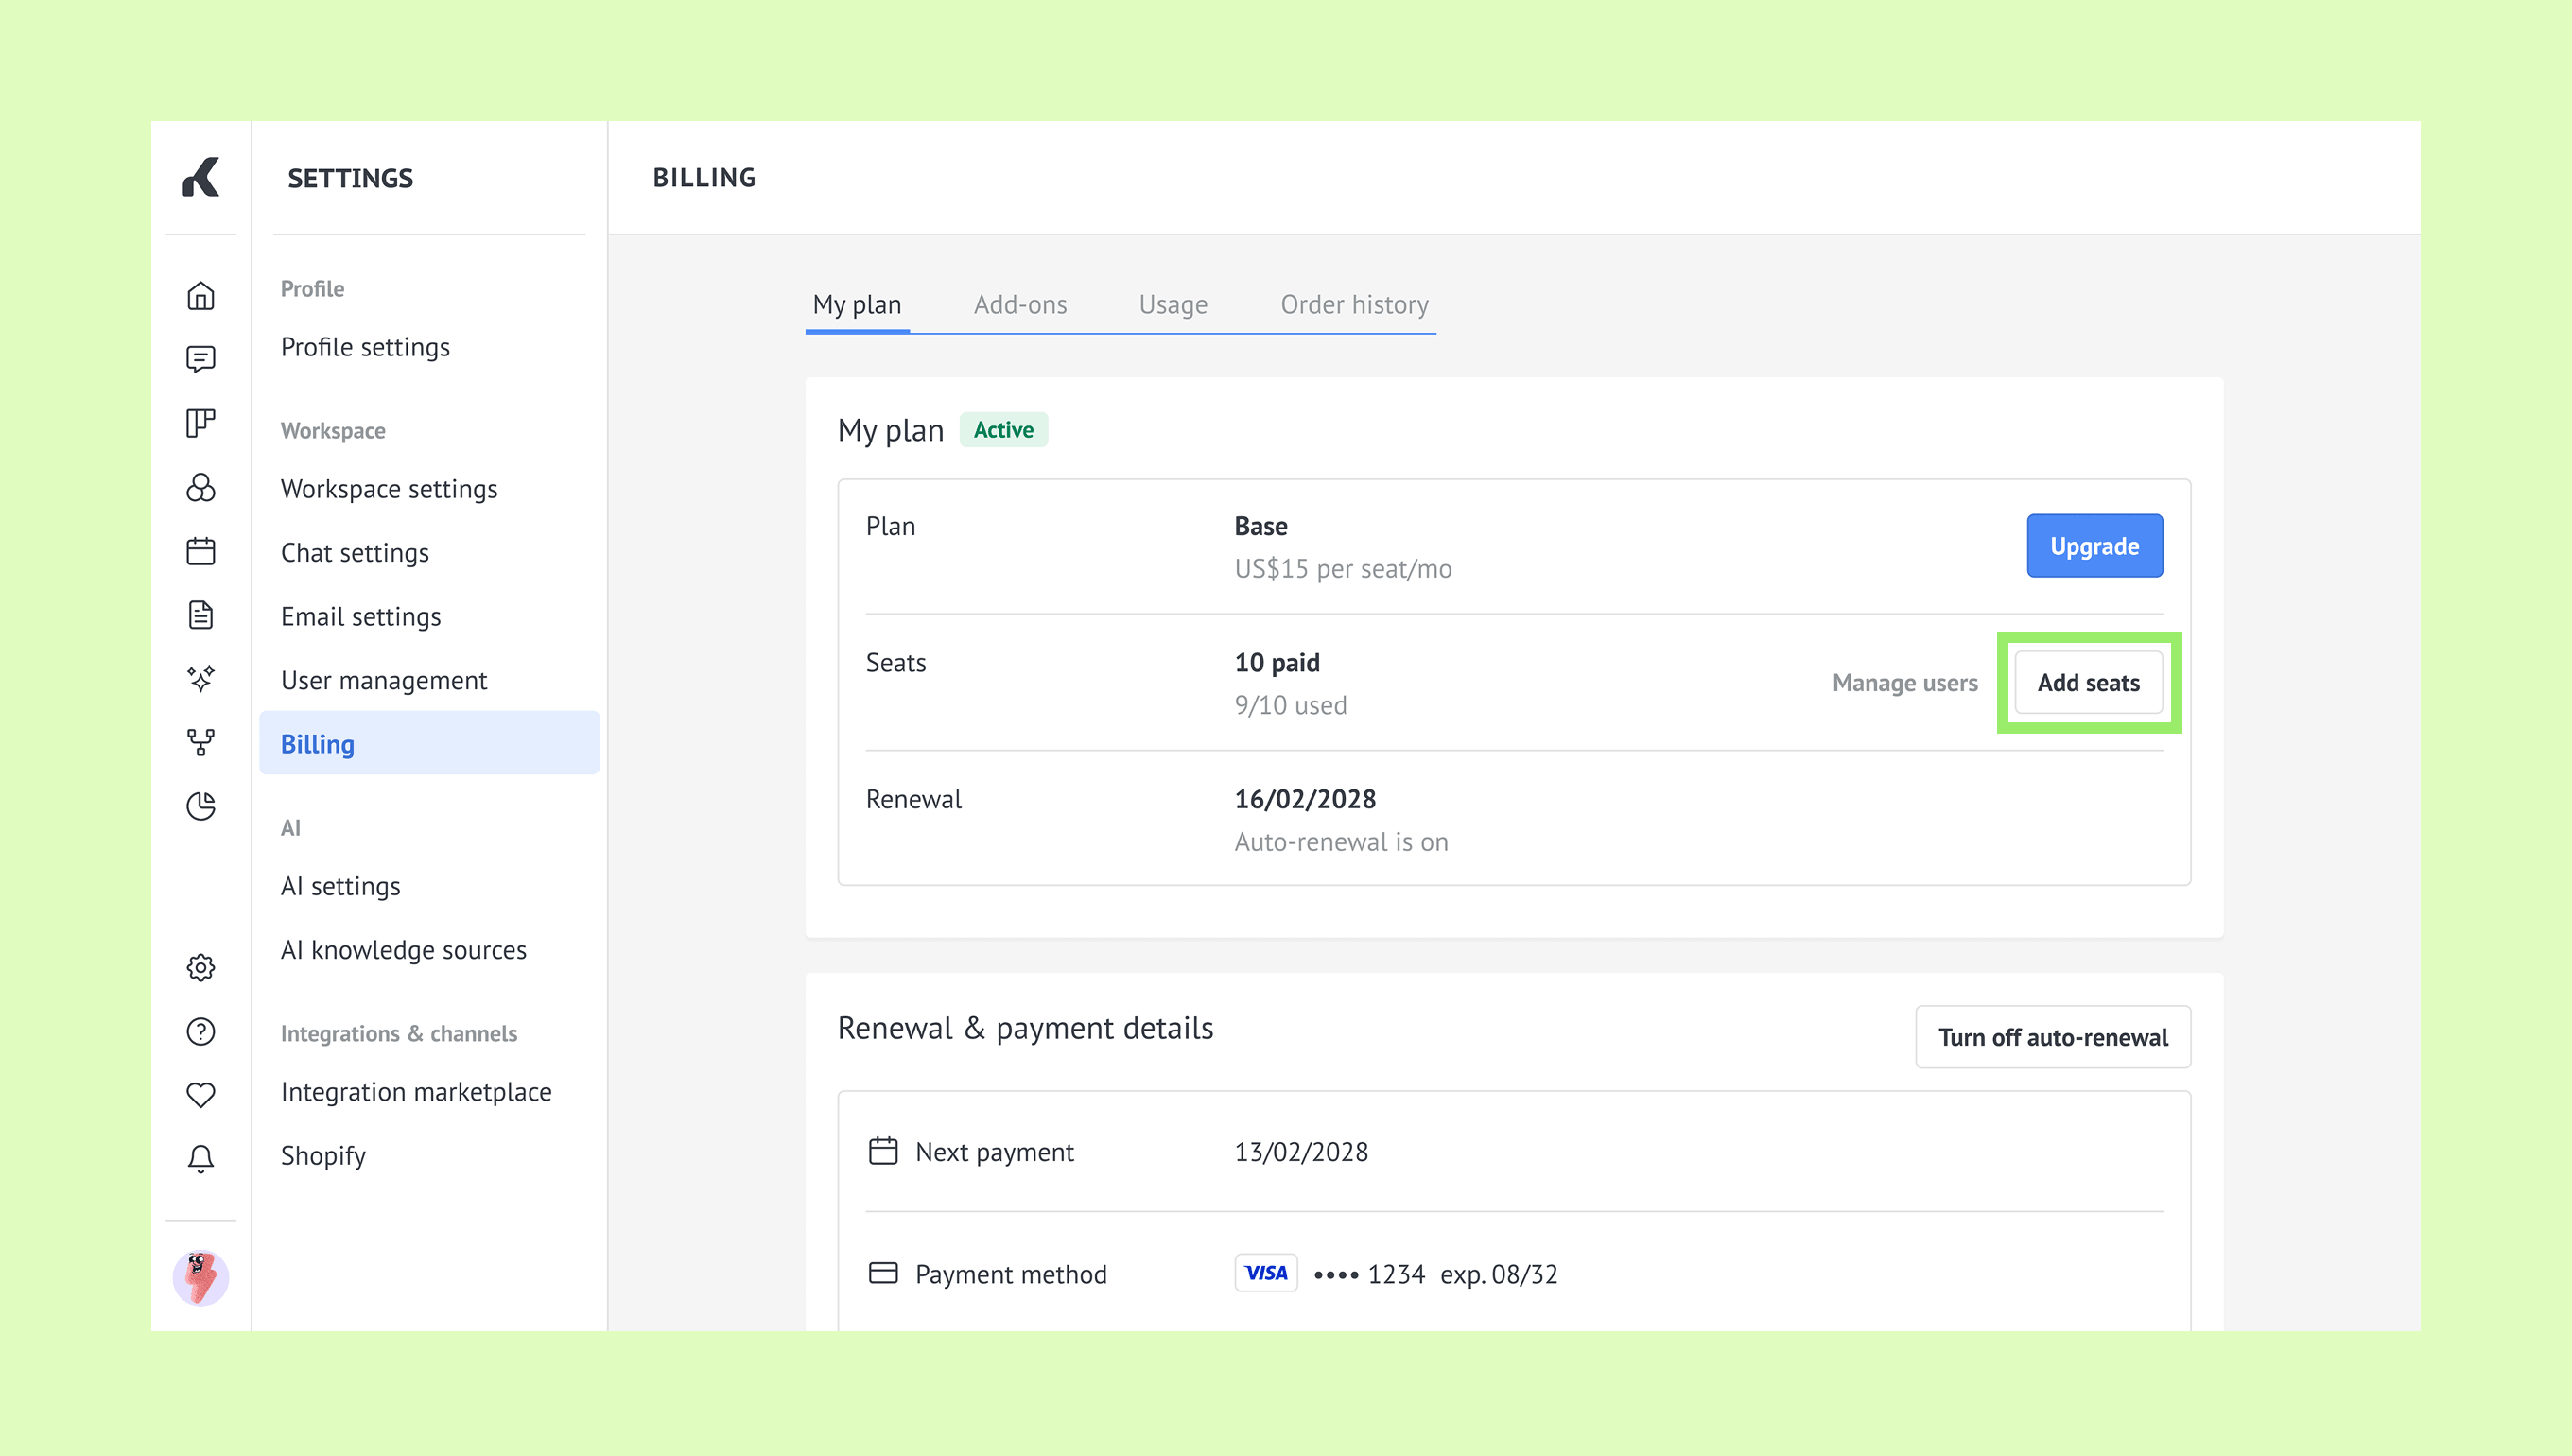
Set the number of user seats, click Continue.
.png)
Check the order details, click Continue.
Review your saved payment method and payment details. To use another payment method or enter new details, click Change.
Review your saved billing details. To update them, click the pencil icon, make your changes, and save them.
Click Continue and complete the payment.
Extend your subscription
Go to Settings → Billing, click Extend subscription.
.png)
Select a subscription period, click Continue.
.png)
Check the order details, click Continue.
Choose a payment method, enter the billing invoice details, then click Continue.
Complete your payment on the payment page. Once your payment is confirmed, your subscription will be extended automatically.
You’ll receive a reminder email 9 days before your subscription expires. A renewal order is created automatically with your current plan, seats, and billing period.
Note: Extending a subscription is only available if auto-renewals are turned off.
Verify the change
If you’ve successfully made a purchase, invoices will appear as Paid in Billing → Order history. 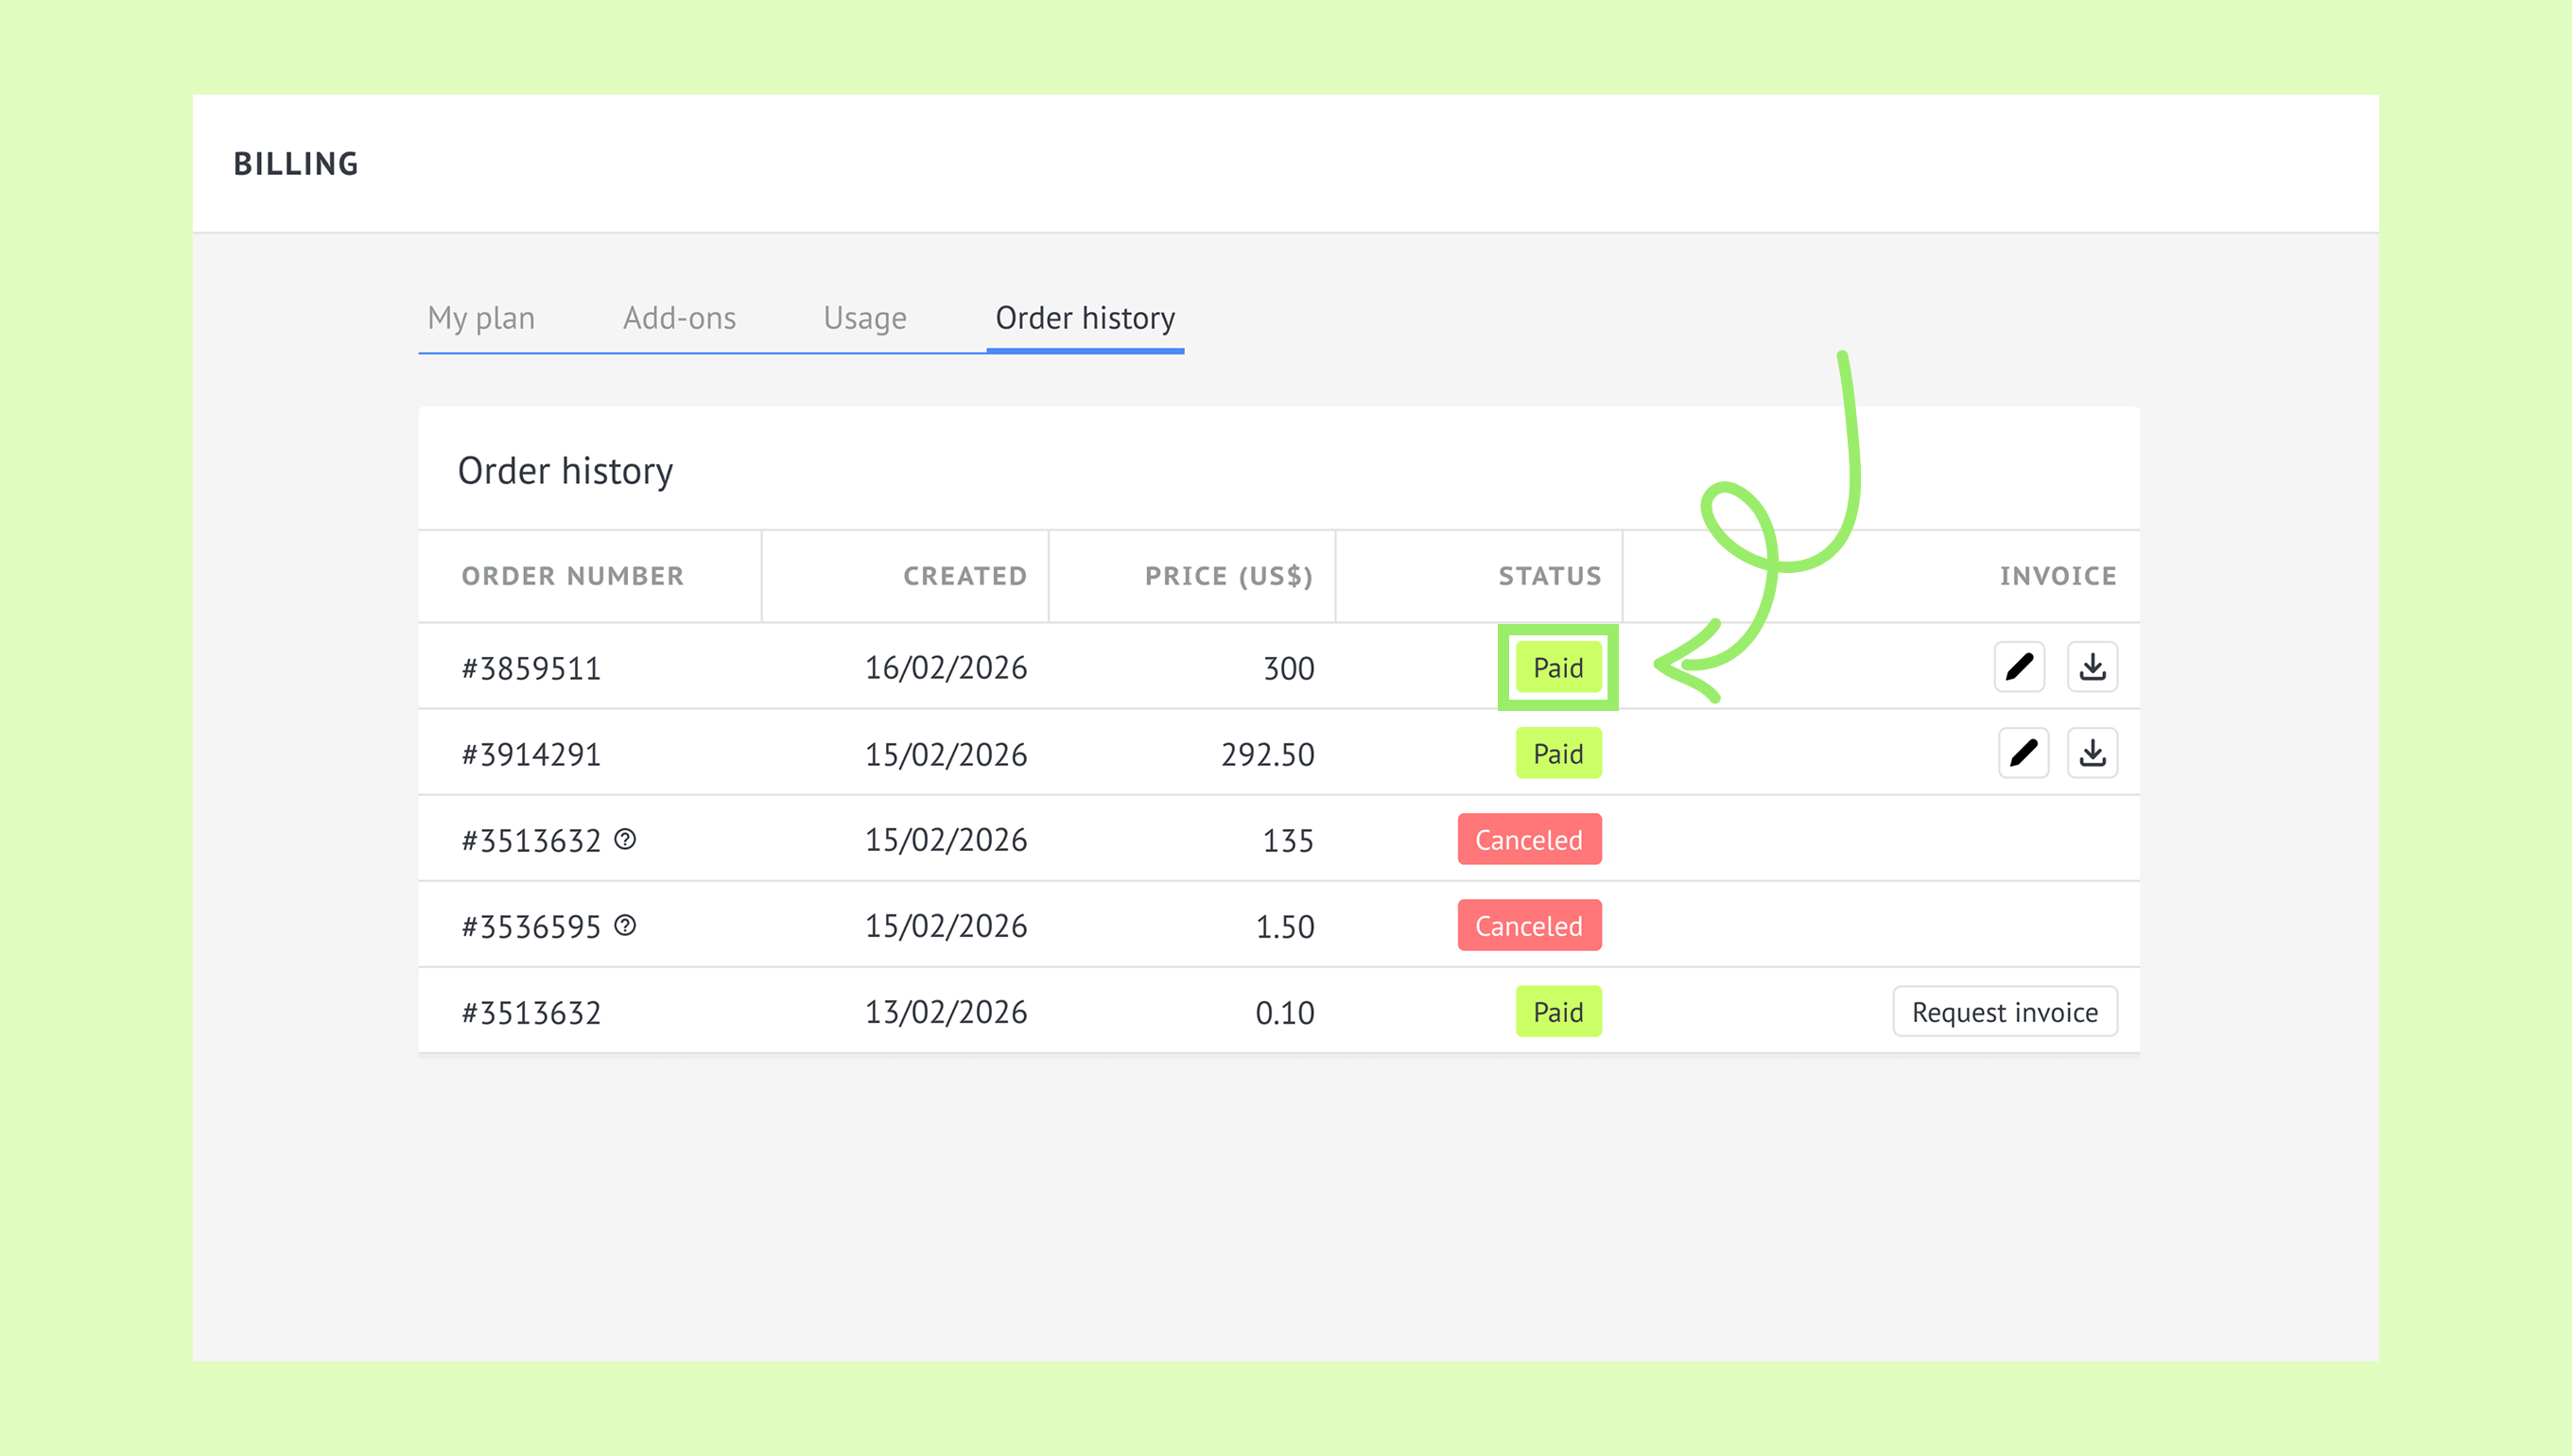
New features become available immediately after your payment is processed.
If the change doesn’t apply or you can’t complete the process, see Fix billing or payment issues.