What you’ll need:
Available during the 14-day trial and as part of paid plans after the trial period.
Keep in mind:
You can create multiple AI agents in the same workspace.
The number of active AI agents depends on your subscription plan.
To ensure fair use and prevent system overload, usage limits apply. If you hit a limit, an error will appear – you can purchase an AI agent package or contact Support for help.
In this guide, you’ll learn how to activate or deactivate AI agents, duplicate or delete existing setups, disconnect them from chats, and regenerate agents when needed.
Start managing your AI agents
To access your AI agents:
Go to AI agents.
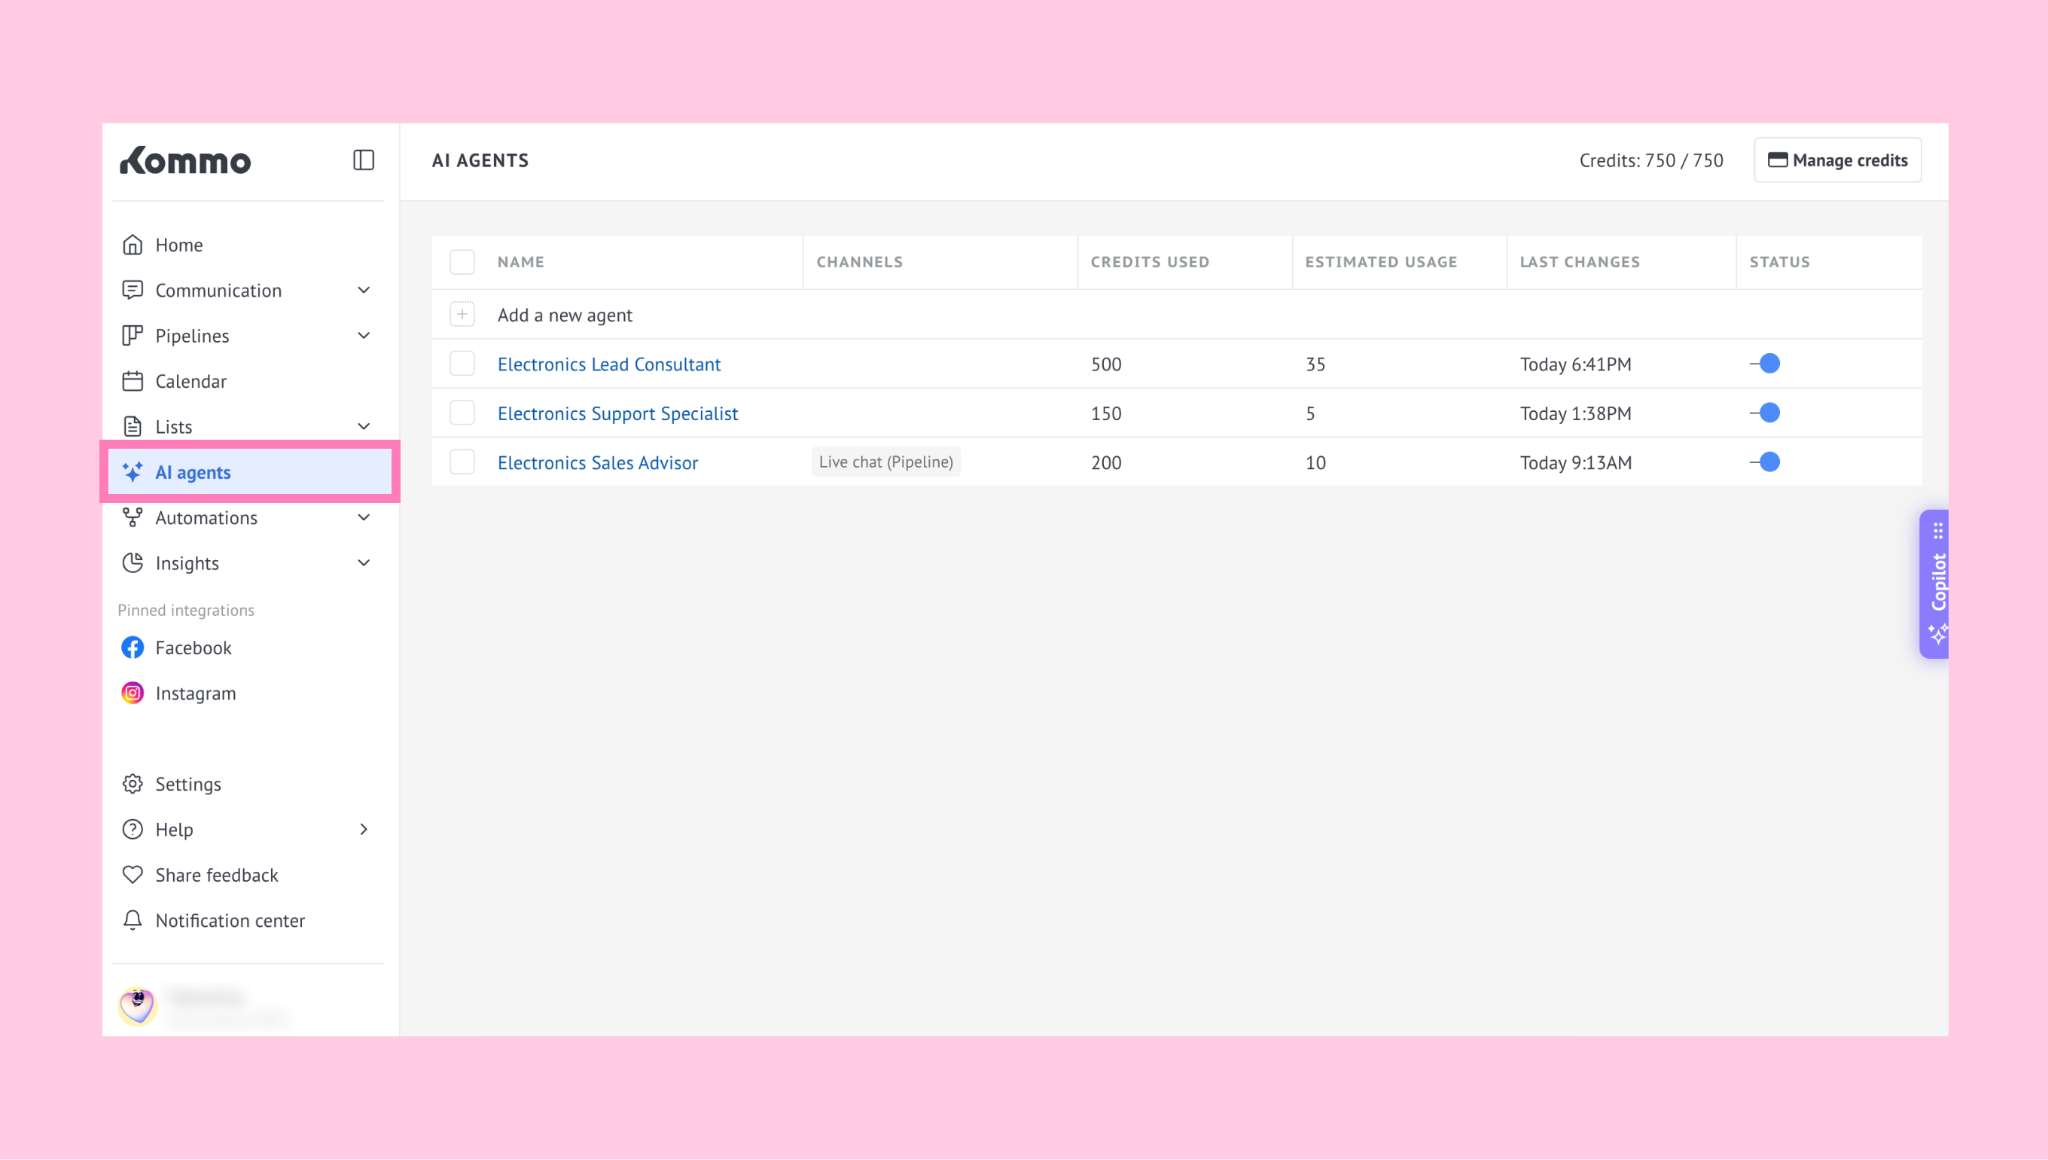
You’ll see your AI agents list, where all agents in your workspace are displayed.
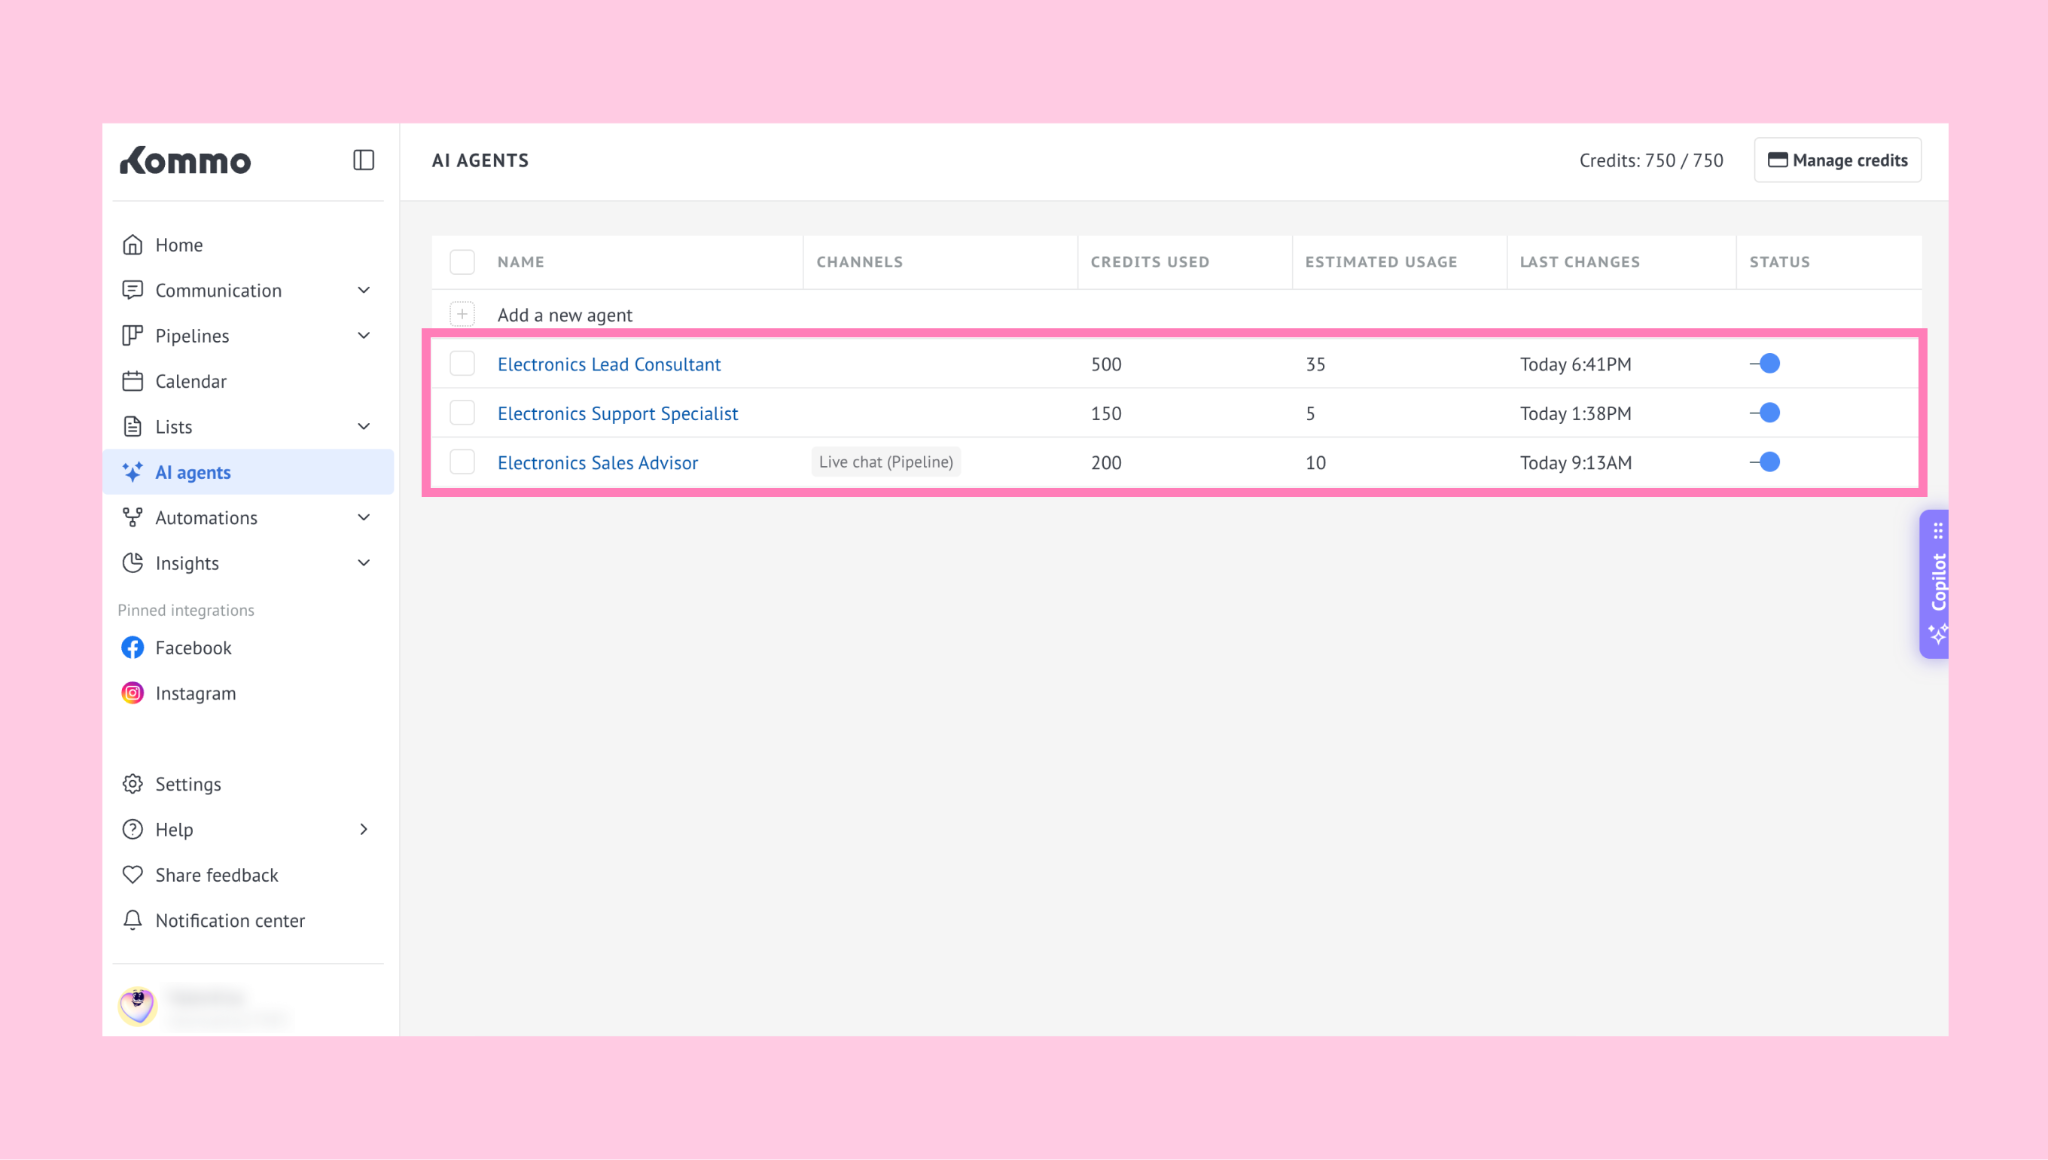
Each agent includes details such as:
Name
Channels – where the agent is active
Credits used – total credits spent
Estimated usage – cost per message
Last changed – date of the most recent edits
Status – turn the agent on or off
Activate or deactivate AI agents
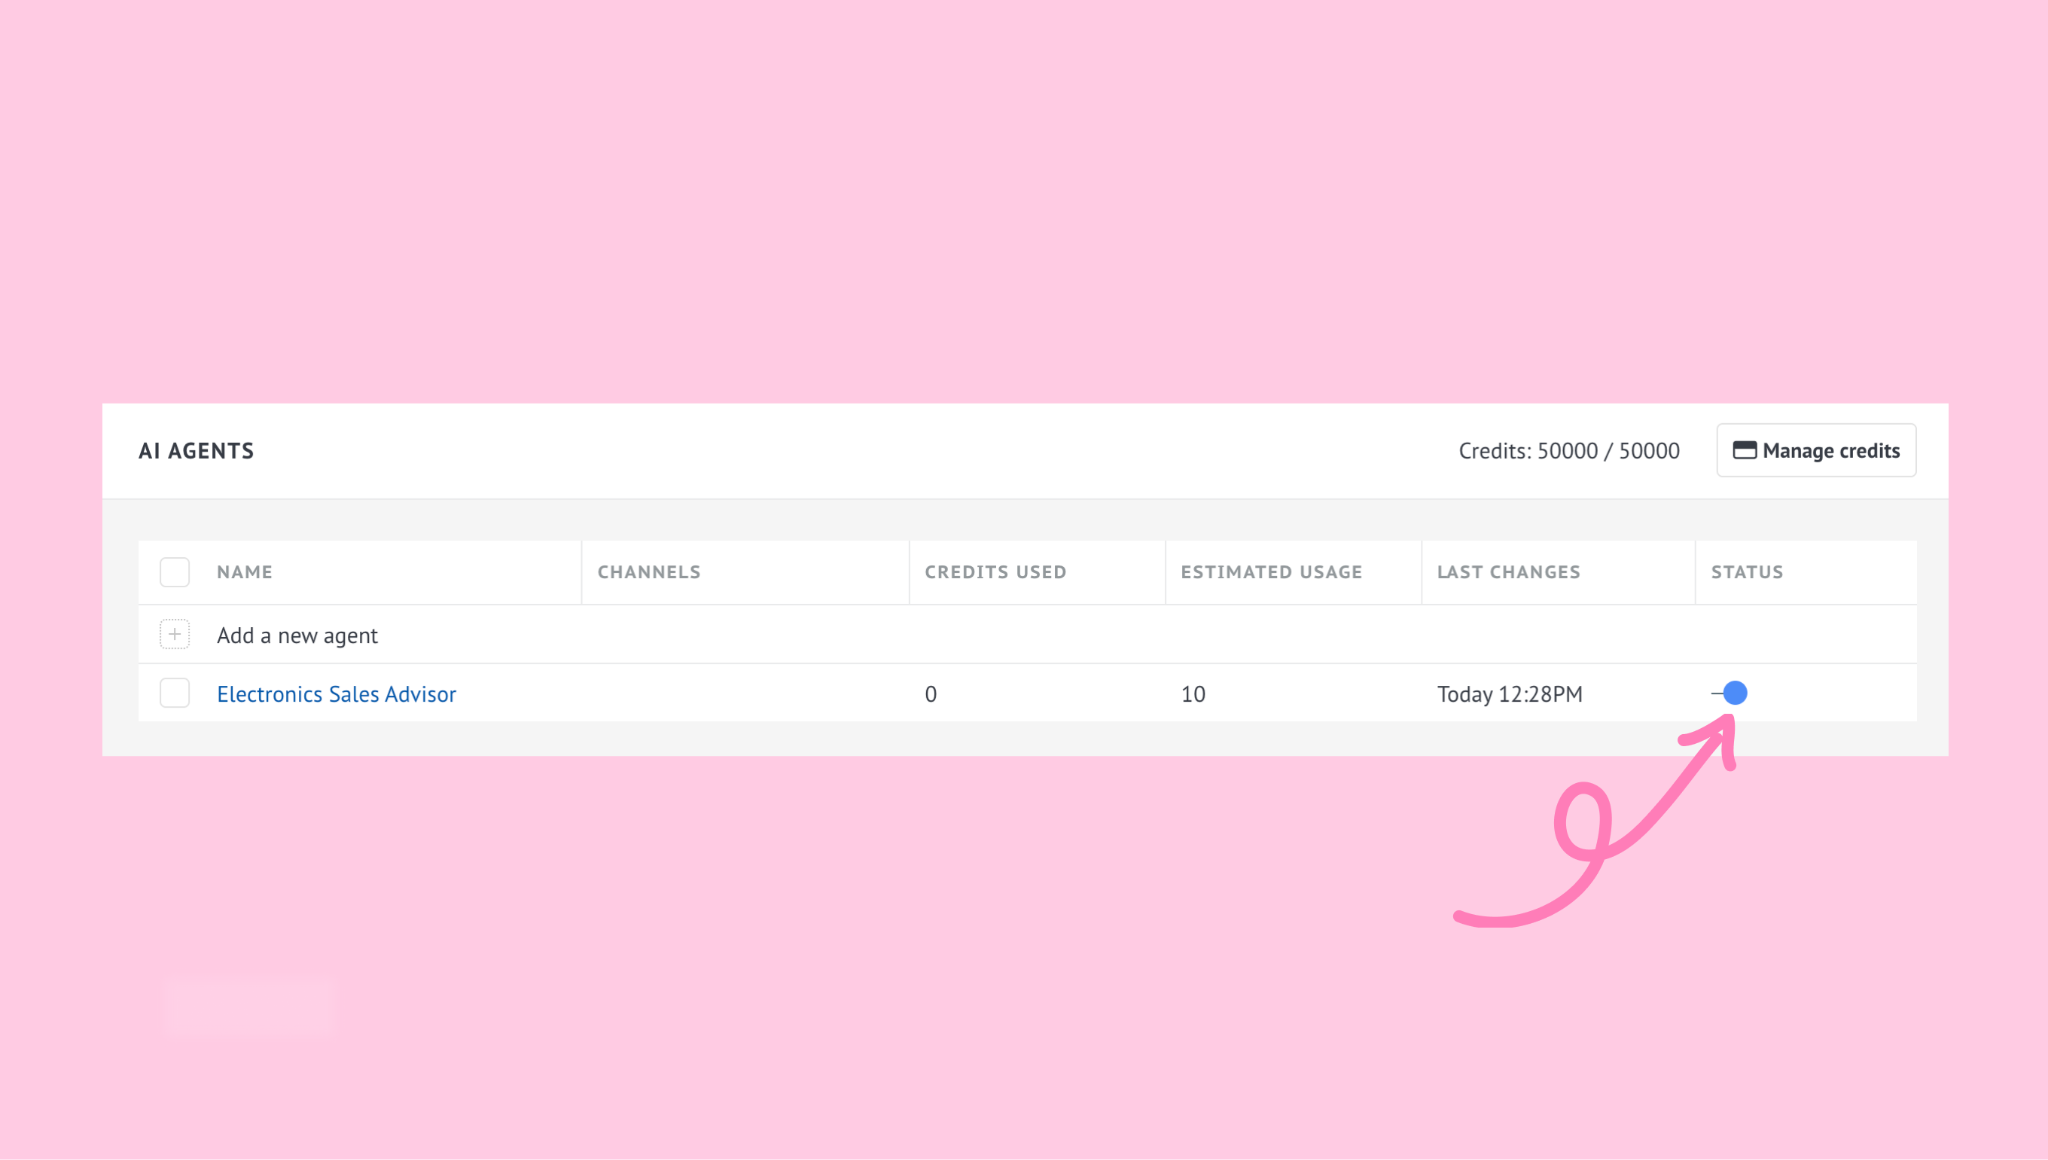
You can activate or deactivate AI agents at any time from the Status column in your AI agents list.
To activate an AI agent:
Turn on the toggle for the AI agent you want to activate.
If the agent doesn’t have a channel connected yet, a modal window will appear asking you to add one. Click + Add channel.
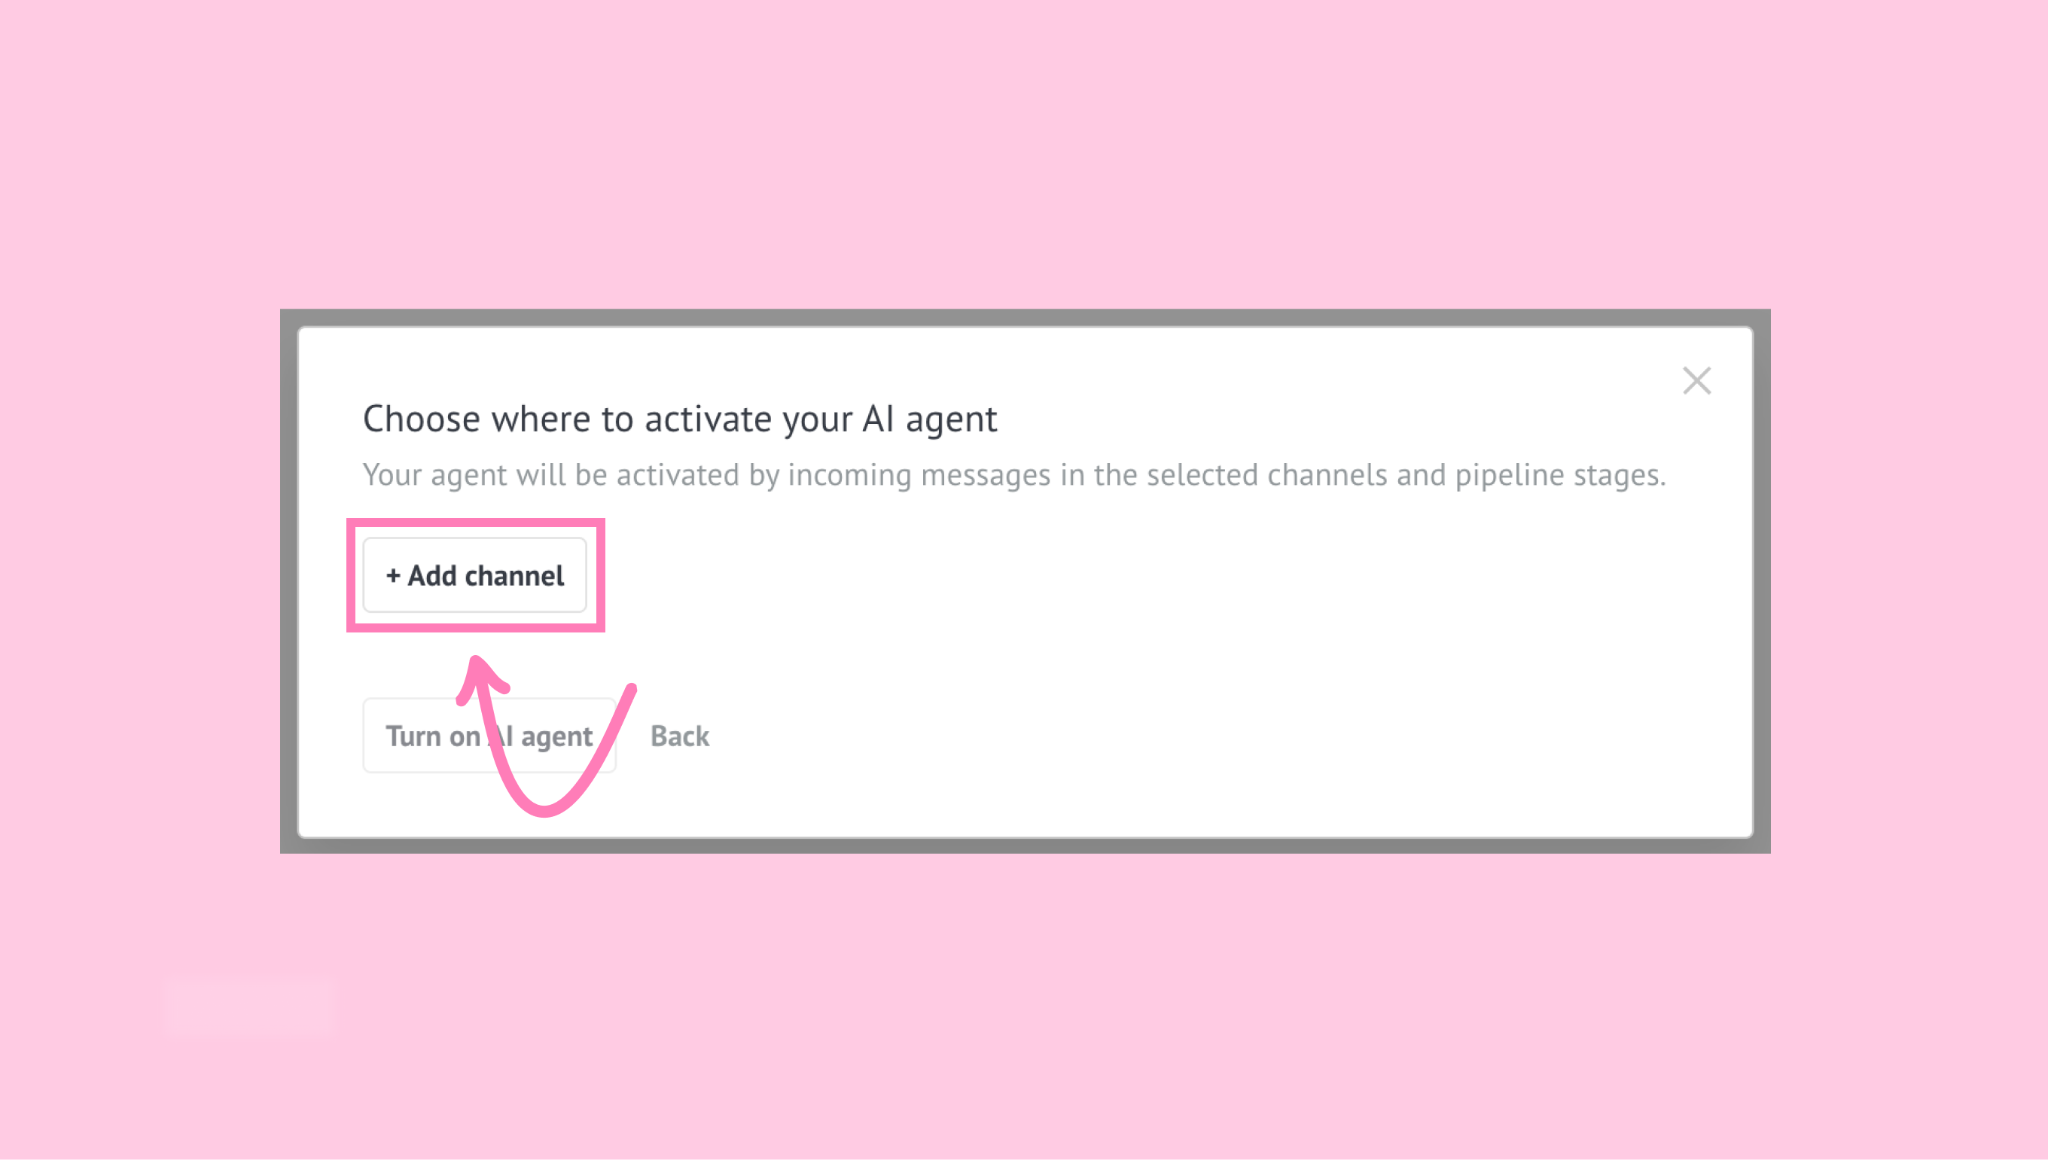
Select the channel where the AI agent should reply to incoming messages.
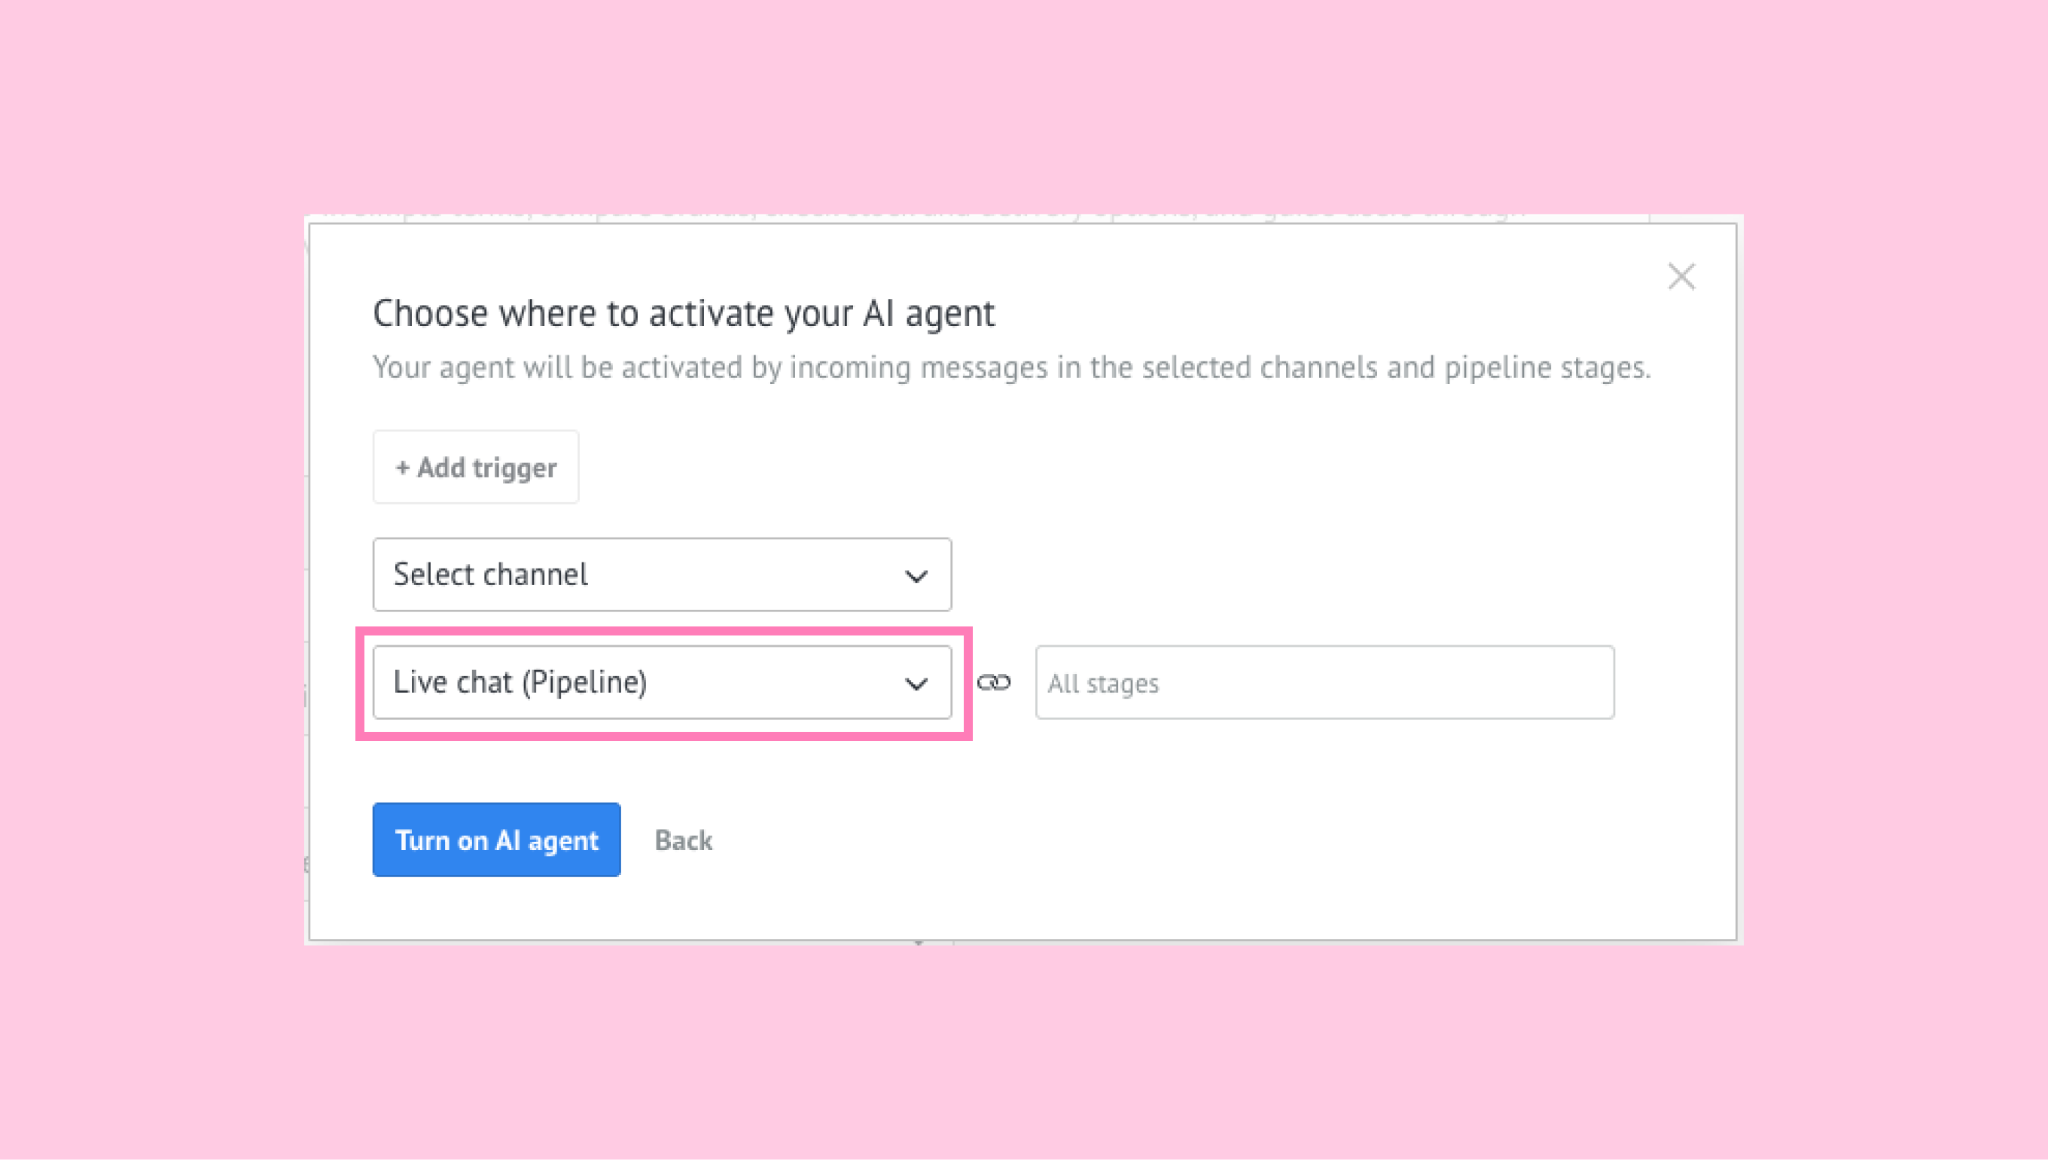
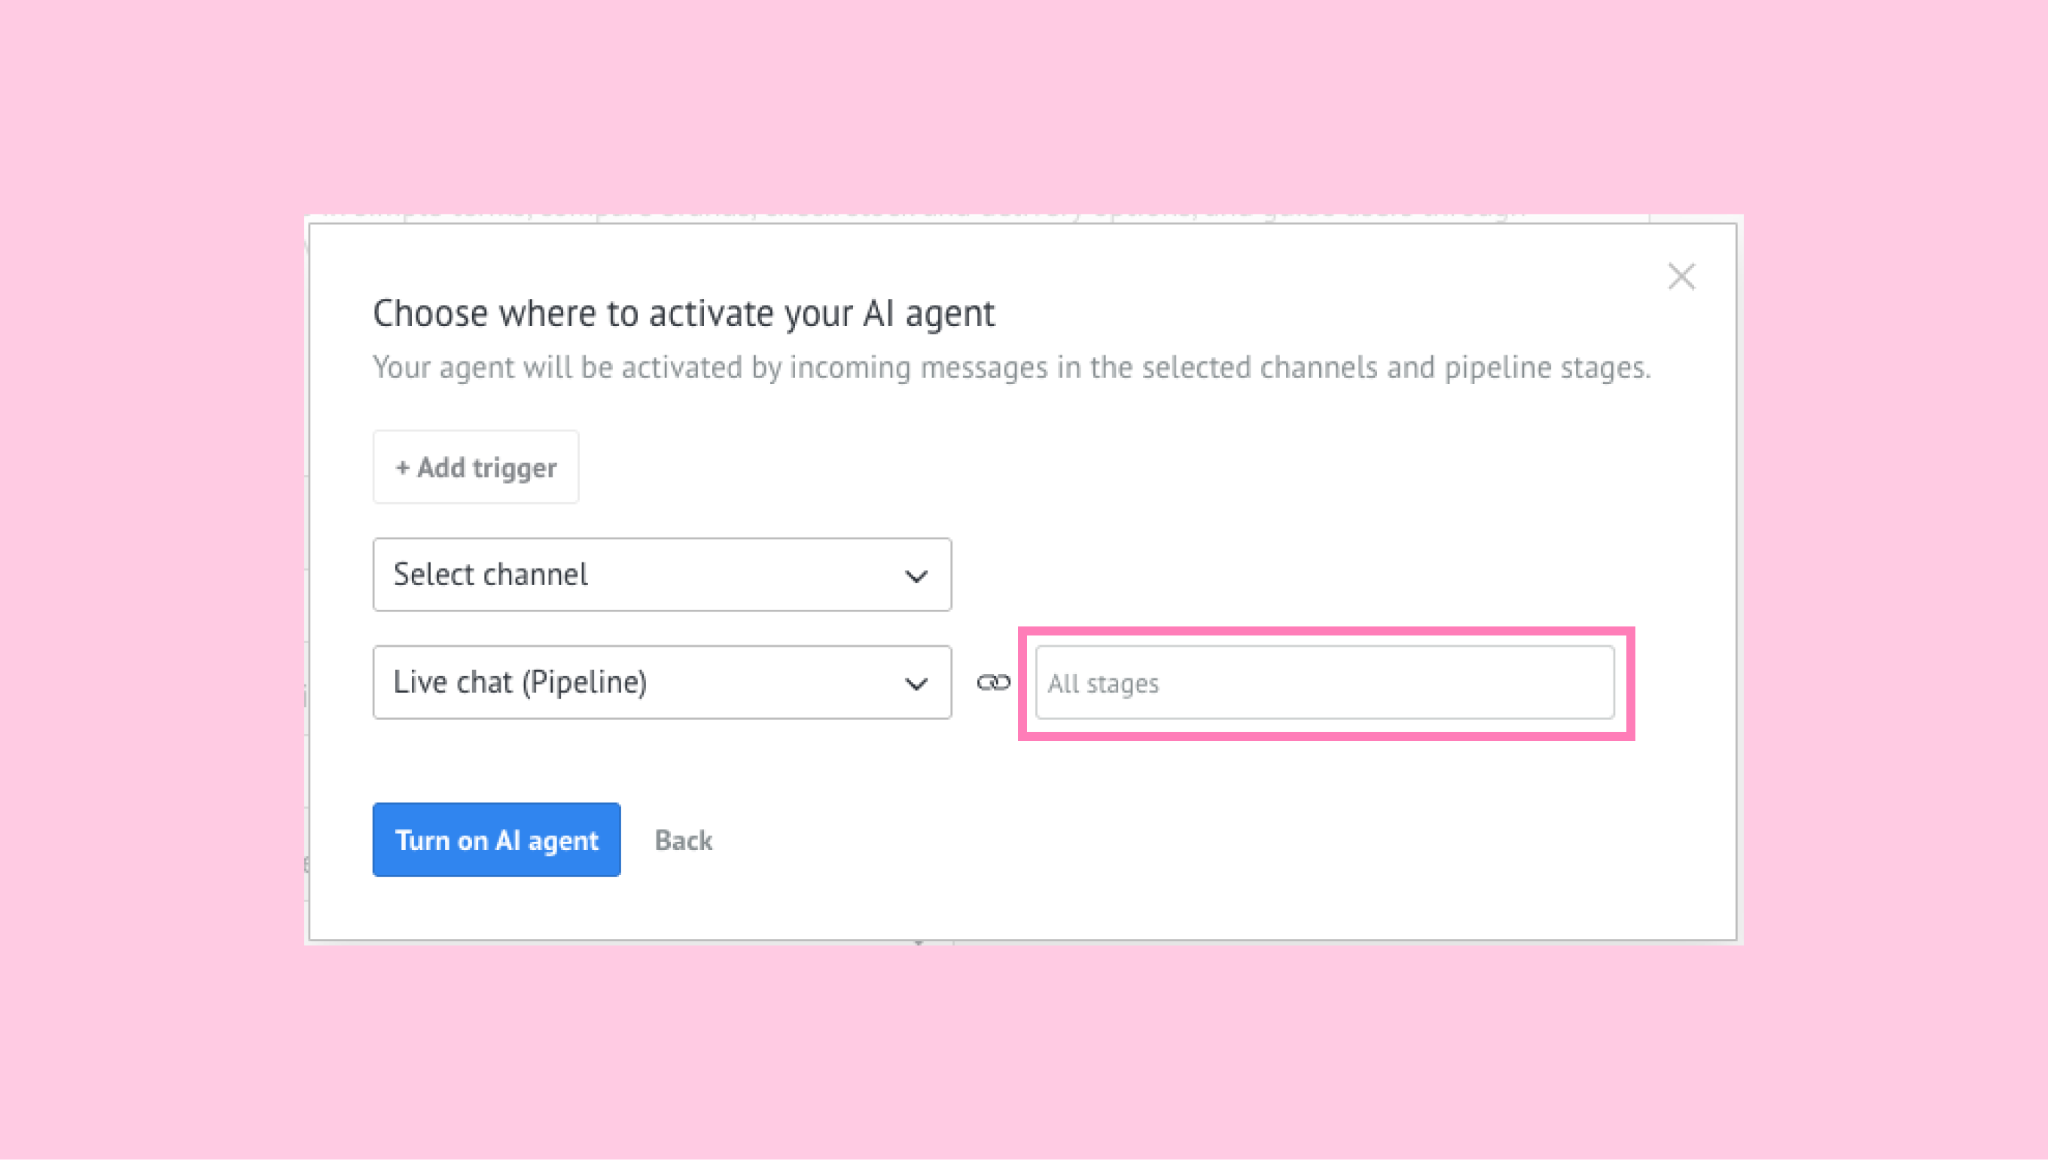
Then, choose the pipeline stages where it should operate.
Click Turn on AI agent to confirm.
Once the AI agent is active, you can open the Settings tab to review or update the connected channel and selected pipeline stages. You can also add more channel and pipeline stage combinations or remove existing ones whenever needed.
Before activating an AI agent, make sure its setup is complete. For configuration steps, see our set up guide.
To deactivate an AI agent:
In the Status column, turn off the toggle for the AI agent you want to deactivate.
A confirmation modal will appear. Click Turn off AI agent.
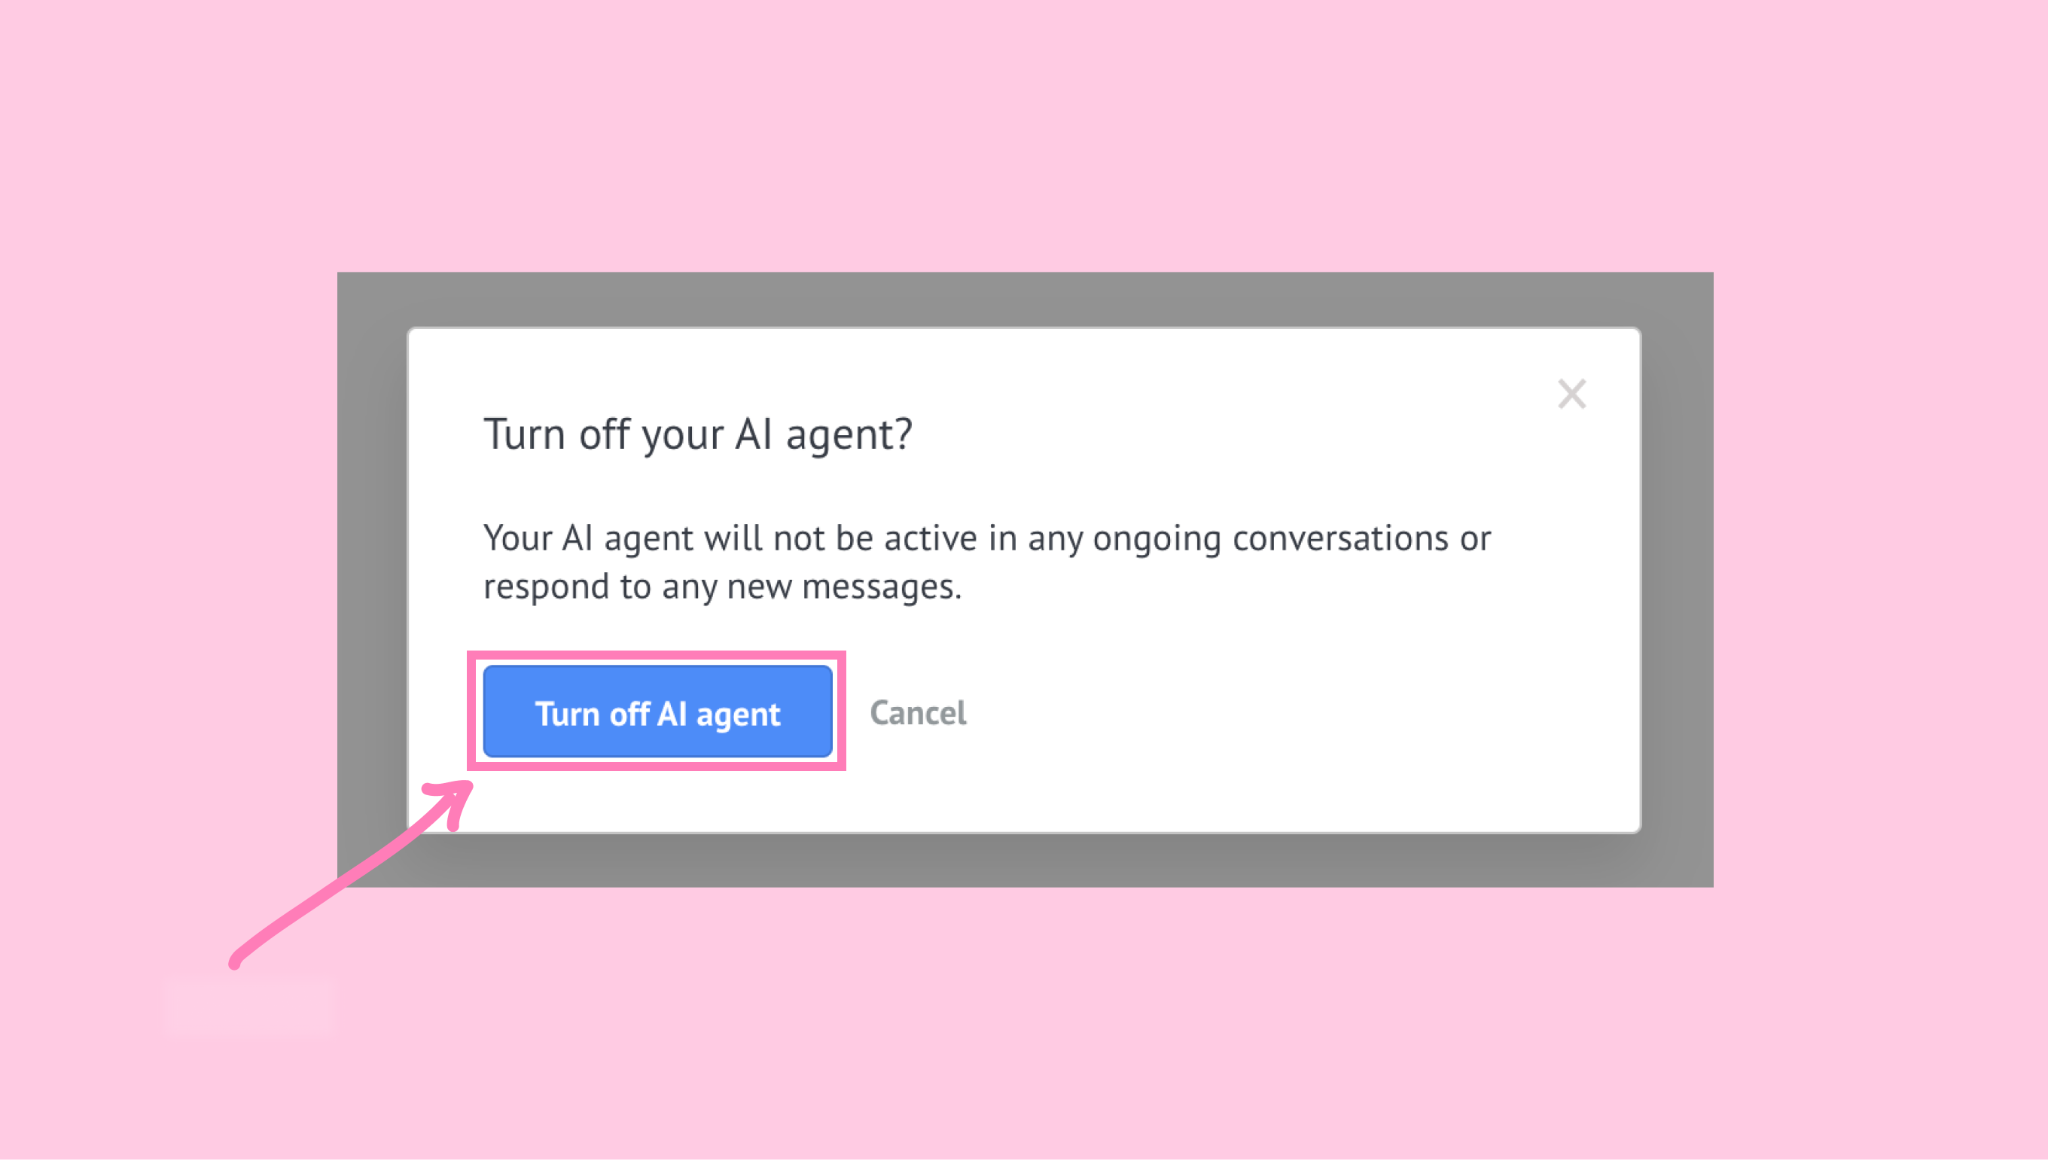
Once deactivated, the AI agent will stop responding to new incoming conversations until it is activated again.
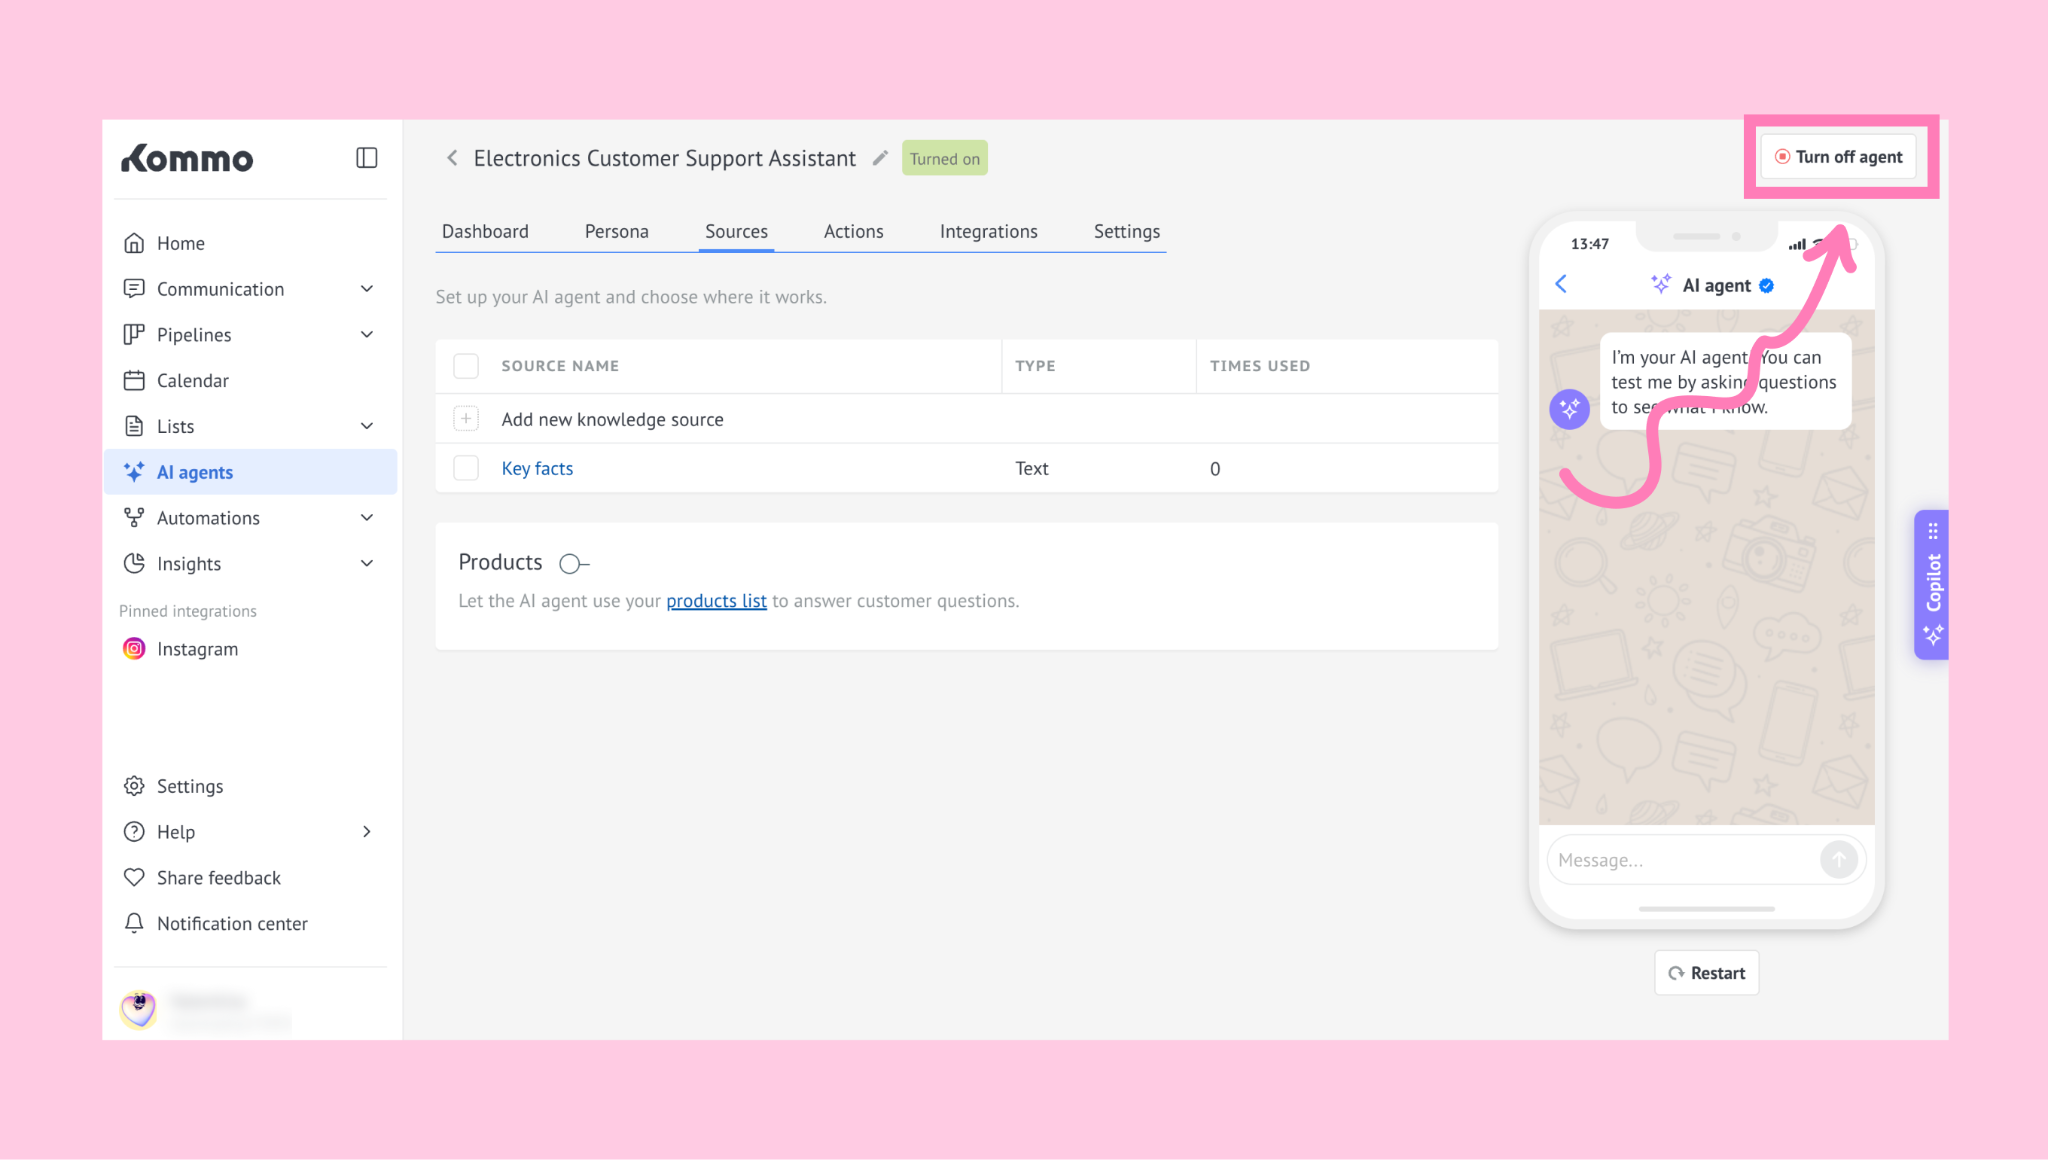
Disconnect an AI agent from a conversation
Open the active conversation and find the AI agent listed above the chatbox, next to the participants.
Click its label to reveal a red stop button, then click it to disable the AI agent in that conversation.
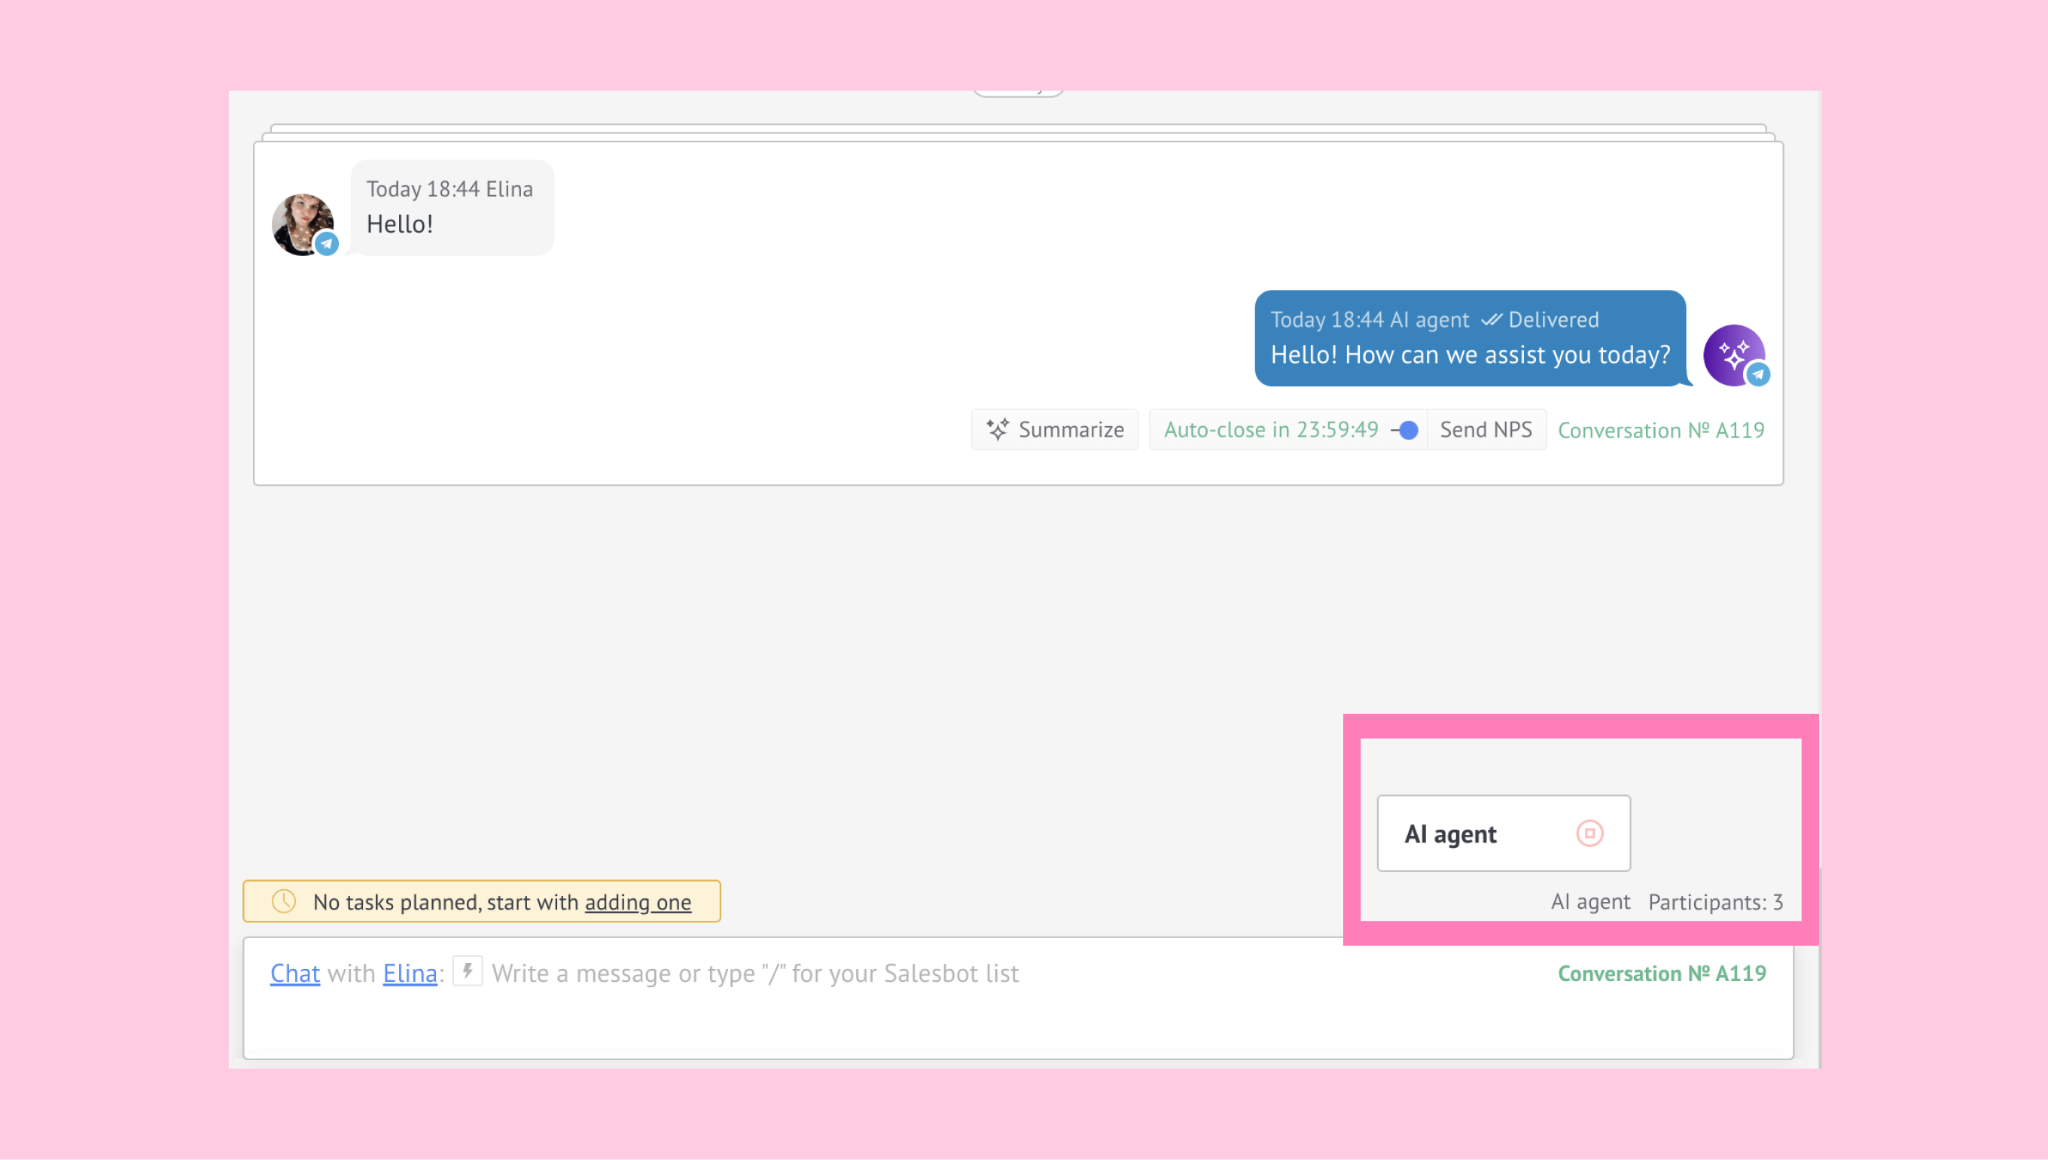
Note: Once stopped, the AI agent won’t respond to the current or any future messages in any conversation.
The Turn off agent option in the AI agent settings stops the agent across all conversations and removes active triggers.
To learn more about how AI agent triggers work, see our article.
Duplicate or delete AI agents
Select an AI agent by clicking the checkbox next to its name.
You’ll see two options: delete and copy.
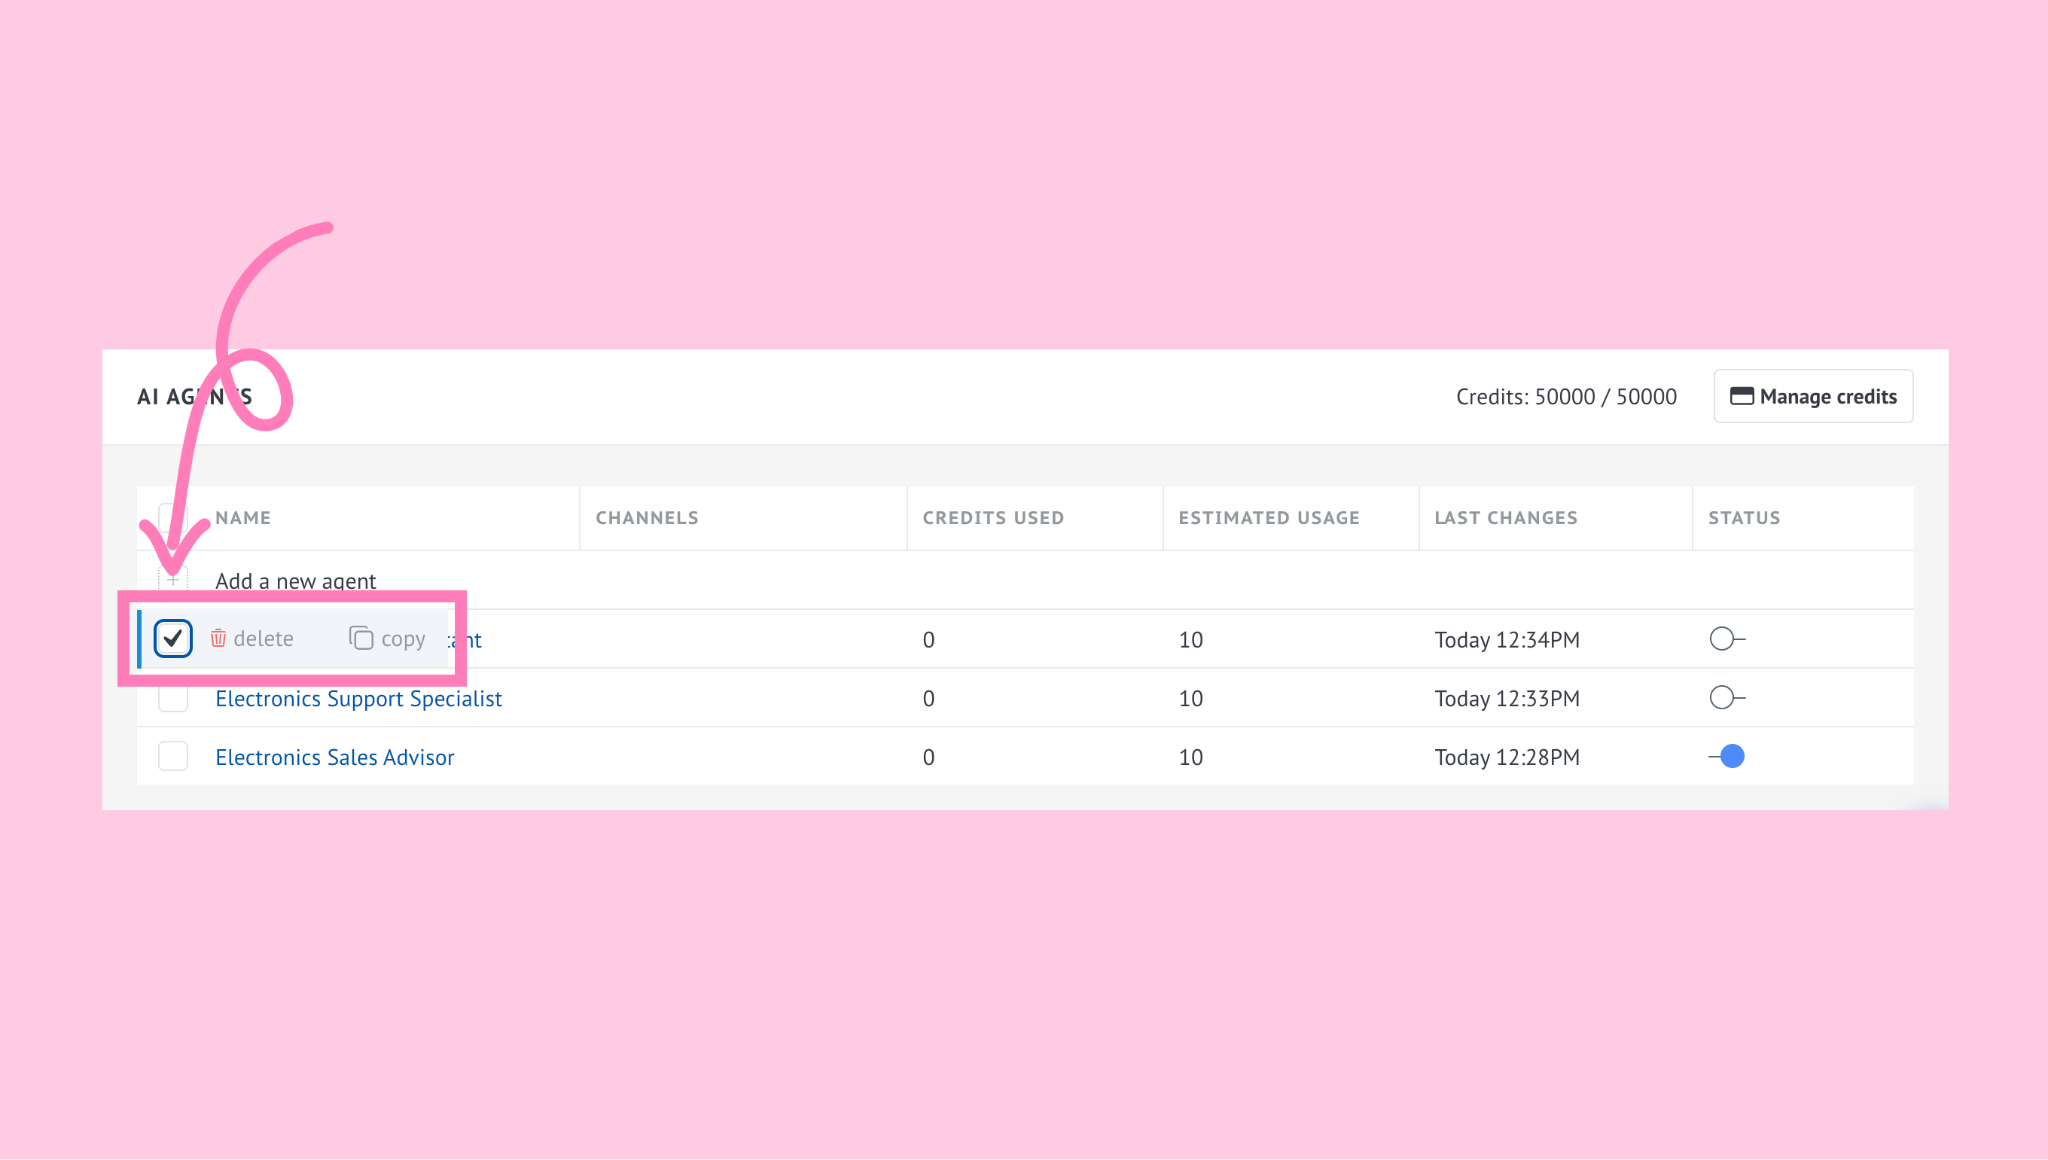
To duplicate an AI agent, click copy.
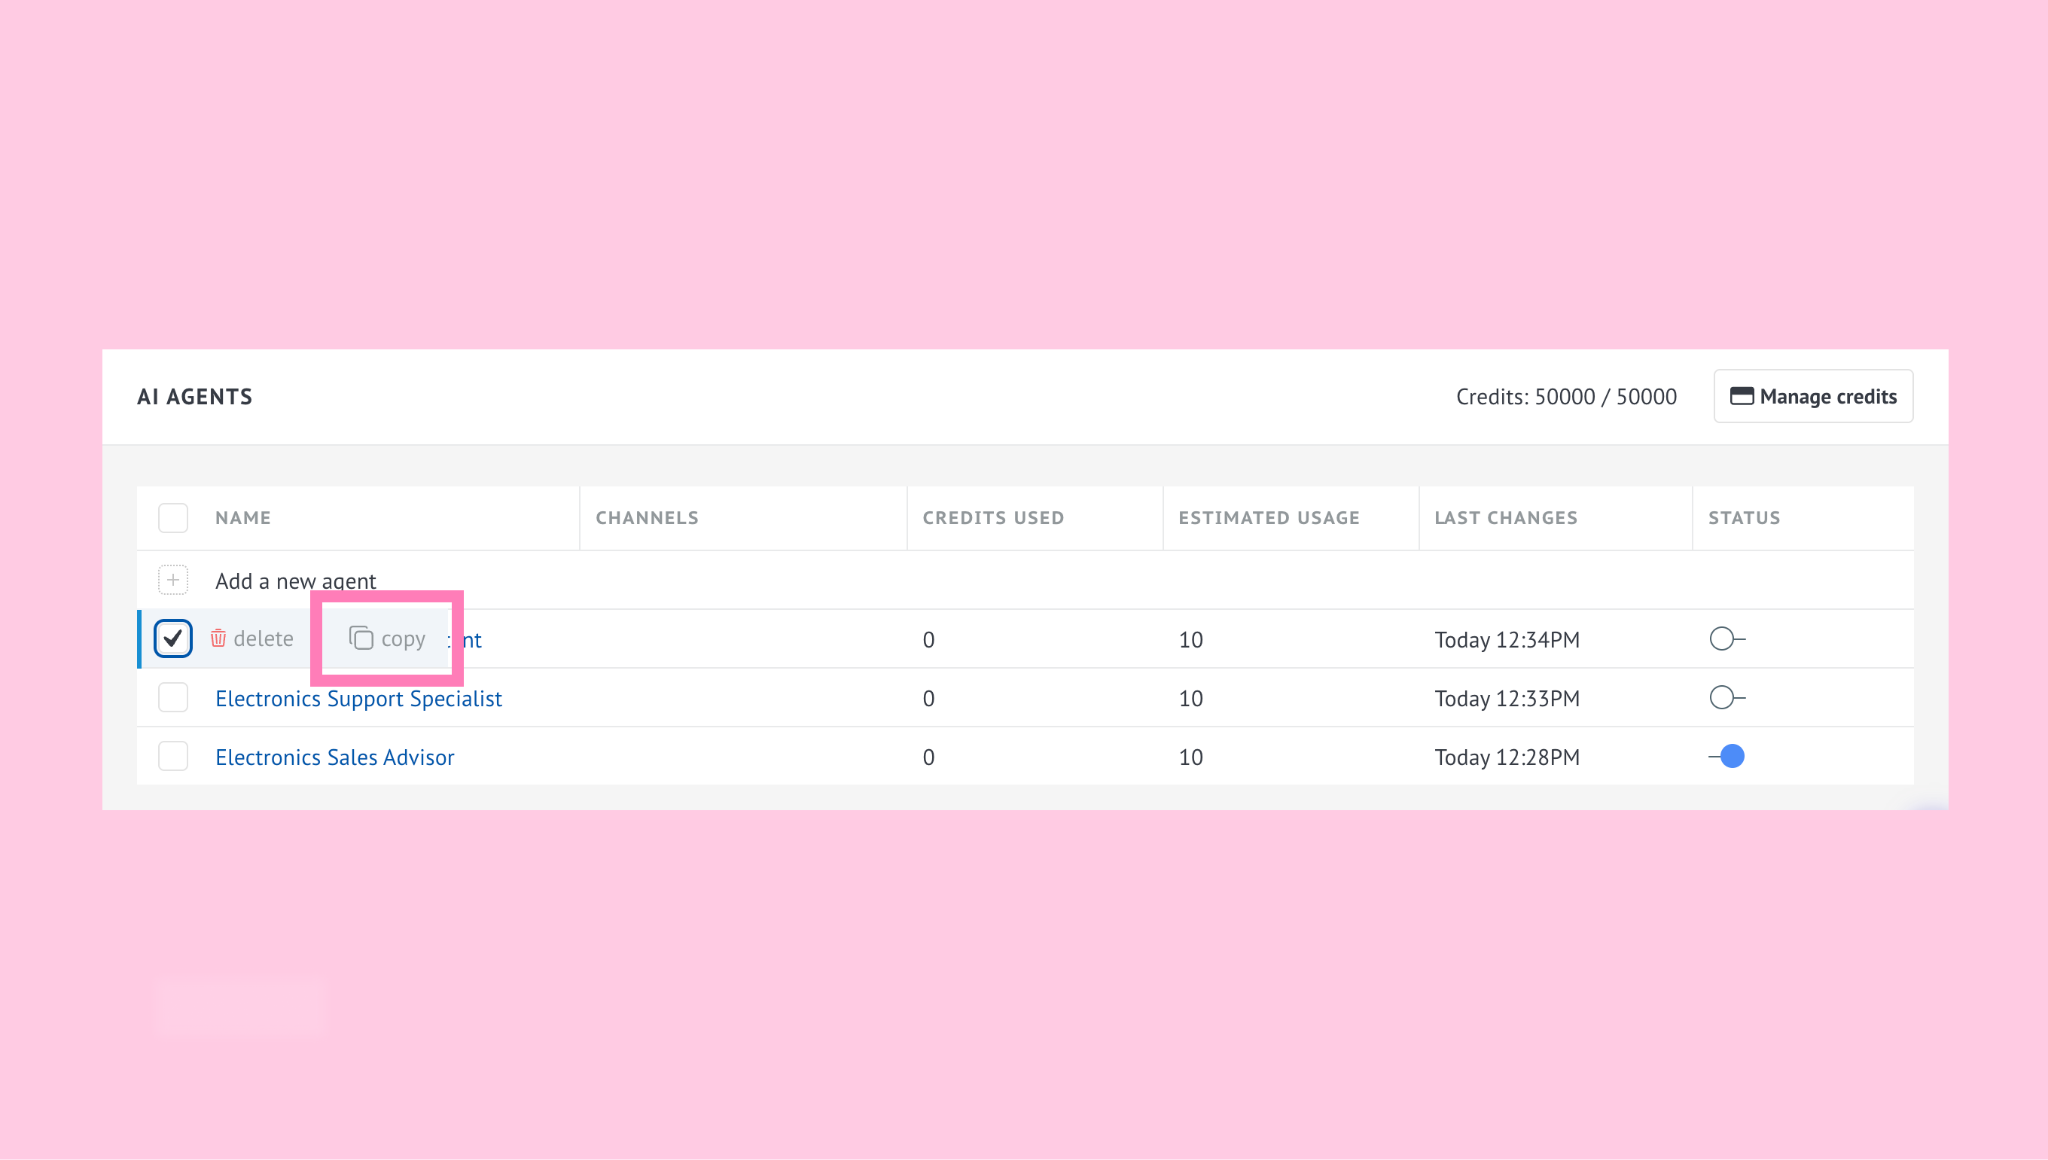
A copy of the selected agent will be created automatically, so you can reuse its setup instead of starting from scratch.
This is useful when creating agents for:
different teams
different languages
different channels
different products or services
different workflows
The copied agent will appear in your list, where you can review and edit it before activating.
To delete an AI agent, click delete.
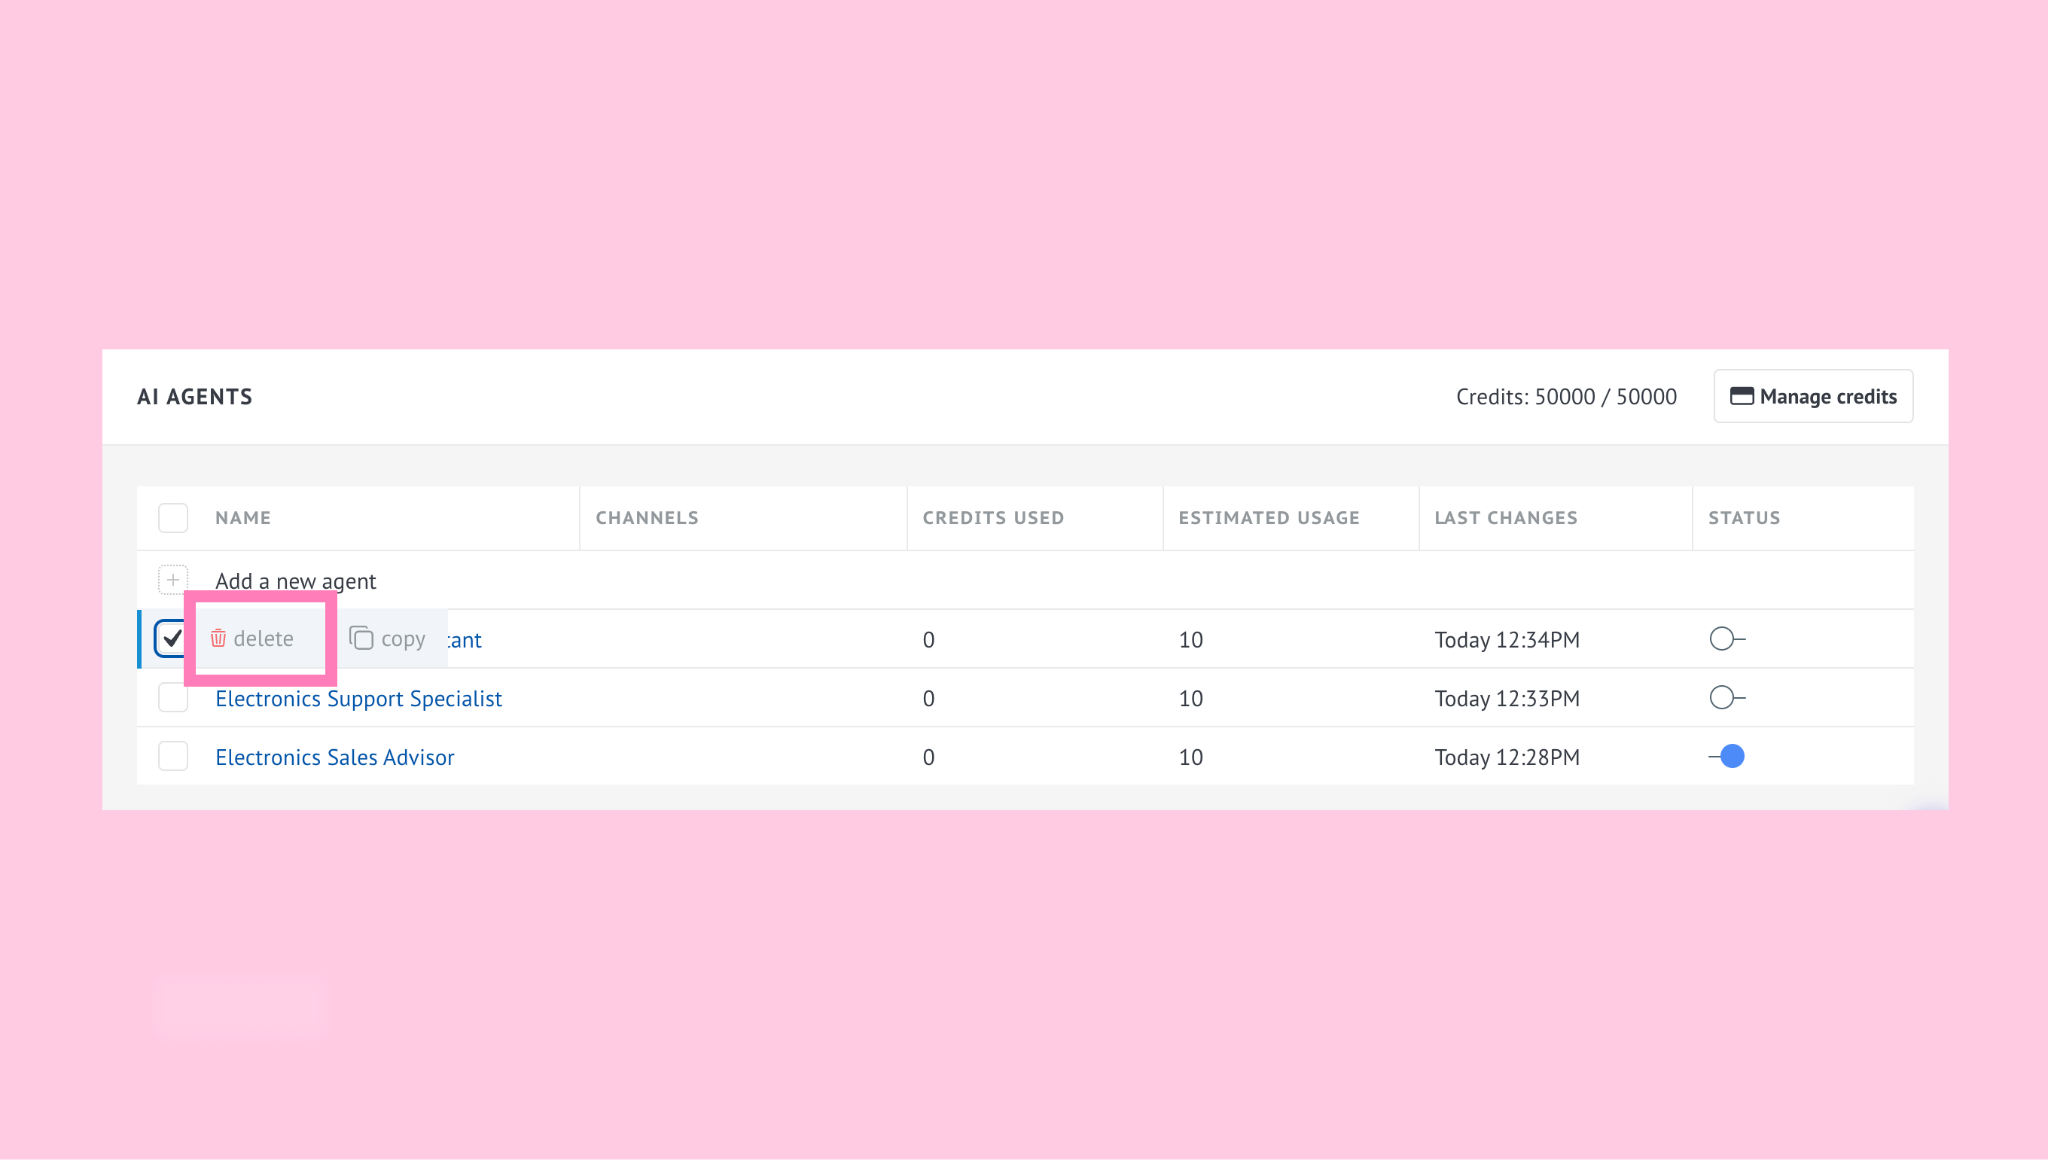
Important: Deleted AI agents can’t be restored.