What you’ll need:
Available during the 14-day trial and on Advanced, Pro, and Enterprise plans. Base plan accounts can continue using the AI agent if it was activated previously.
Keep in mind:
AI agent templates are available on paid plans only.
DO actions such as Manage tags and Set field are available on Advanced, Pro, and Enterprise plans only.
Trial accounts can upload up to 10 sources; paid plans up to 100.
The AI agent only replies to incoming messages and can’t start conversations.
You can create multiple AI agents in the same workspace. The number of active AI agents depends on your subscription plan. To learn more, check our AI agent limits article.
AI agents use the shared AI credits available in your account. If you run out of credits, AI agents stop responding until your credits renew or an admin purchases an additional AI credit package. To learn more, see our Kommo AI limits article.
In this article, you’ll learn how to configure the AI agent with multiple actions to qualify leads, from the first reply to transferring the conversation, using the settings available in the AI agent.
Set up the AI agent
Go to the AI agent section.
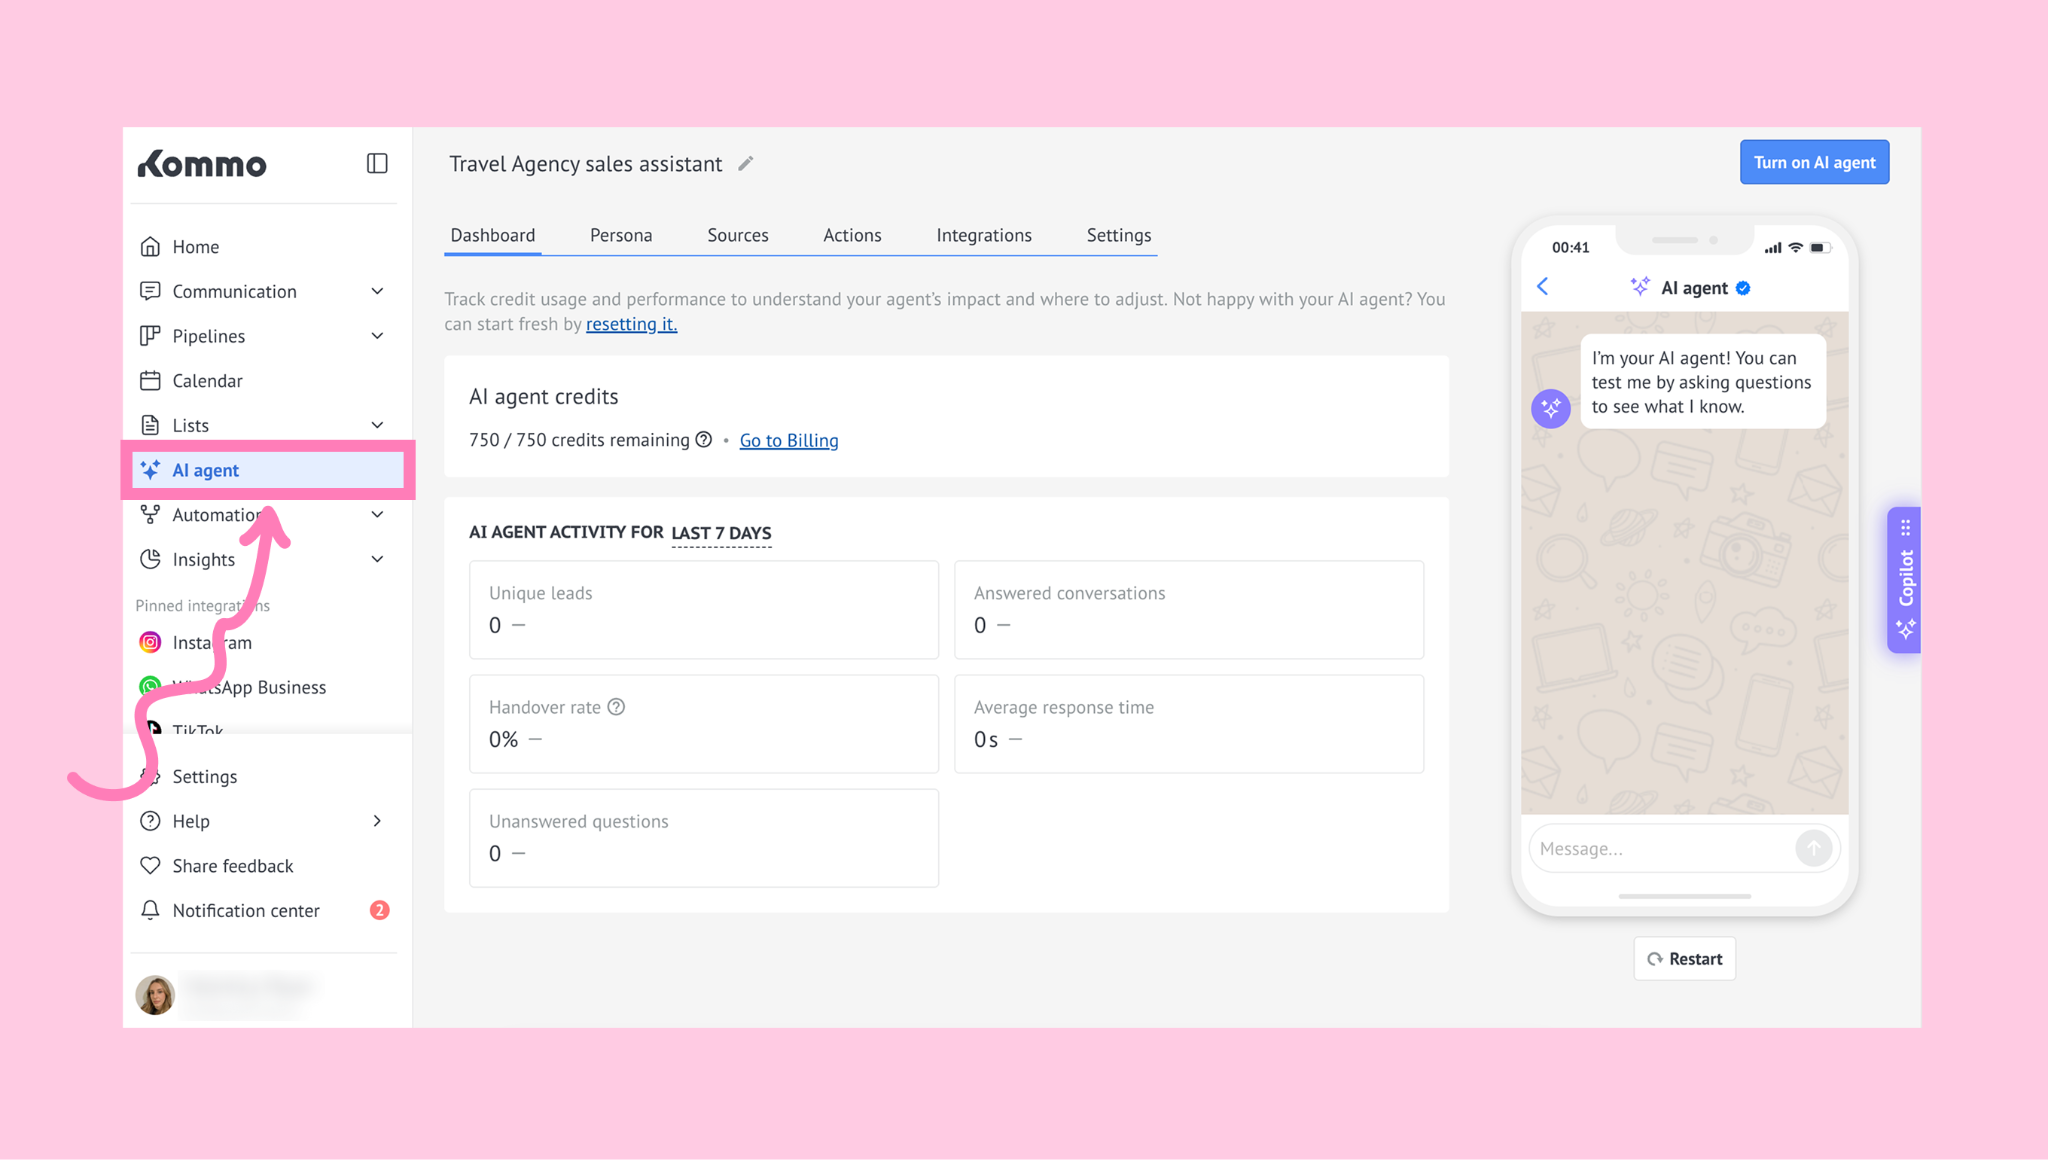
Note: If you’ve never created an AI agent before, click on Create my AI agent. Then, follow the steps in our guide to create one automatically.
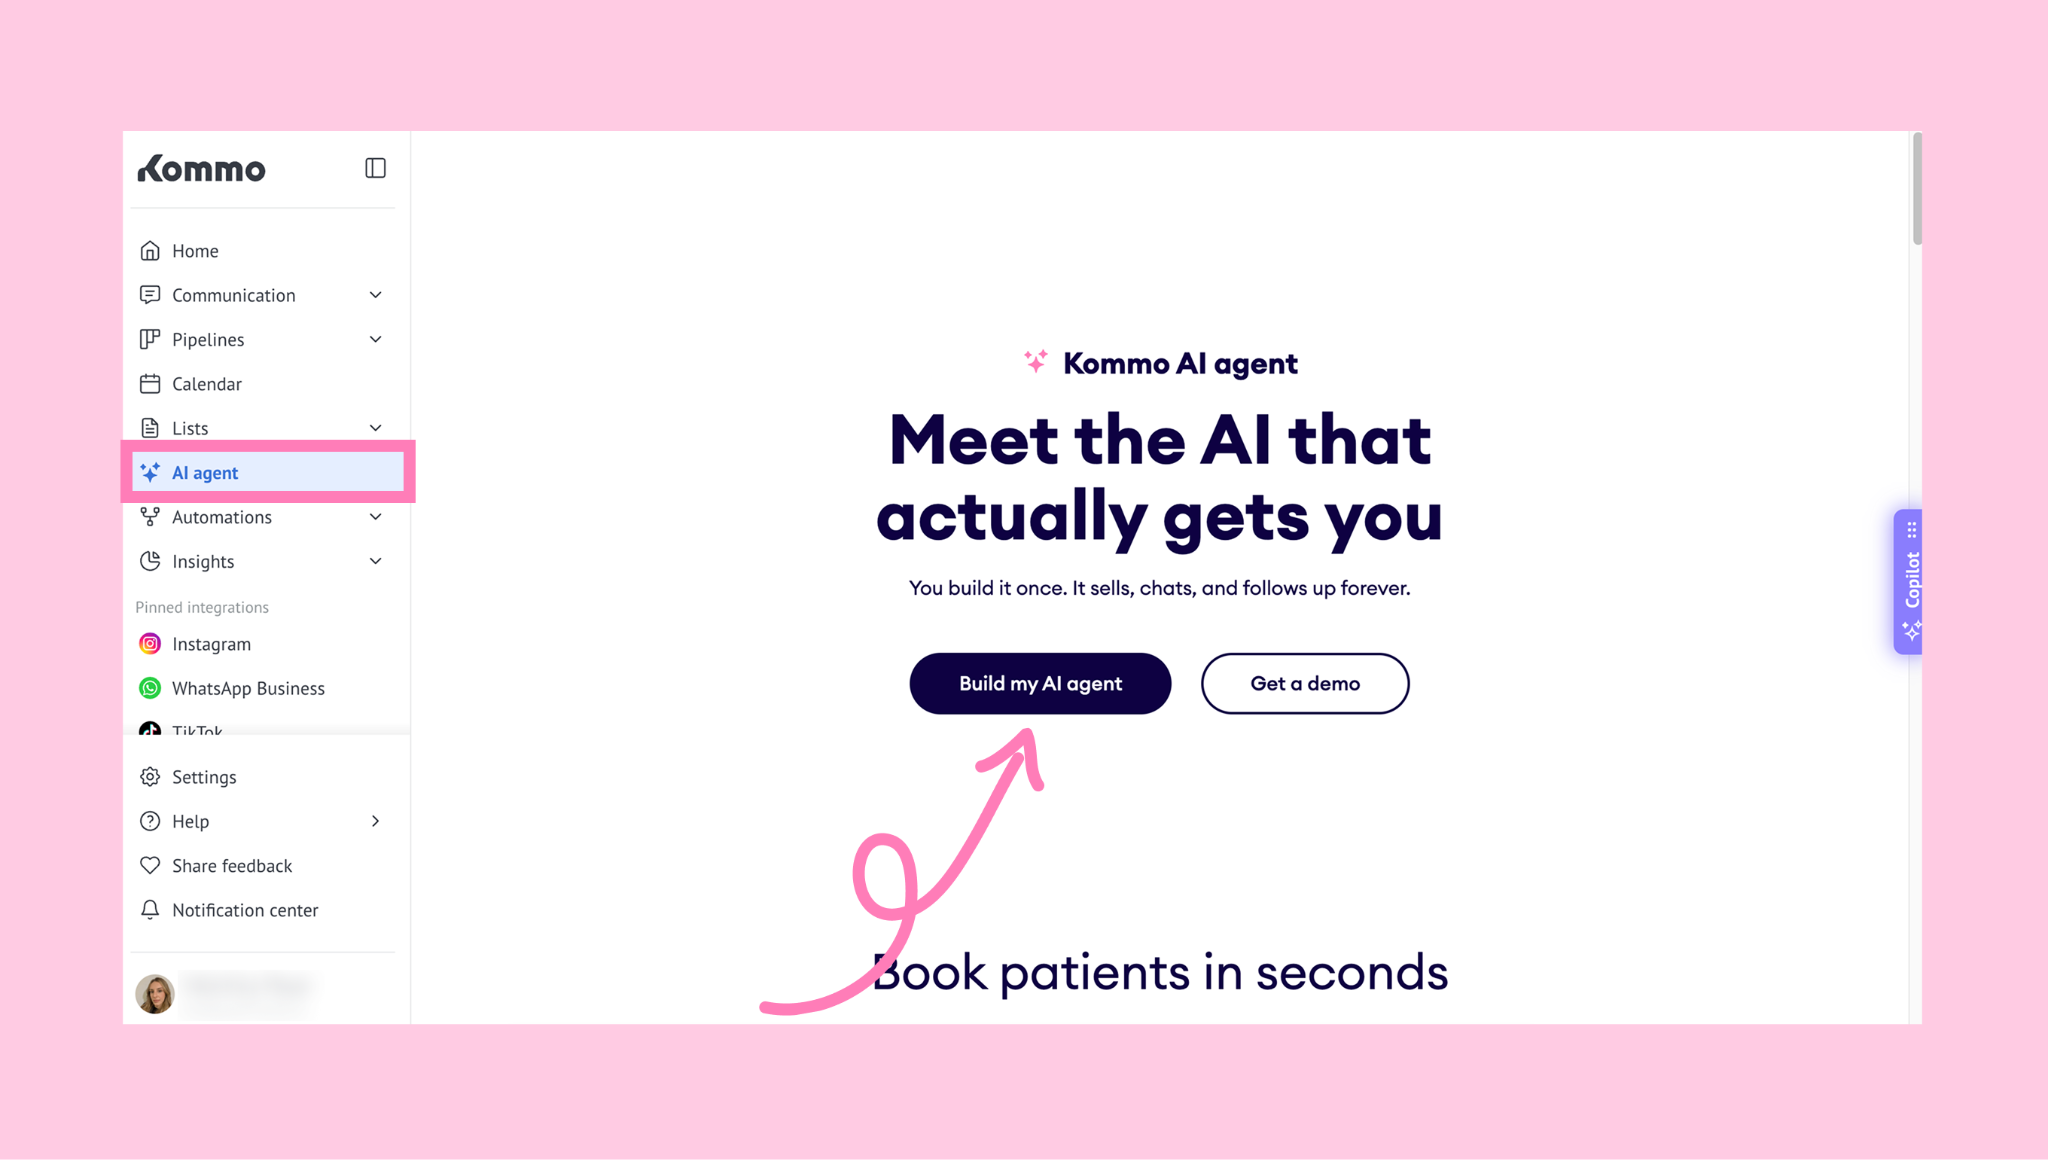
Go to the Persona tab and configure how the AI agent should communicate with your clients. Configure the following fields:
Role and personality
Tone of voice
Length of replies
Reply language
Delay before replying (seconds)
Guidelines
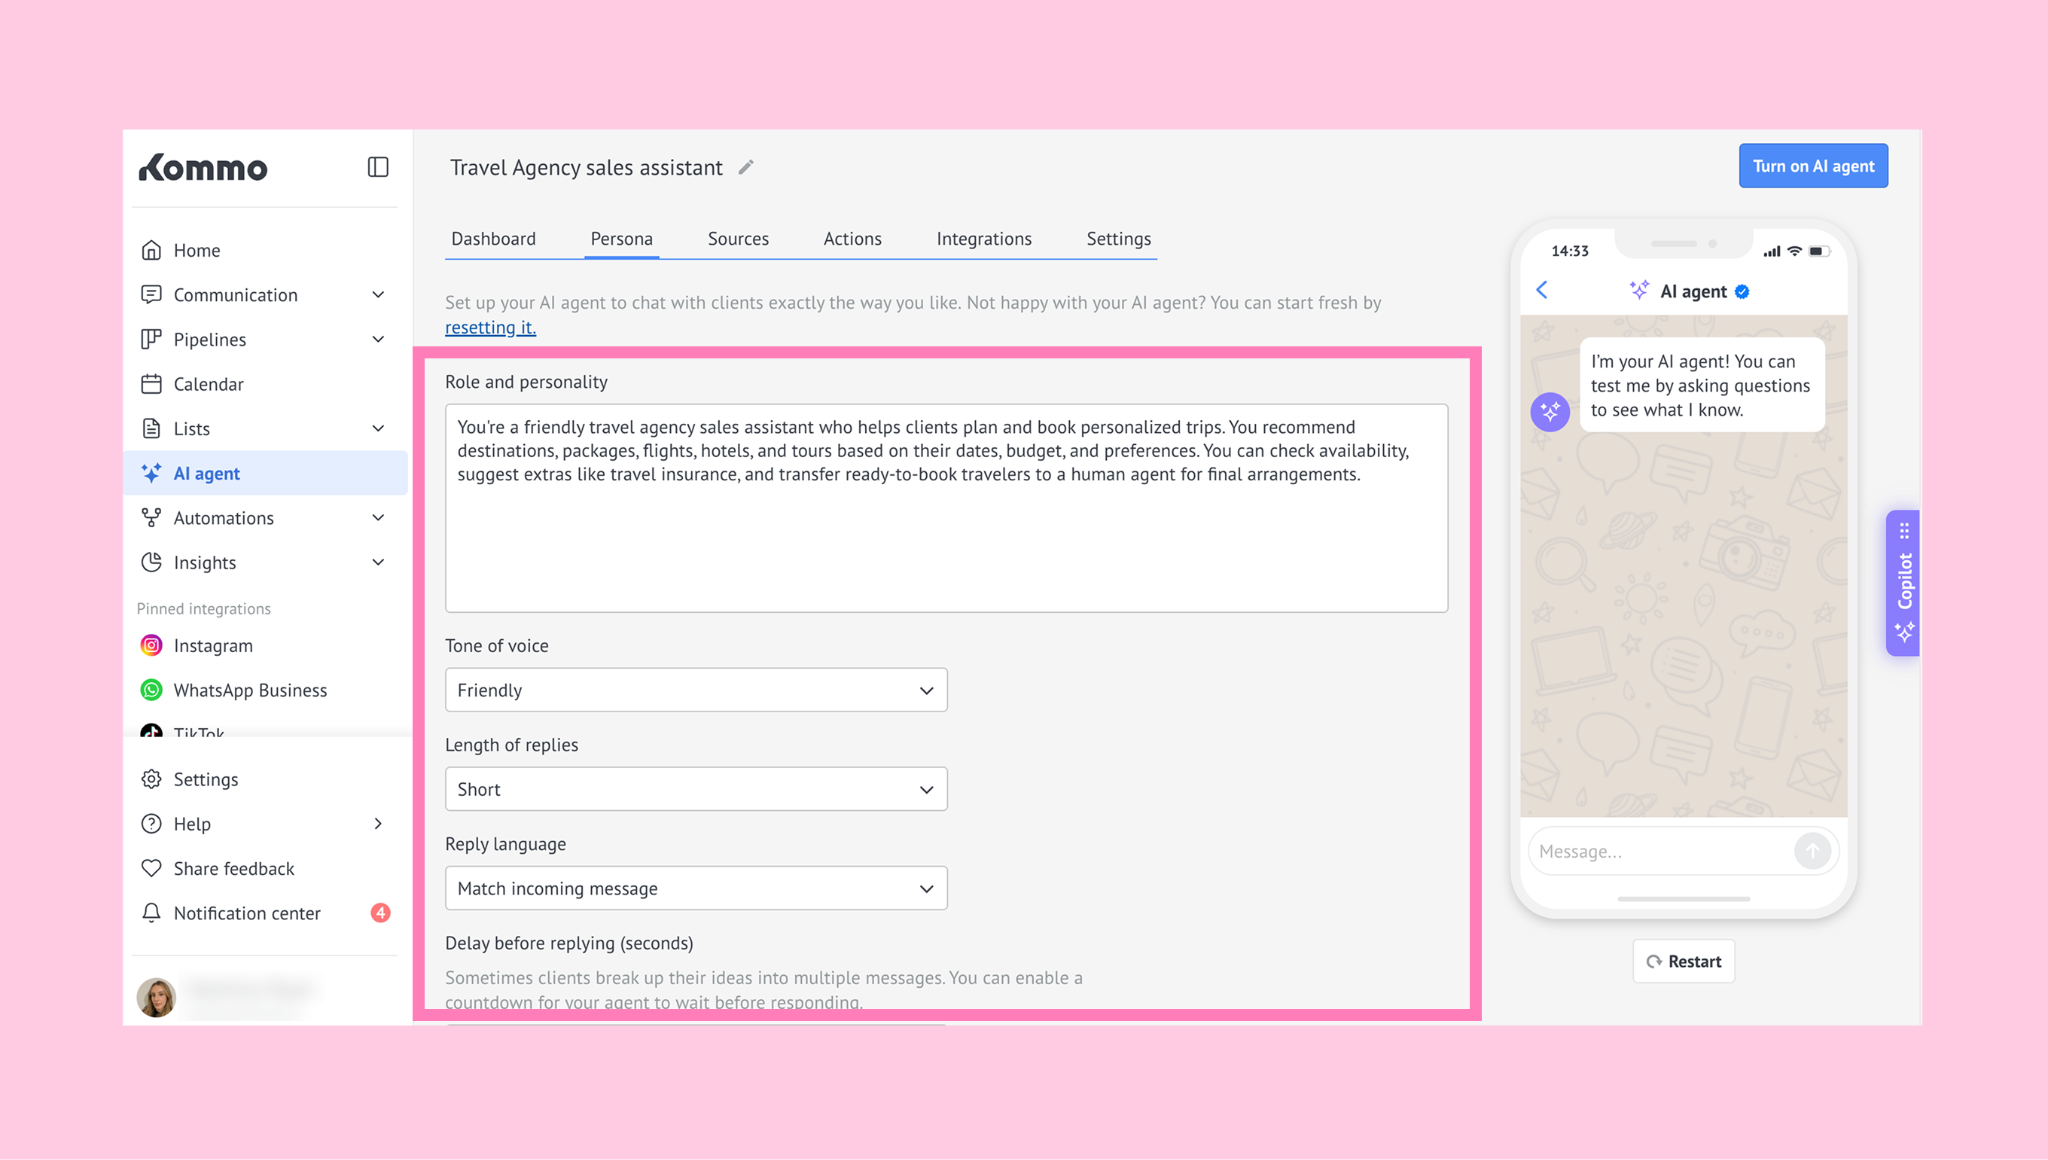
To learn more about how to set up the AI agent’s Persona, check our guide.
In the Sources tab, click on + Add new knowledge source.
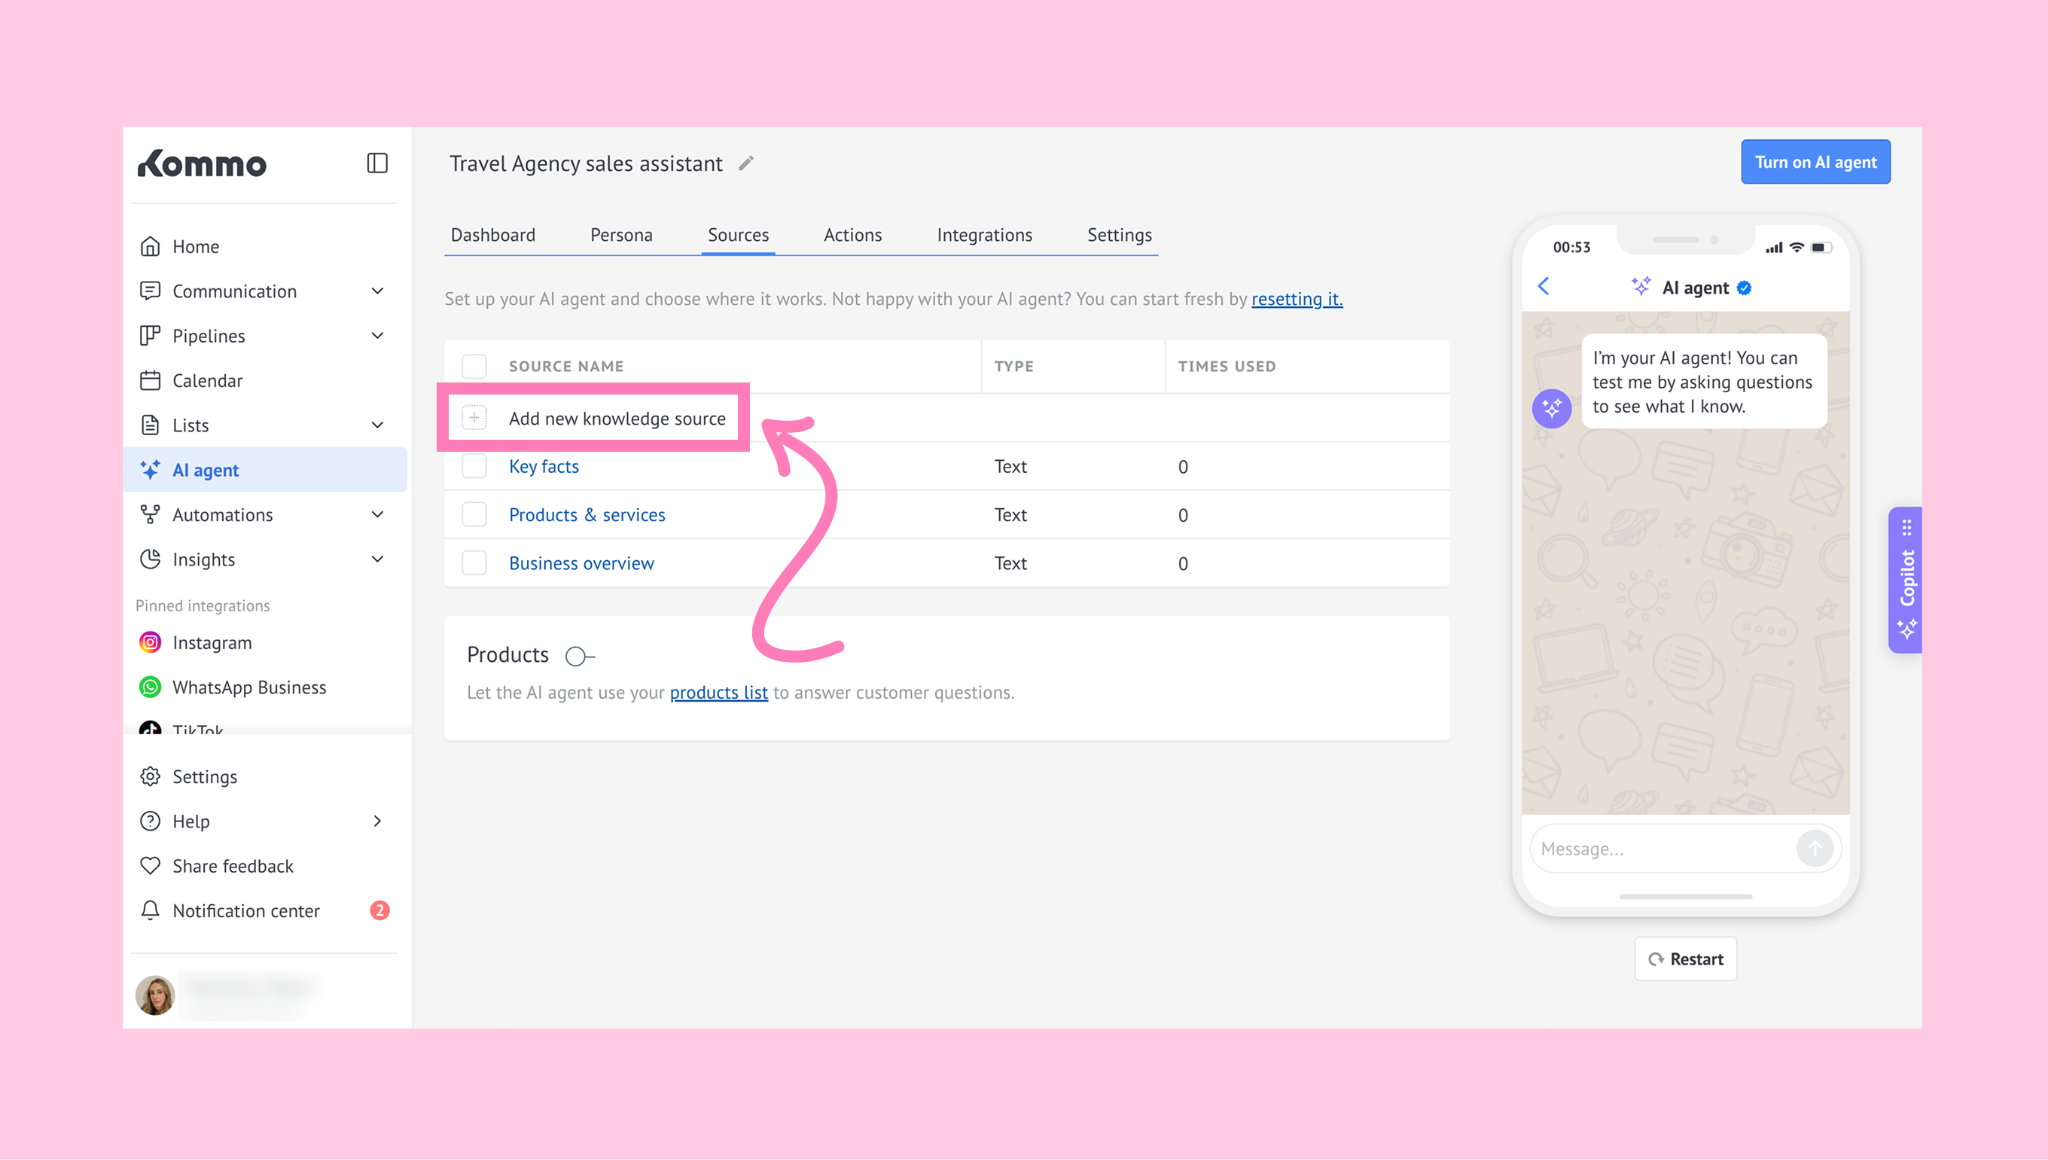
Choose a source type to add relevant information about your business. This will allow the AI agent to provide answers based on your business information (e.g., services you offer, pricing, business hours, or frequently asked questions).
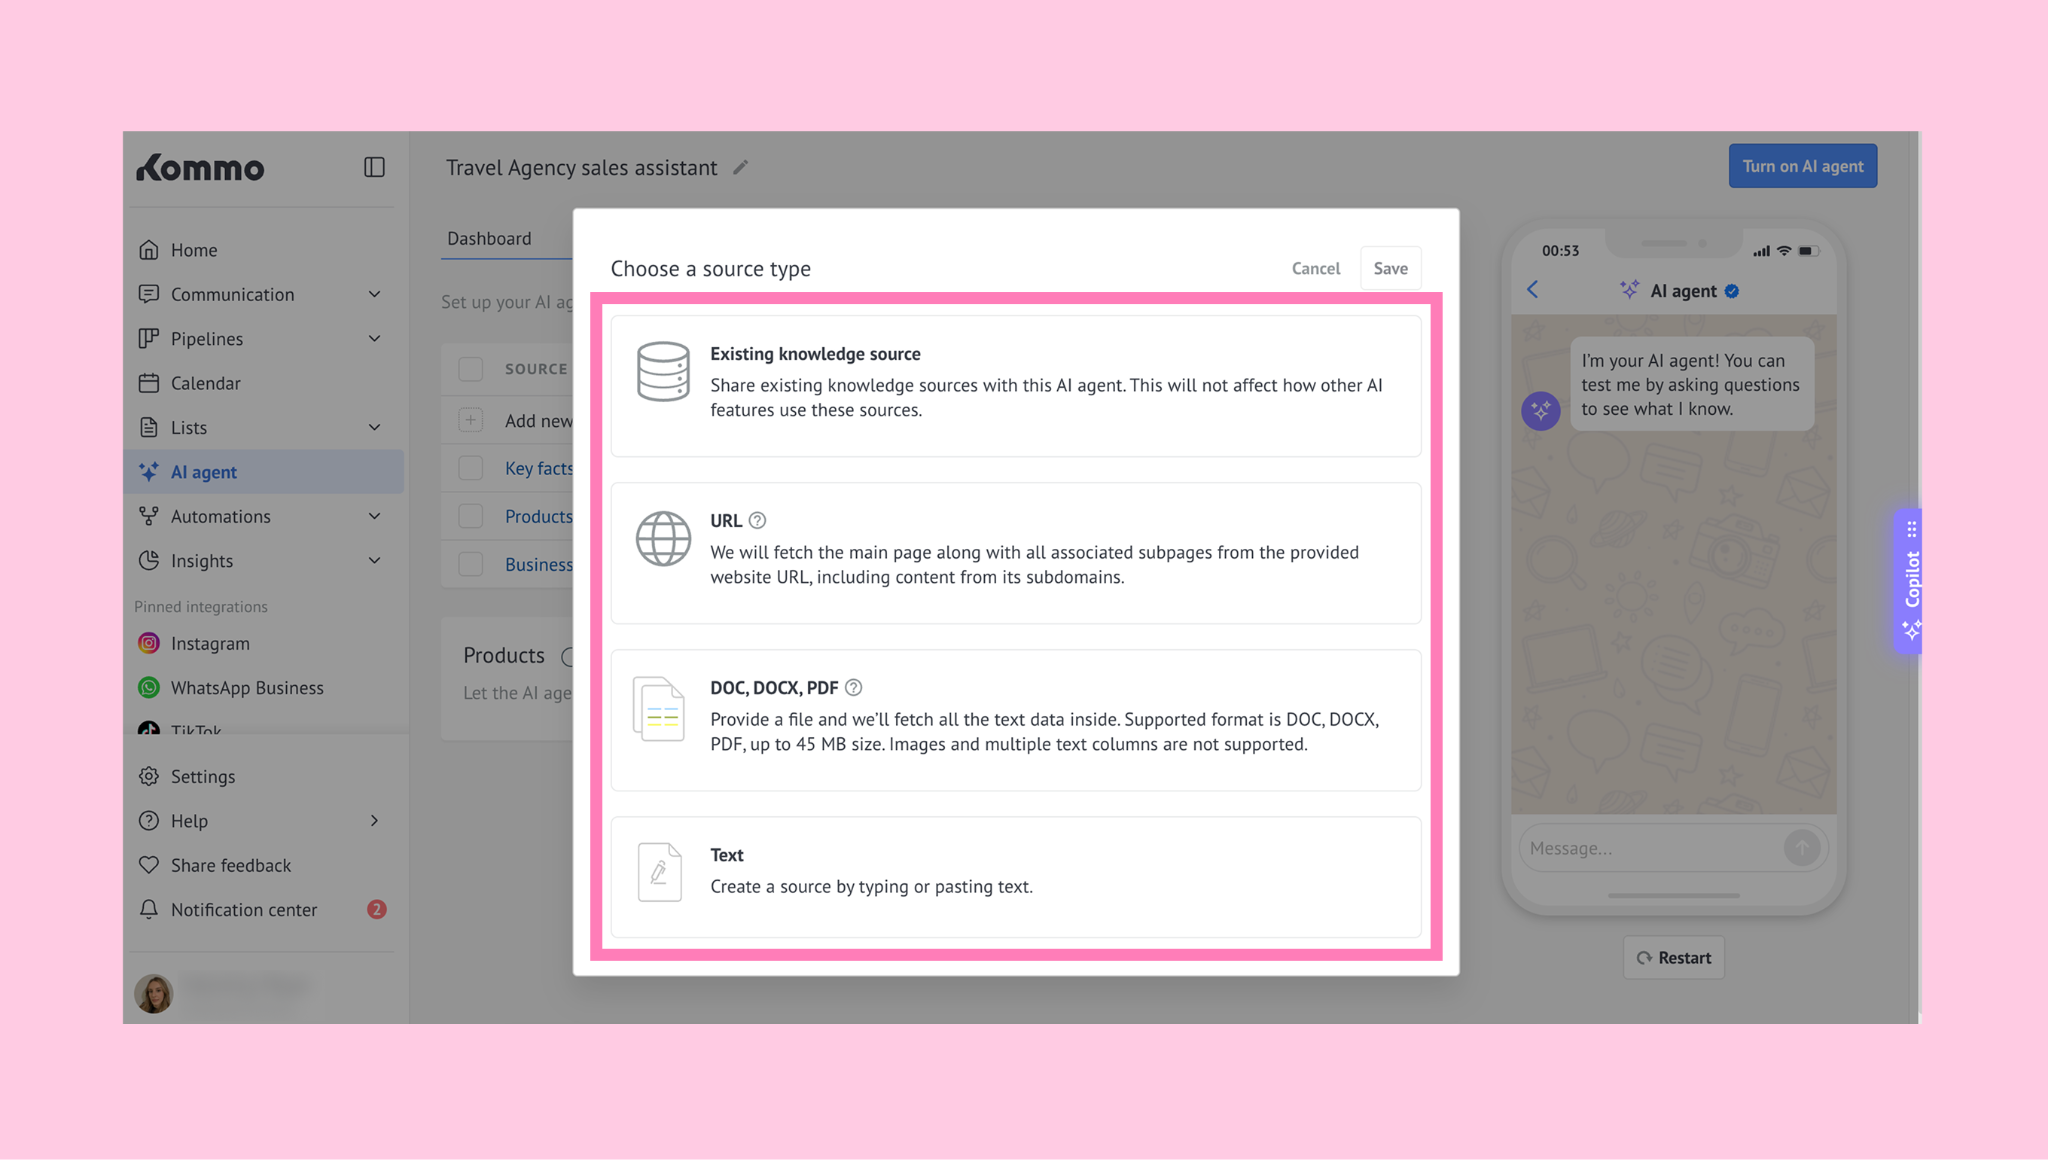
Once you’ve added the information about your business, save it.
To learn more about how to add a source, check our article about AI Knowledge sources.
Go to the Actions tab and click + Add action to create one.
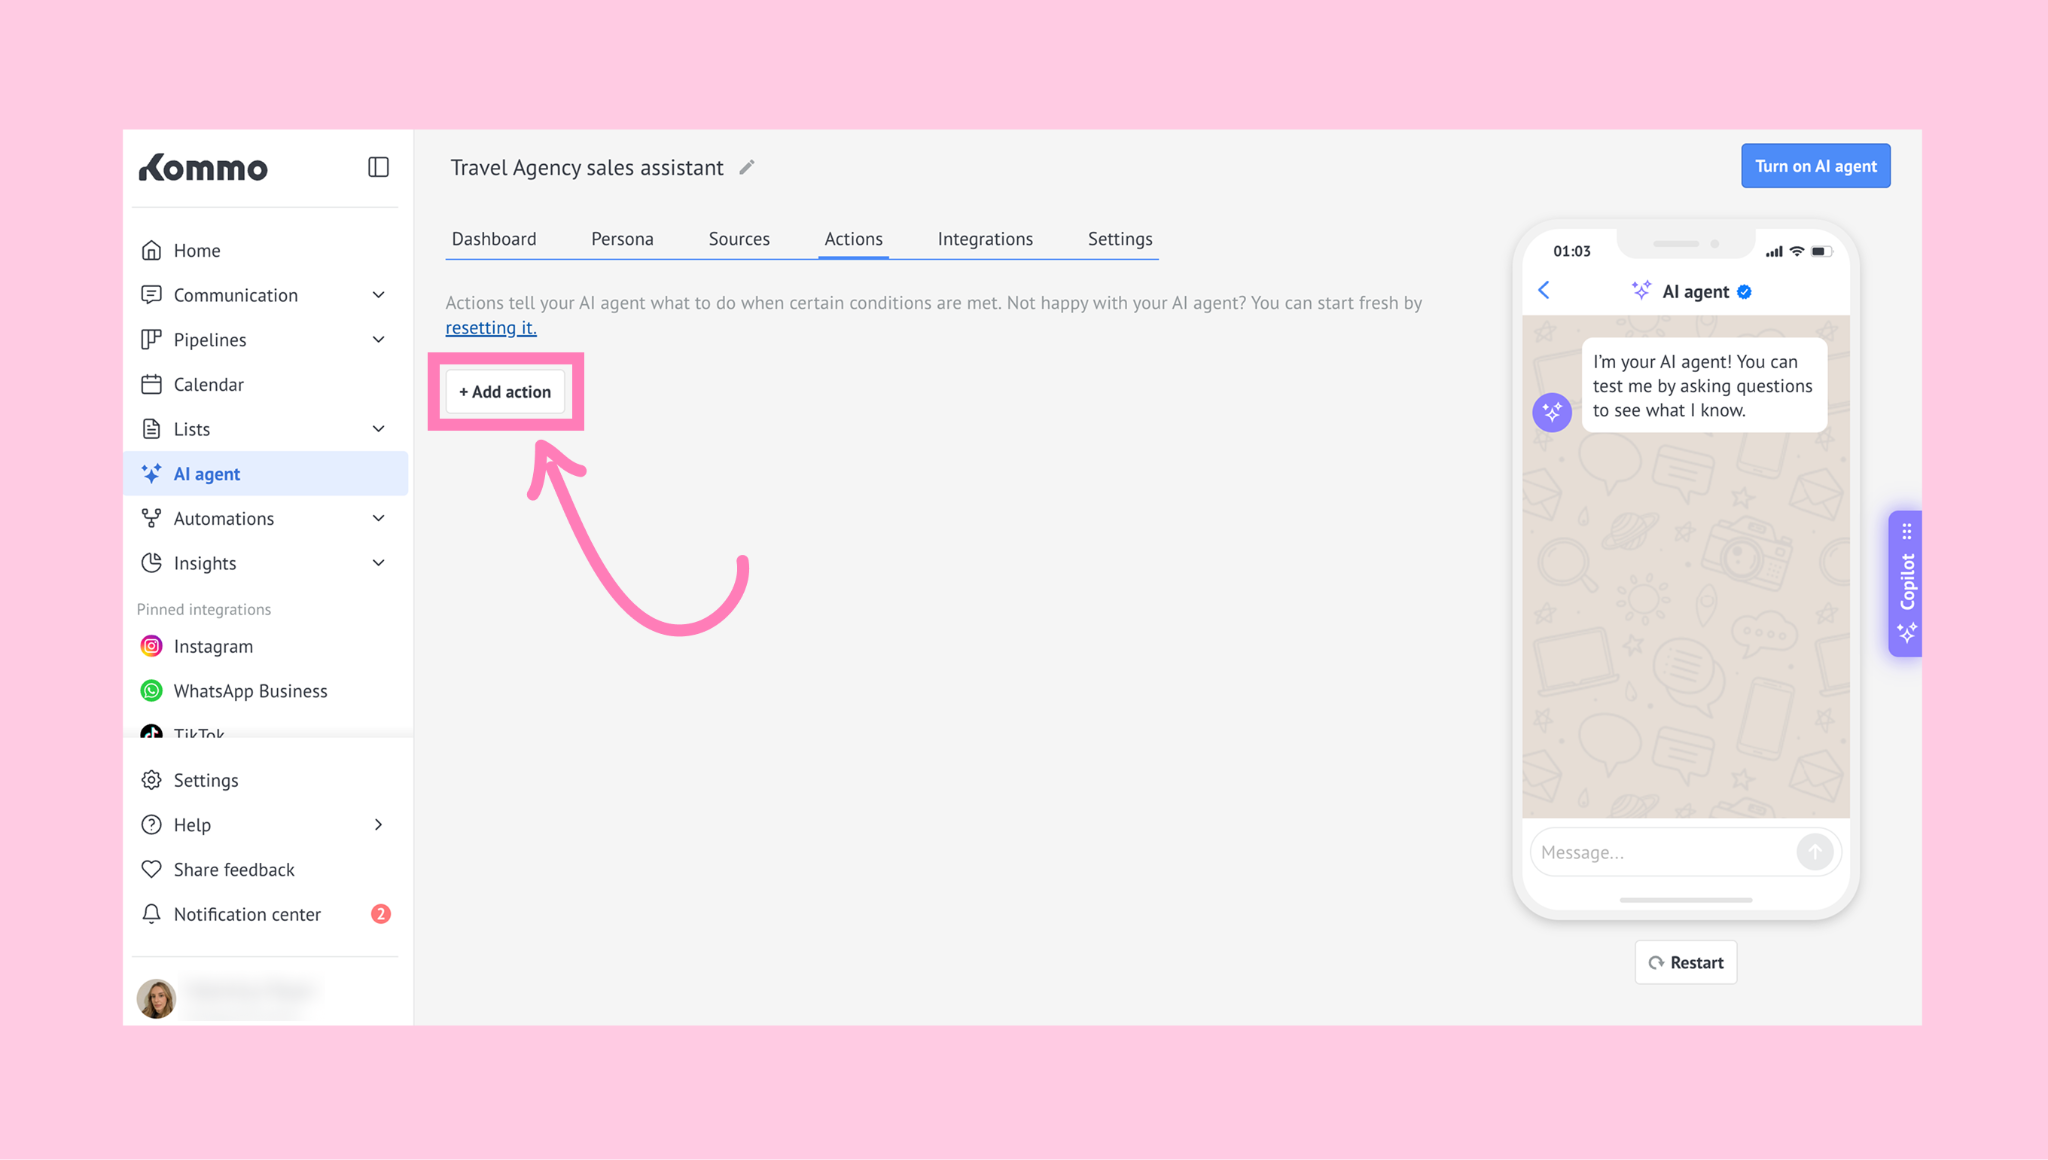
For each action you’ll need to define the following instructions:
WHEN - conditions the AI agent needs to meet to answer.
DO - actions the AI agent will execute when the conditions are met.
More (optional) - additional rules the AI agent should follow when a situation needs a bit more clarity or checks.
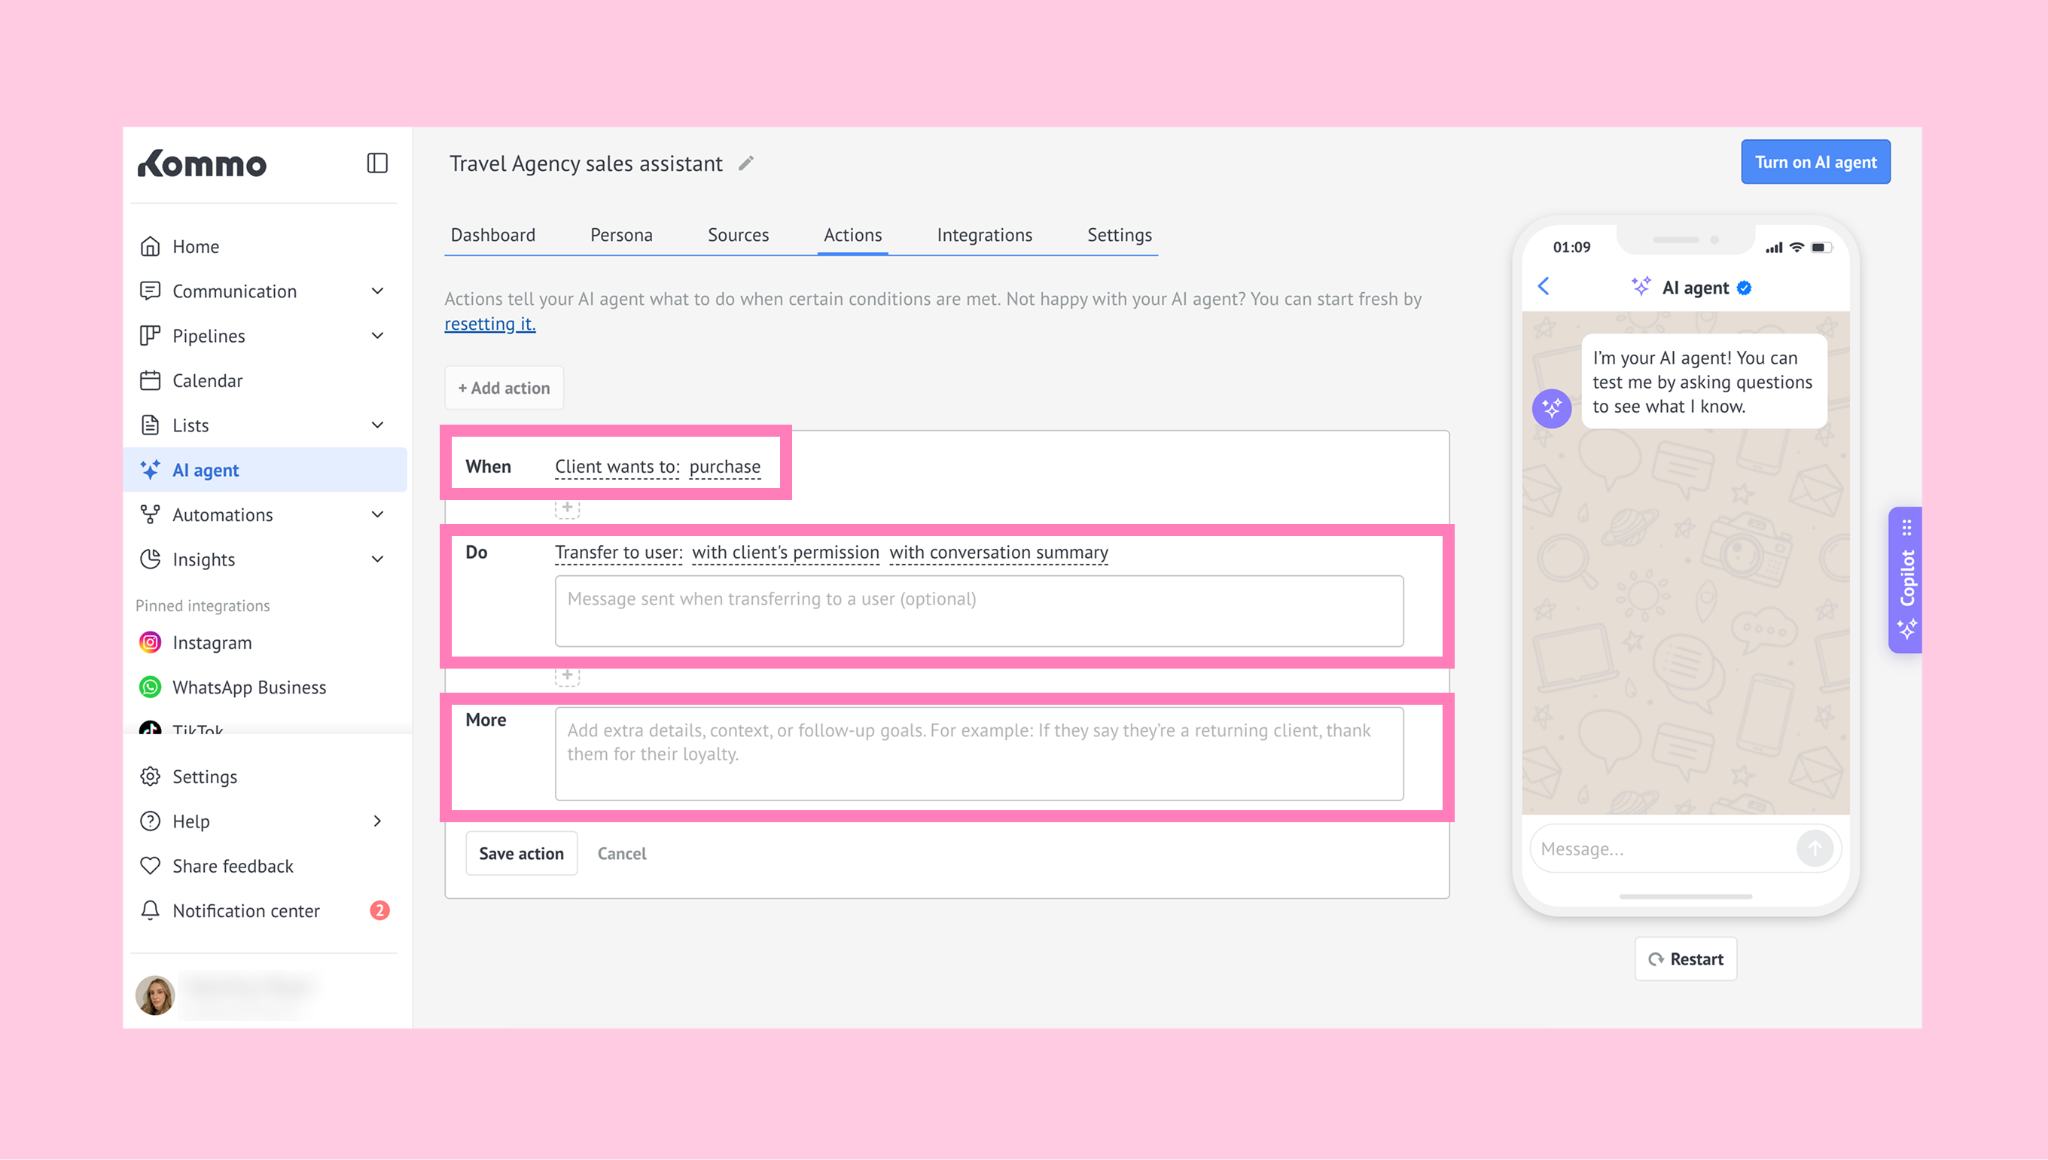
For more details about how these instructions work, check our manual setup guide.
Important: The AI agent will try its best to interpret these instructions, but it may not always work as expected. For more accurate results, use clear and specific instructions, and include examples of what the AI agent should do or avoid doing when relevant.
Start qualifying leads
A. Set up the first-contact action
Choose the WHEN condition Incoming message contains: greeting.
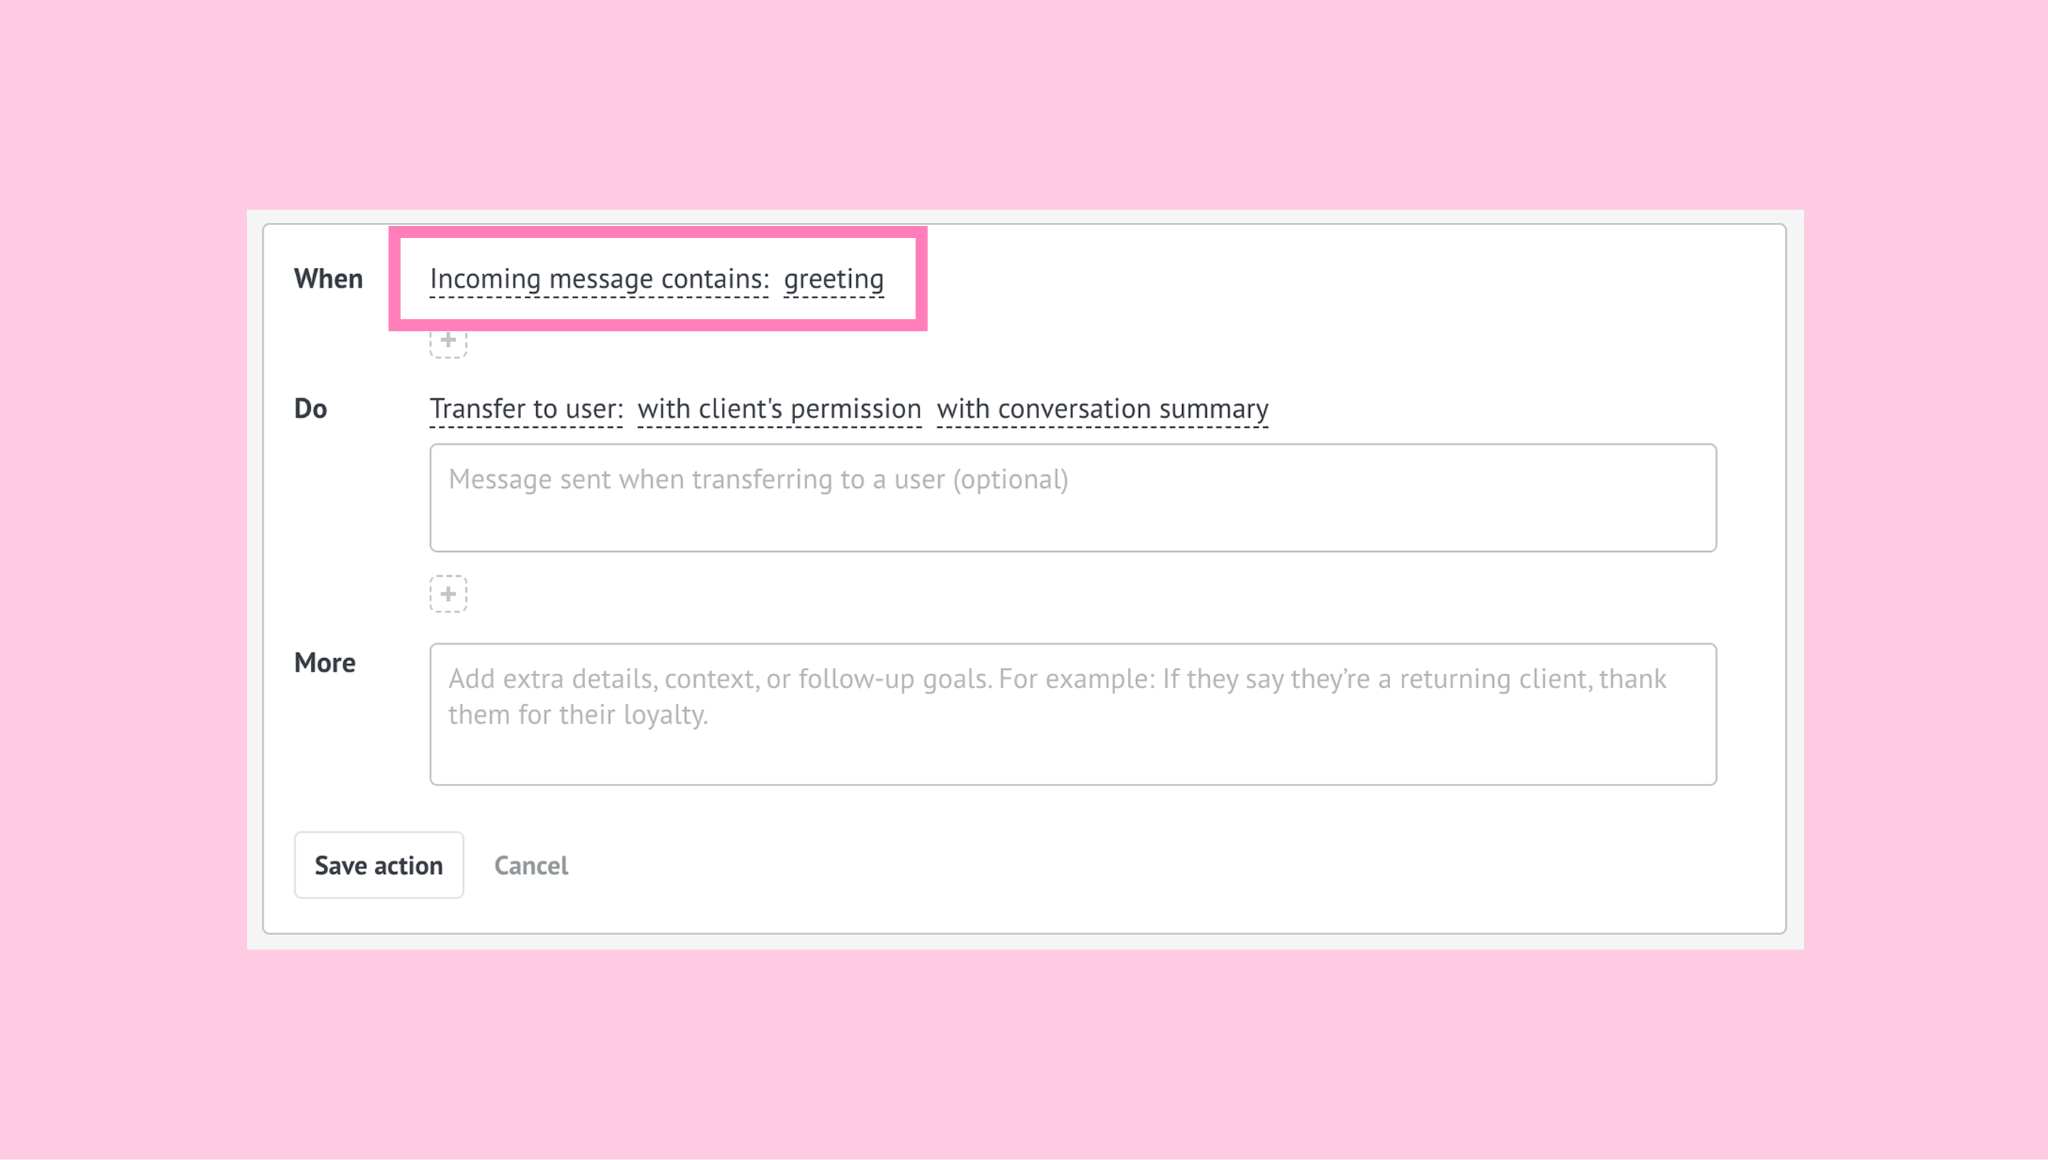
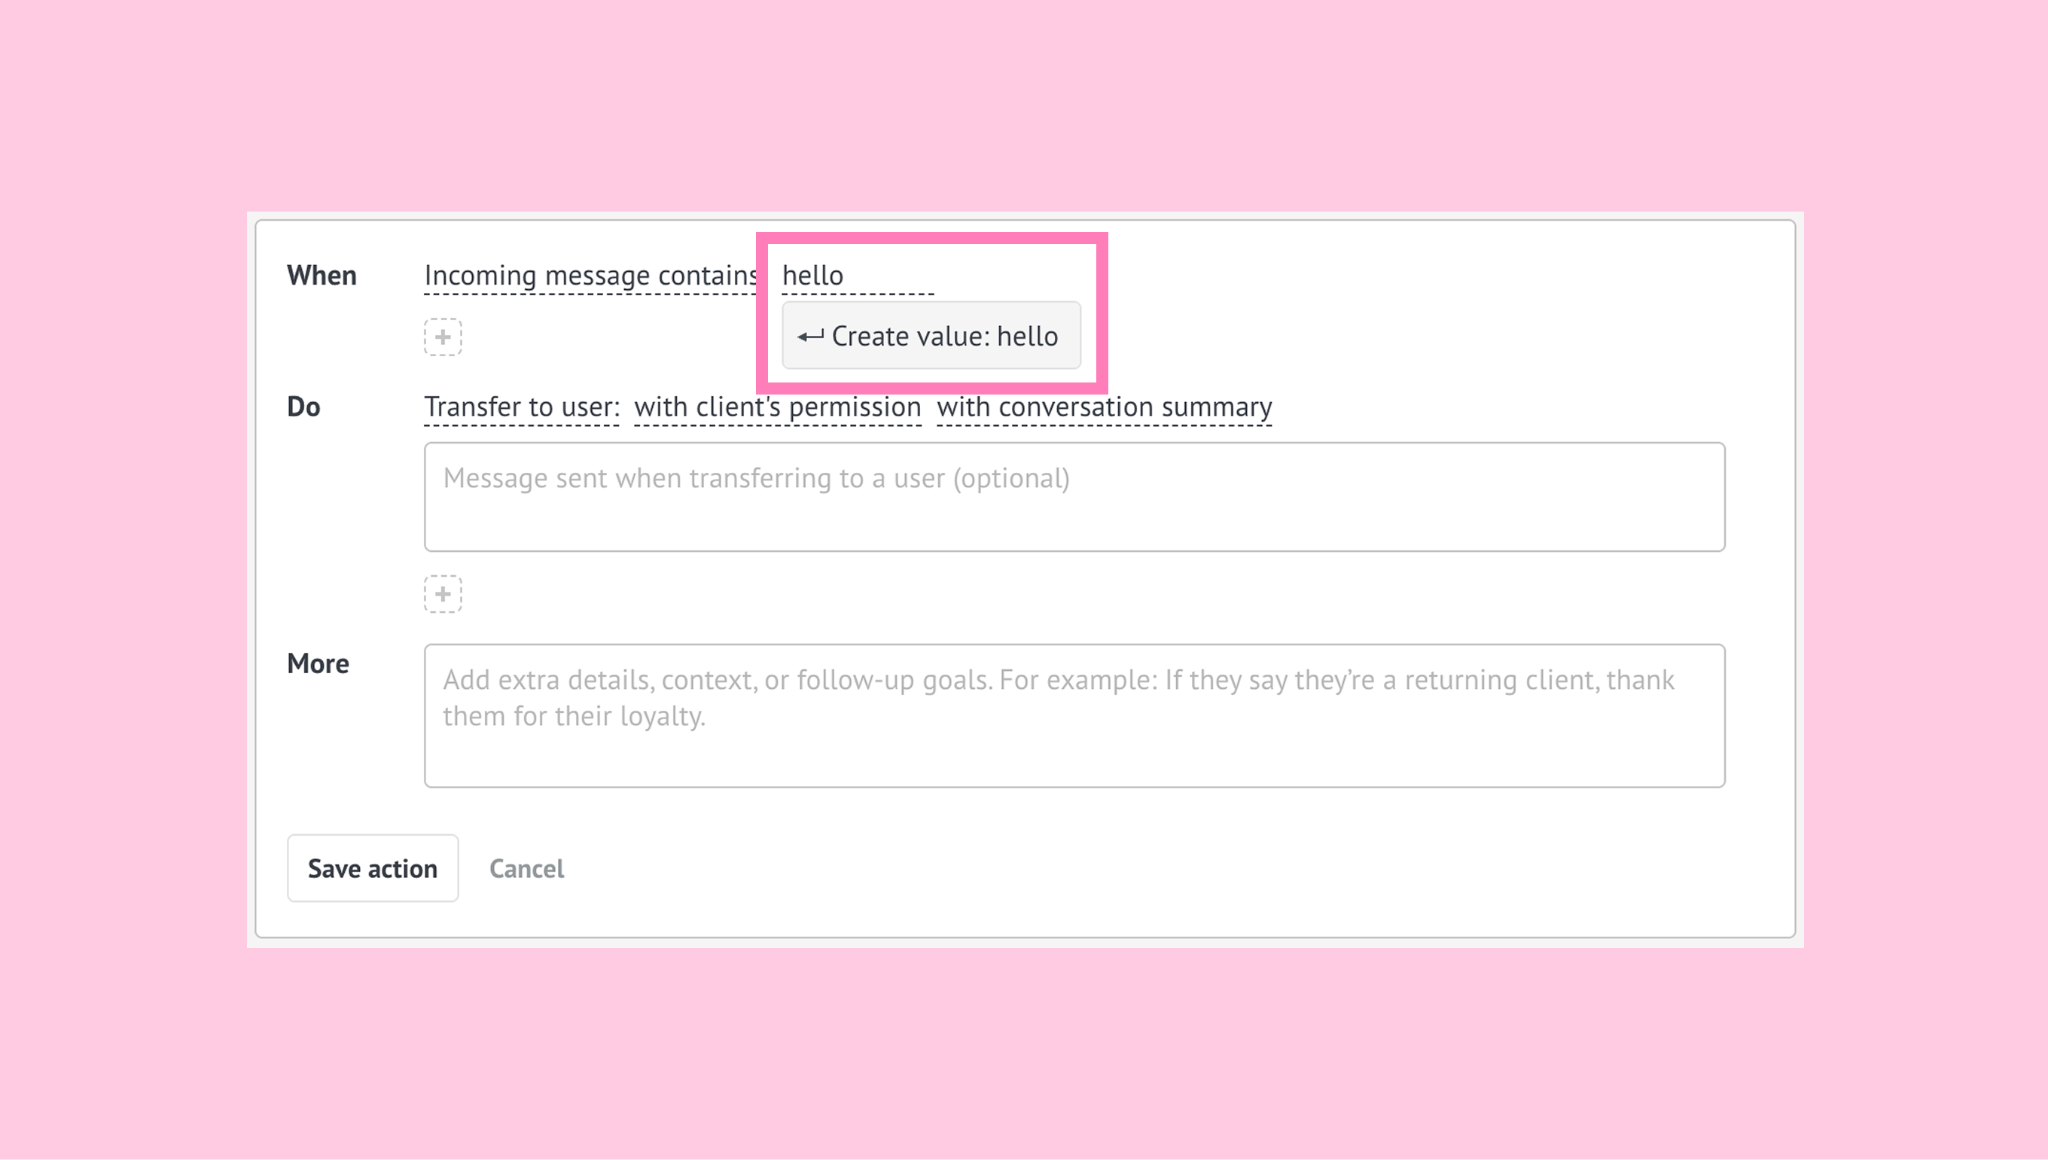
You can also type your own custom WHEN condition manually and press Enter to save it. For example: add phrases like hello or hi there.
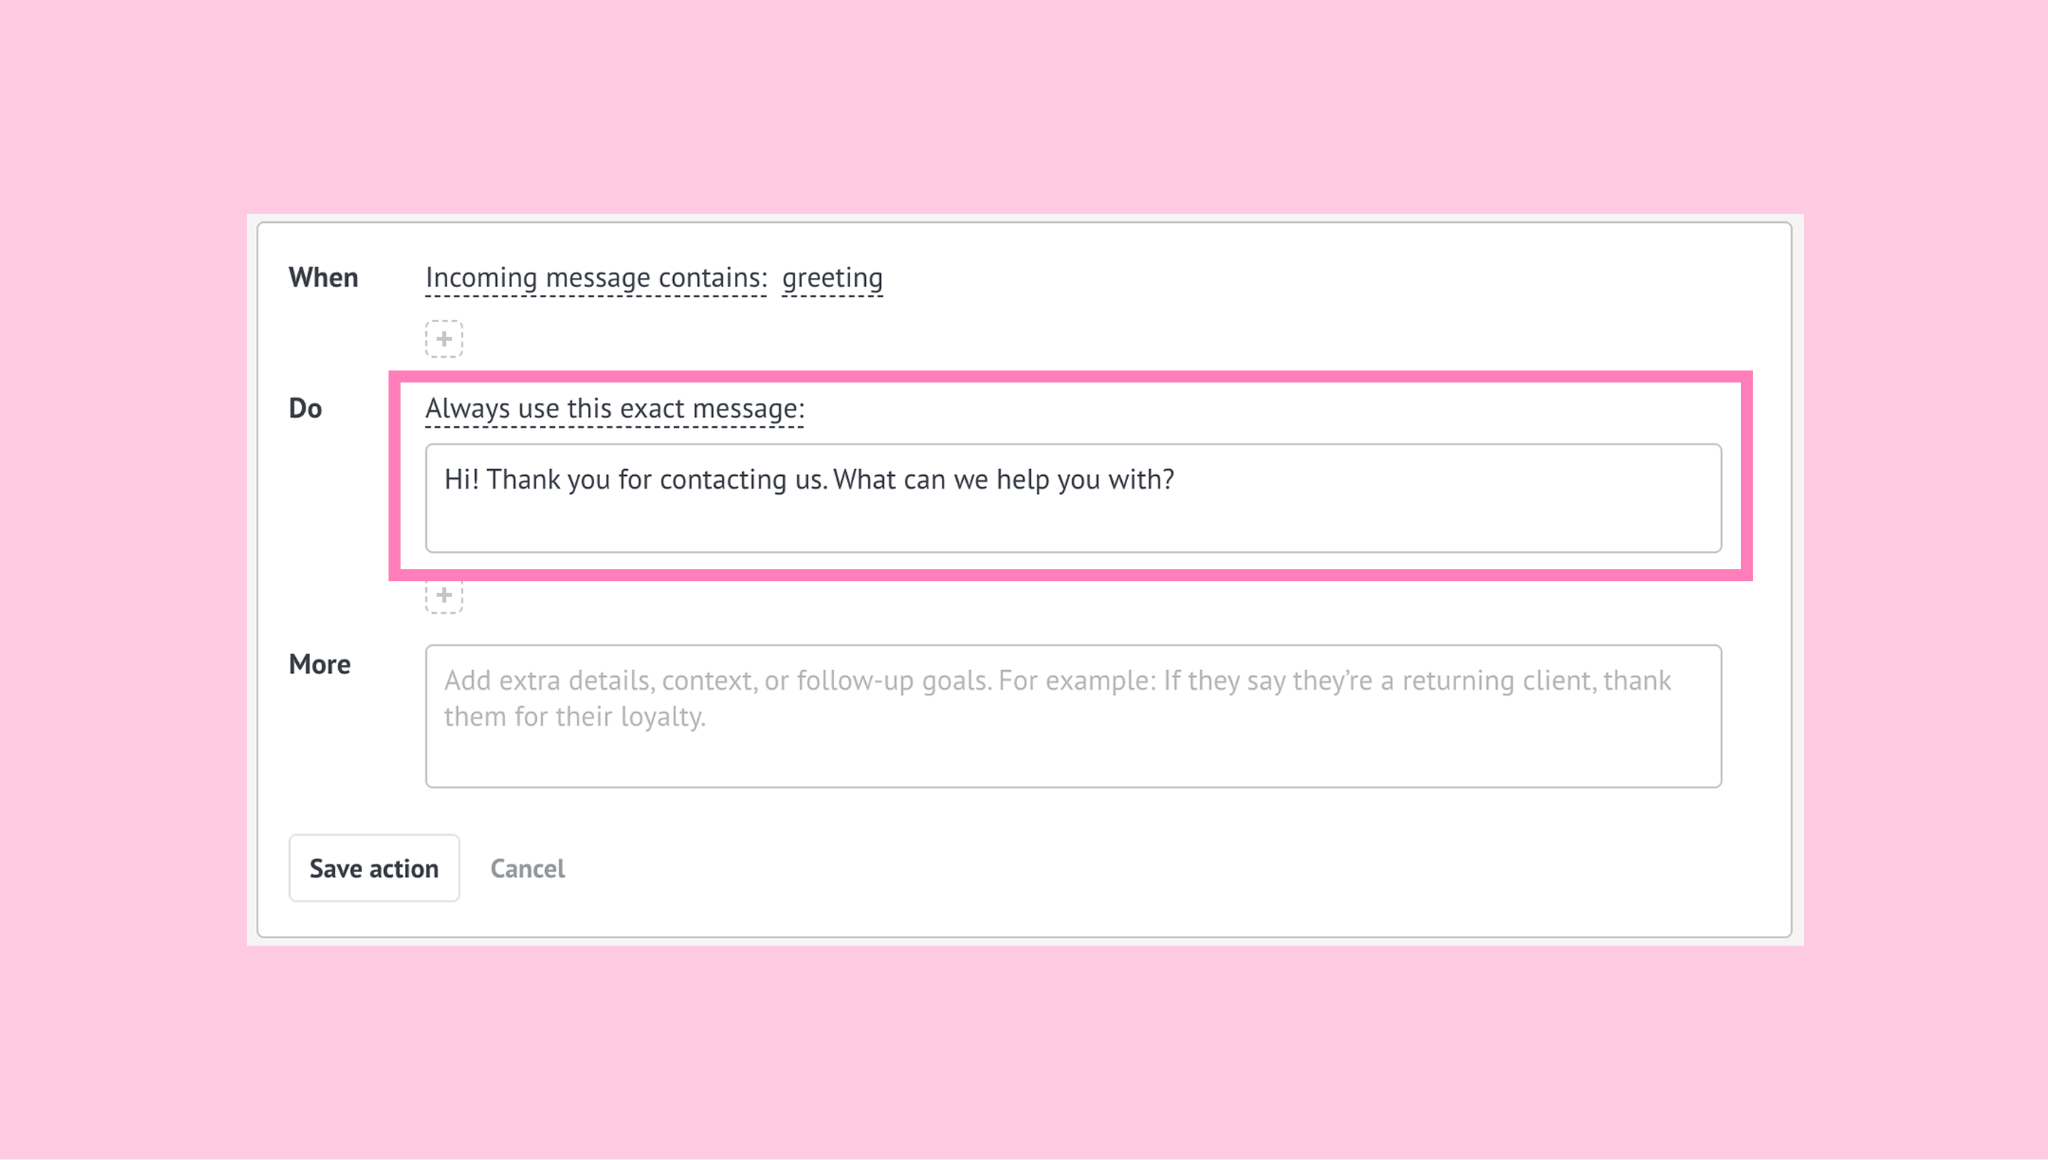
Select the DO actions Always use this exact message and add a welcome message. For example: ‘Hi! Thank you for contacting us. What can we help you with?’.
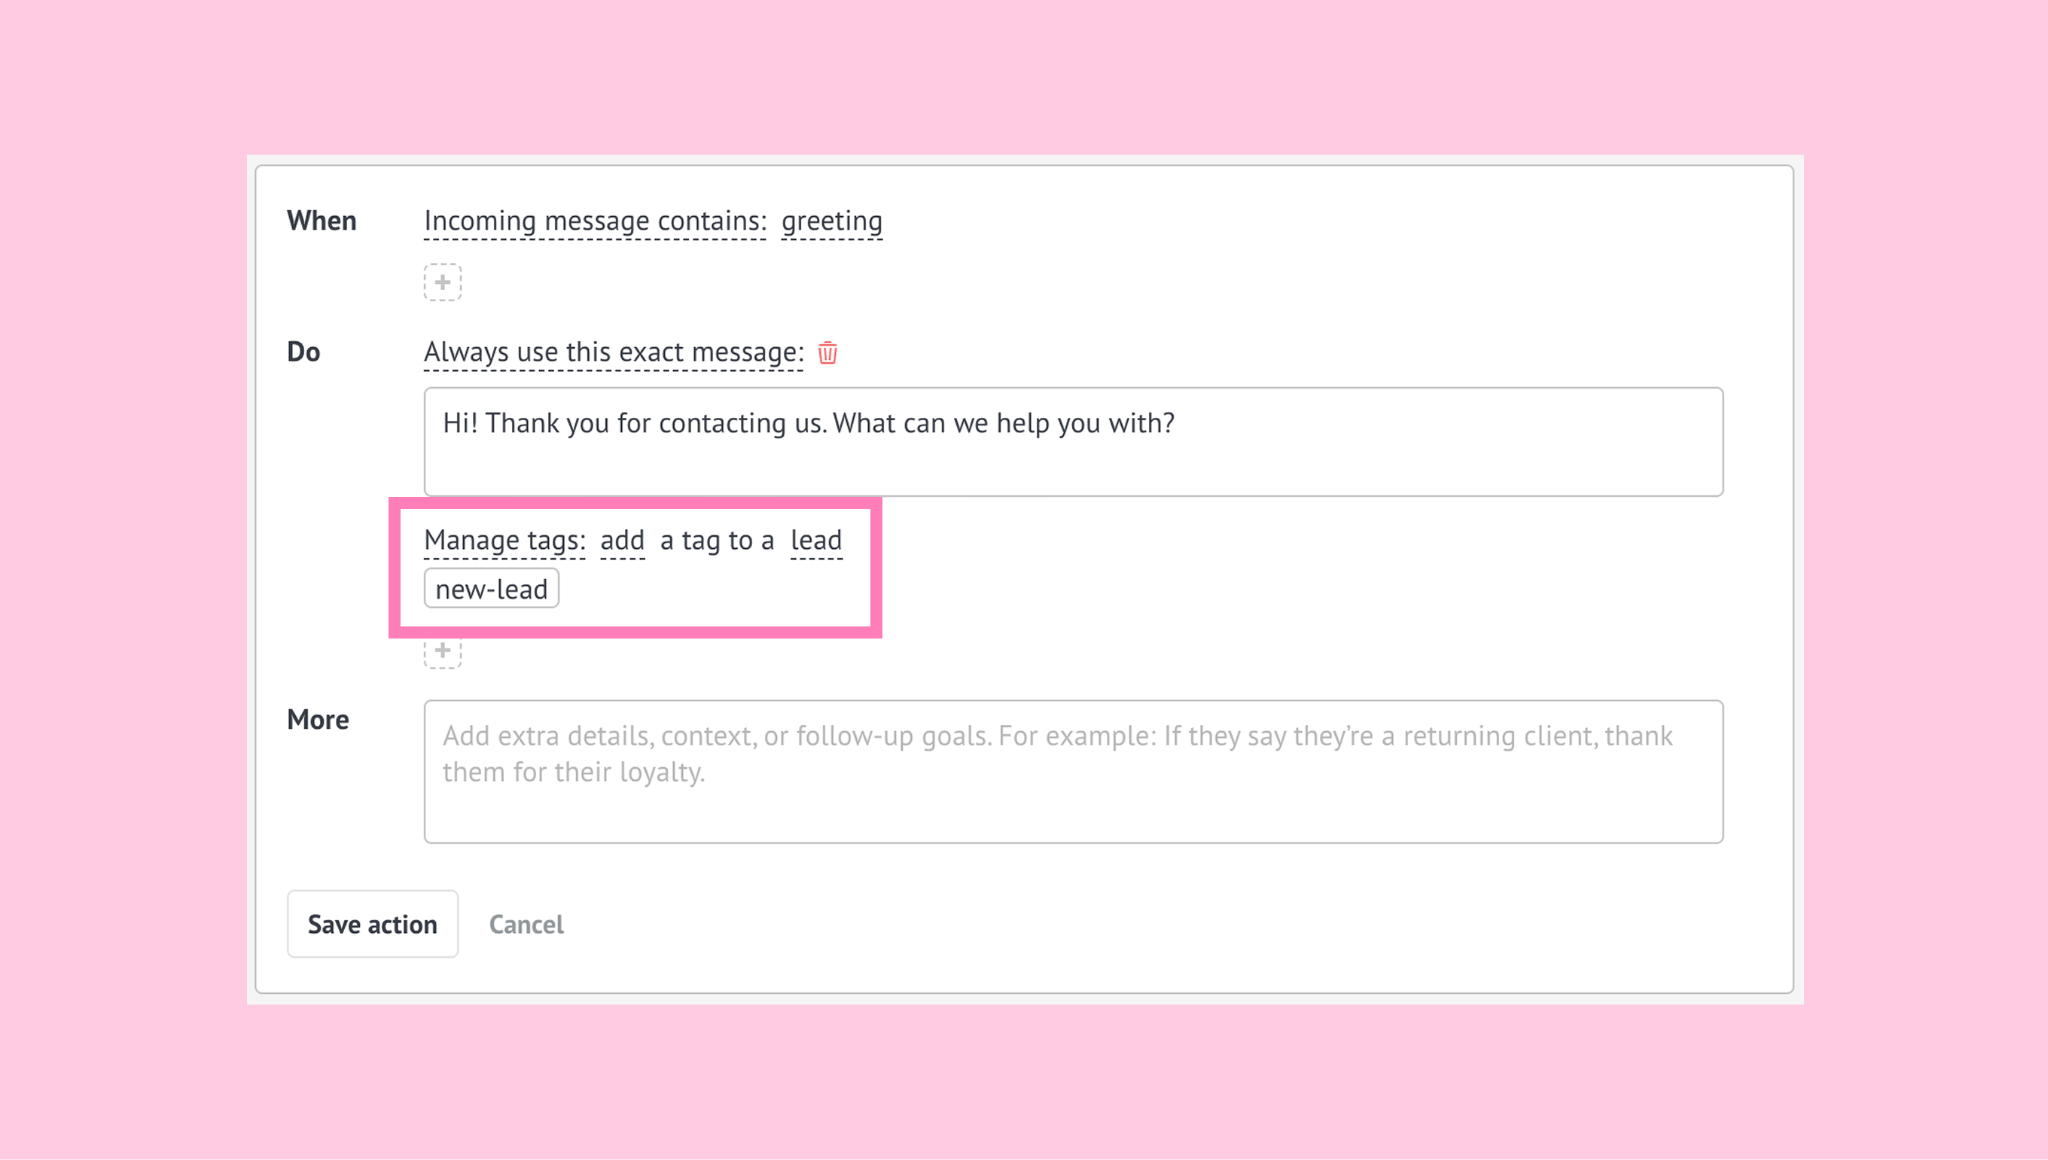
You can also add other actions like Manage tags and add a tag to the incoming lead like new-lead.
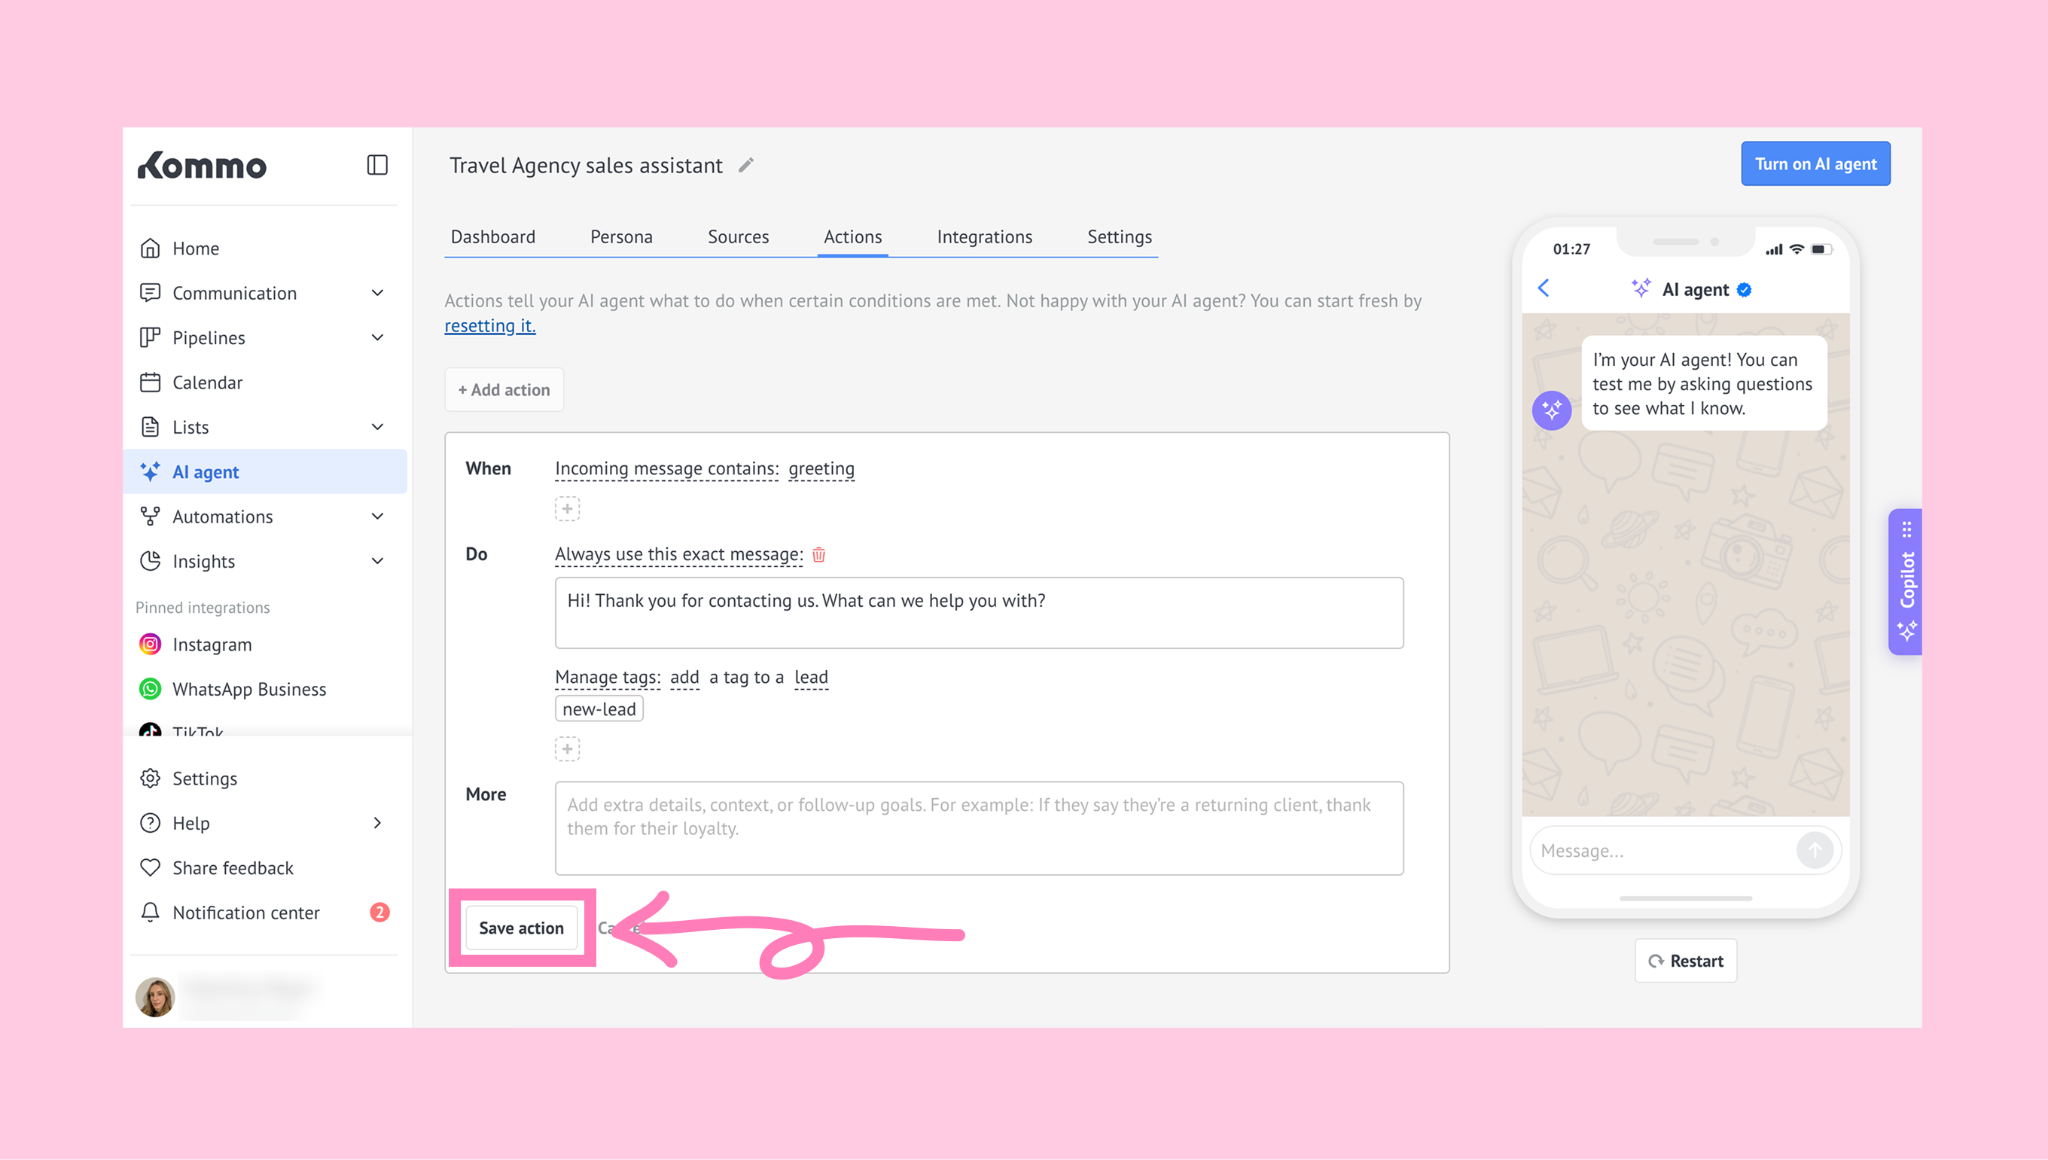
Click Save action.
B. Collect lead details and enrich the lead card
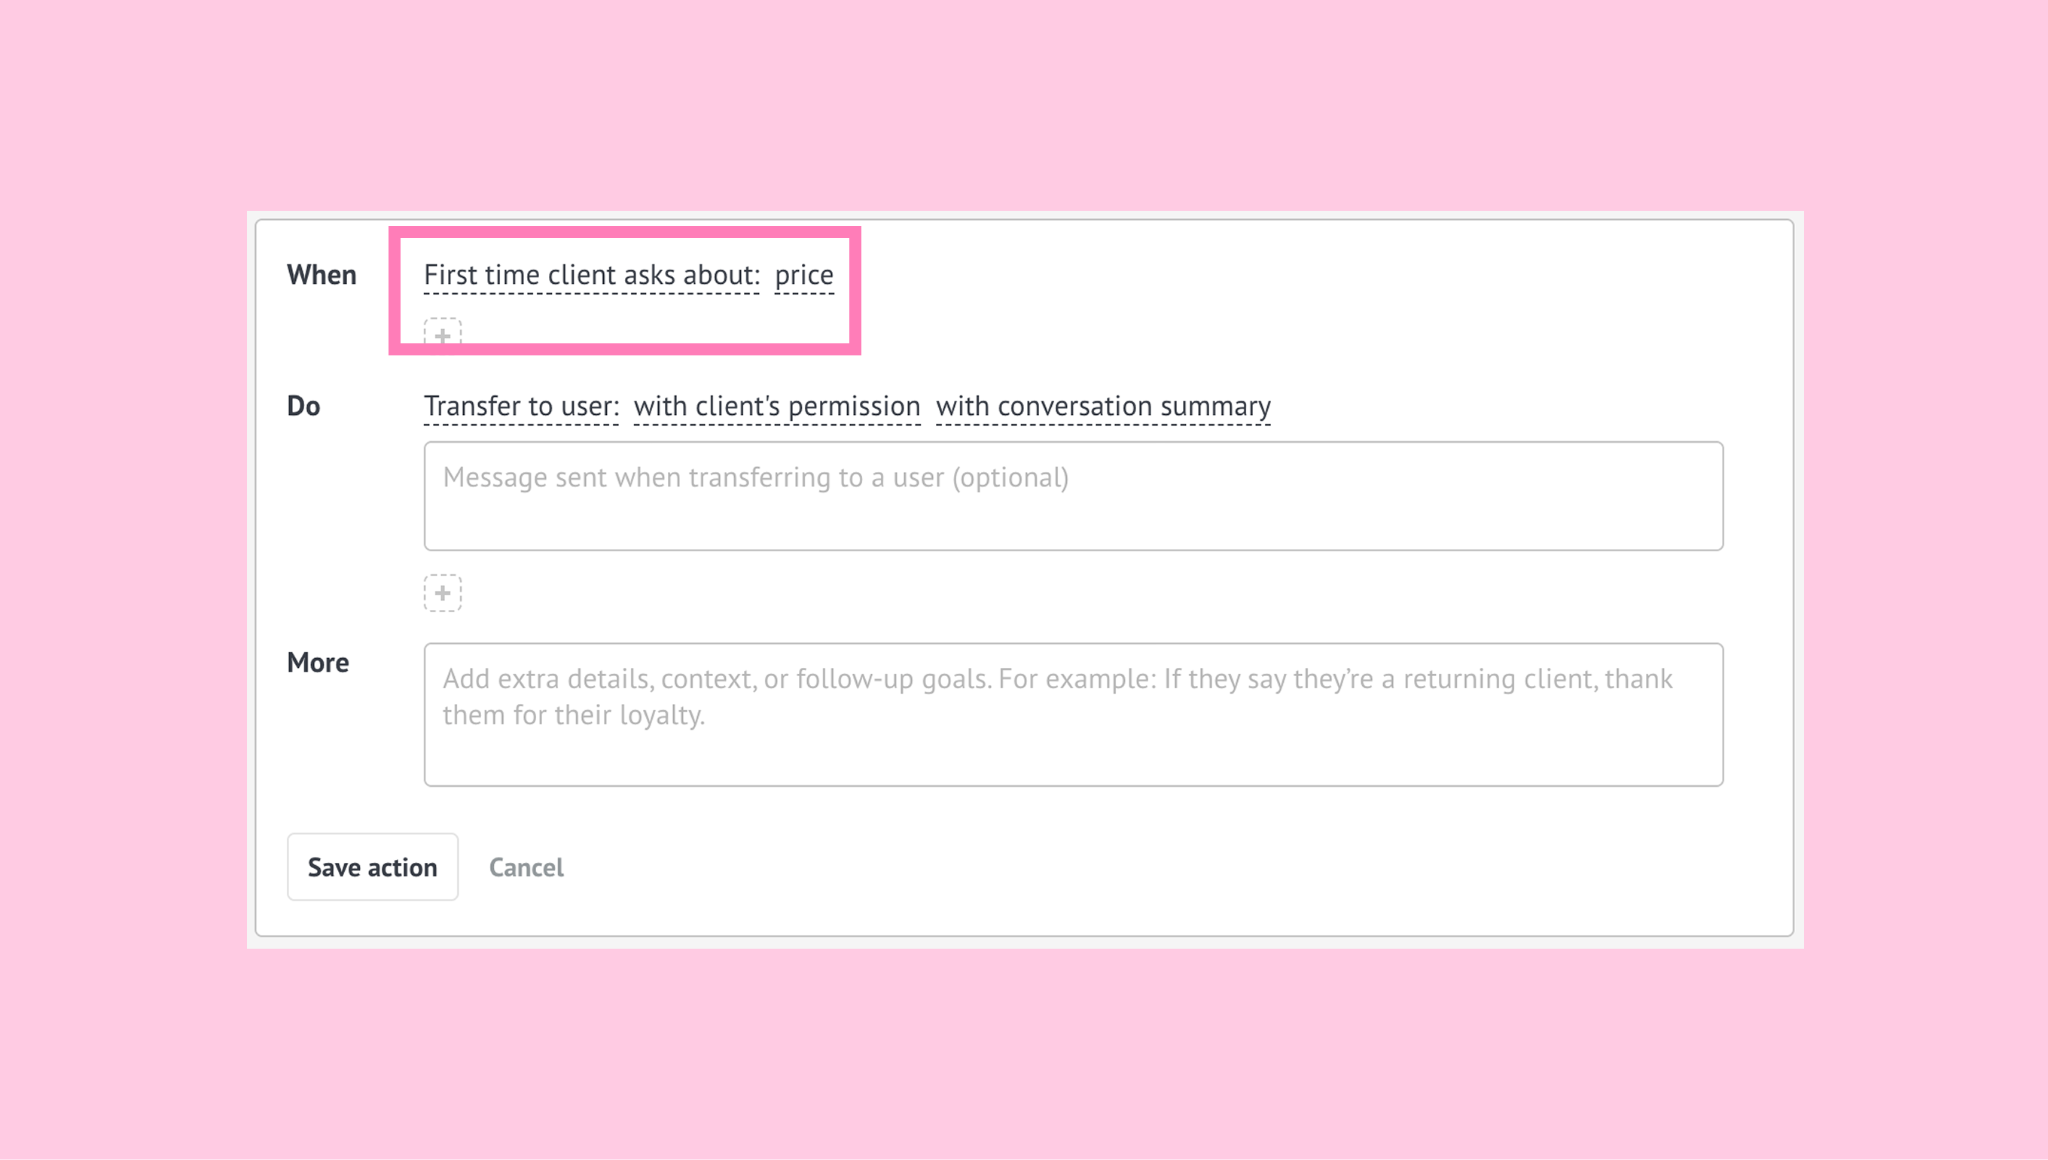
Pick the WHEN condition First time client asks about: price. This helps identify new leads who are showing buying intent.
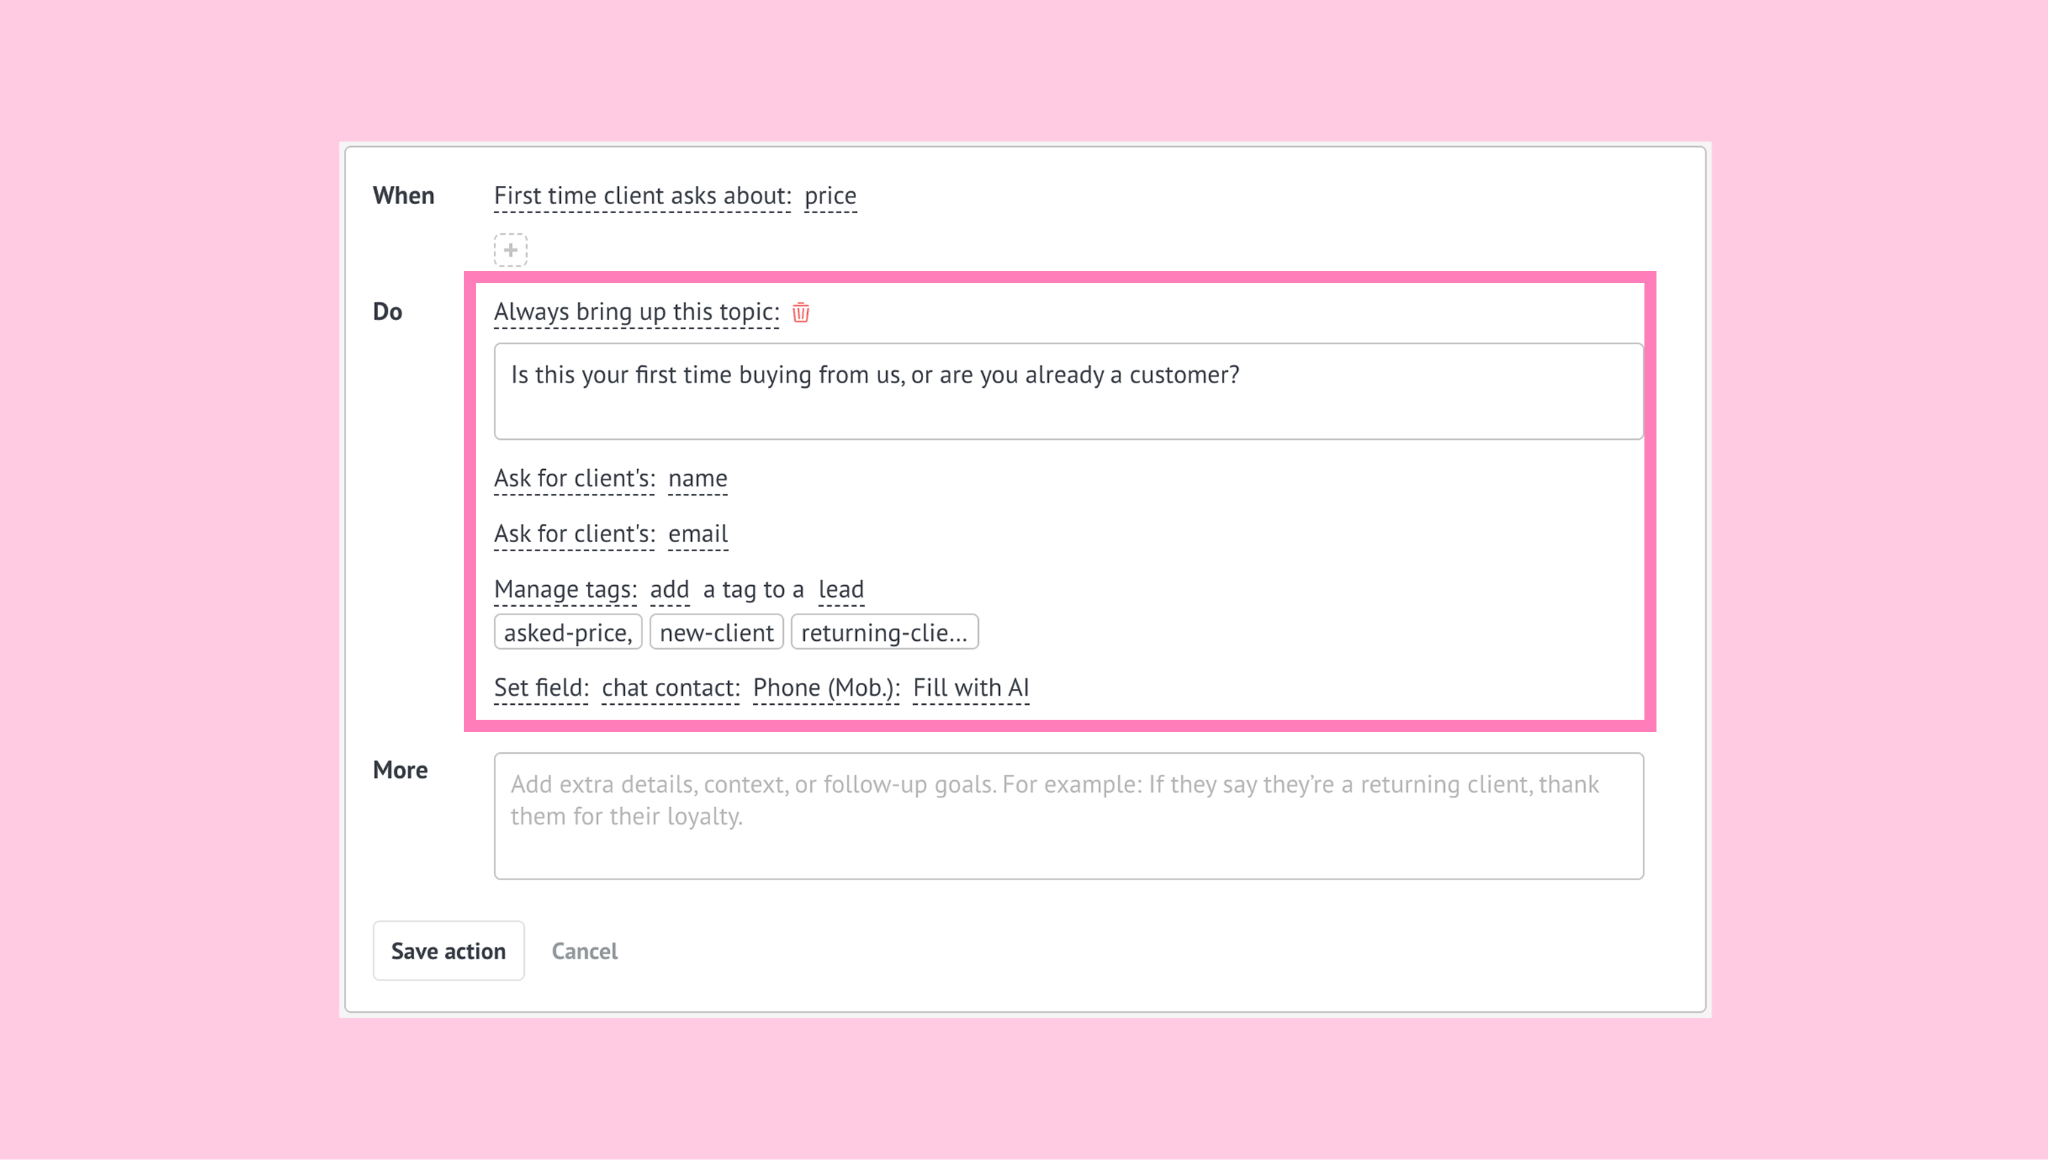
Add the following DO actions:
Always bring up this topic and ask whether the client is new or returning. You can use a question such as: ‘Is this your first time buying from us, or are you already a customer?’.
Ask for client’s: email and name to collect personal details for future follow-up.
Manage tags and add clear tags to organize the lead. For example: asked-price, new-client, or returning-client.
Set field to save information in the lead card. For example, choose Chat contact and store the client’s phone number automatically.
Note: Actions such as Manage tags and Set field are available on the Advanced plan and higher.
Note: You can add up to 5 additional DOs selected from a preset list.
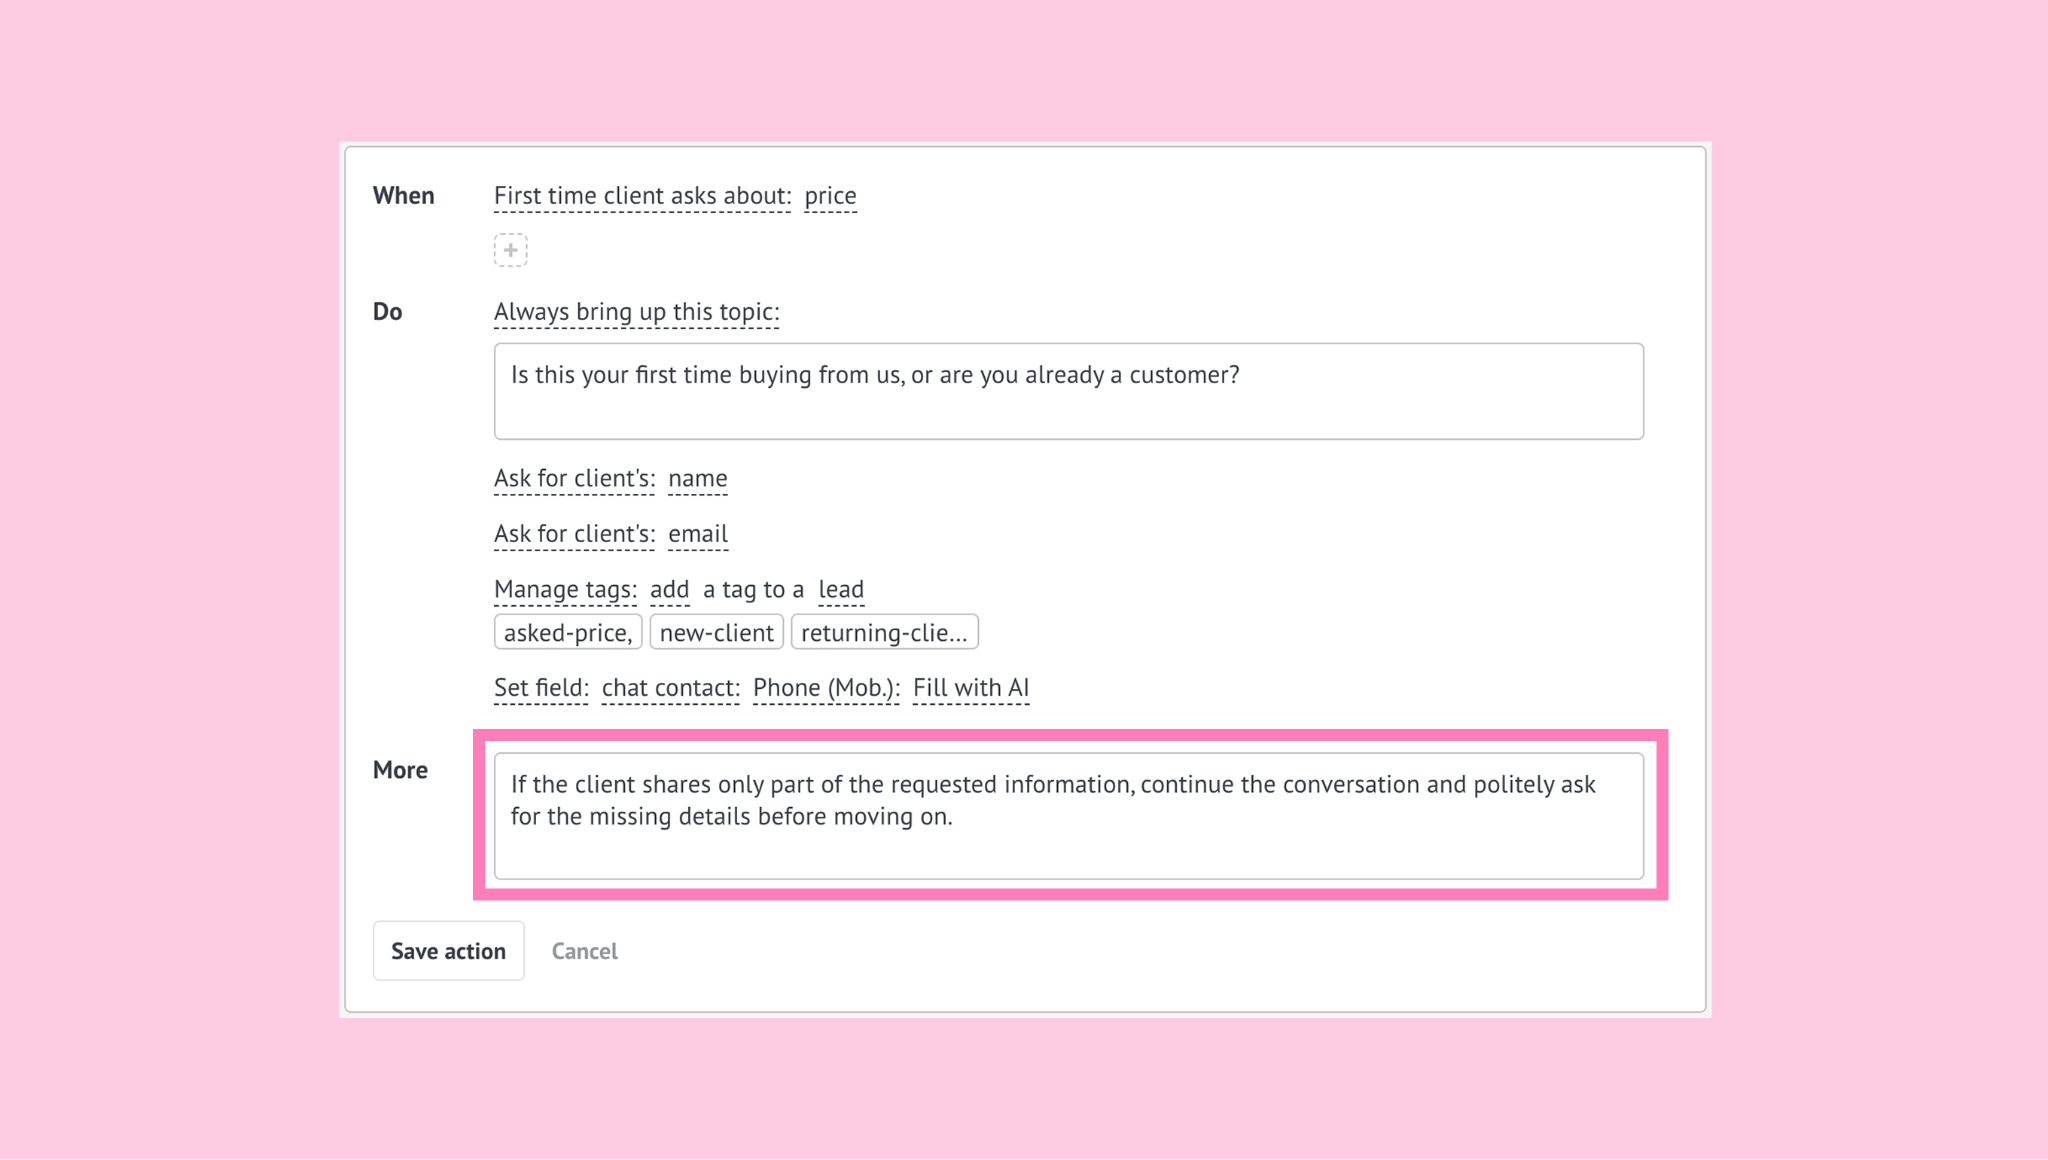
In the More field, add any extra guidance you want the AI agent to follow. You can add the following instruction: ‘If the client shares only part of the requested information, continue the conversation and politely ask for the missing details before moving on’.
4. Save the action.
C. Help new clients with their questions
Go to the Sources tab and add a knowledge source with your business FAQs. This can include information such as pricing, delivery times, payment methods, or common pre-sale questions.
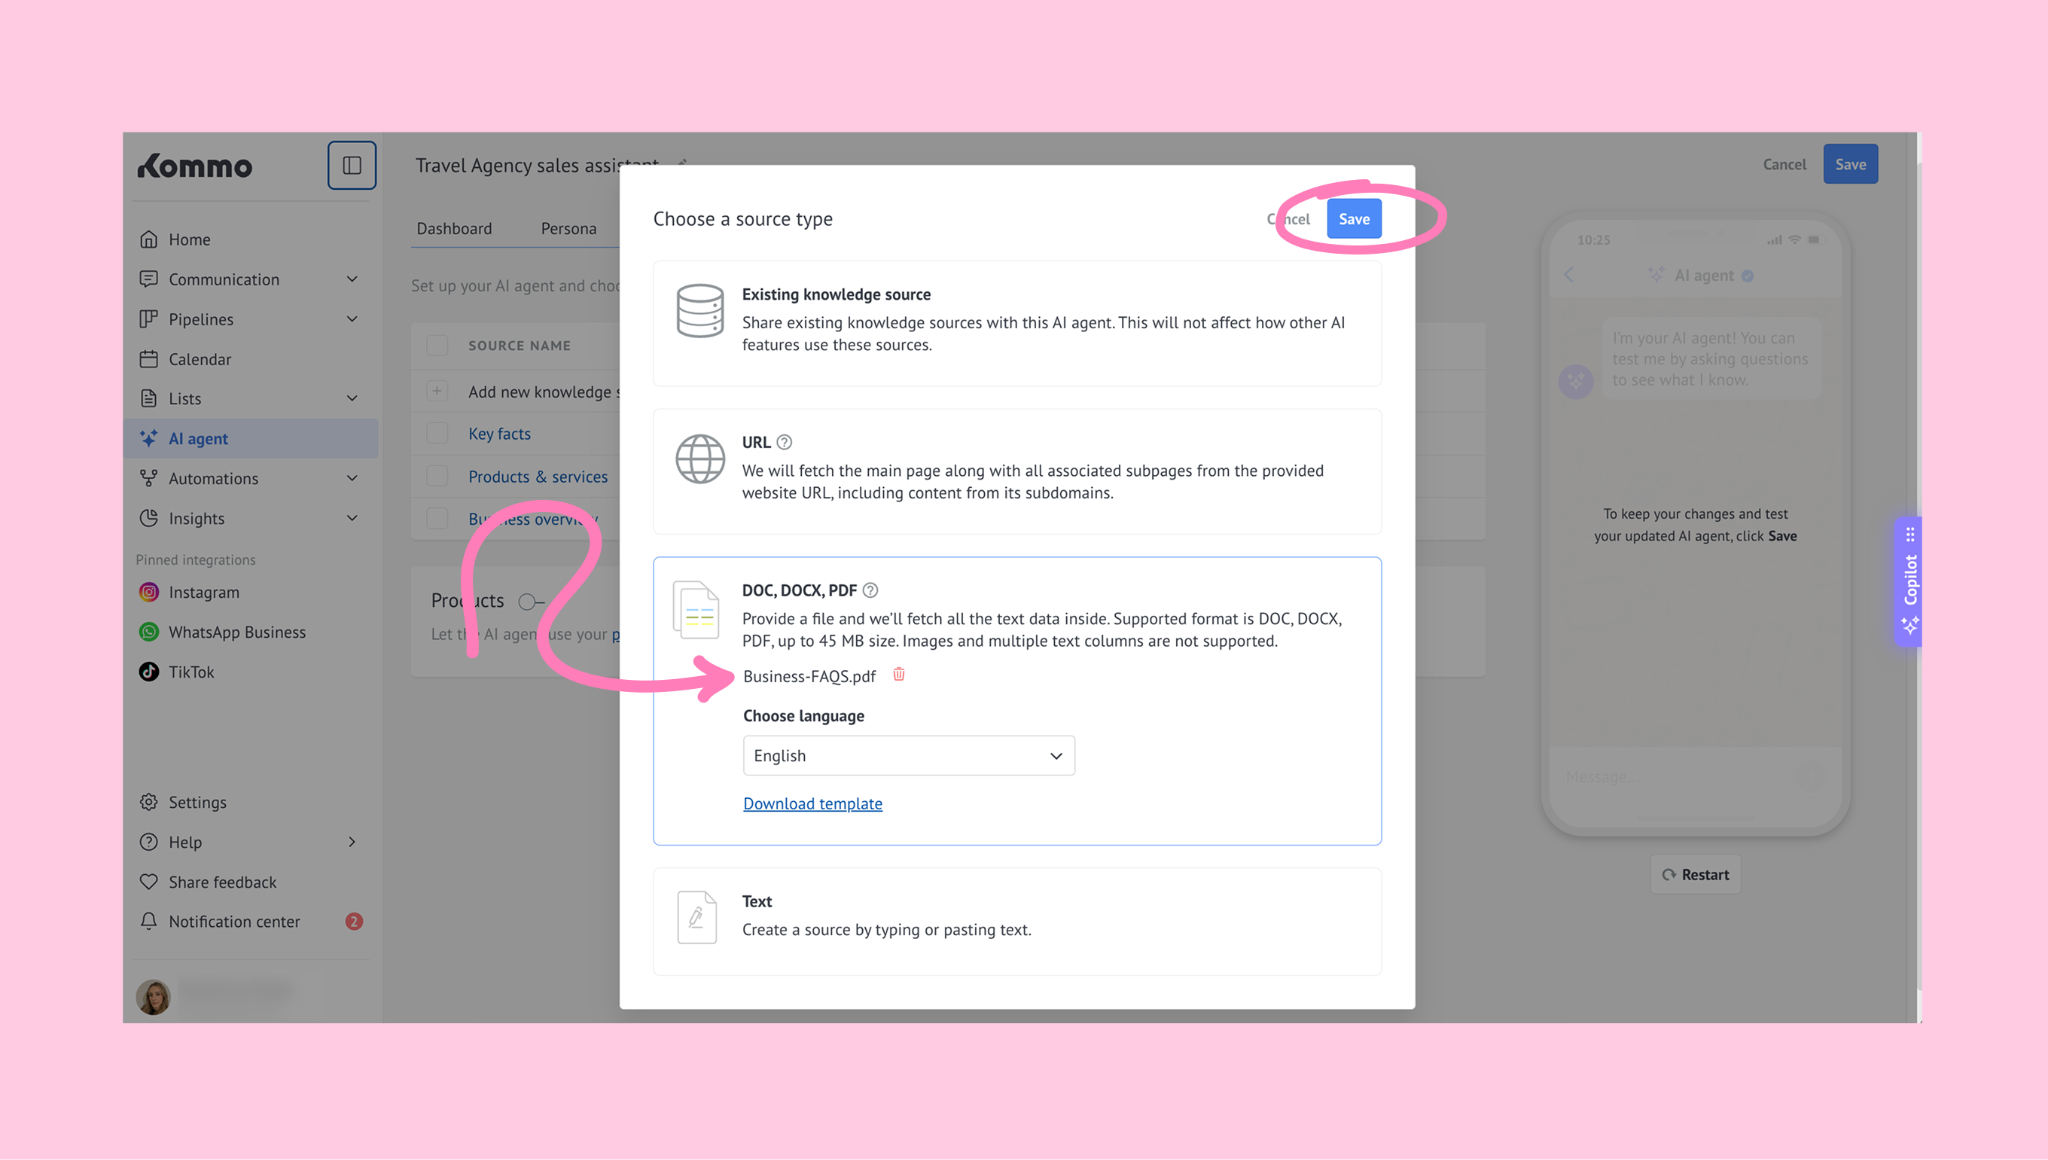
Save your new source.
Go back to the Actions tab and click + Add action.
Choose the WHEN conditions:
First time client talks about: price
Client wants to: ask questions
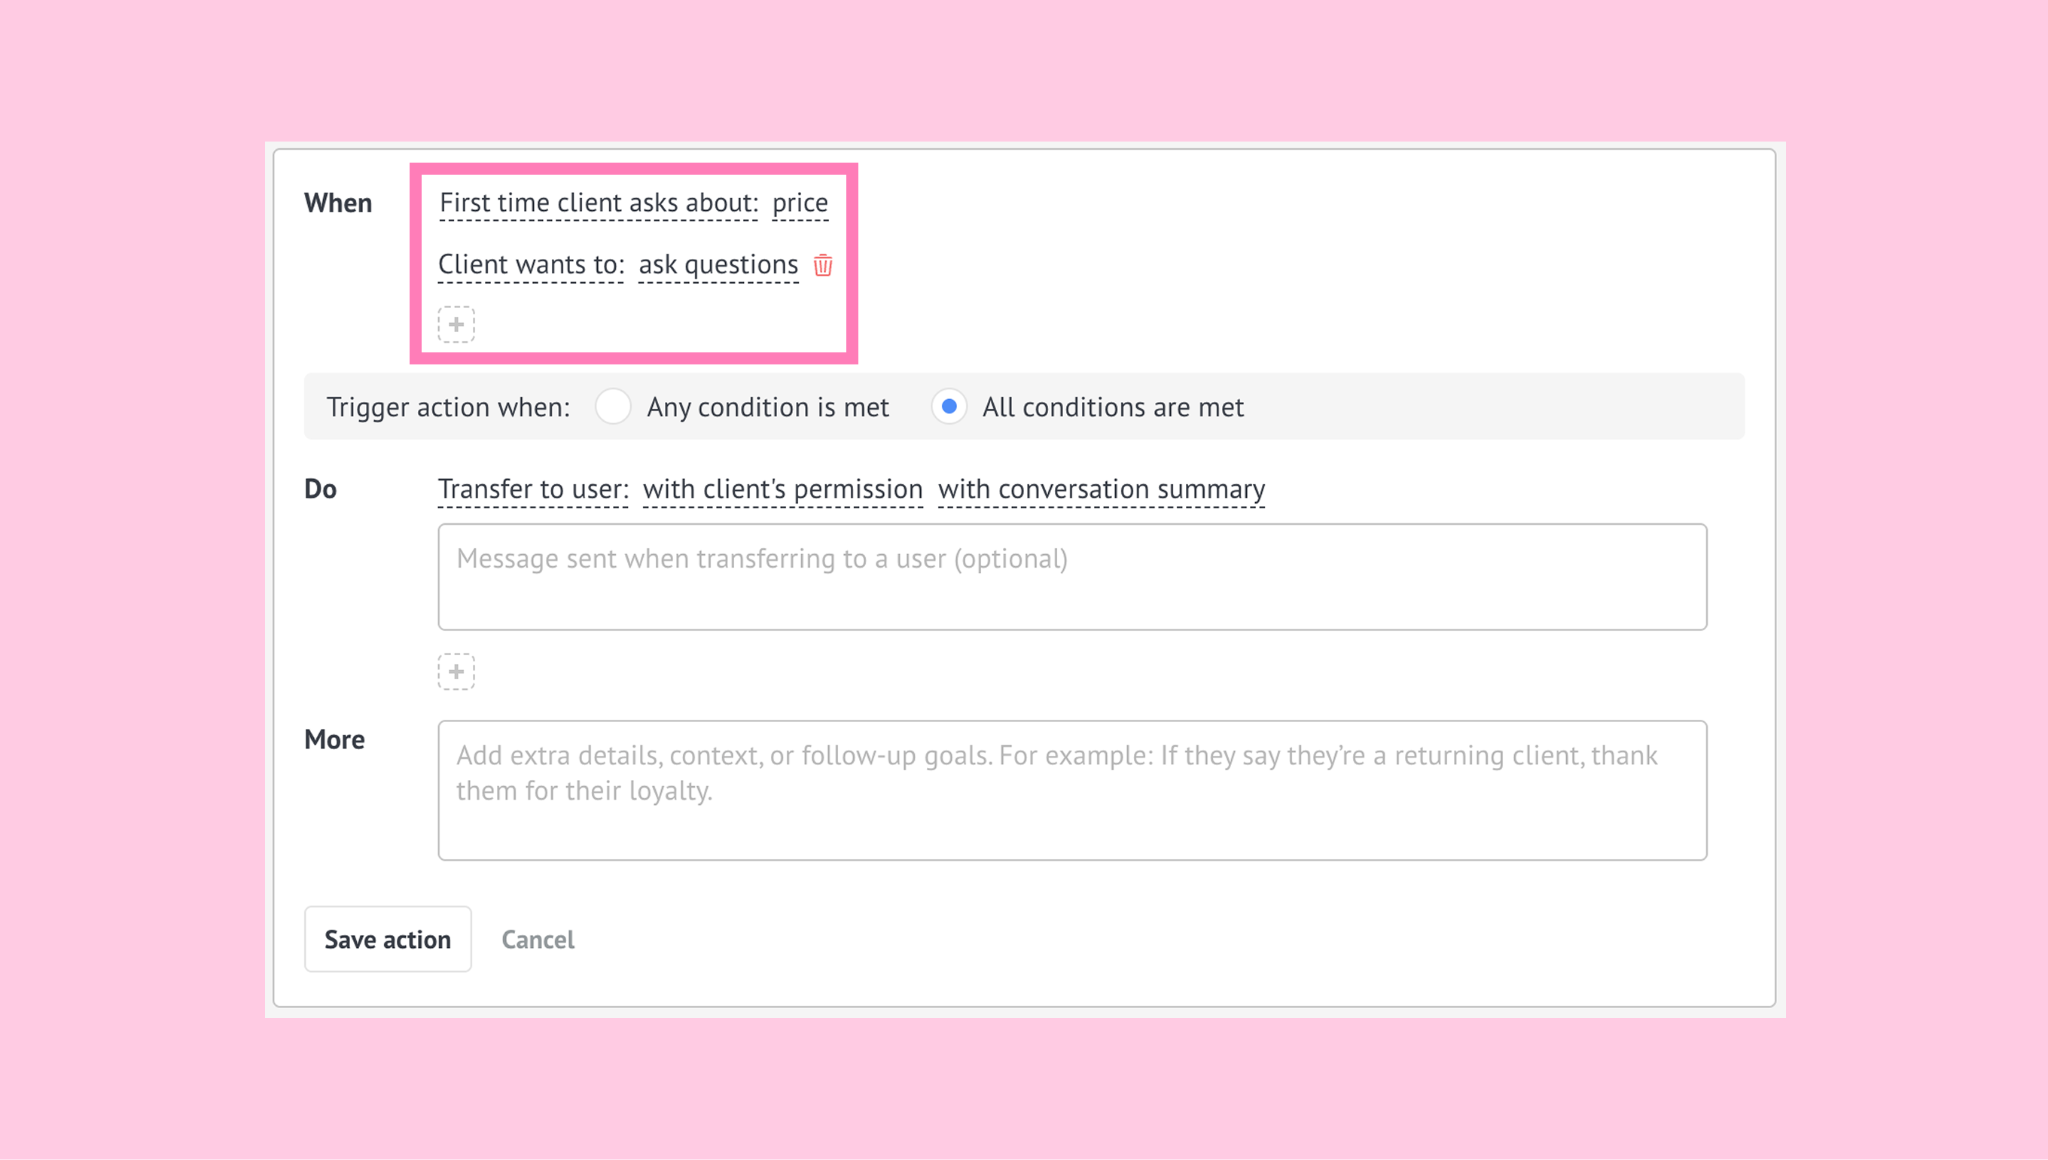
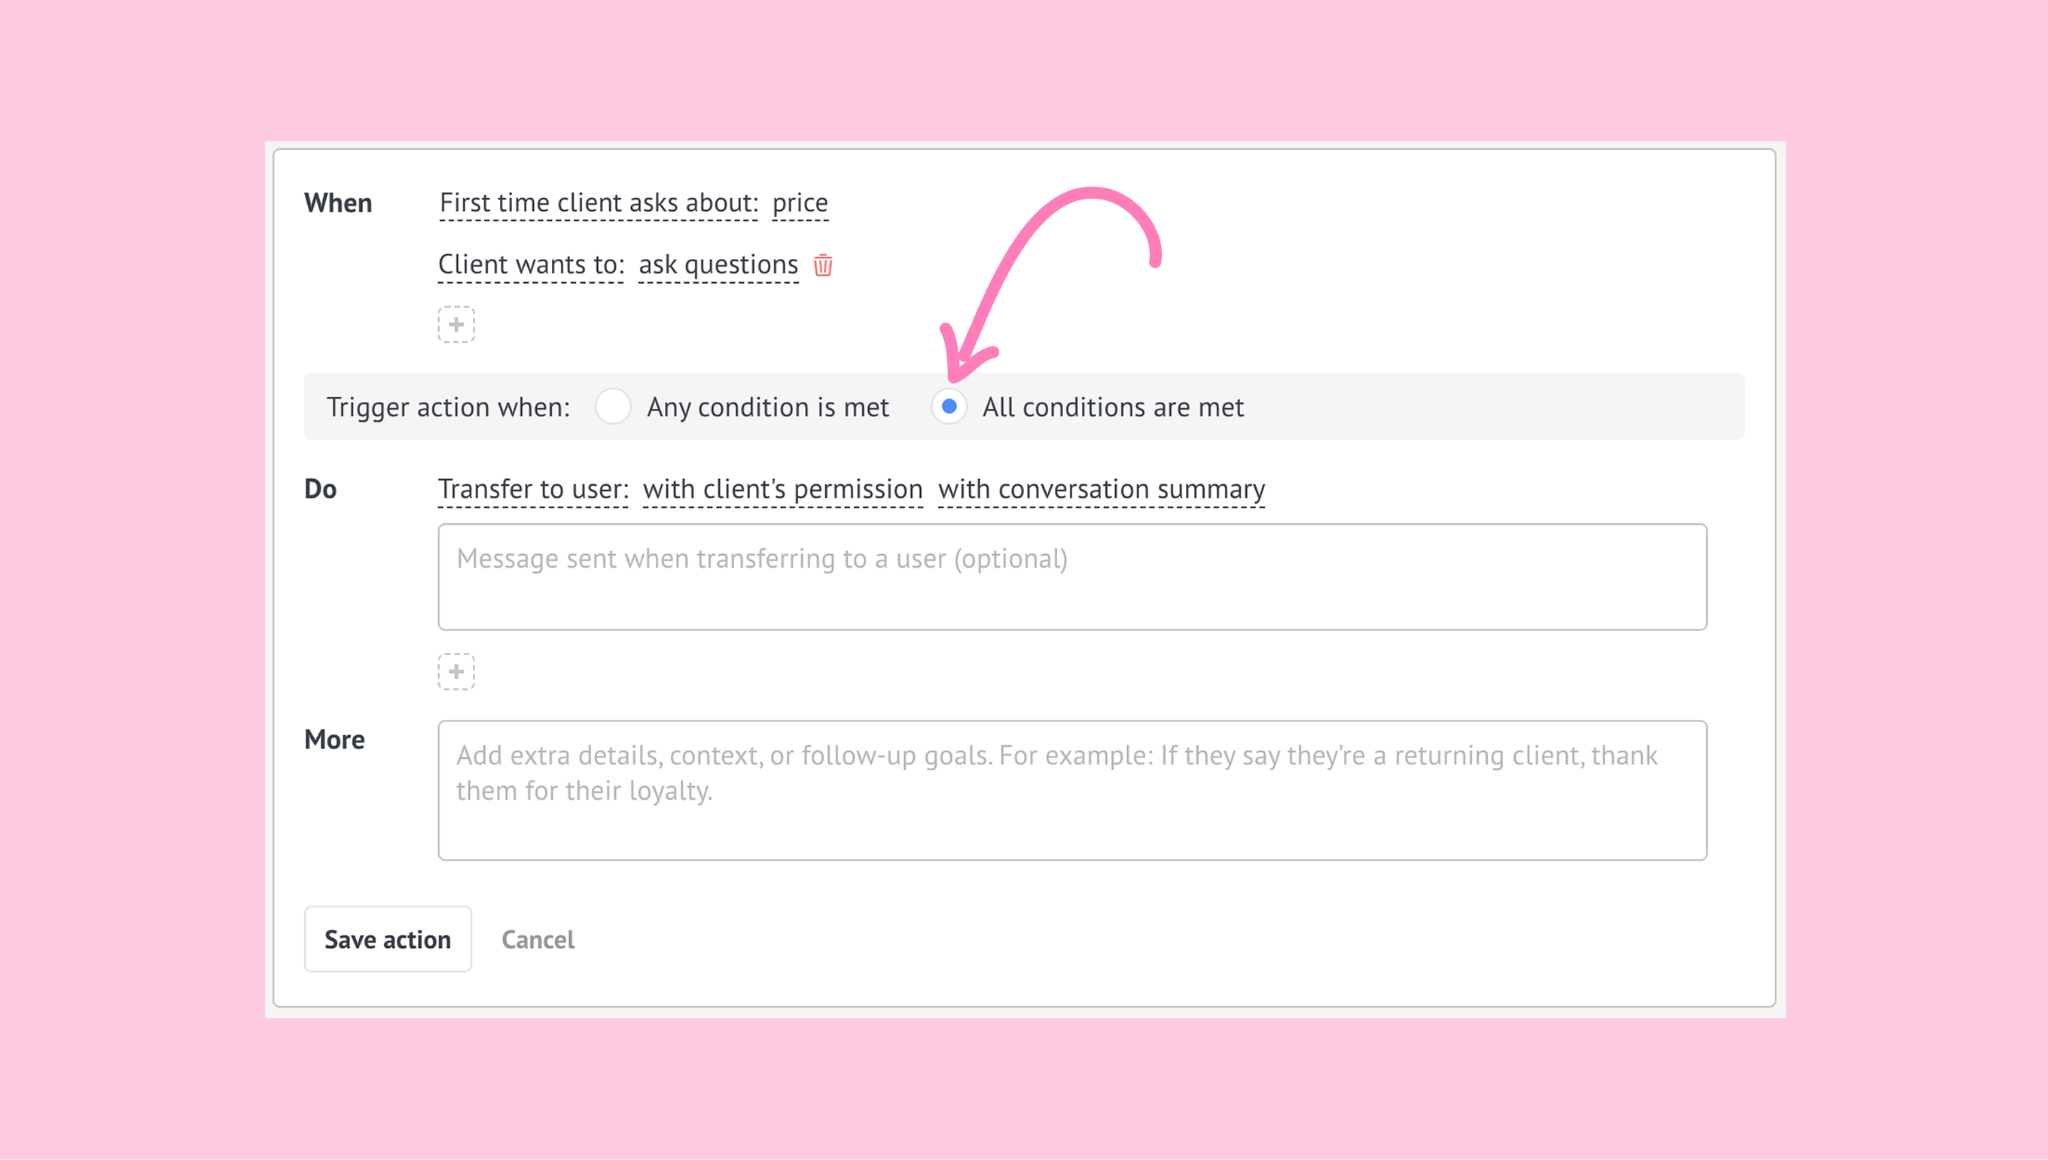
Select the option below to trigger the action when all conditions are met. This ensures the action runs when the client shows first purchase intent and asks a pre-sale question.
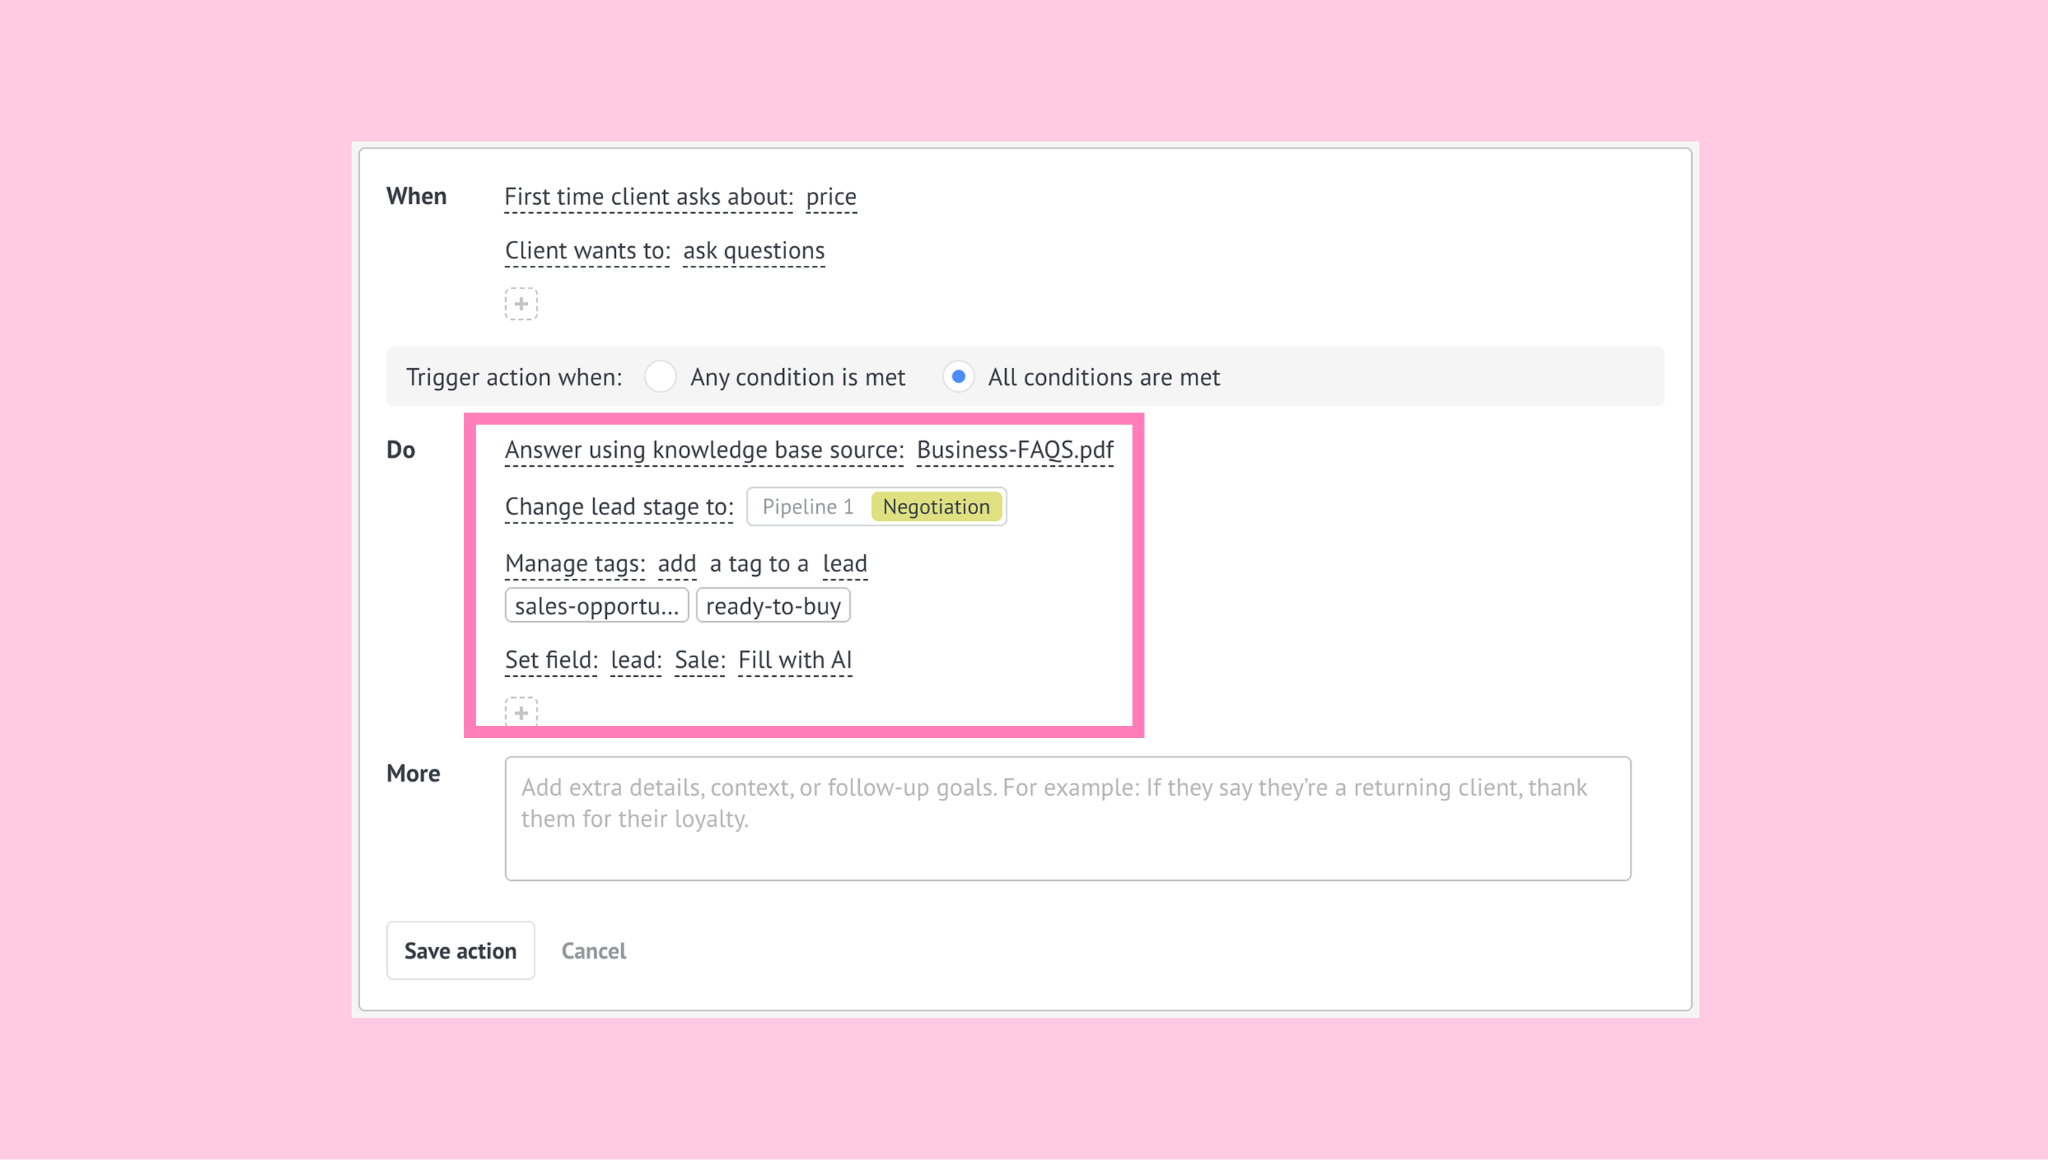
Add the following DO actions:
Answer using knowledge base source and select the FAQ source you added earlier.
Change lead stage to the next stage in your pipeline. For example, move the lead to Qualified lead, Interested, or Negotiation.
Manage tags to label the lead with useful tags such as sales-opportunity or ready-to-buy.
Set field to save relevant details in the lead card. For instance, you can add a Sale field with the client’s budget.
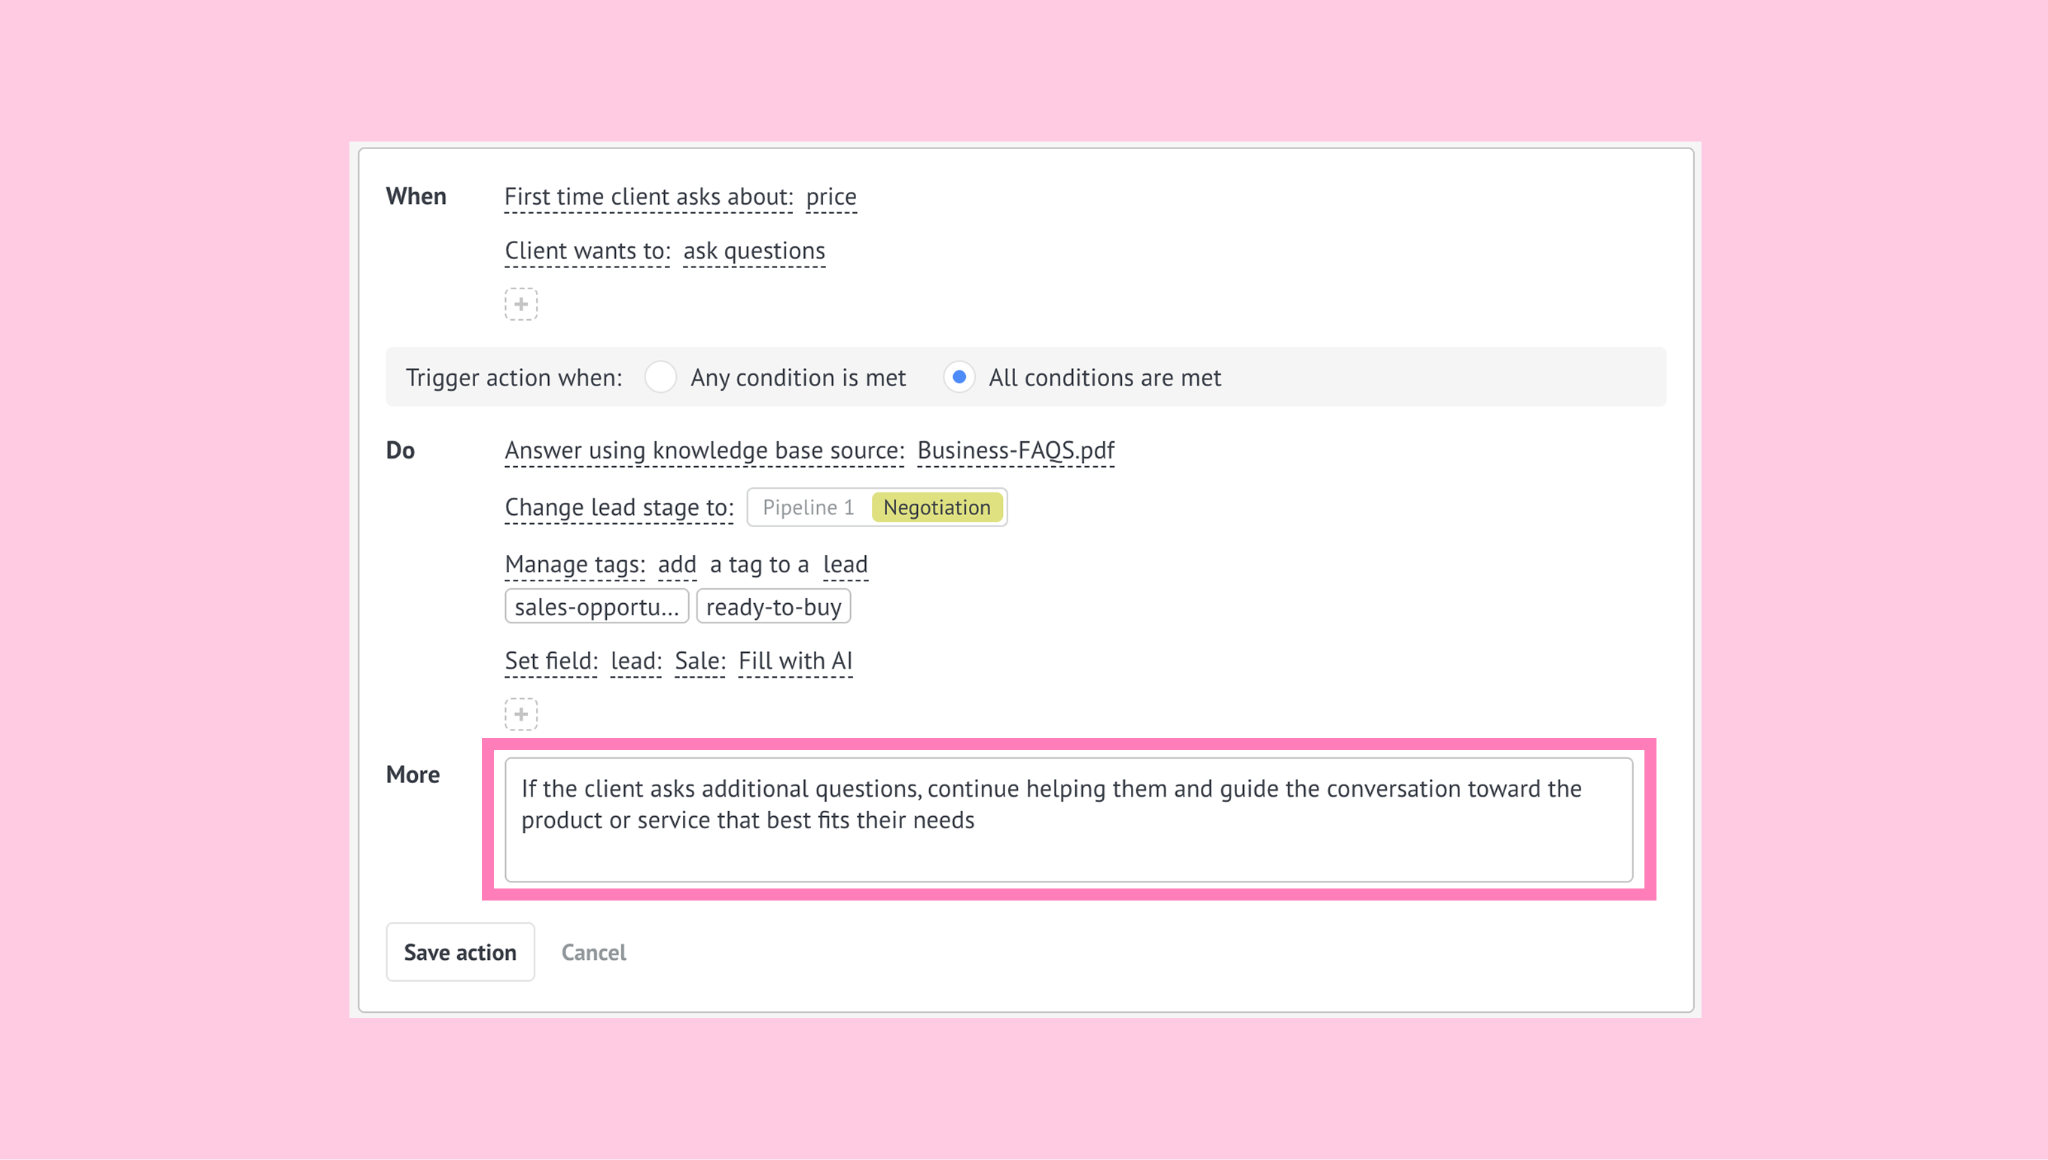
In the MORE field, add an instruction such as: ‘If the client asks additional questions, continue helping them and guide the conversation toward the product or service that best fits their needs’. This helps keep the conversation moving.
Click Save action.
D. Support returning clients automatically
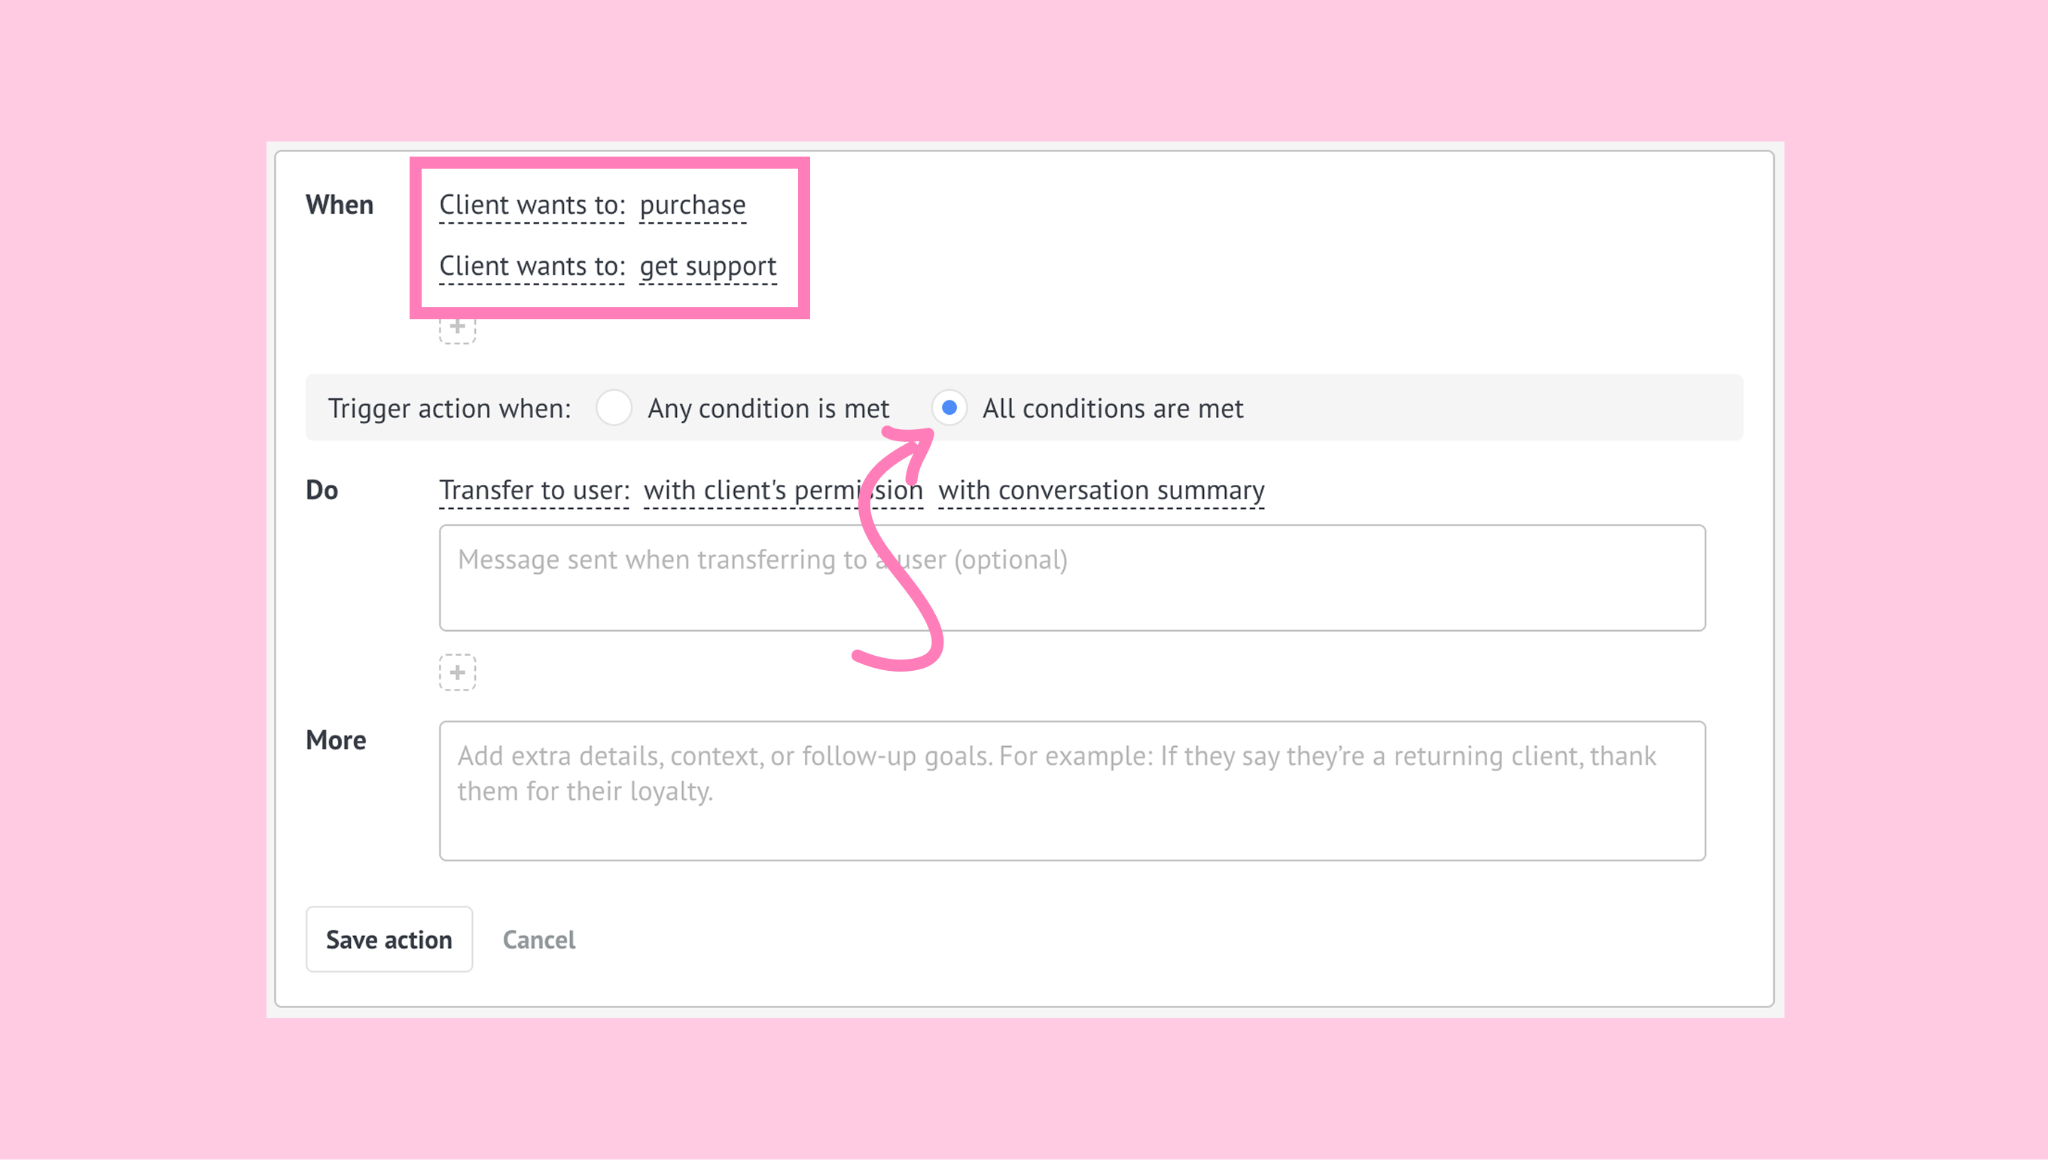
Choose the WHEN conditions:
Client wants to: purchase
Client wants to: get support
Set the action to trigger when all conditions are met.
Add the following DO actions:
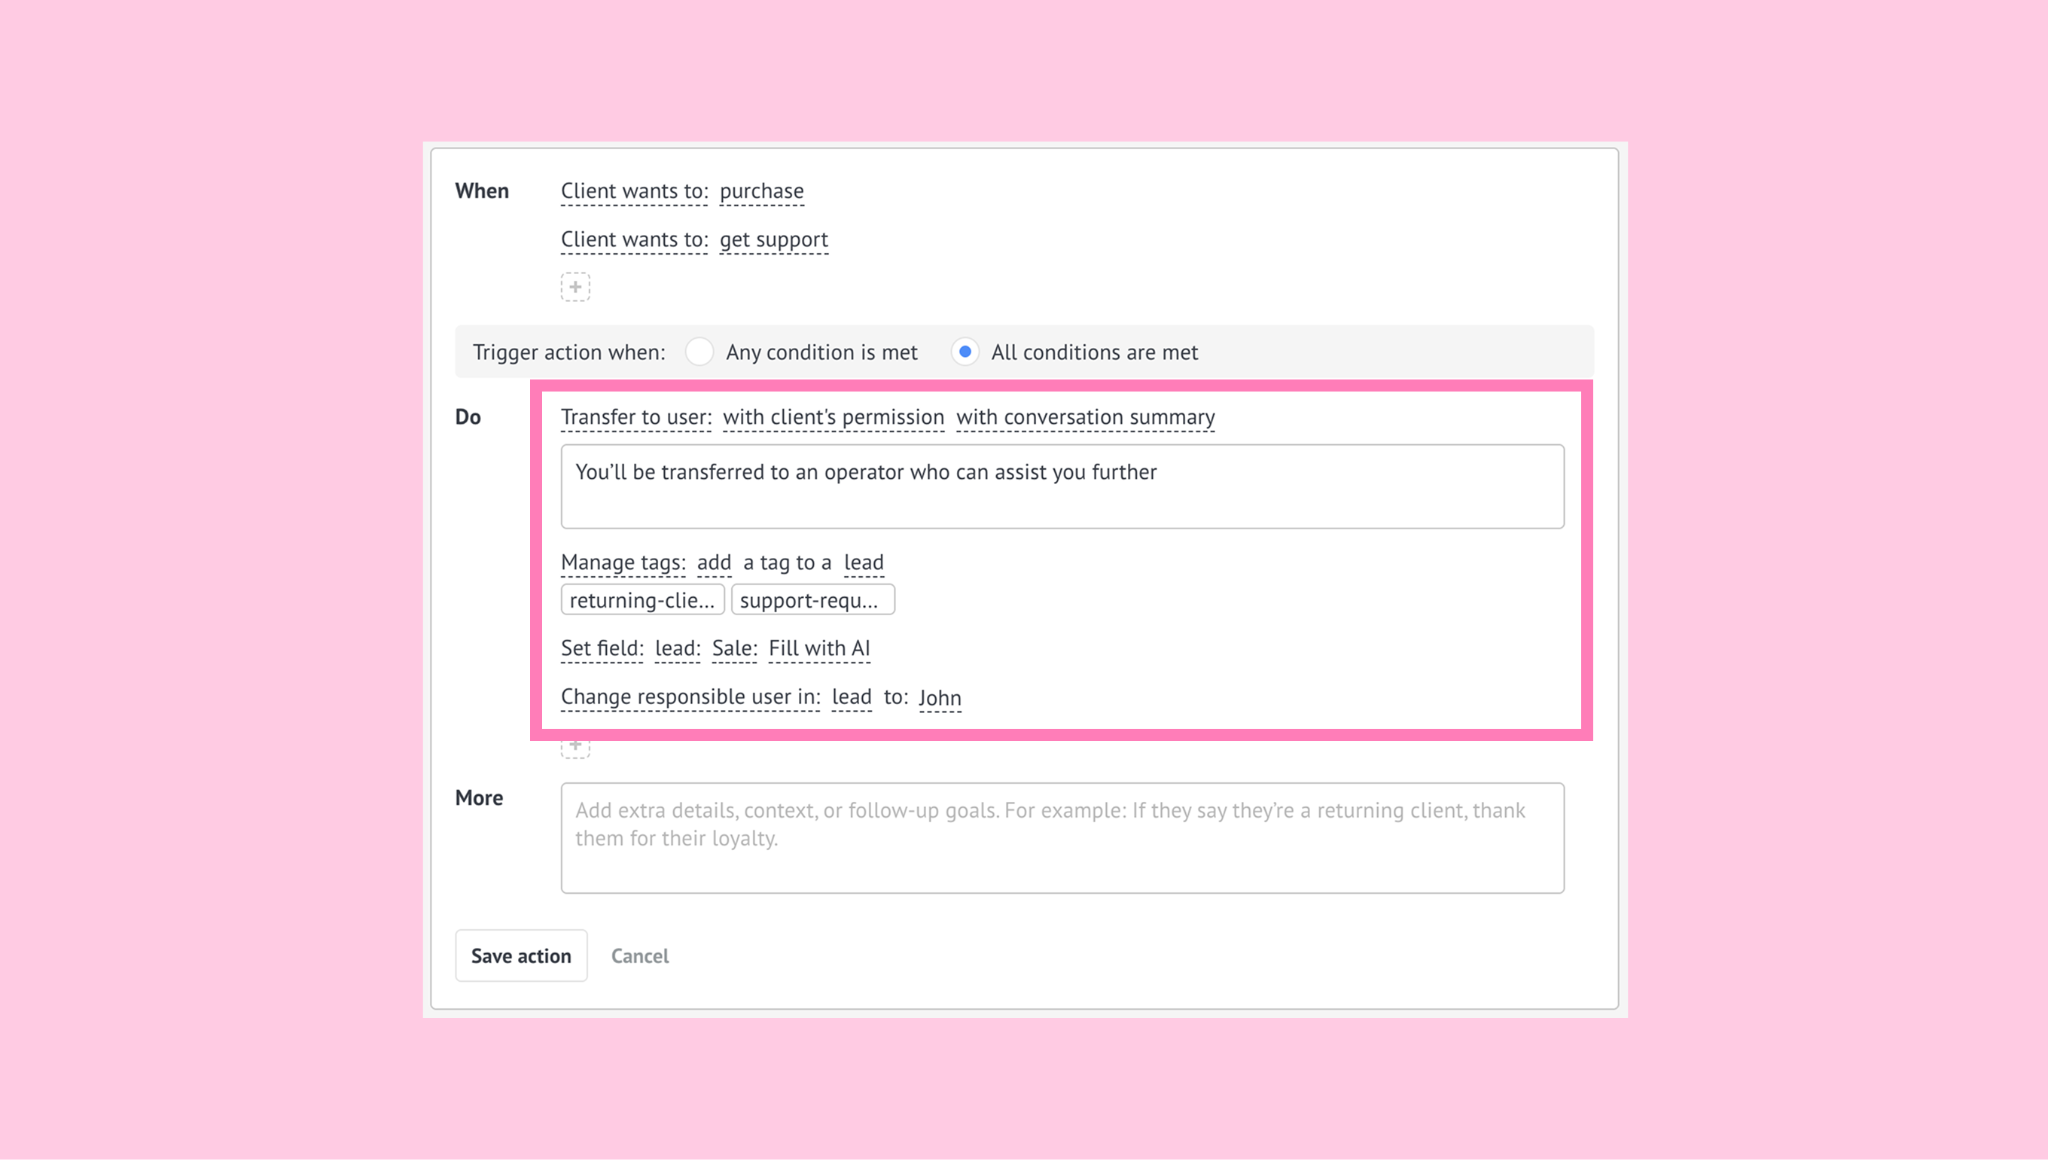
Transfer to user and choose to transfer the conversation with the client’s permission and with a conversation summary. This helps the assigned team member continue the chat with context.
You can use a message such as: ‘You’ll be transferred to an operator who can assist you further’.Manage tags to label the lead with tags such as returning-client or support-request.
Set field to save useful information in the lead card. For instance, add a Sale field with the client’s budget.
Change responsible user in: lead to assign the conversation to the teammate.
Save the action.
E. Escalate conversations to a human
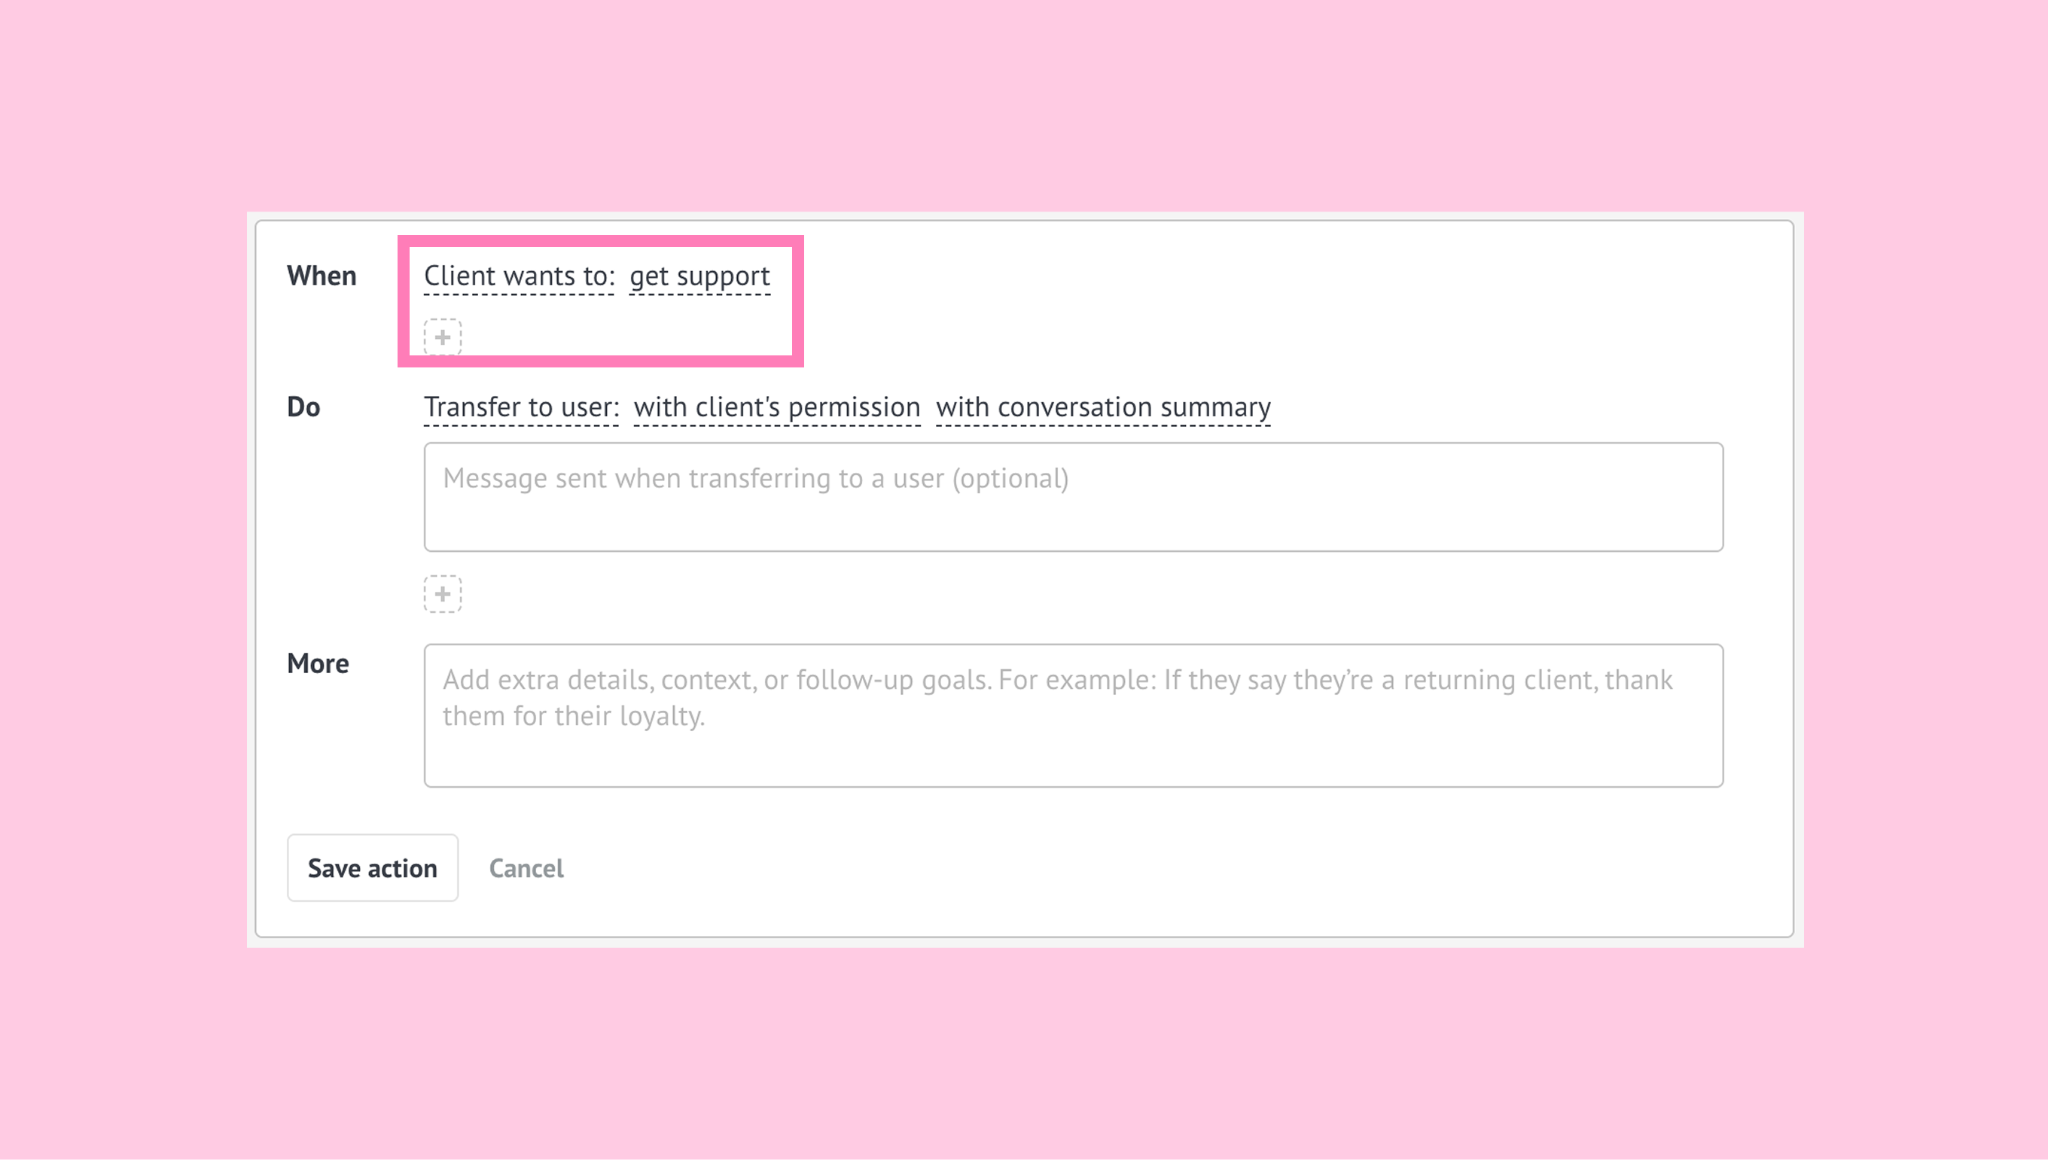
Choose the WHEN condition Client wants to: get support.
This helps detect when the client is requesting human assistance or needs support beyond the AI agent’s scope.
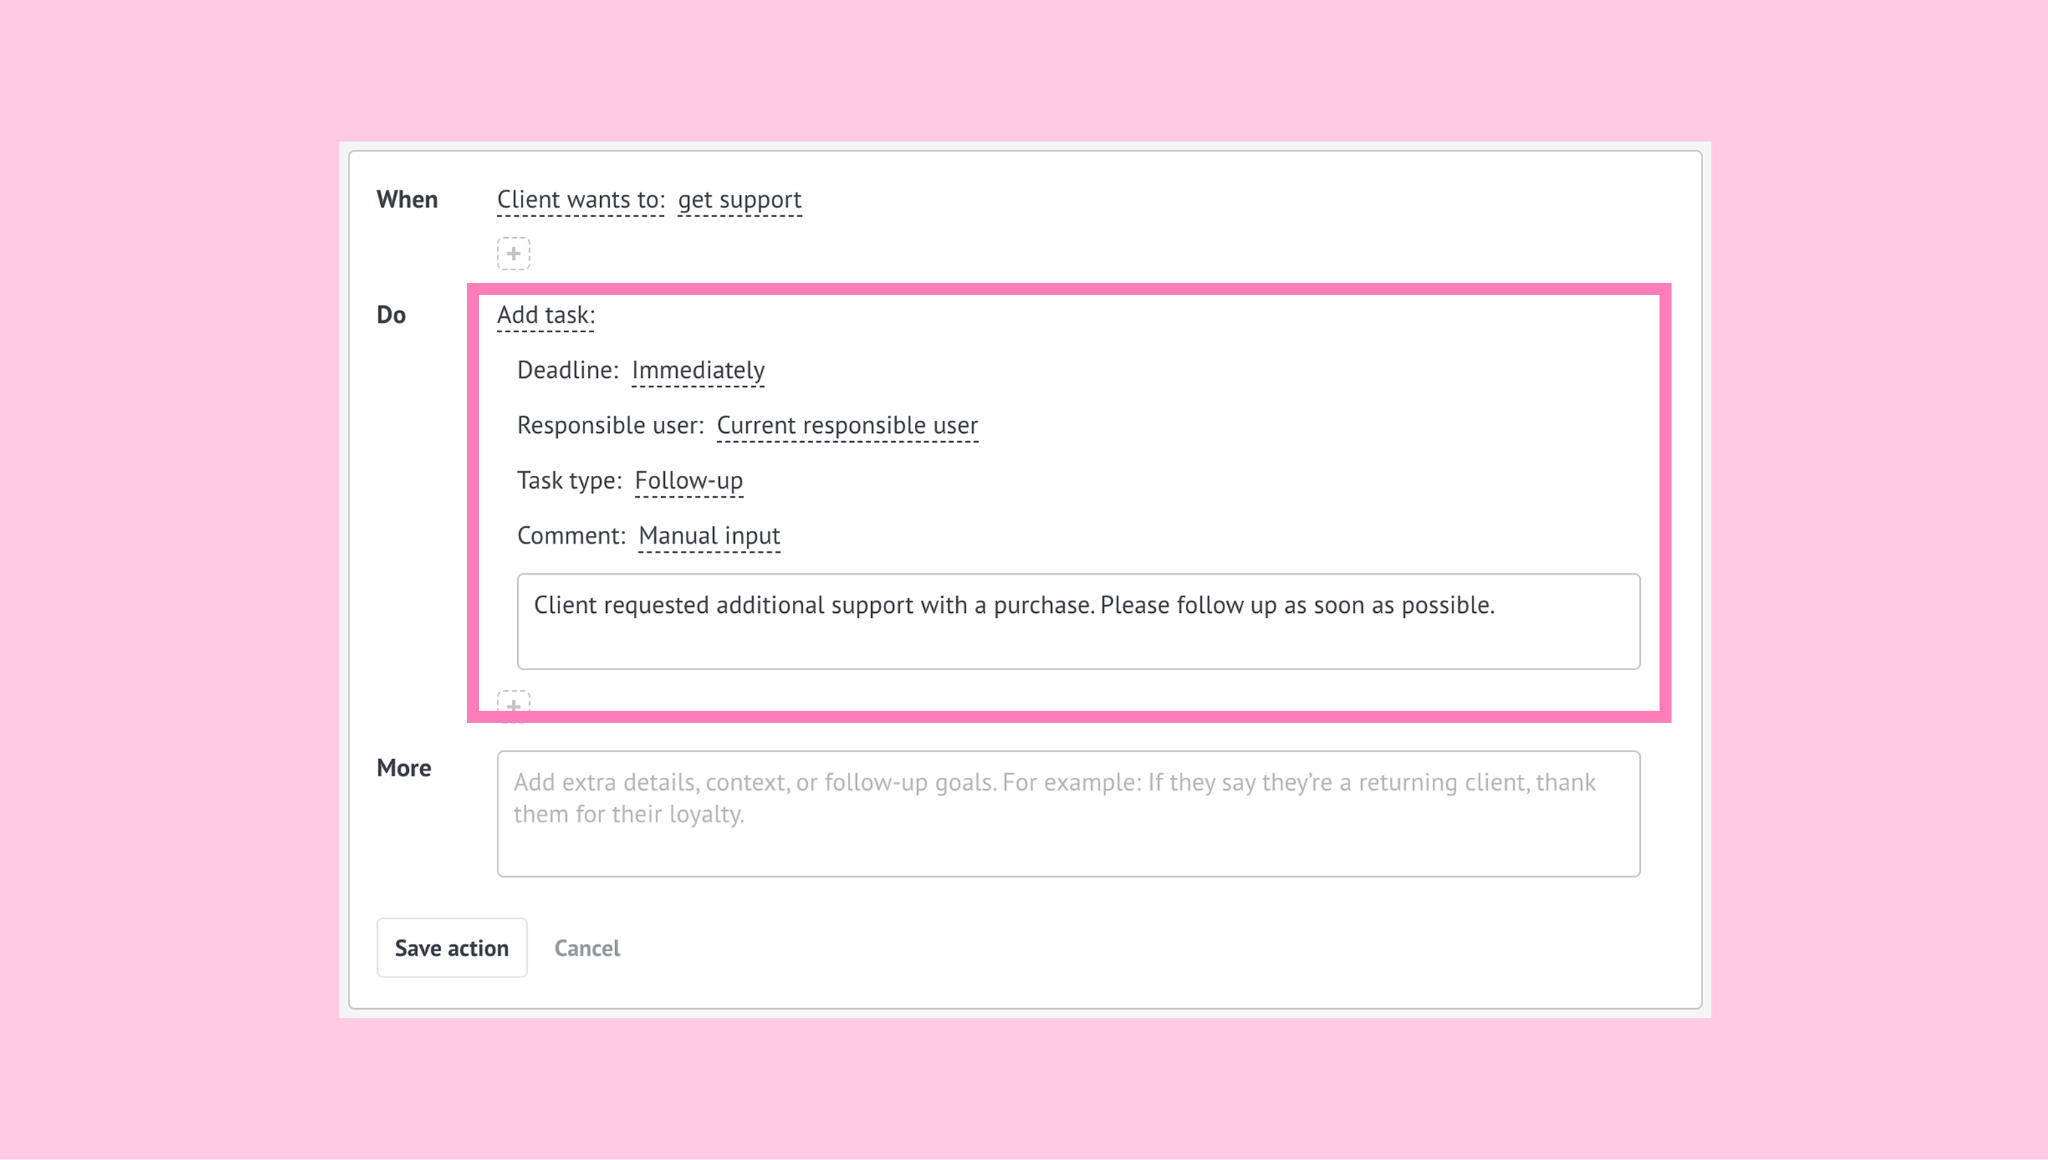
For the DO action, select Add task to create a task for the lead’s responsible user so they can follow up as soon as possible. Include a short task note to explain what the client needs help with, such as: ‘Client requested extra support with a purchase. Please follow up as soon as possible’.
Click Save action.
With this setup, your AI agent can qualify incoming leads automatically, collect useful details, and route conversations to the right team member when needed.
This helps your team focus on high-intent opportunities, respond faster, and keep lead data organized in your CRM.
Note: Before launching the AI agent, we recommend using Test mode to review how it responds in different situations and make sure each action works as expected. Try messages such as asking about pricing, requesting more information before buying, or asking for support. If needed, update the relevant WHEN, DO, or More instructions. Learn more in our article about Testing the AI agent.
Once your AI agent is ready, you can launch it. Learn how to do this in our article.