What you’ll need:
A connected WhatsApp Business integration.
Admin permissions in Kommo to configure opt-in and opt-out settings.
Keep in mind:
Using opt-in and opt-out statuses is optional, but highly recommended. It helps you respect contacts’ preferences, reduce complaints, and protect your WhatsApp Business phone number’s quality rating.
Only mark a contact as Opt-in if they have agreed to receive marketing messages. Learn more about Meta’s opt-in requirements.
Marketing subscription statuses affect marketing templates. They do not block utility templates or regular service replies sent within the 24-hour customer service window.
Opt-in and opt-out keywords let contacts subscribe to or unsubscribe from WhatsApp marketing messages by replying with a specific word. You can use Kommo’s default keywords or create your own.
This article explains how keywords work and how to set up, edit, delete, and add them to WhatsApp marketing templates.
To learn more about WhatsApp Business marketing subscription statuses, check out WhatsApp Business opt-in and opt-out overview.
To learn how to check and change contacts’ statuses and how opt-outs affect messages, see Use WhatsApp opt-in and opt-out in Kommo.
How opt-in and opt-out keywords work
Kommo includes two default keywords:
Start — Changes the contact’s status to Opt-in.
Stop — Changes the contact’s status to Opt-out.
When Kommo receives a WhatsApp message that exactly matches one of your configured keywords, it automatically updates the contact’s marketing subscription status.
Keywords are not case-sensitive. For example, Kommo treats “stop,” “Stop,” and “STOP” as the same keyword. Messages that do not exactly match a configured keyword do not affect the contact’s status.
Important: An opt-out keyword works regardless of the type of message your business sent previously. For example, if a contact replies “Stop” after receiving a utility message, Kommo still changes their marketing subscription status to Opt-out.
You can also configure a confirmation message that Kommo sends after a keyword changes the contact’s status.
Set up opt-in and opt-out keywords
Add keywords in the Marketing subscription tab of your WhatsApp Business integration.
Limitations:
Each opt-in and opt-out keyword must be unique.
You can add up to 10 opt-in keywords and 10 opt-out keywords.
Keywords can contain up to 20 characters.
Confirmation messages can contain up to 1,024 characters.
Set up an opt-in keyword
An opt-in keyword changes a contact’s marketing subscription status to Opt-in.
To add an opt-in keyword:
Open your WhatsApp Business integration in Kommo.
Open the WhatsApp Business integration, then Marketing subscription tab.
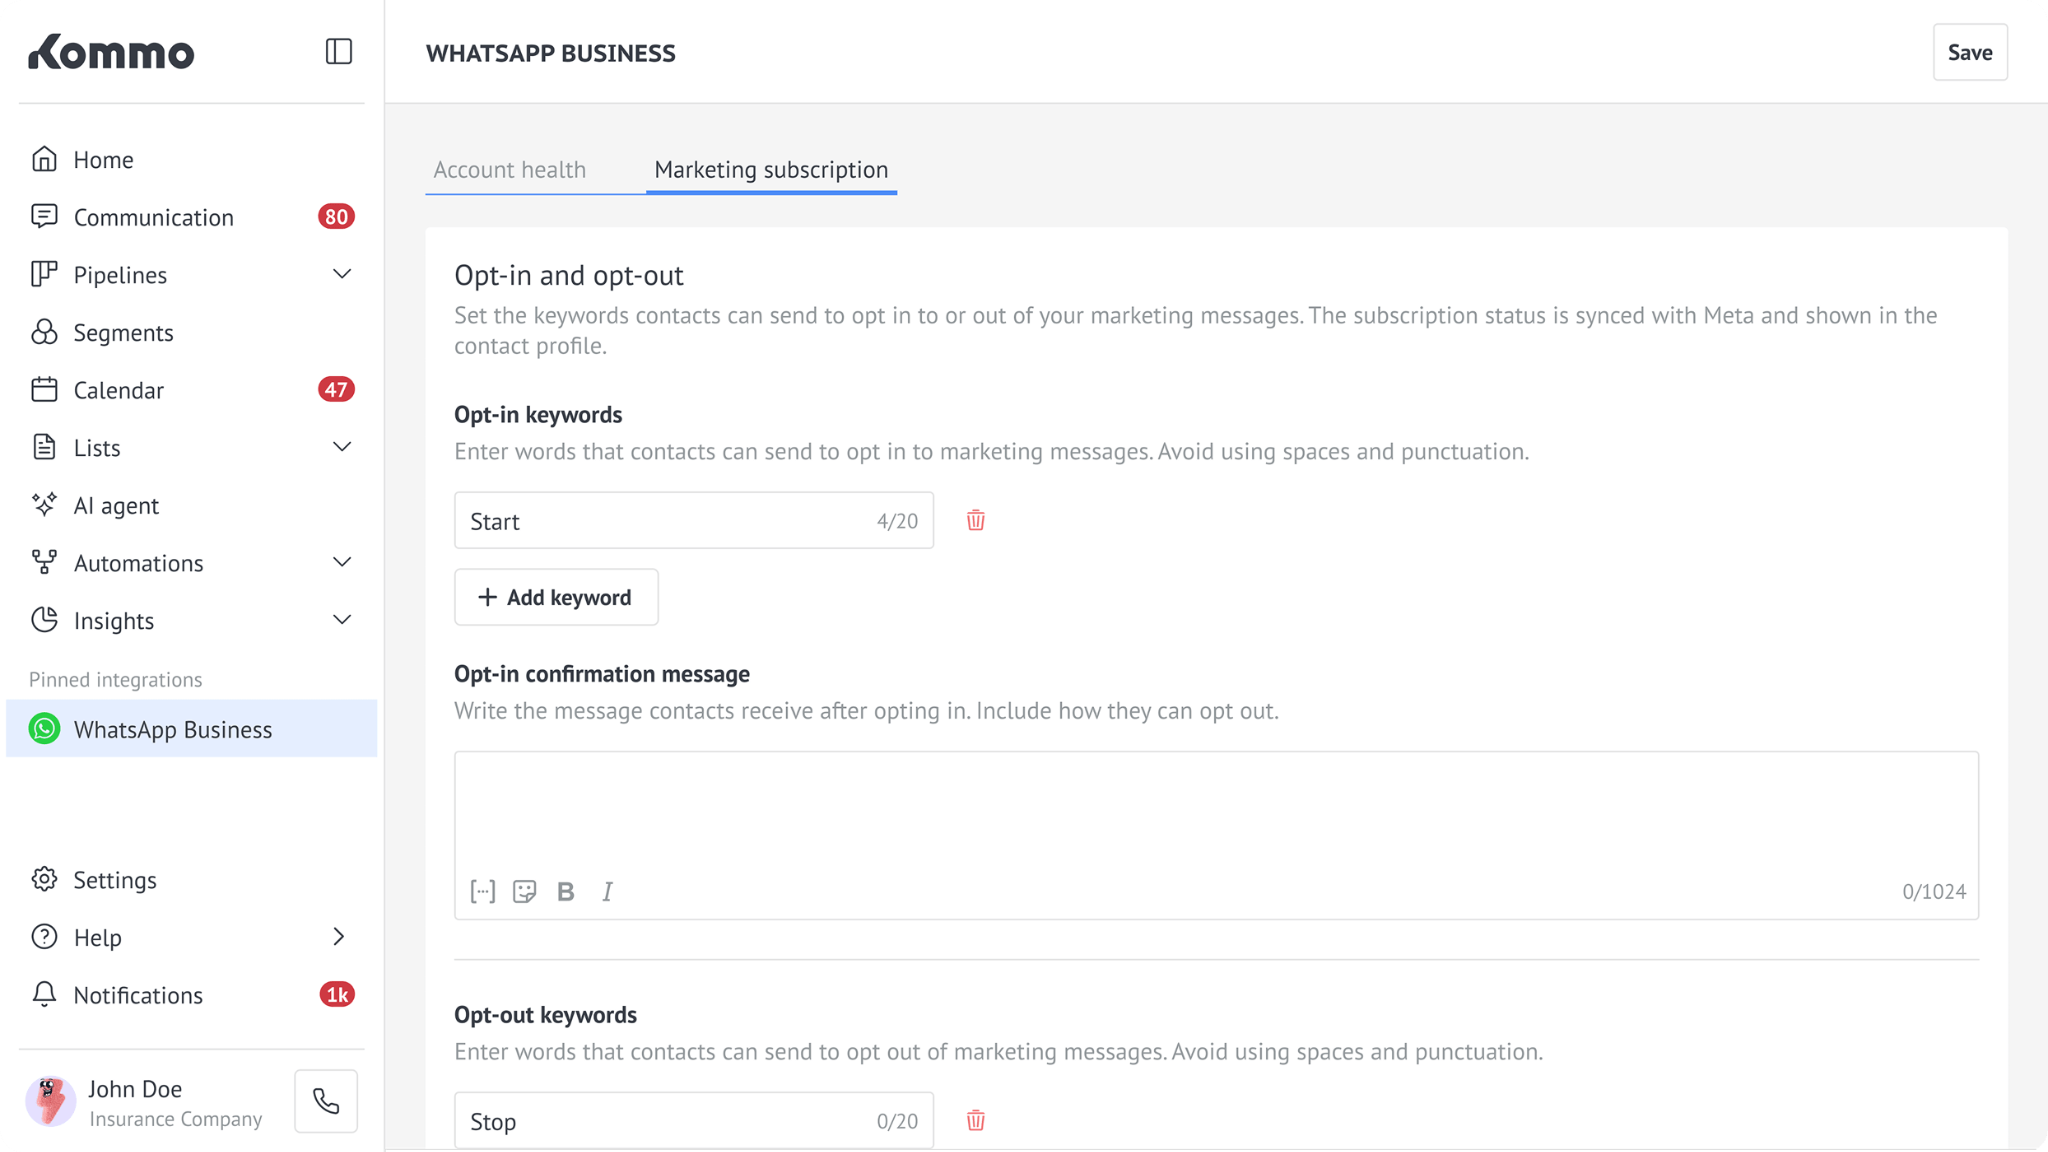
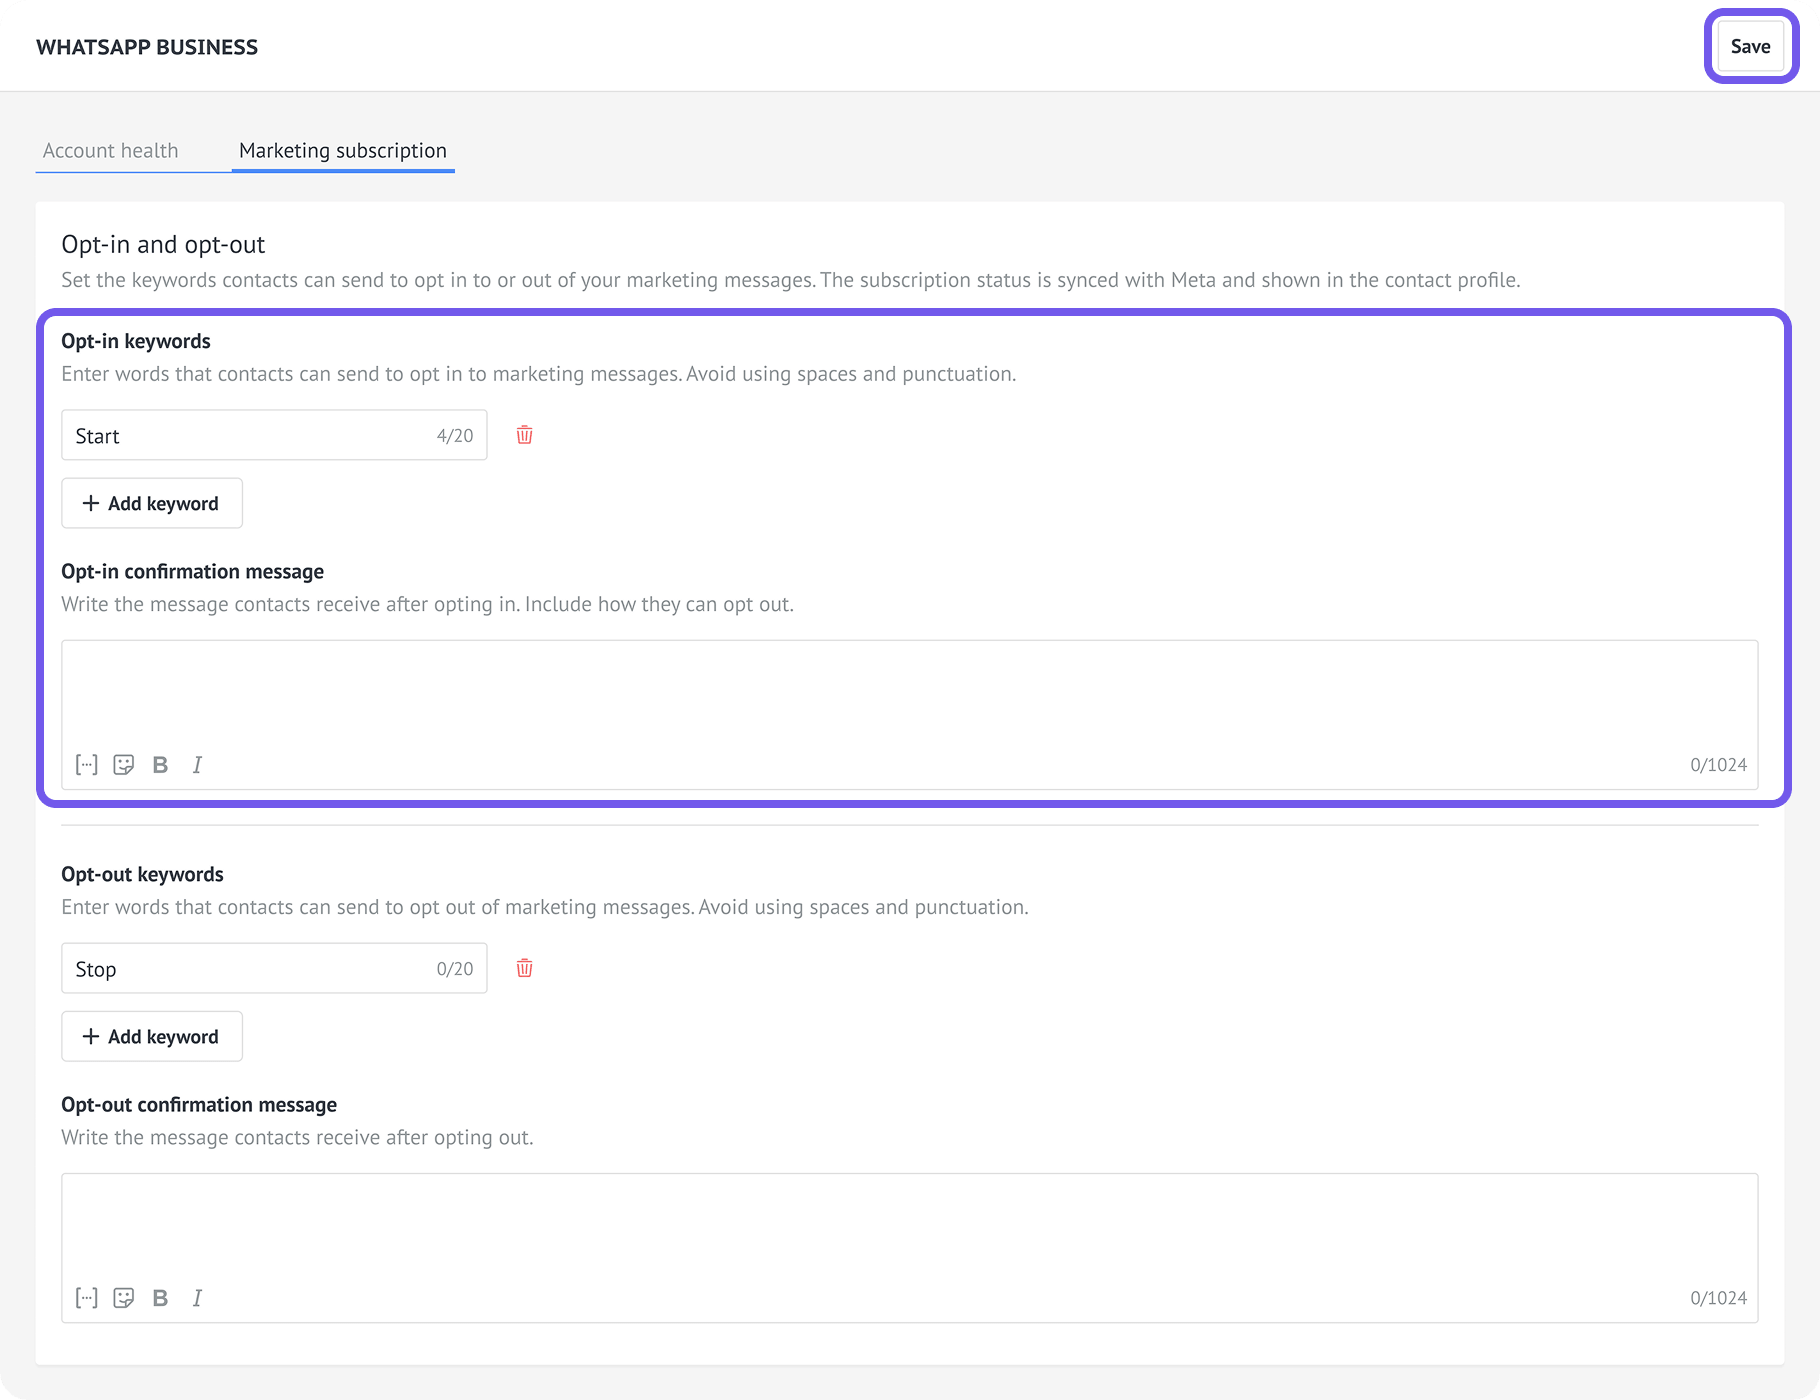
In the Opt-in keywords section, click Add keyword.
Enter a unique keyword.
Optional: Add a confirmation message.
Click Save.
Set up an opt-out keyword
An opt-out keyword changes a contact’s marketing subscription status to Opt-out.
To add an opt-out keyword:
Open your WhatsApp Business integration in Kommo.
Open the Marketing subscription tab.
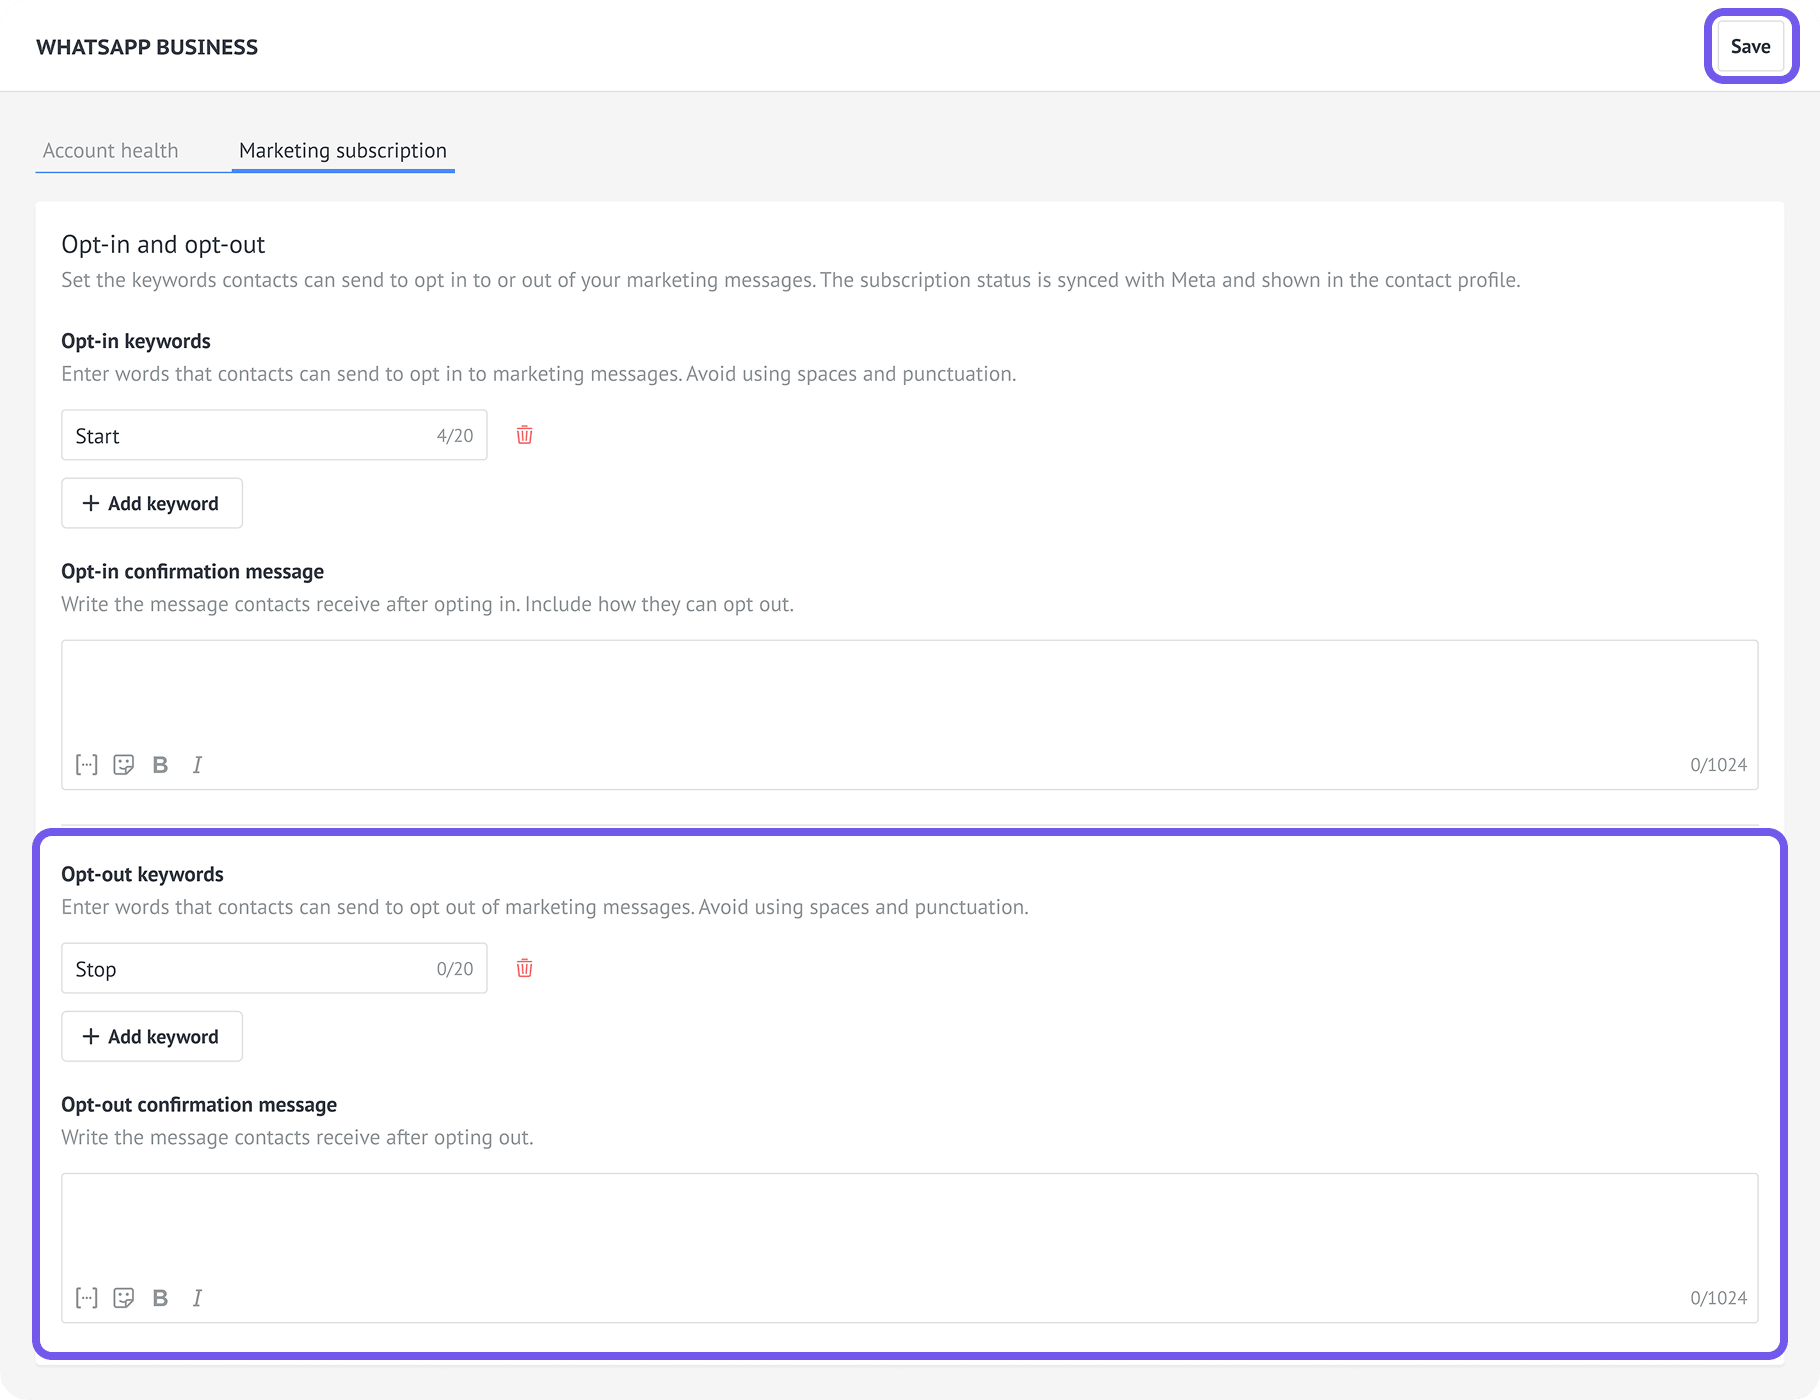
In the Opt-out keywords section, click Add keyword.
Enter a unique keyword.
Optional: Add a confirmation message.
Click Save.
Add keywords to a marketing template
Include an opt-in or opt-out keyword in your marketing template so contacts know how to update their preferences.
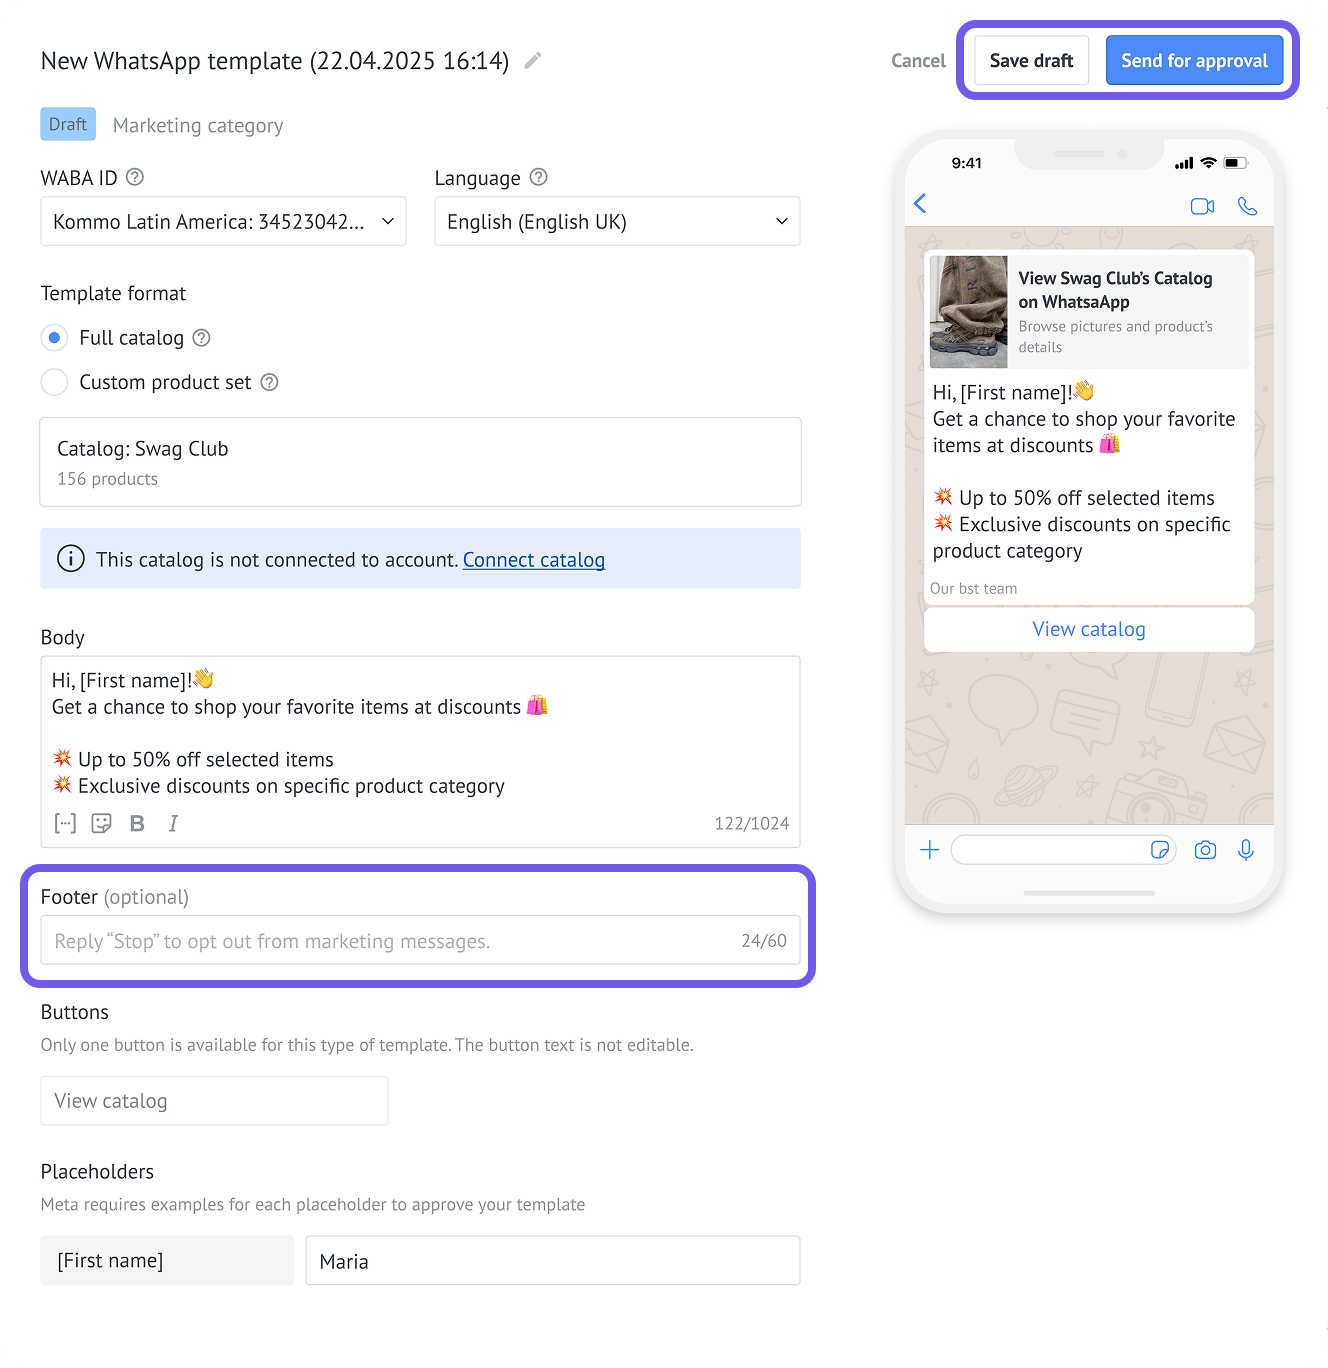
For example, you can add the following text to the template footer:
To stop receiving messages from us, reply STOP.
Add the keyword before submitting the template to Meta. Once Meta approves a template, you cannot edit it. If you add or change a keyword, create and submit a new template containing the updated keyword.
To add a keyword to a template:
Go to Automations → Templates → Chat templates.
Create a WhatsApp template. For detailed instructions, see Create and manage WhatsApp Business message templates.
Add a message containing your opt-in or opt-out keyword to the footer.
Save the template as a draft or submit it to Meta for approval.
After Meta approves the template, you can send it:
Manually from a chat with a contact.
Through a broadcast.
Automatically through Salesbot or a Digital Pipeline trigger.
When contacts reply with a configured keyword, Kommo updates their marketing subscription status.
For more information about template approval, see the WhatsApp templates overview.
Manage keywords
You can edit or delete keywords in the Marketing subscription settings.
If you change or delete a keyword, remember to replace any marketing templates that contain it. The old keyword will no longer update contacts’ statuses.
Edit a keyword
Edit a keyword when you want contacts to use a different word to update their status.
To edit a keyword:
Open your WhatsApp Business integration in Kommo.
Open the Marketing subscription tab.
Click the keyword you want to edit.
Change the keyword.
Click Save.
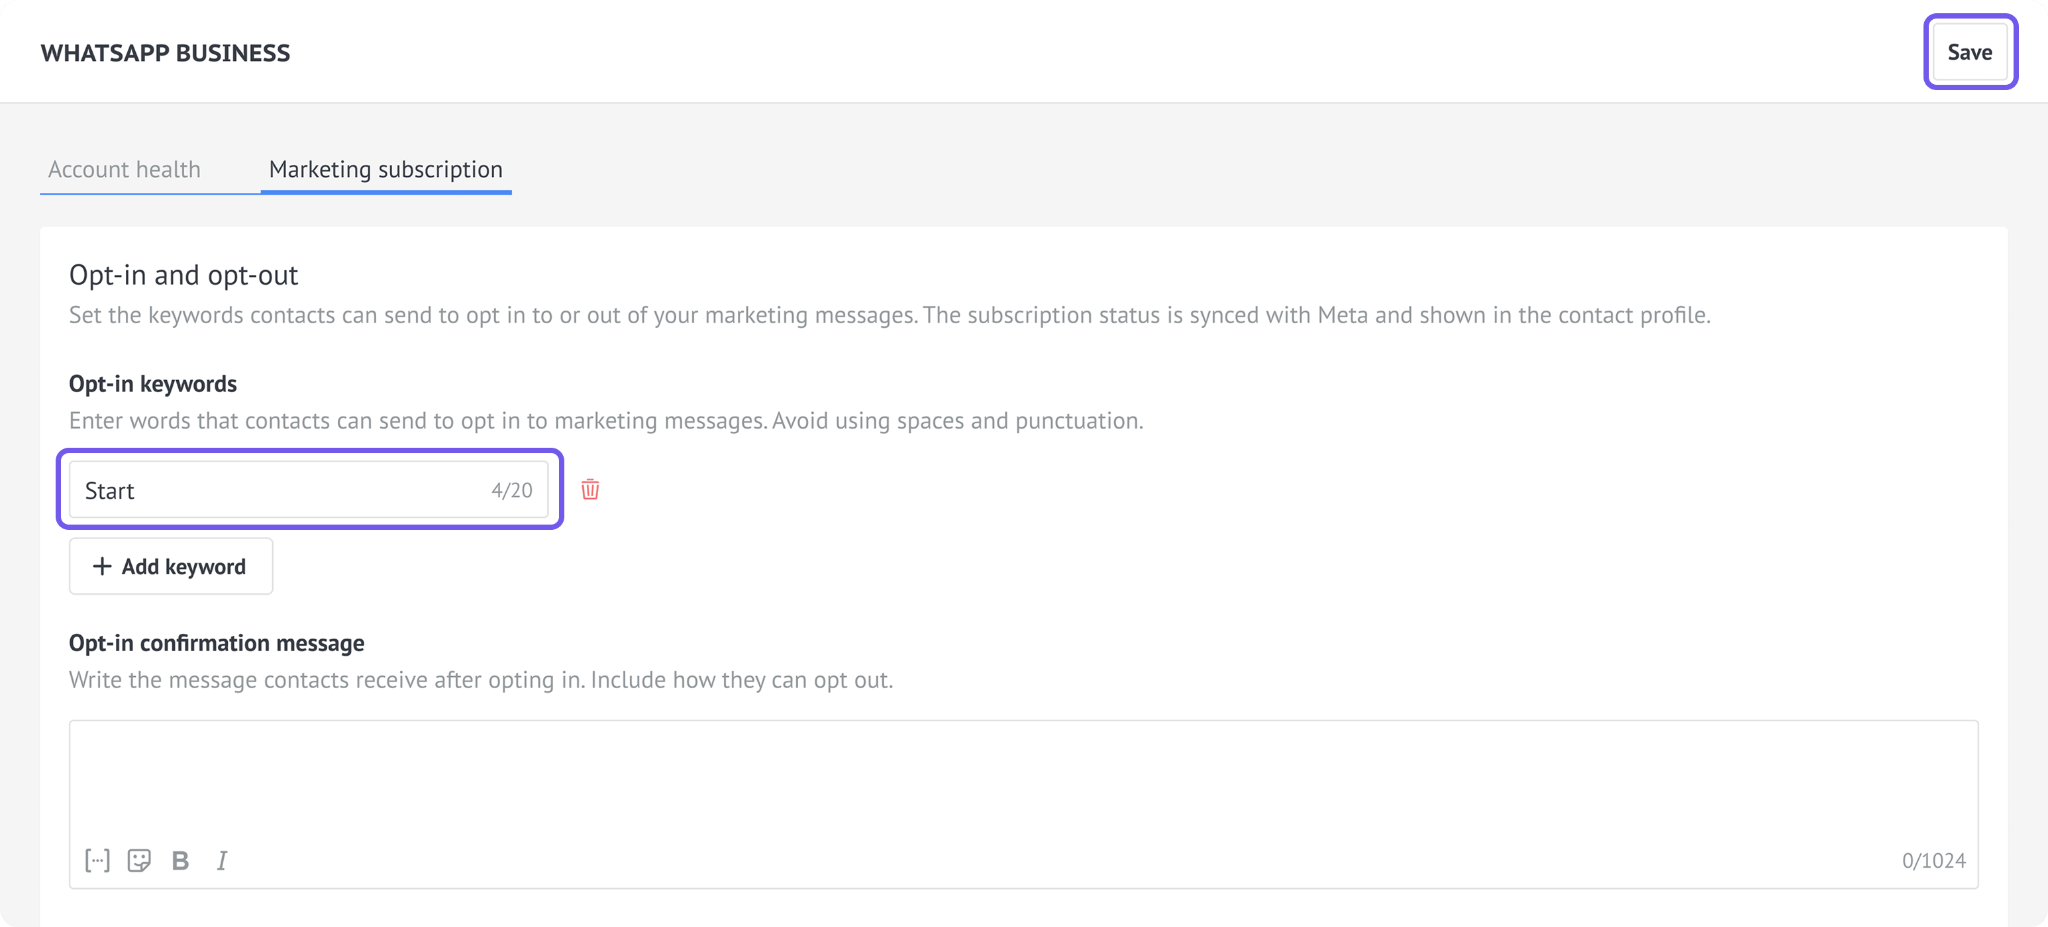
Approved templates cannot be edited. If an approved template contains the previous keyword, create a new template containing the updated keyword and stop using the old template.
Delete a keyword
Delete a keyword when you no longer want contacts to use it.
Tip: Keep at least one opt-in and one opt-out keyword so contacts can easily manage their preferences.
To delete a keyword:
Open your WhatsApp Business integration in Kommo.
Open the Marketing subscription tab.
Click the trash bin icon next to the keyword.
Click Delete to confirm.
Click Save.
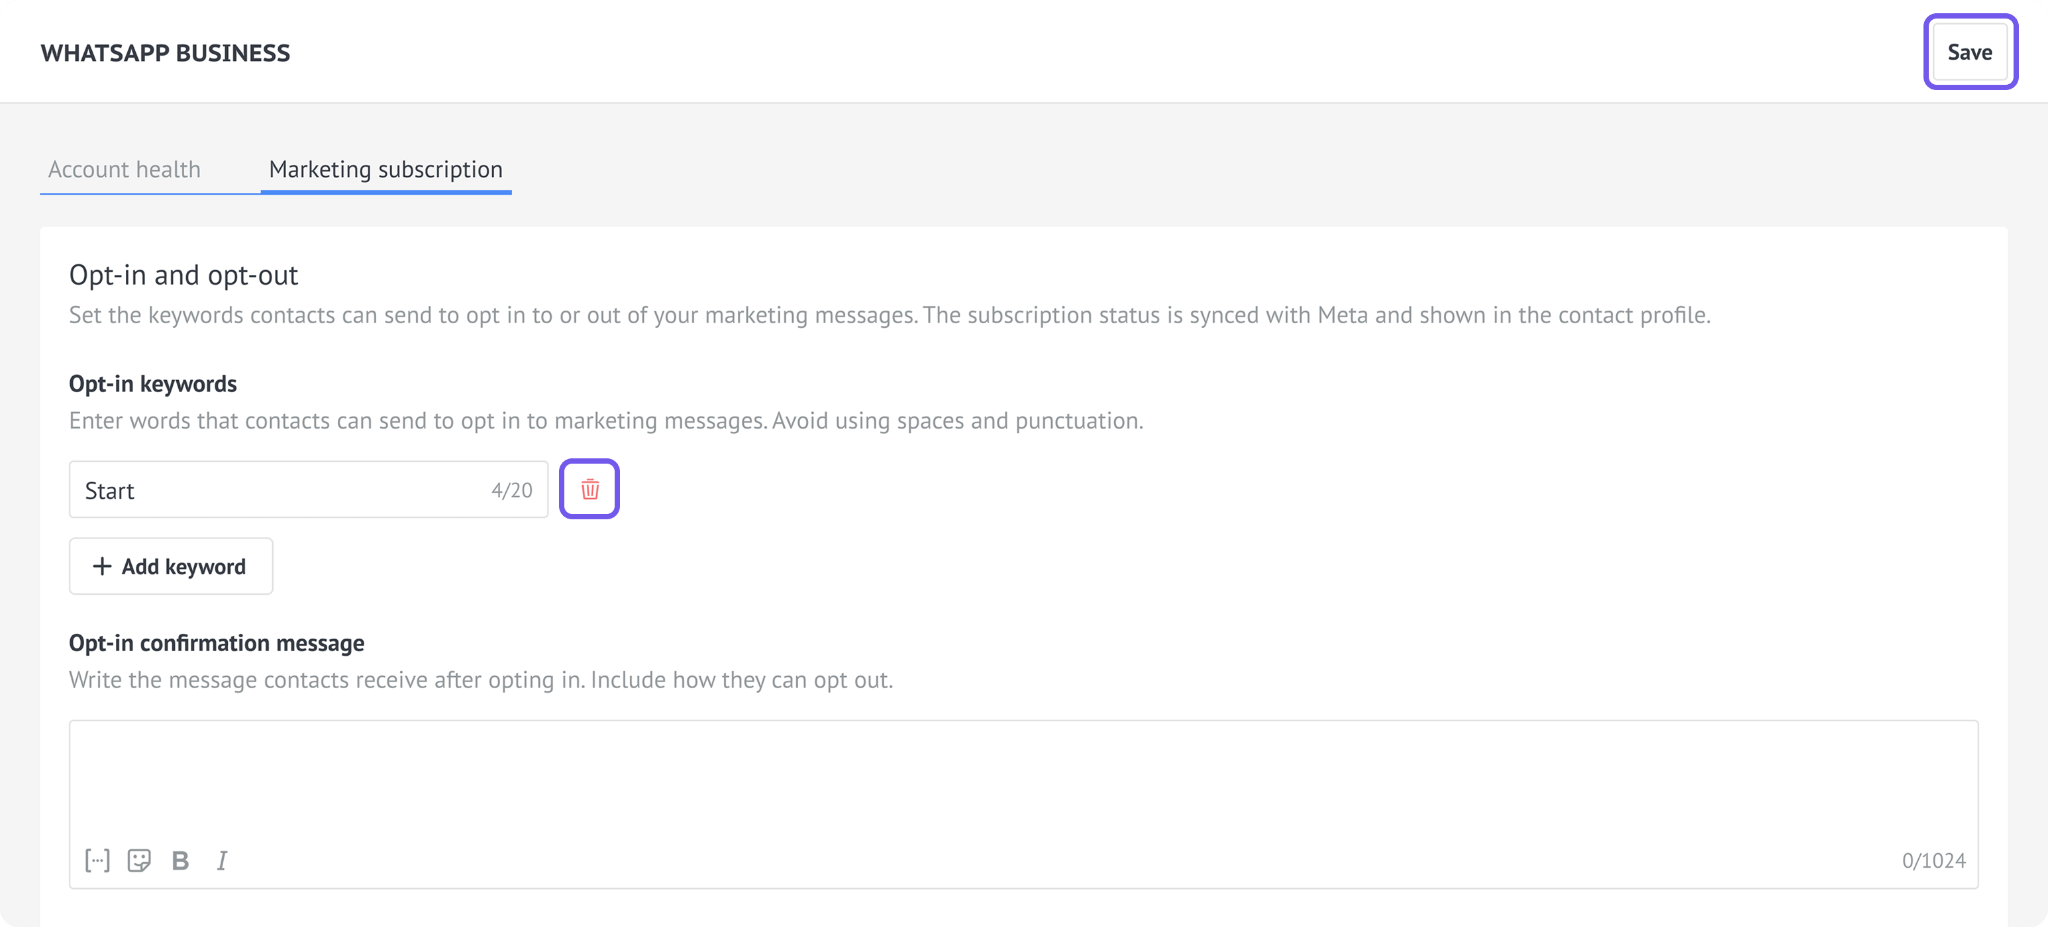
After deleting a keyword, stop sending templates that contain it. If you add a replacement keyword, create new templates that include it.
Check keyword changes in the Activity log
The Activity log shows which team members added or deleted keywords and when each change was made.
To check keyword changes:
Go to Insights → Activity log.
Review the table to see which keywords were added or deleted, when the changes occurred, and who made them.
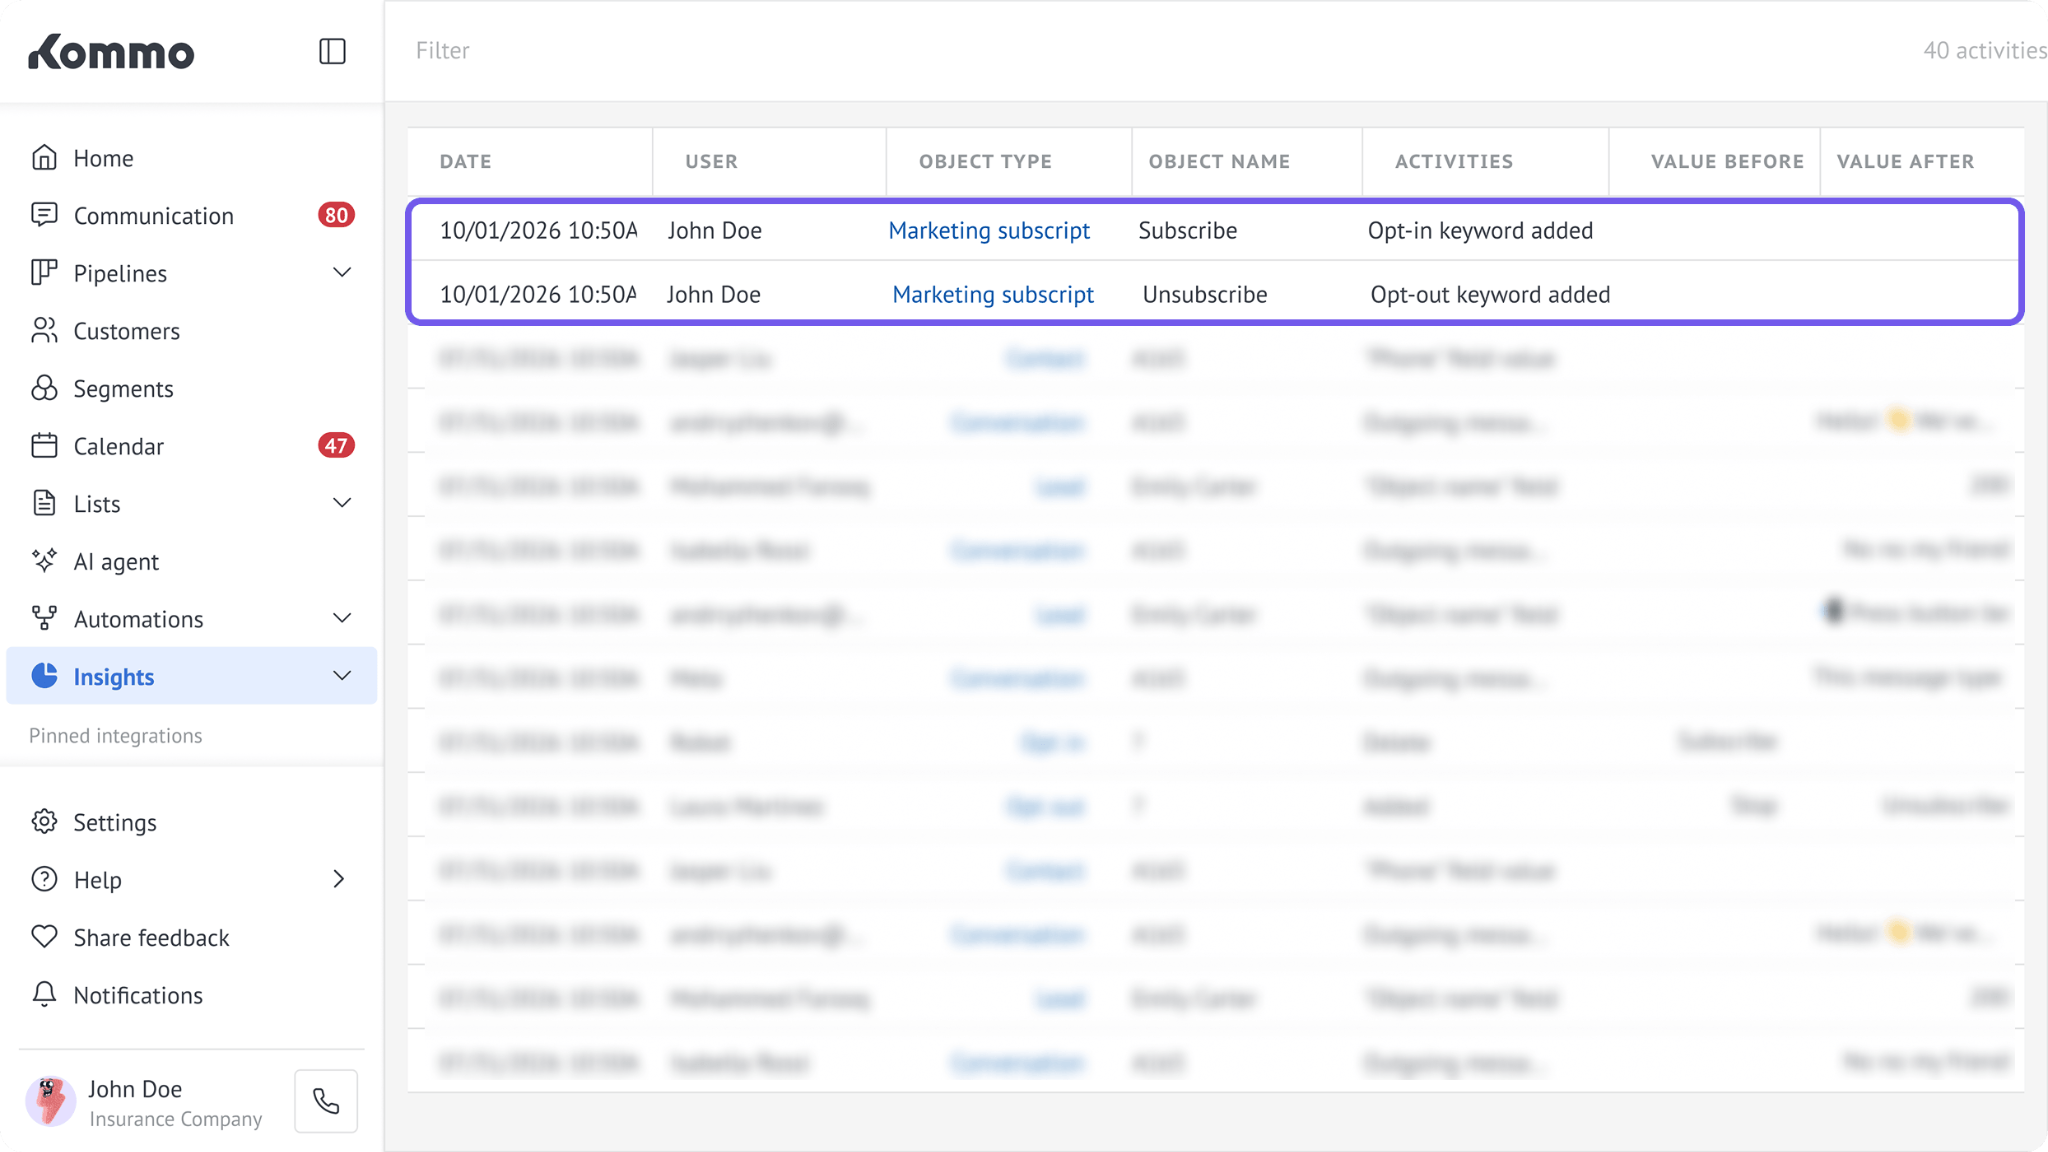
To filter the results:
Click the filter bar.
Select criteria such as the period or user.
In the Activities dropdown, select Opt-in, Opt-out, or both.
Click Apply.
To clear the filters, click the cross icon in the filter bar.