What you’ll need:
A Kommo account on the Advanced plan or higher, or an active 14-day trial.
Admin access in Kommo.
A configured booking process.
The WhatsApp Business integration installed and connected to your number.
Keep in mind:
WhatsApp templates must be approved by Meta before they can be sent.
Clients must have agreed to receive WhatsApp messages from your business.
You can create a template during setup or select an existing approved template.
Meta charges for delivering WhatsApp template messages according to its pricing rules. Learn more in Updated pricing rules for WhatsApp Business.
Keep clients informed about their bookings and save time with automatic WhatsApp notifications in Kommo.
Use ready-to-edit templates to get started quickly, customize the messages to fit your business, and let Kommo handle the automation.
This article explains how to create, submit, and manage WhatsApp templates for automatic booking notifications.
How automatic booking notifications work
Automatic WhatsApp booking notifications keep clients updated without requiring you to set up a Salesbot manually. Kommo automatically sends messages when a booking is created or an appointment is coming up.
Notification types
You can send two types of notifications:
Booking confirmation: Sent when a new booking is created.
24-hour booking reminder: Sent 24 hours before the appointment.
Setting up notifications
In Booking settings, you can choose how to set up your notifications:
Create a new template: Start with prefilled content and edit it to fit your needs.
Use an existing template: Select a template that Meta has already approved.
New templates must be approved by Meta. Once approved, Kommo automatically creates and activates the bot that sends the notifications.
Client actions
If your notification includes action buttons, clients can respond directly in WhatsApp:
Confirm: Kommo adds a confirmation note to the associated lead.
Cancel: Kommo cancels the appointment.
Reschedule: The client can choose a new appointment time.
Important: The automatically created bot cannot be edited. If you want to add booking notifications to a custom flow, set them up manually using Salesbot instead.
Set up a WhatsApp booking notification
You can set up booking confirmations and 24-hour reminders separately.
Note: If you already use a Salesbot for WhatsApp booking notifications, turn it off before enabling automatic notifications — otherwise your clients may receive duplicate messages.
To set up a notification:
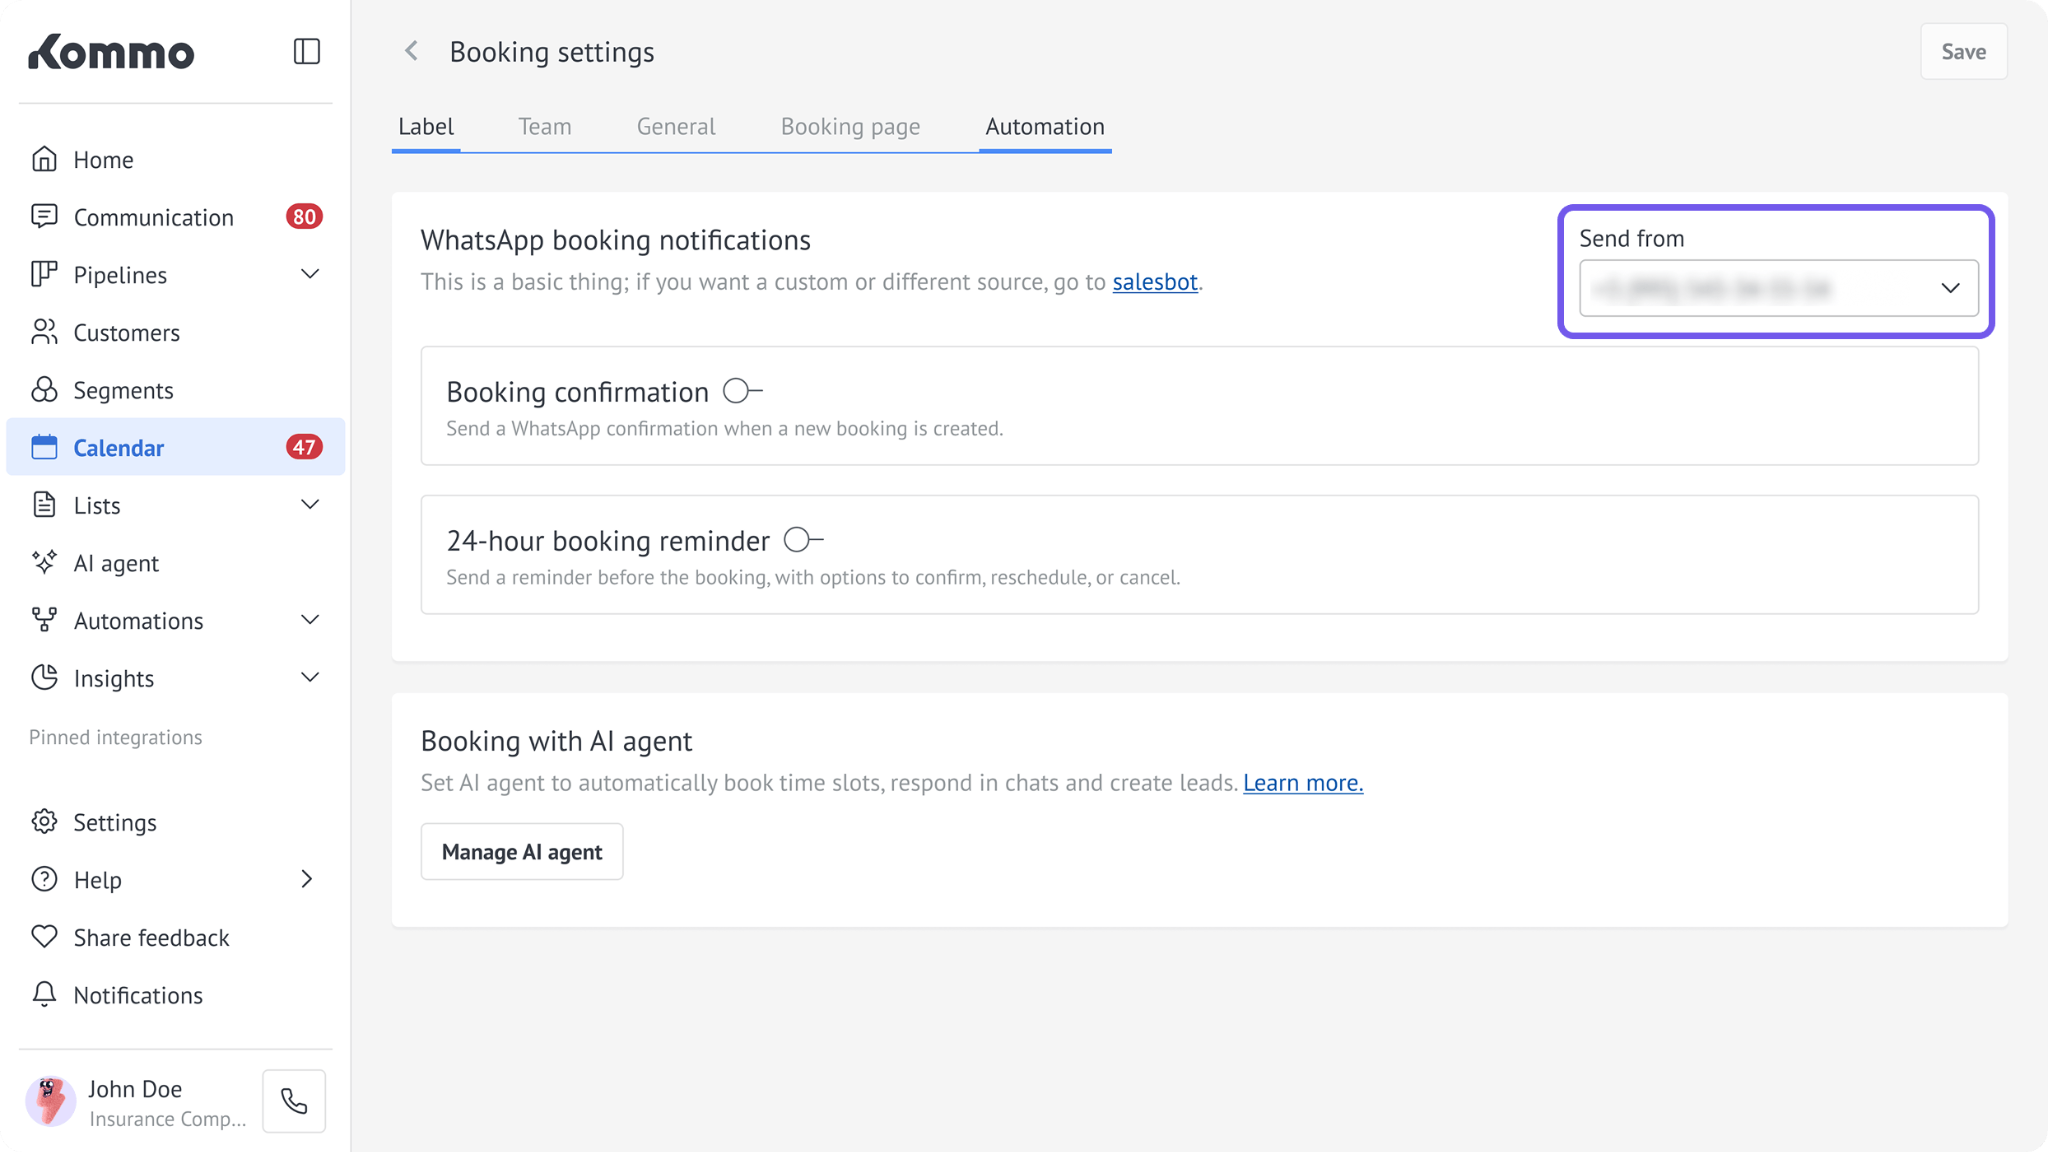
Go to Calendar → Booking settings → Automation.
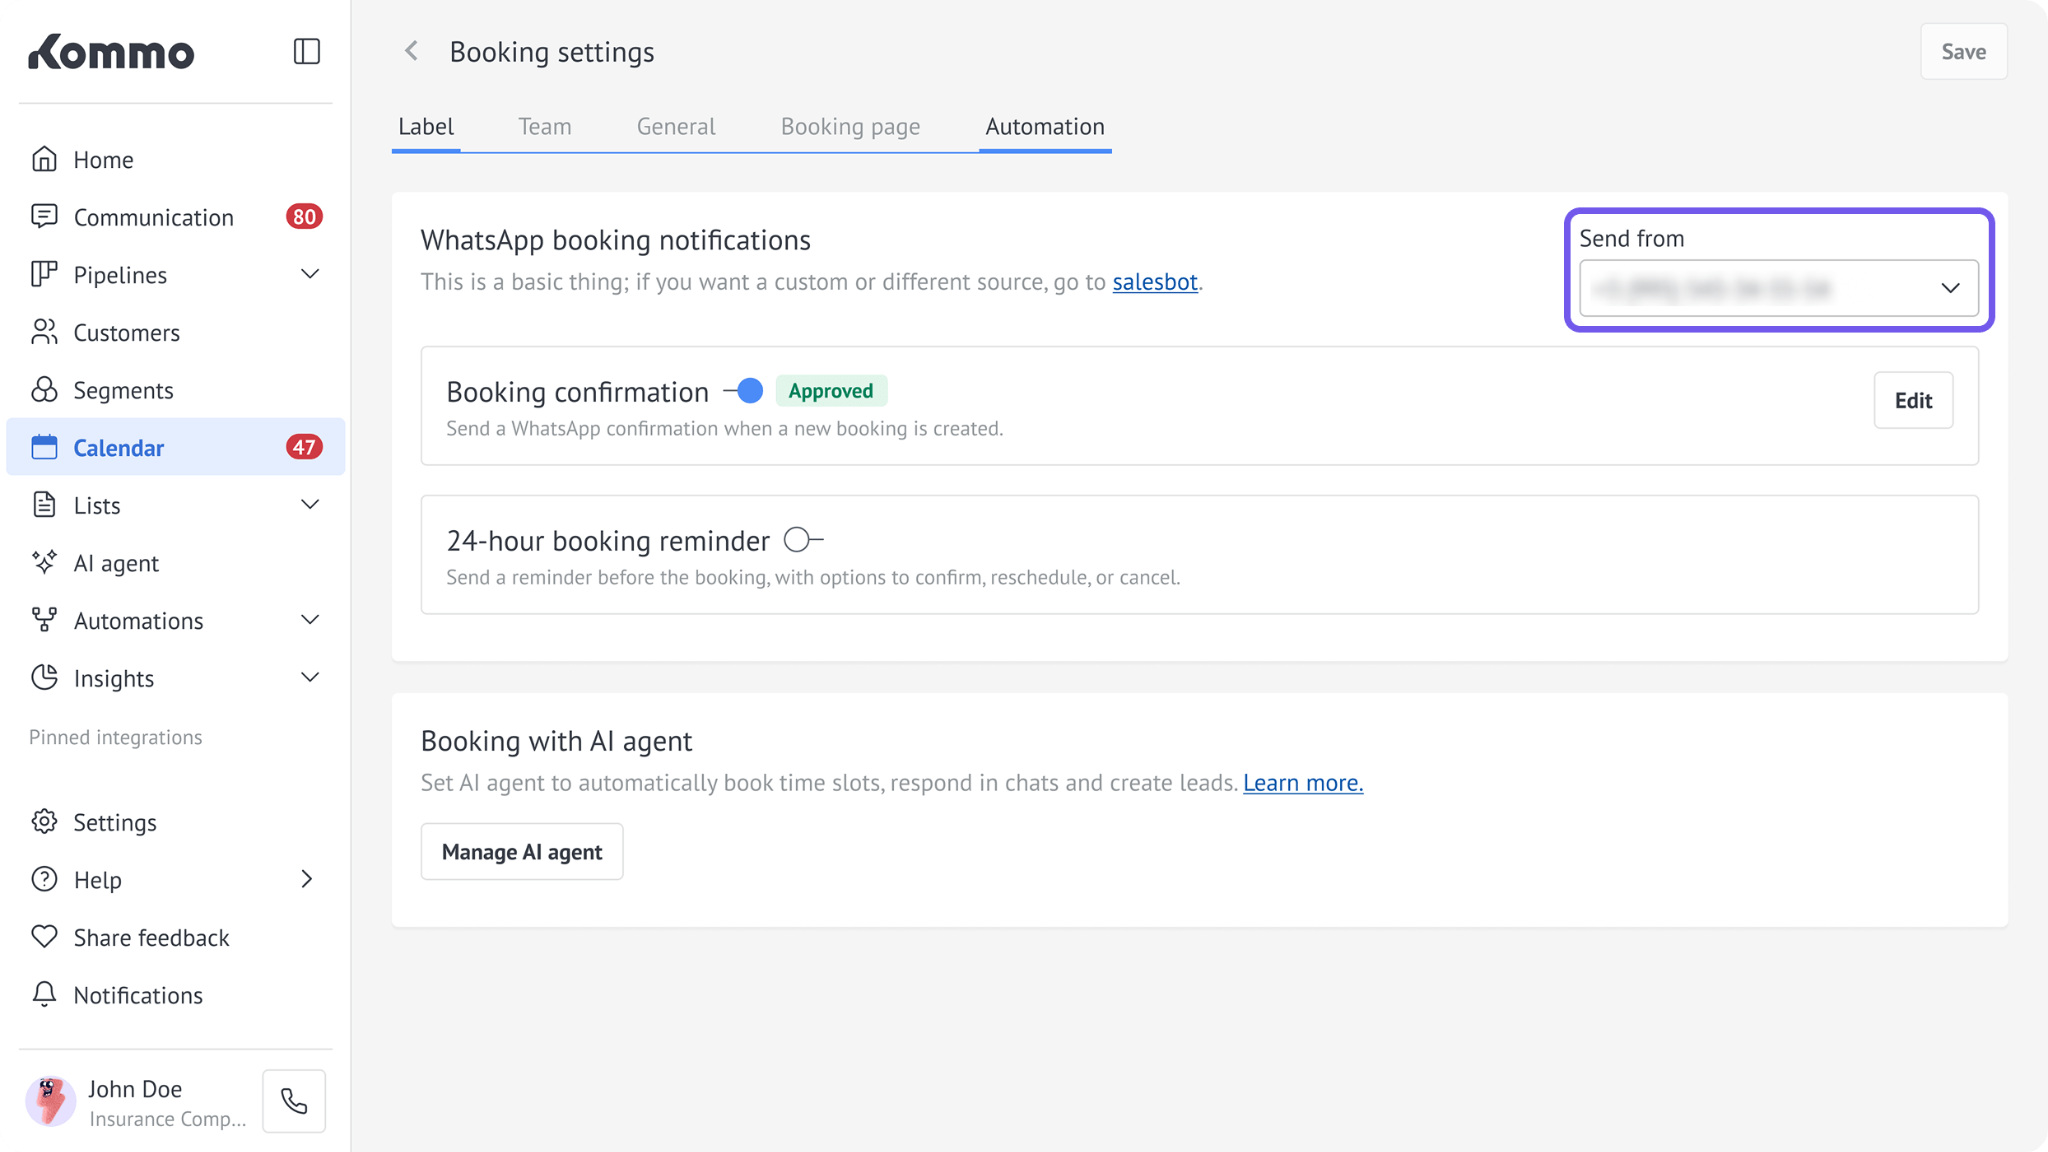
In Send from, select the WhatsApp number you want to use.
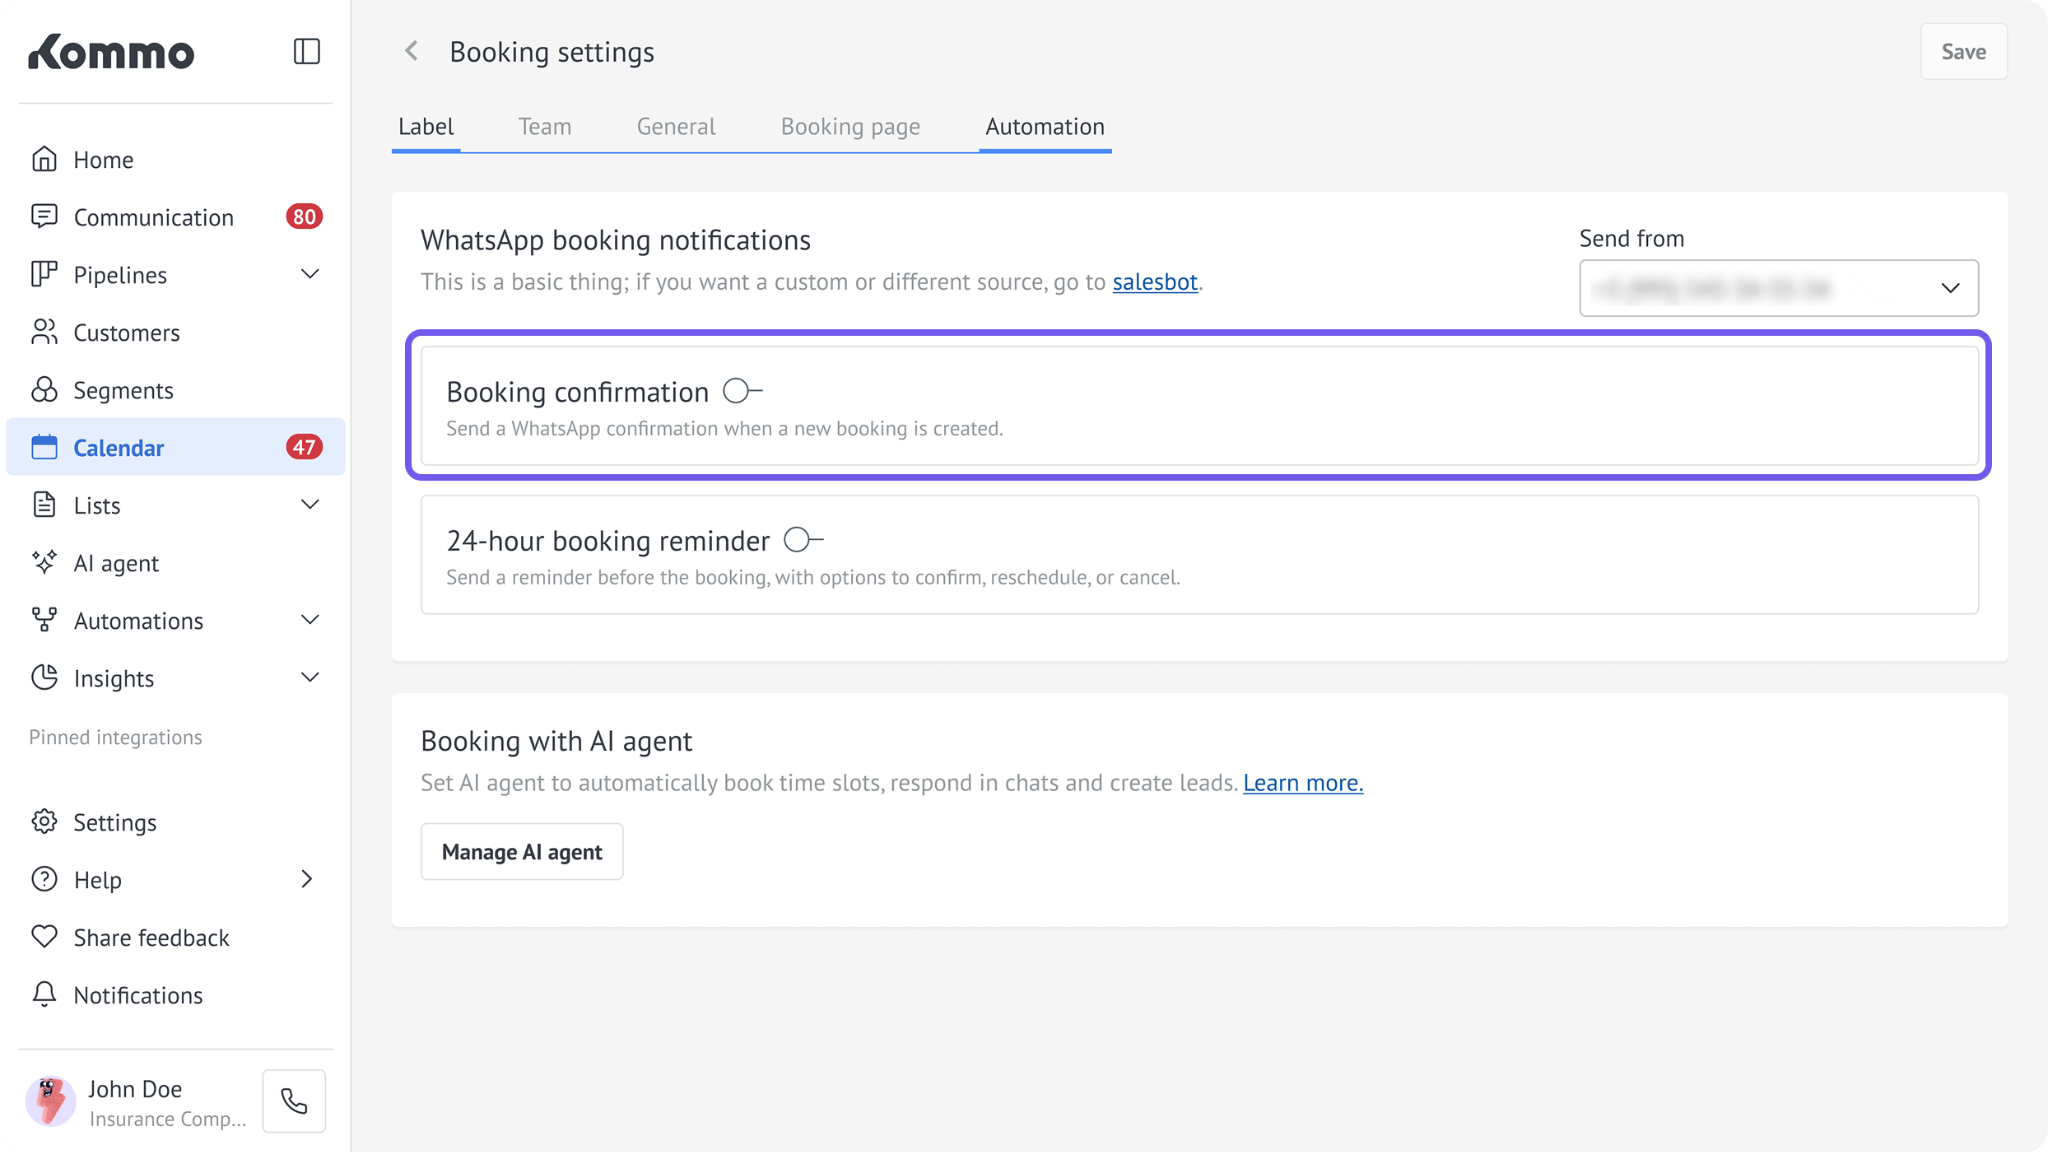
Turn on the toggle next to the notification type:
Booking confirmation
24-hour booking reminder
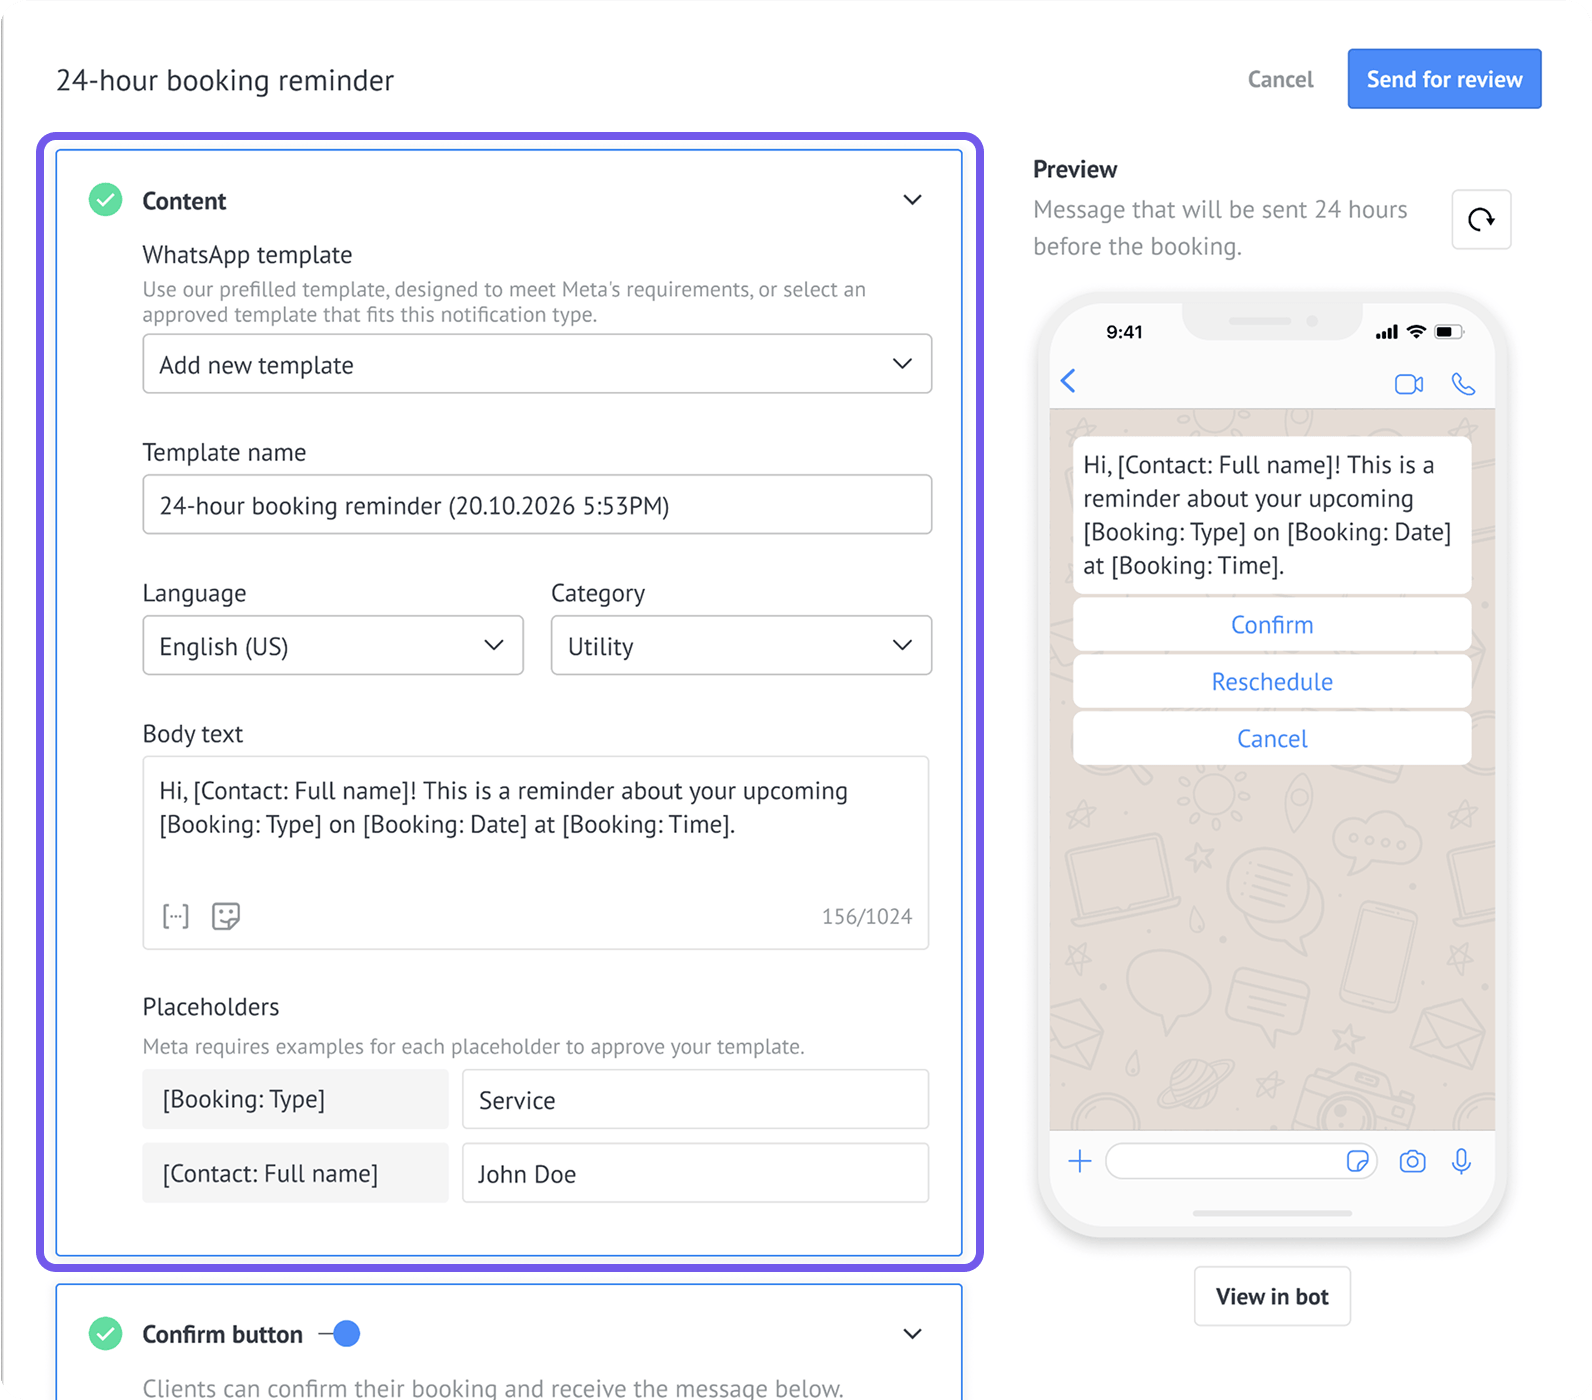
The template settings window opens automatically.
In the Content section, choose one of the following:
Add new template — create a template using ready-made content.
Select an existing approved WhatsApp template.
The next steps depend on whether you created a new template or selected an approved one.
If you create a new template
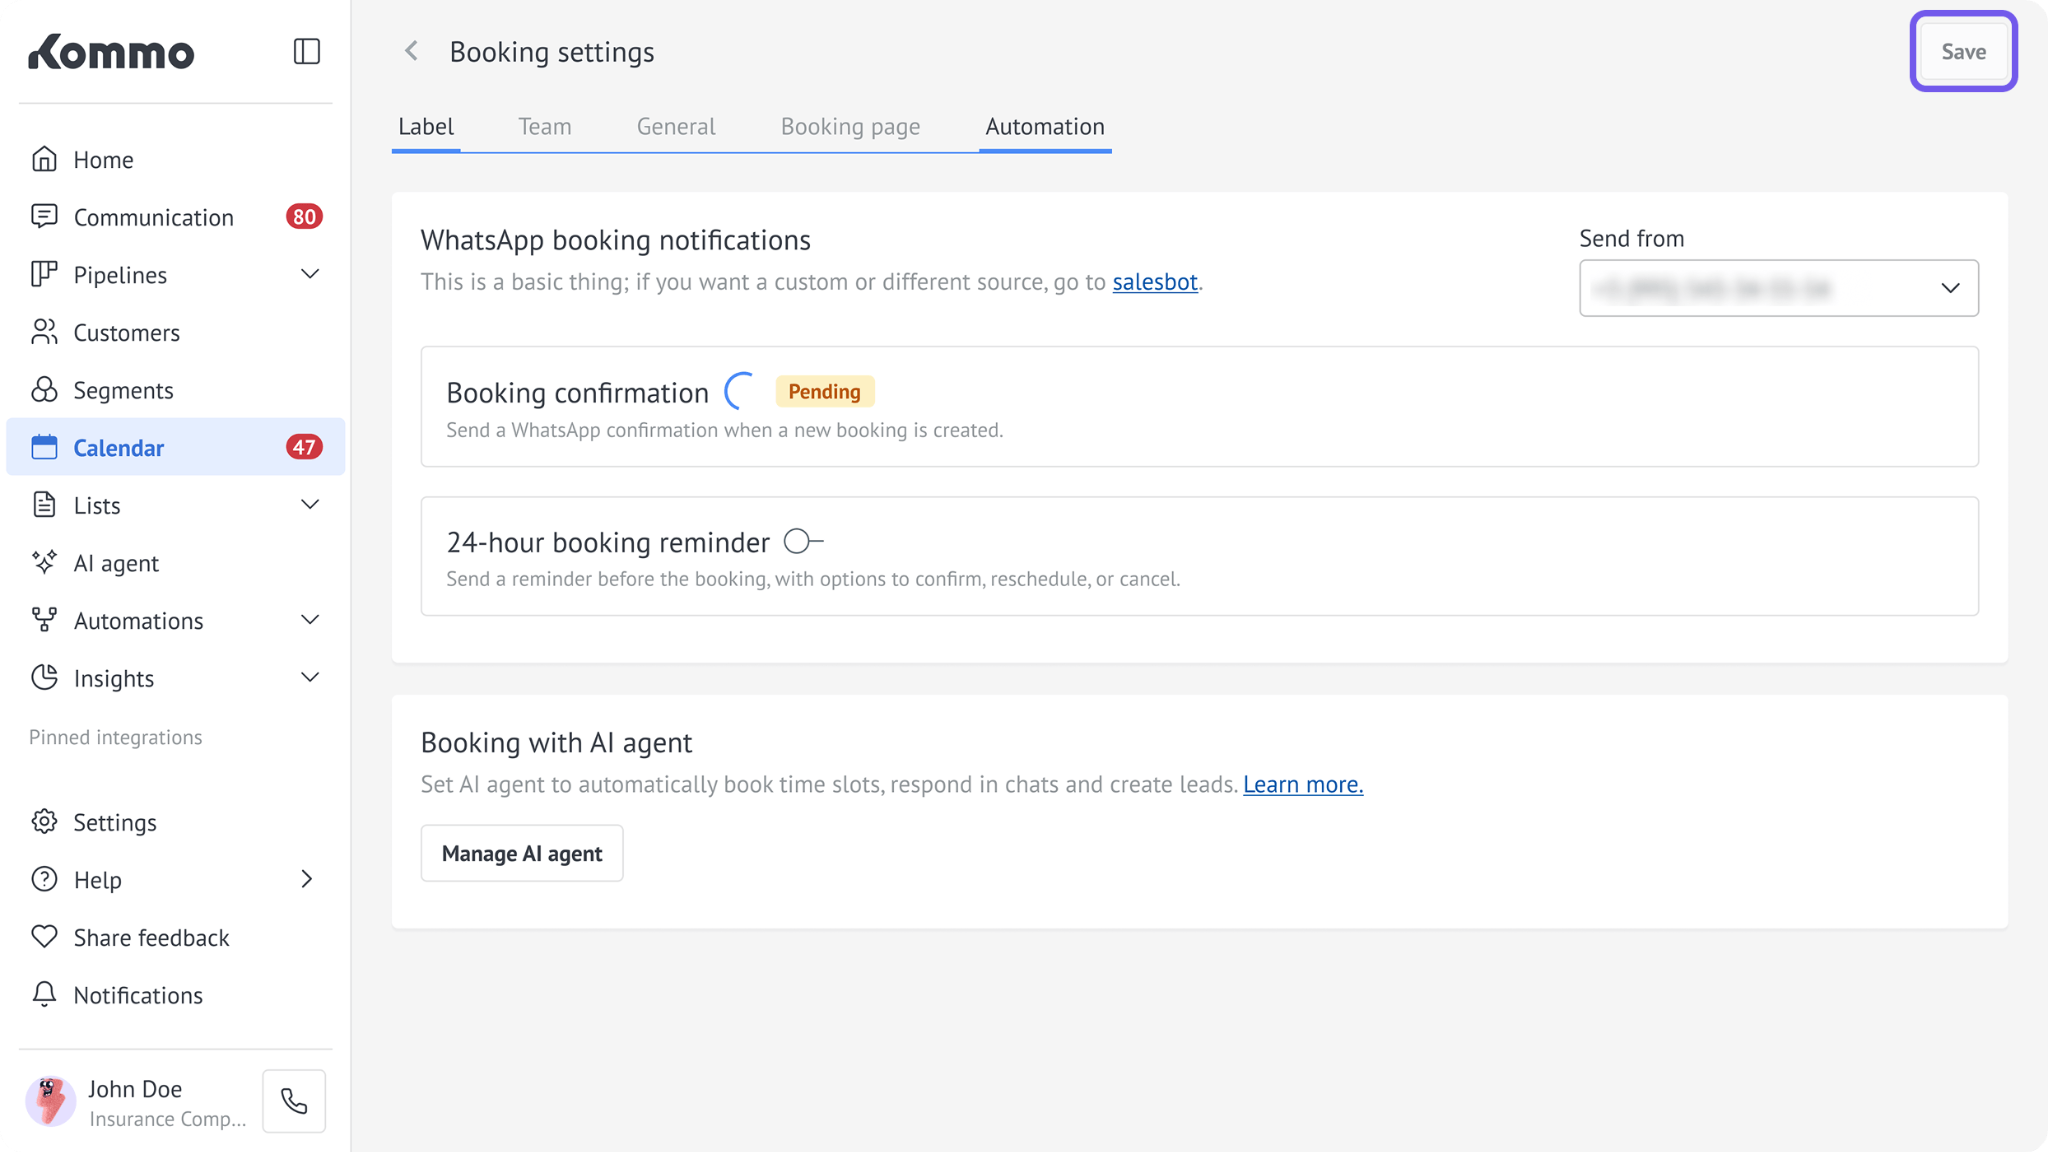
After you submit the template, its status is Pending while Meta reviews it.
You do not need to return to the settings after approval. Once Meta approves the template, Kommo automatically completes the setup and turns on the notification.
If you select an approved template
Kommo turns on the notification automatically after you select the template and save the settings. You do not need to wait for another Meta review.
Create a new WhatsApp booking template
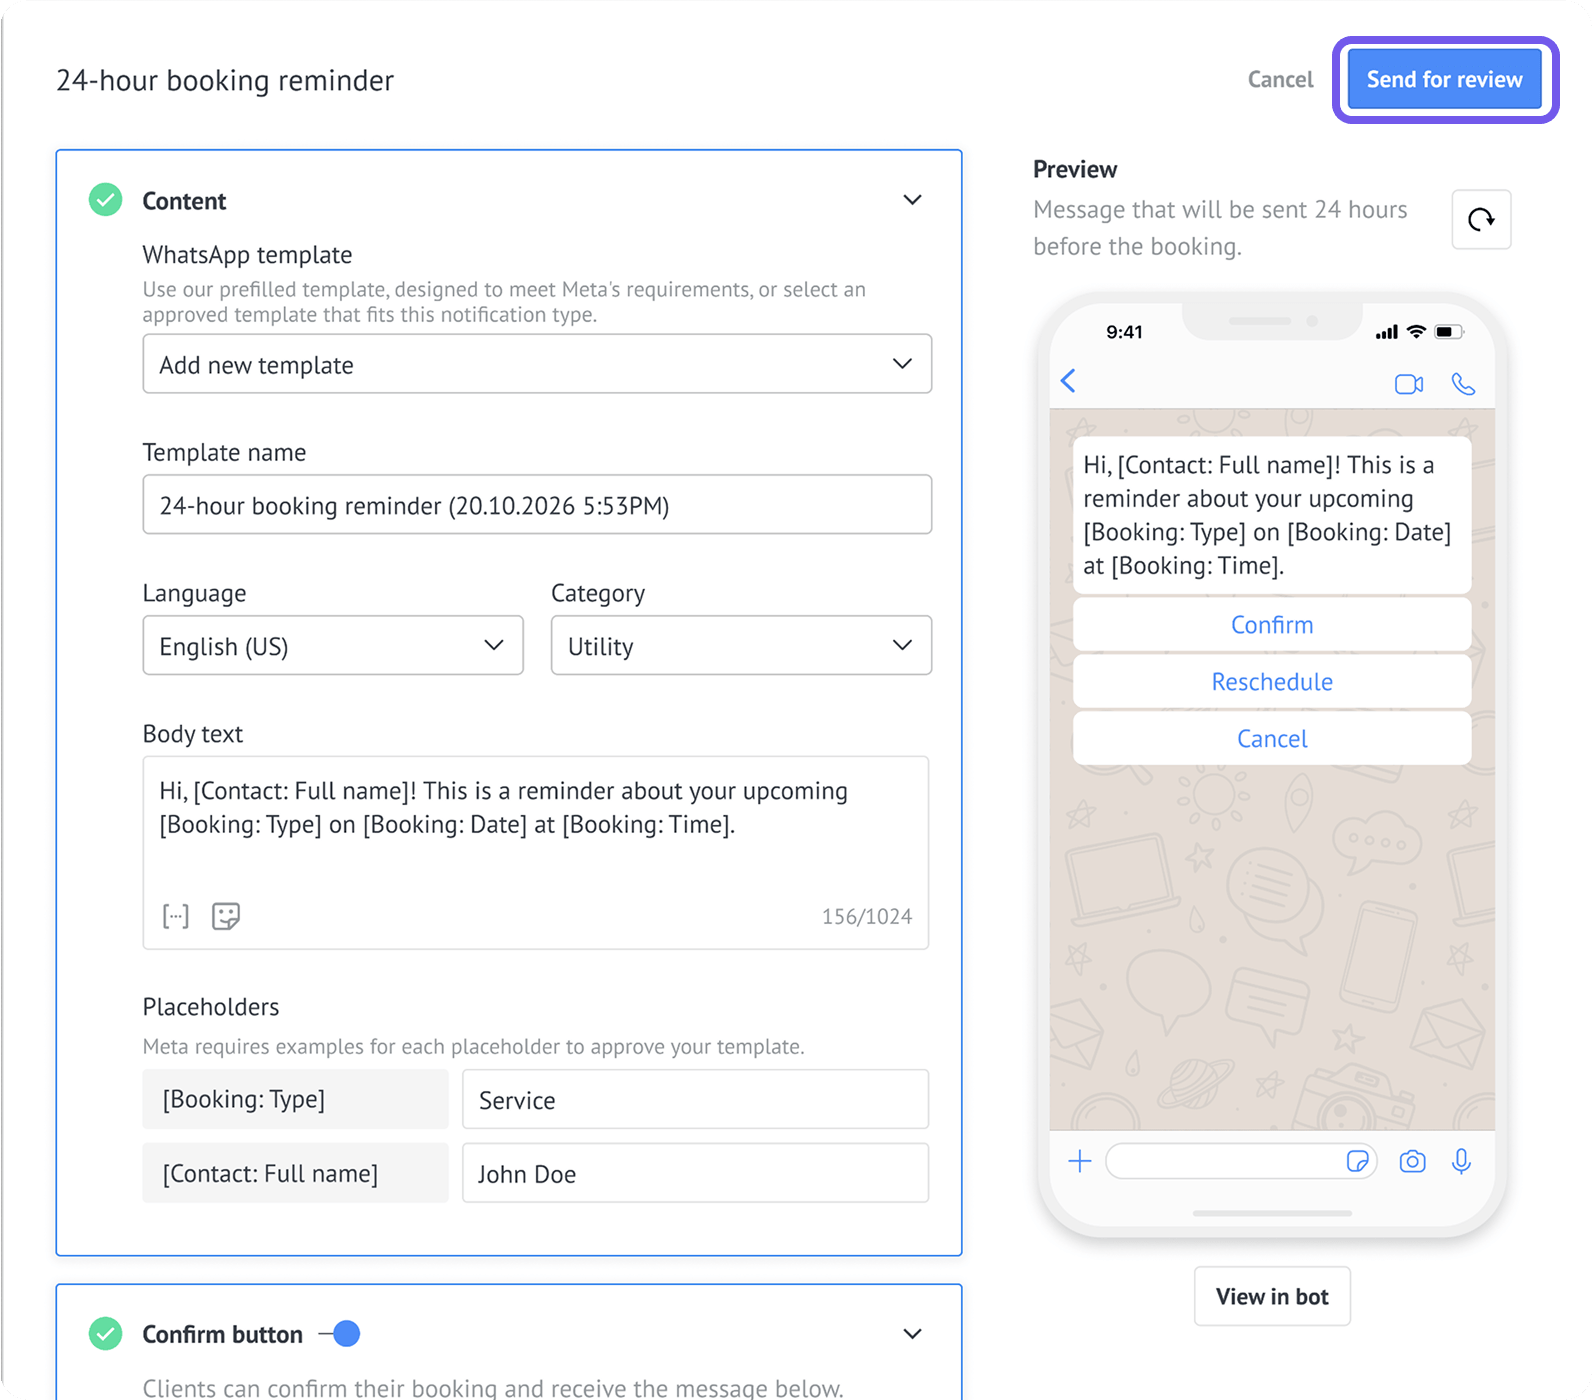
When you select Add new template, Kommo opens a ready-made template for the selected notification. The template name, language, type, and message content are already filled in. You can use the suggested settings or customize them before submitting the template.
To review and configure the template:
Check the name, language, and category, and update them if needed.
Review and edit the message body.
Add examples for any placeholders.
Configure the available buttons:
Confirm button — turn it on or off and edit its label and response text.
Reschedule button — turn it on or off and edit its label and text.
Cancel button — turn it on or off and edit its label and text.
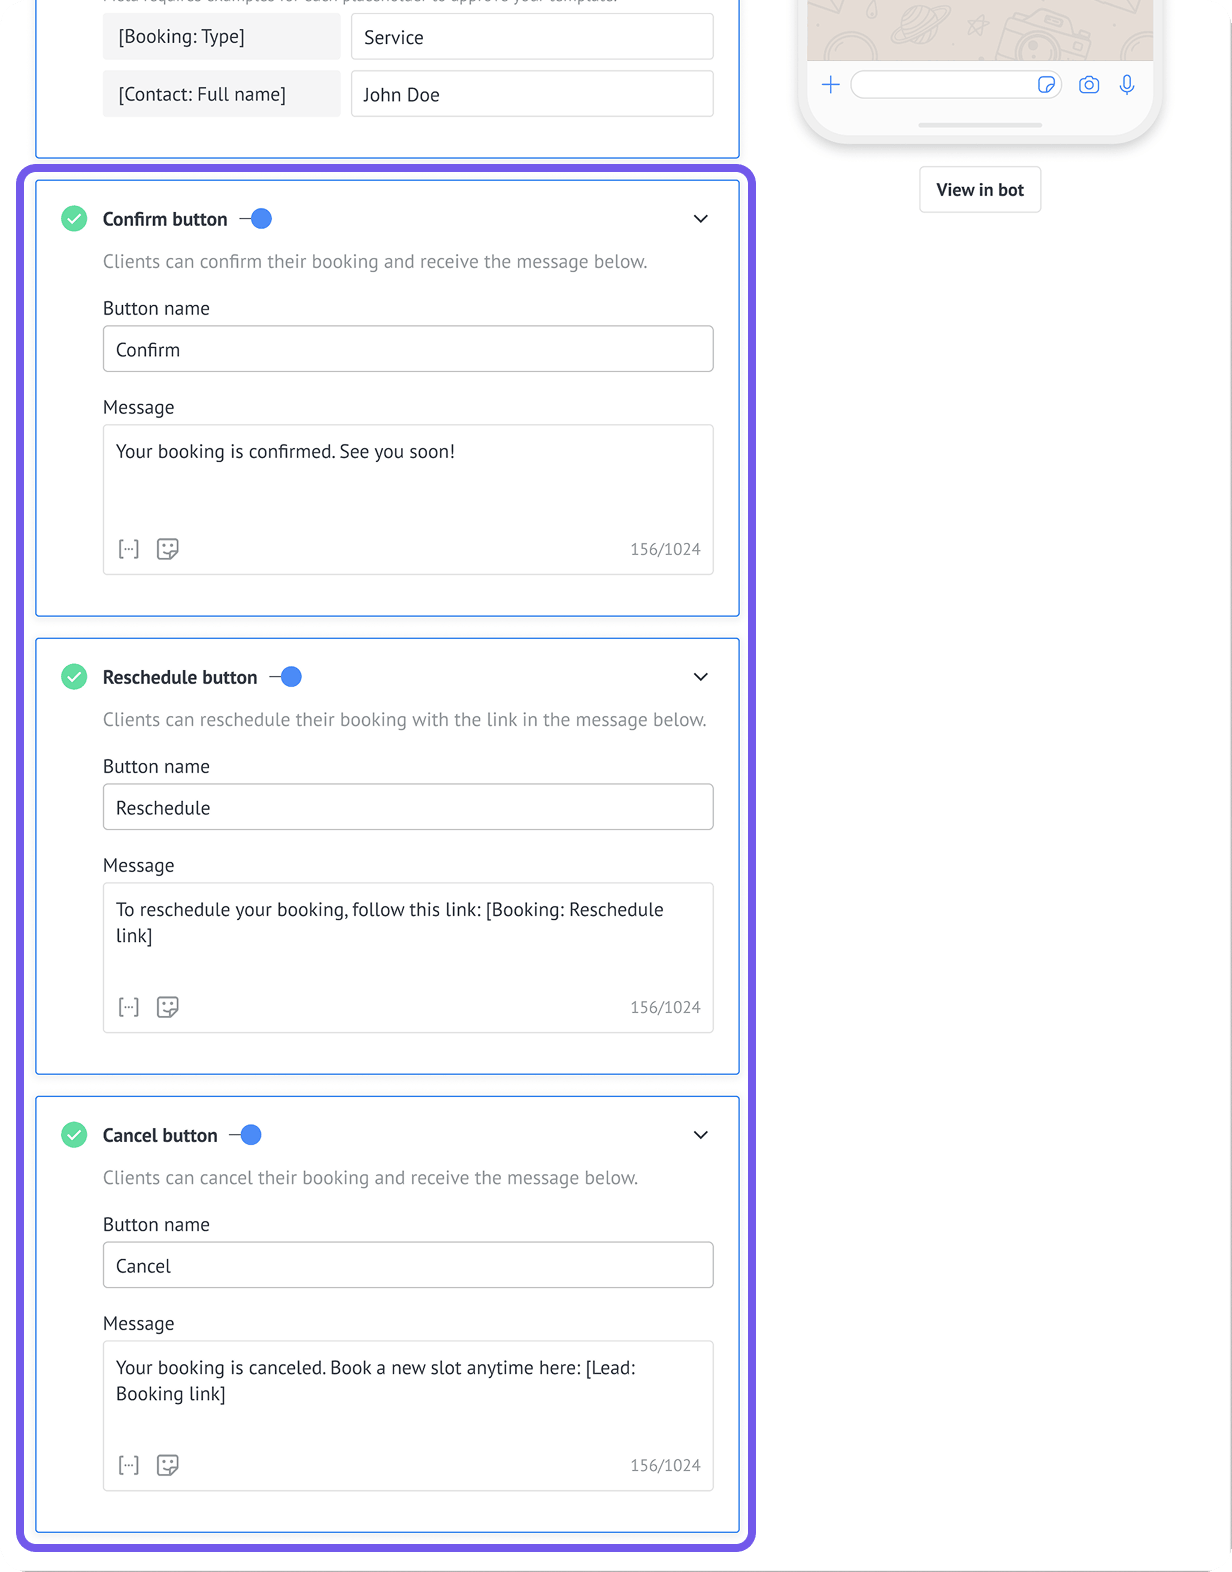
Tip: Buttons are optional. Add them if you want clients to confirm, reschedule, or cancel their appointments directly from the WhatsApp notification.
Click Send for approval.
The template settings window closes, and Kommo submits the template to Meta. Click Save to save the notification setup.
To learn more about creating and submitting a WhatsApp template, see Create and manage WhatsApp Business message templates.
Check the approval status
To check whether Meta has approved your template:
Go to Calendar → Booking settings → Automation.
Find the notification you configured.
Check its status:
Pending — Meta is reviewing the template.
Approved — the template is approved, and the notification is ready to be sent.
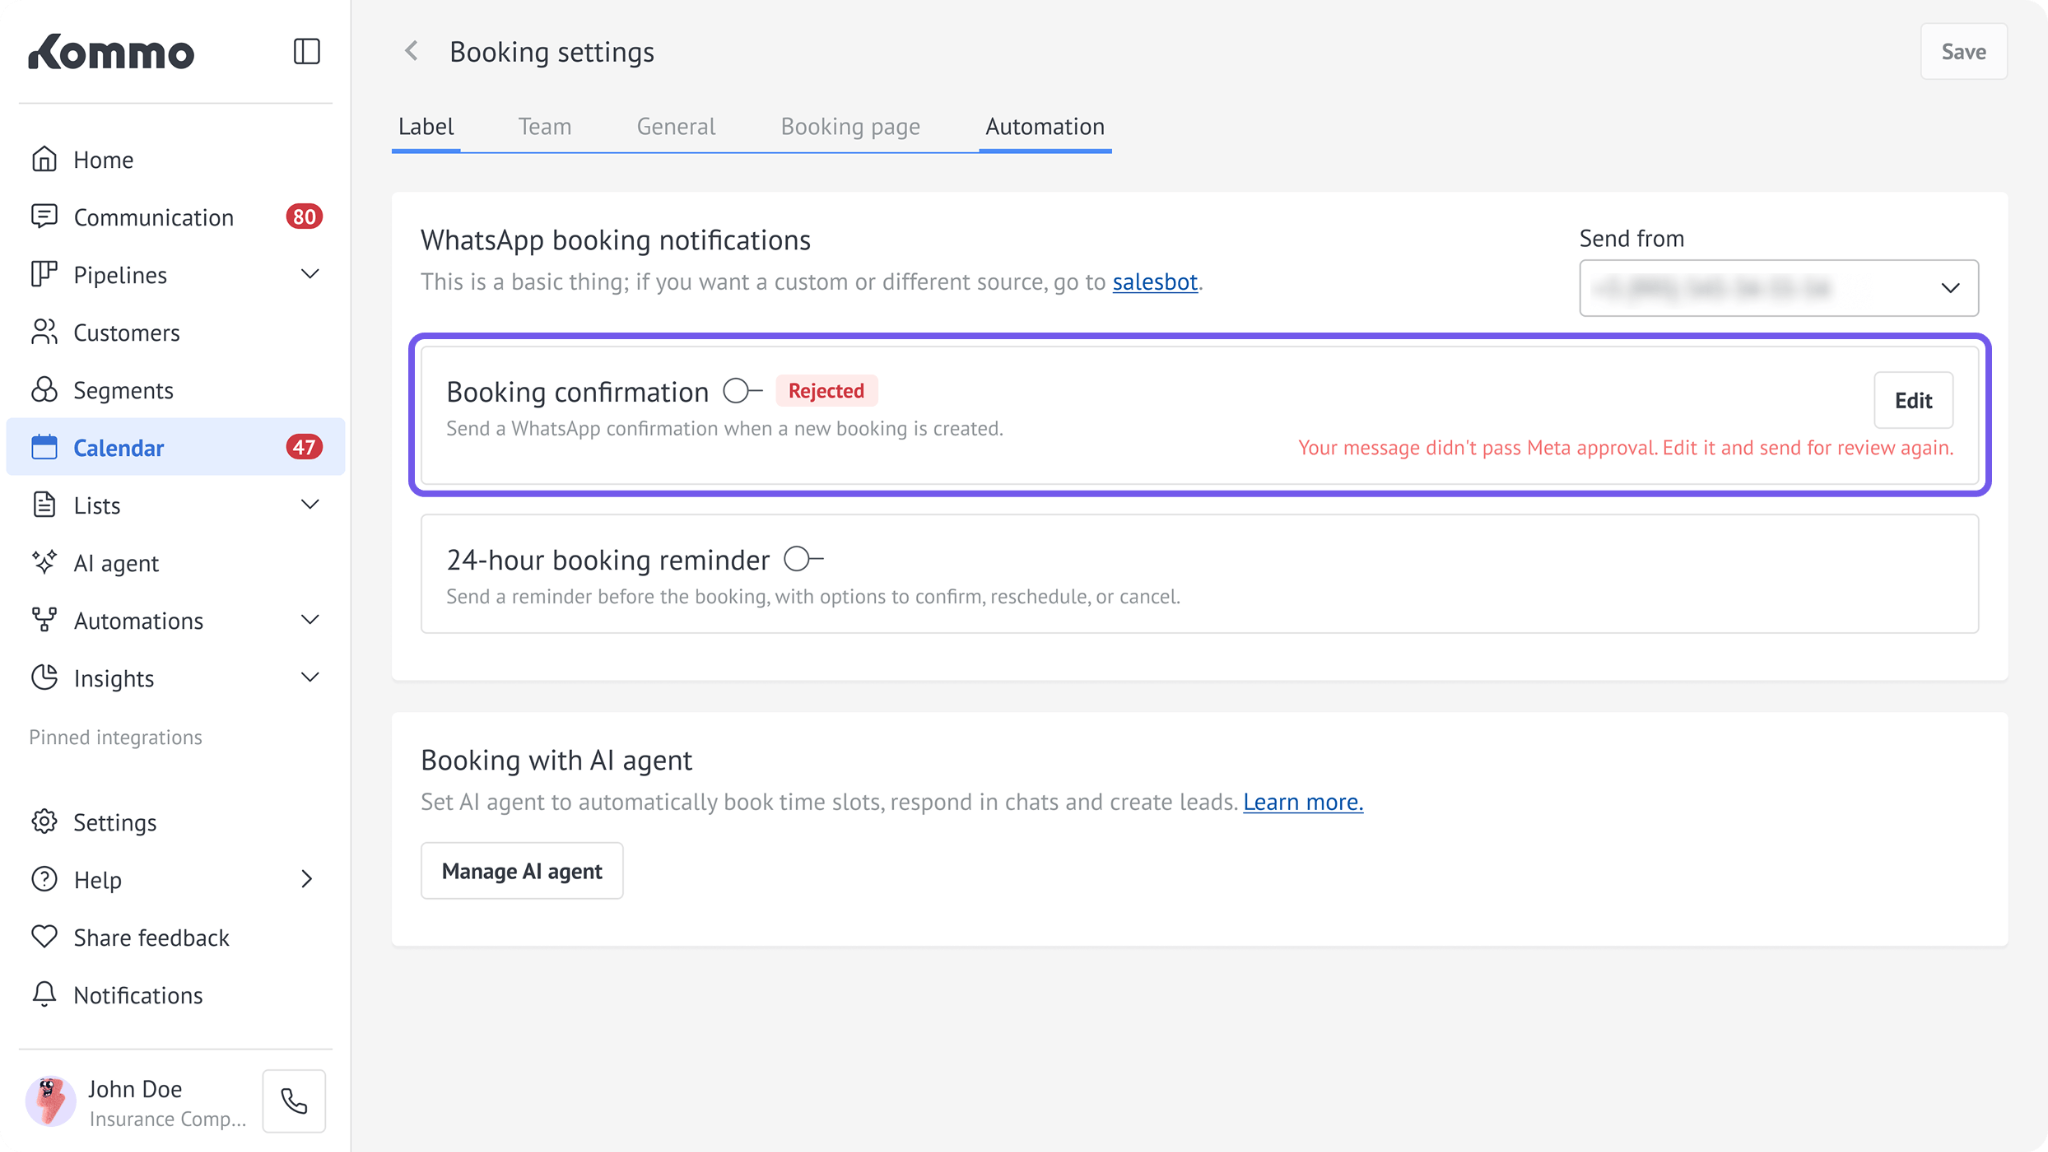
Rejected — Meta did not approve the template.
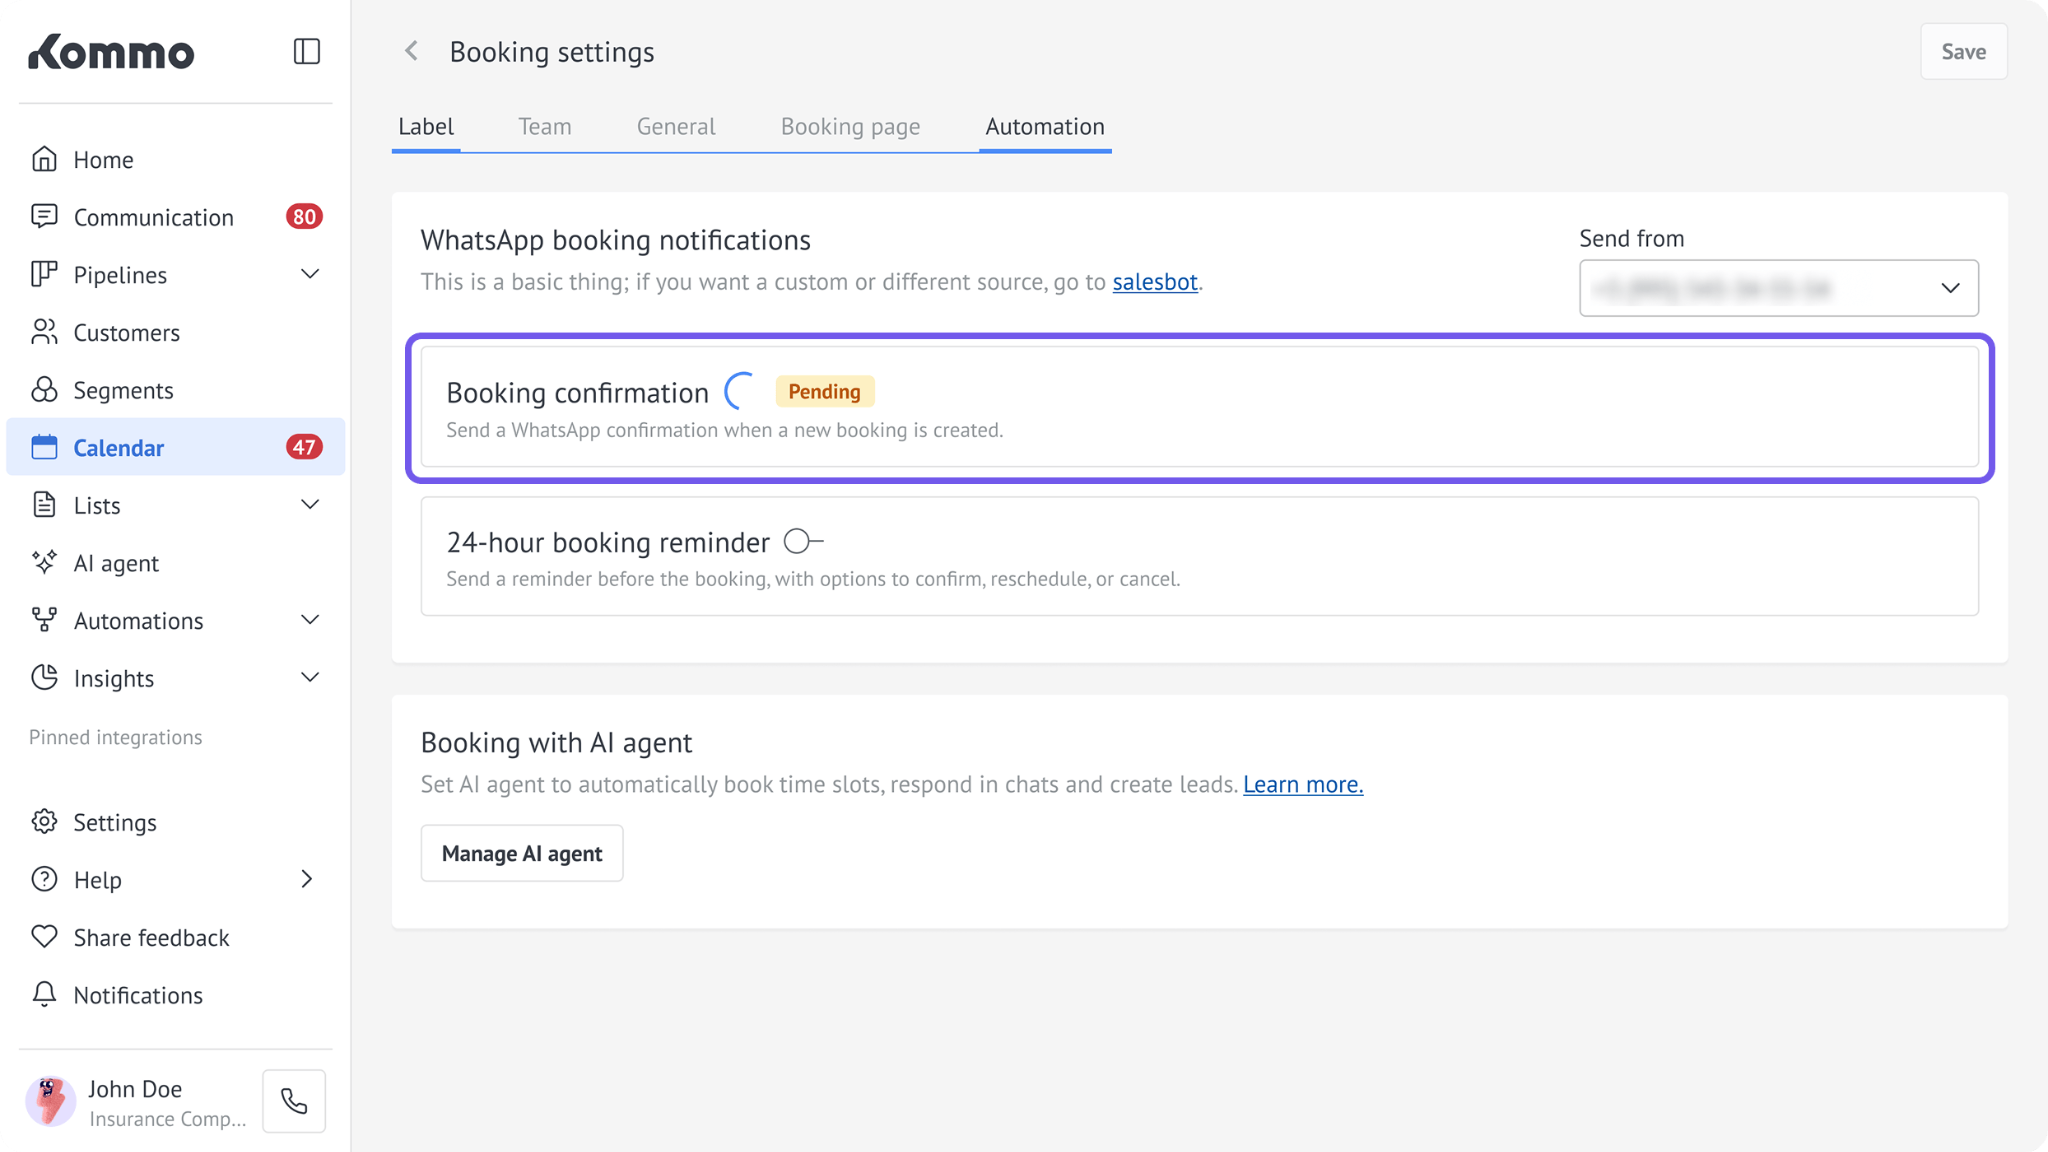
Tip: You can also check the template in Automations → Templates → Chat templates.
Edit a rejected template
To edit and resubmit it:
Go to Calendar → Booking settings → Automation.
Find the notification with the Rejected status.
Hover over the status to review the rejection reason.
Click Edit.
Make the required changes.
Click Send for approval.
When the template settings window closes, click Save on the Automations tab.
The status returns to Pending while Meta reviews the updated template.
Change the WhatsApp number
WhatsApp templates are linked to the number selected in Send from. A template created for one number cannot be used with another.
To change the number:
Go to Calendar → Booking settings → Automation.
Select a different number in Send from.
Set up the notifications again for the new number.
Submit the new templates to Meta for approval.
Click Save.
Turn off a WhatsApp booking notification
To stop sending a notification:
Go to Calendar → Booking settings → Automation. Find the notification you want to turn off.
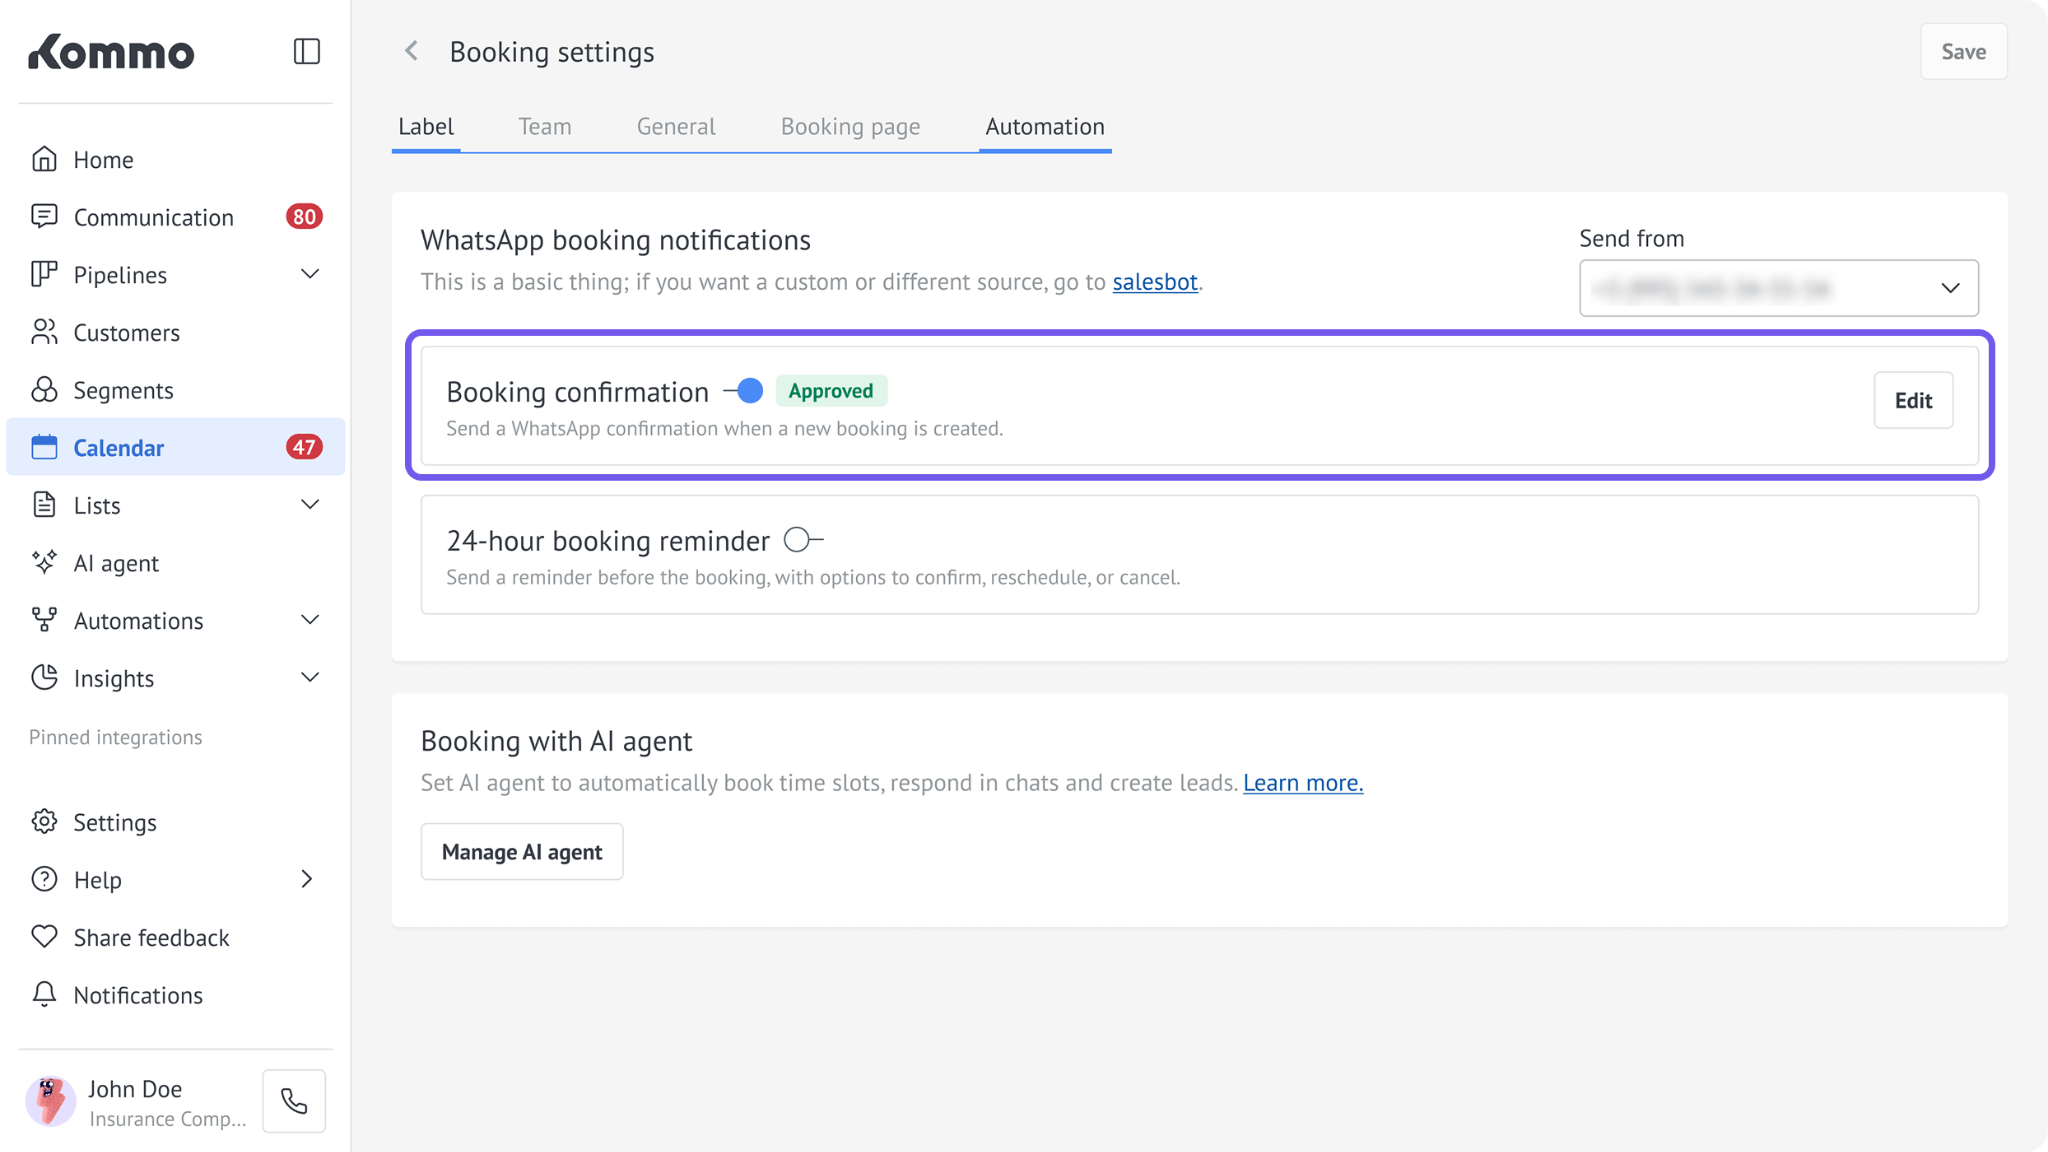
Turn off the toggle next to the notification. Click Save.