What you’ll need:
A valid Facebook Business account.
Any Kommo plan (Base, Advanced, Pro, Enterprise, or 14-day trial).
Admin or Owner role in Kommo to install integrations.
Keep in mind:
Only verified Facebook Business pages can be connected; personal pages are not supported, and you must have admin rights to the page.
Each Kommo account can only connect to one Facebook account. If you have multiple pipelines, you can link a different Facebook Business Page to each one, but the same page cannot be connected to multiple pipelines.
You can only message customers within 24 hours of their last interaction. If more than 24 hours have passed, you must use a Meta-approved tag.
If a client hasn’t messaged you for over 7 days, you won’t be able to reply to them at all.
Facebook restricts promotional messages after the 24-hour window. Only certain types of messages can be sent, depending on Meta’s approved policies.
Connecting Facebook to Kommo lets you message leads via direct messages and comments, capturing leads from Ads and sync your Meta campaigns data.
Note: You can only connect one Facebook account to Kommo. However, you can connect different Facebook Pages from that account to use the available features.
Connect Facebook to Kommo
There’s two ways to connect your Facebook Business page to your Kommo account:
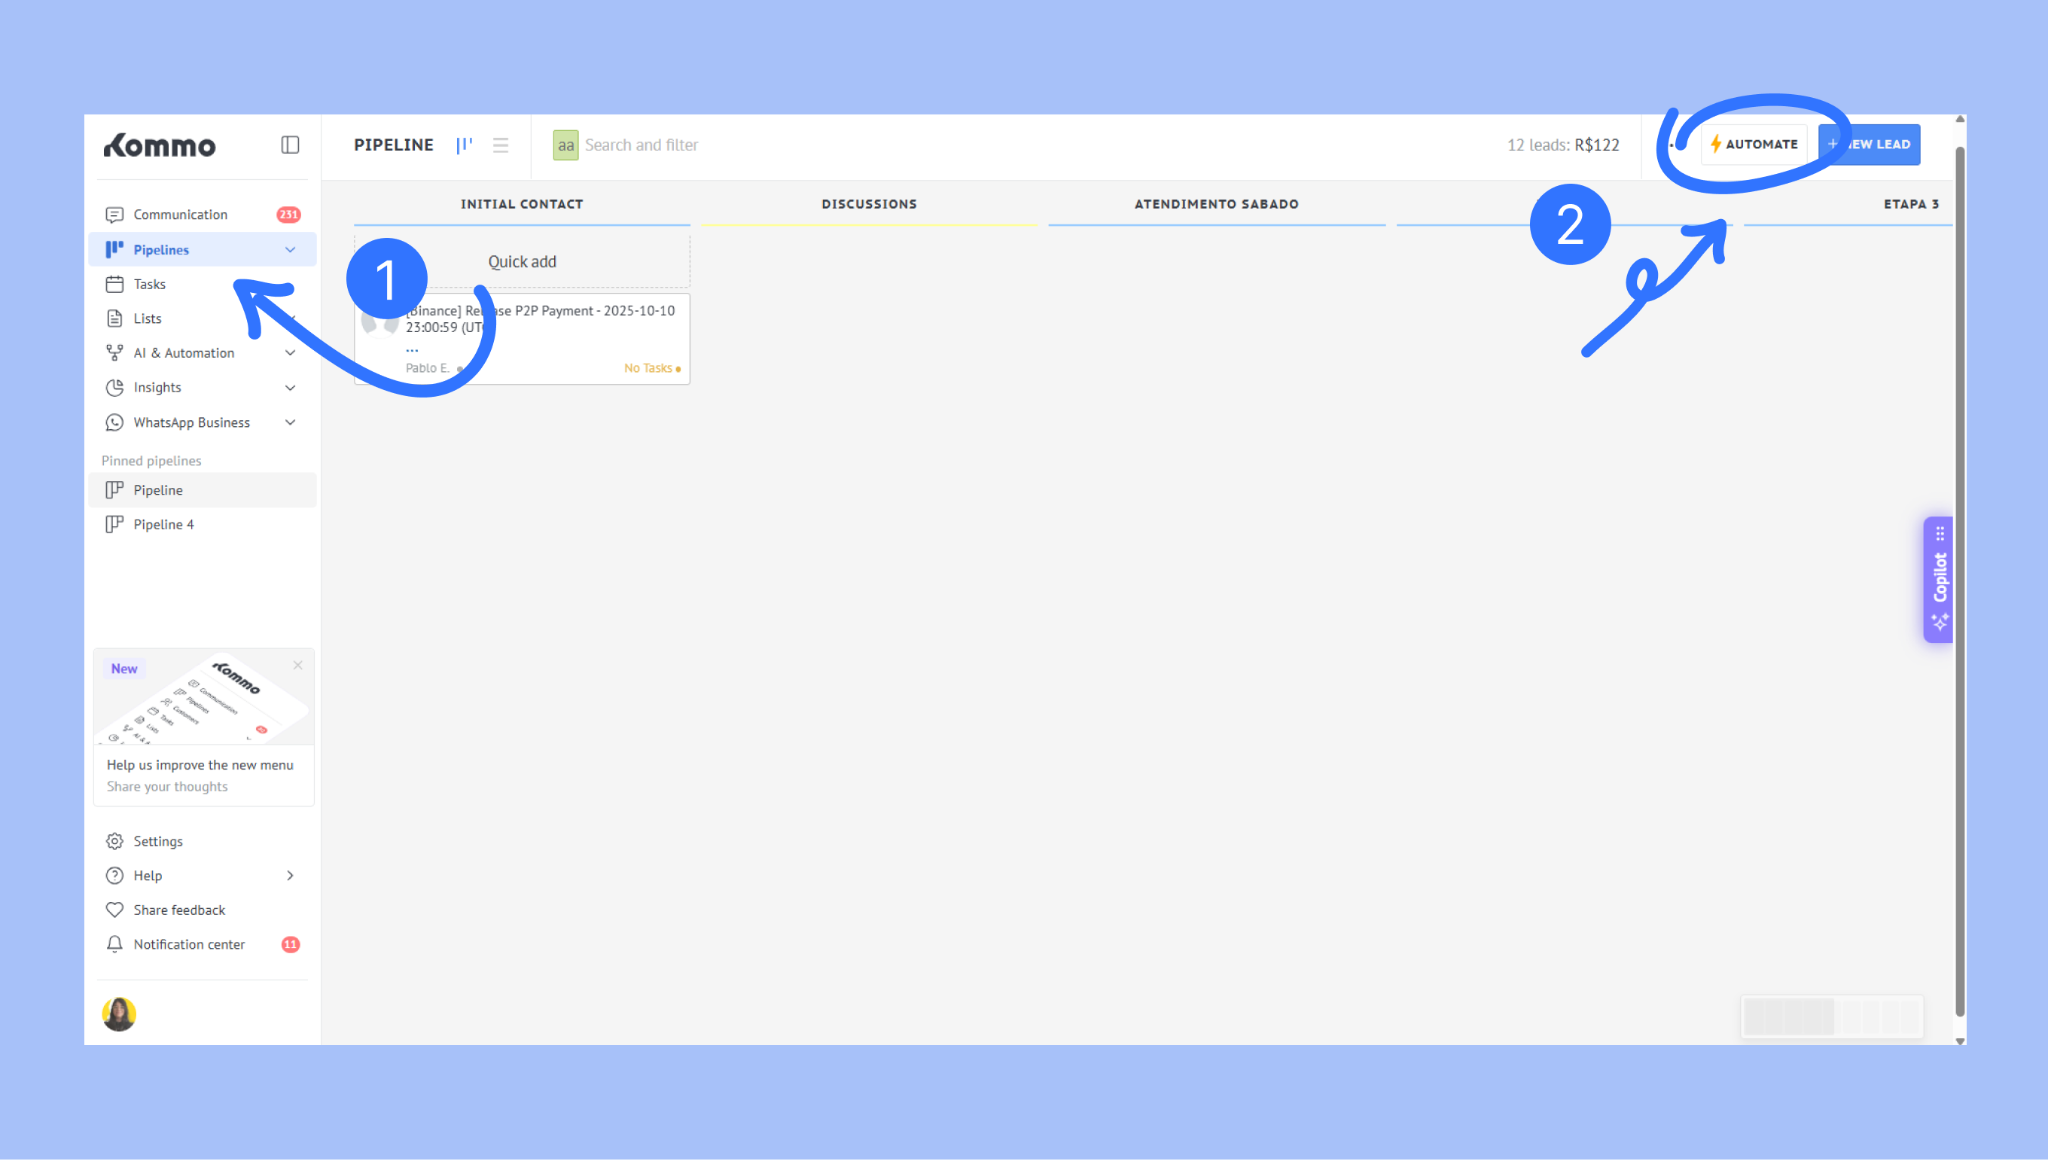
Via pipeline
Go to Pipelines, select the pipeline you want, and then click Automate.
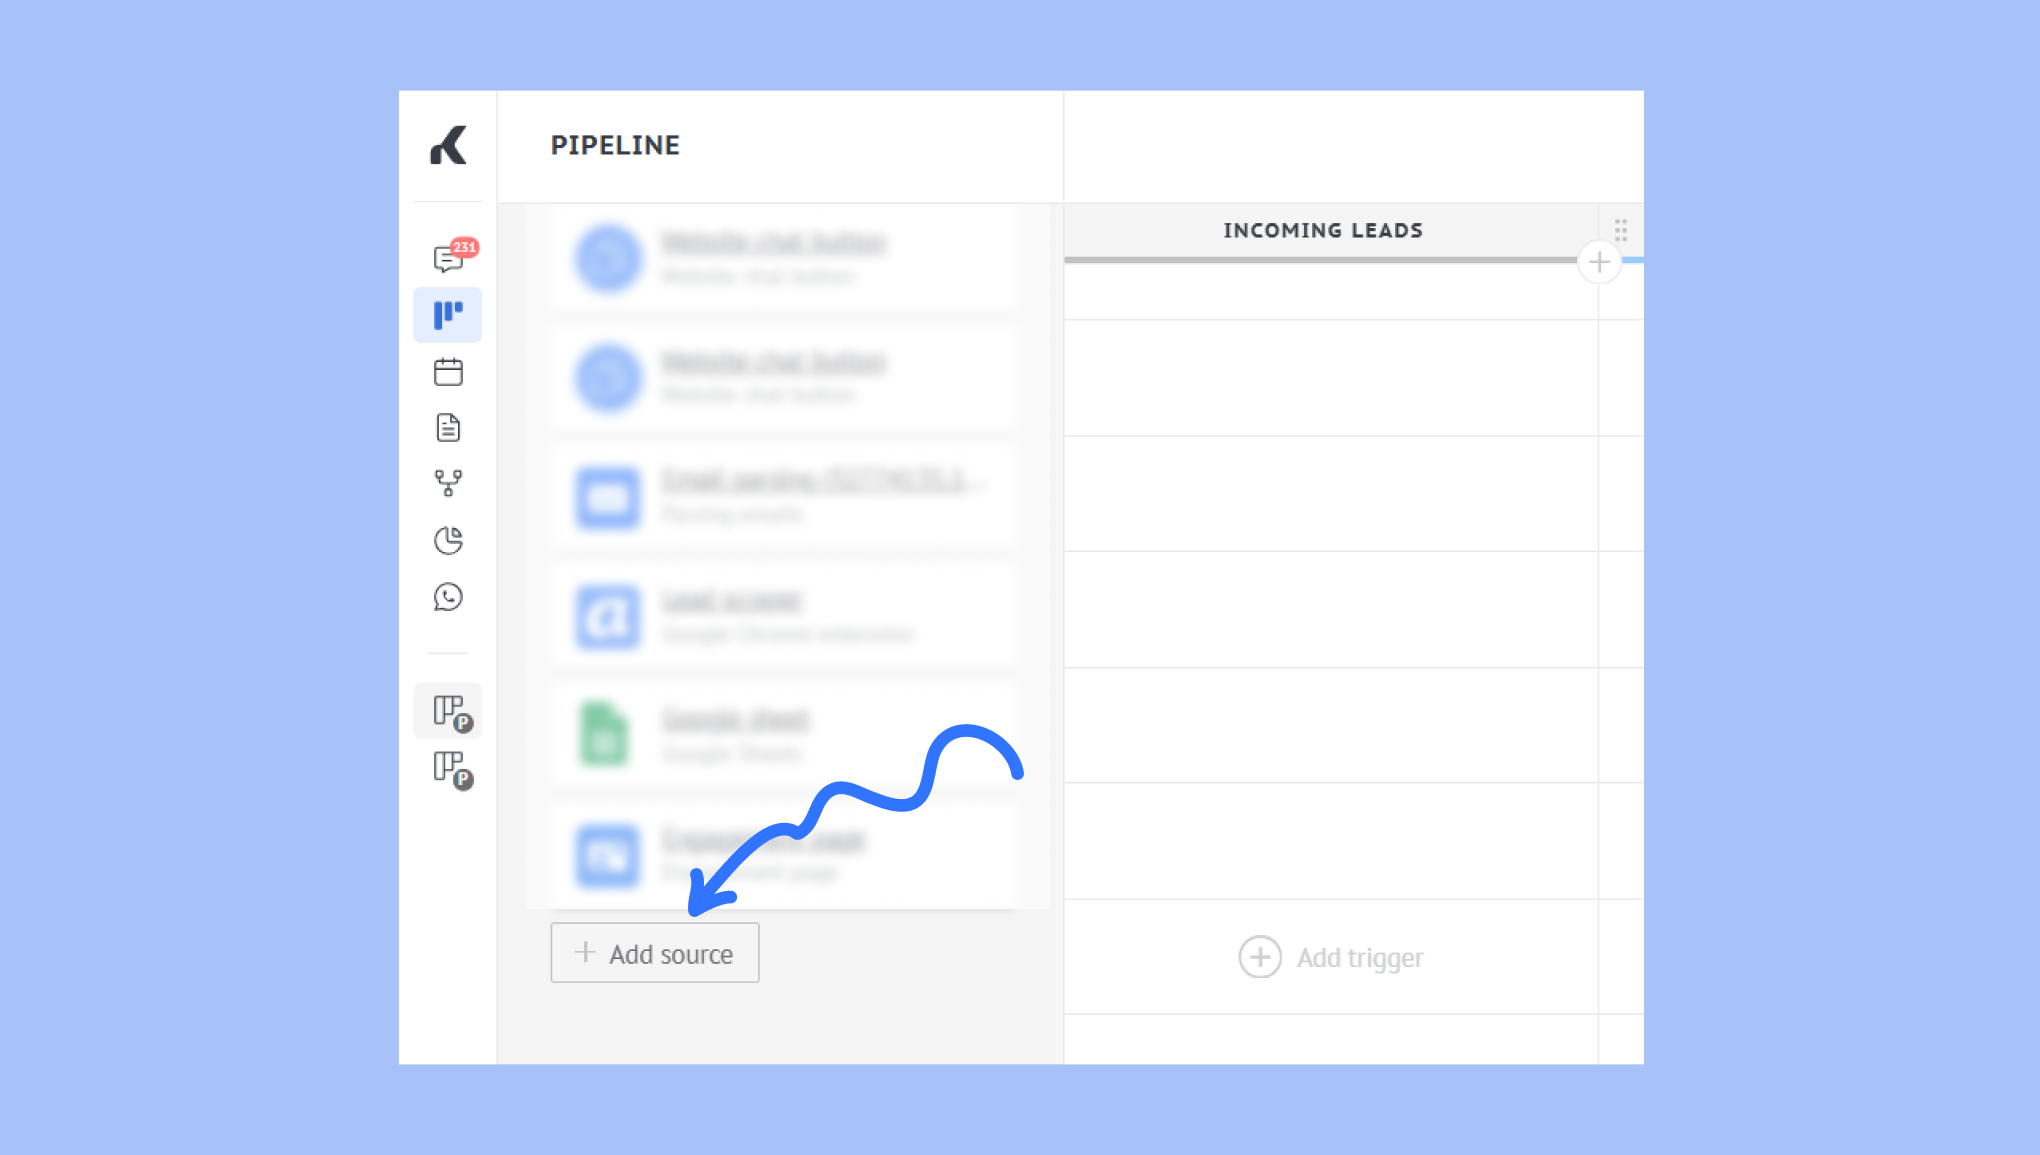
Under Lead sources, select + Add source button.
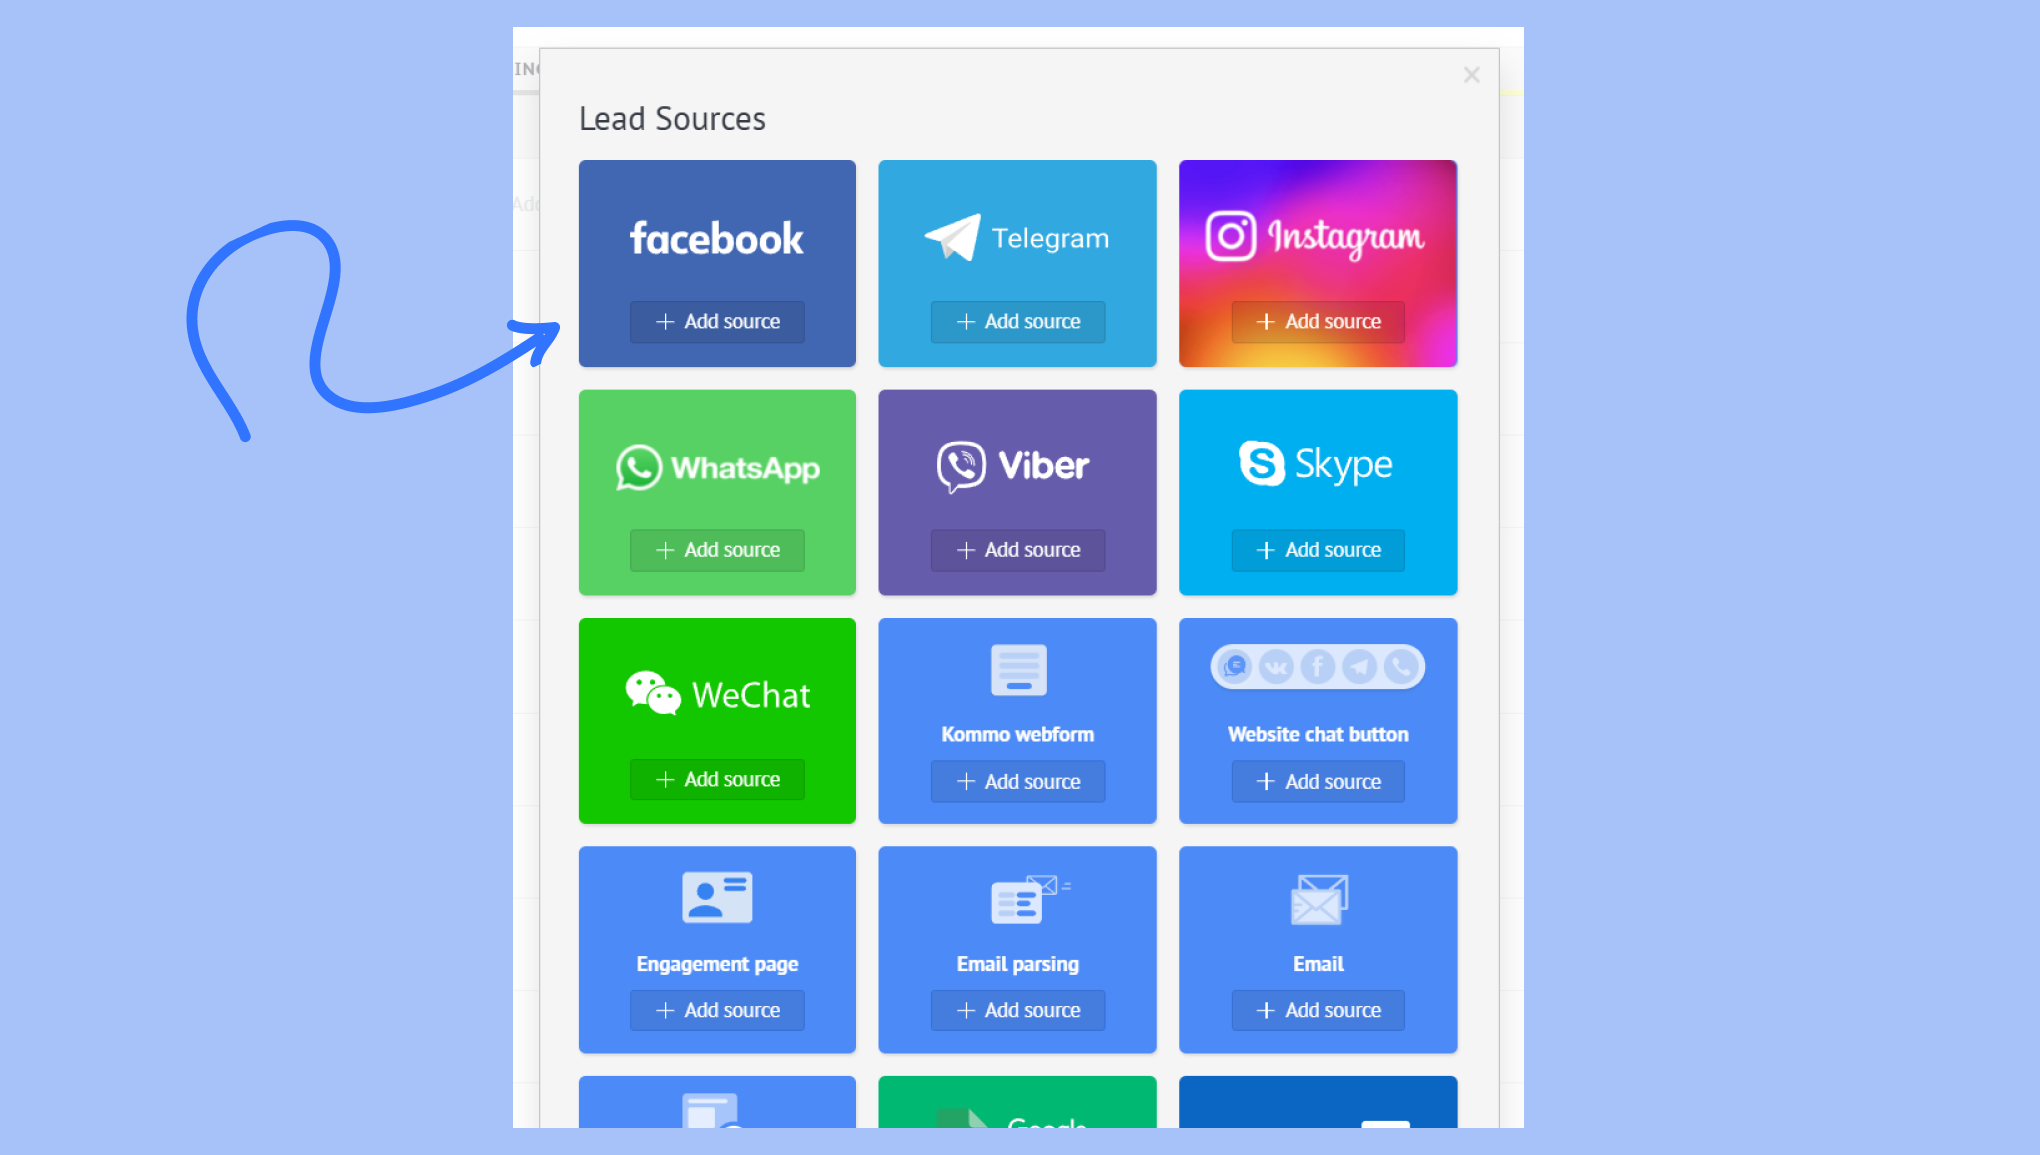
Select Facebook and click + Add source.
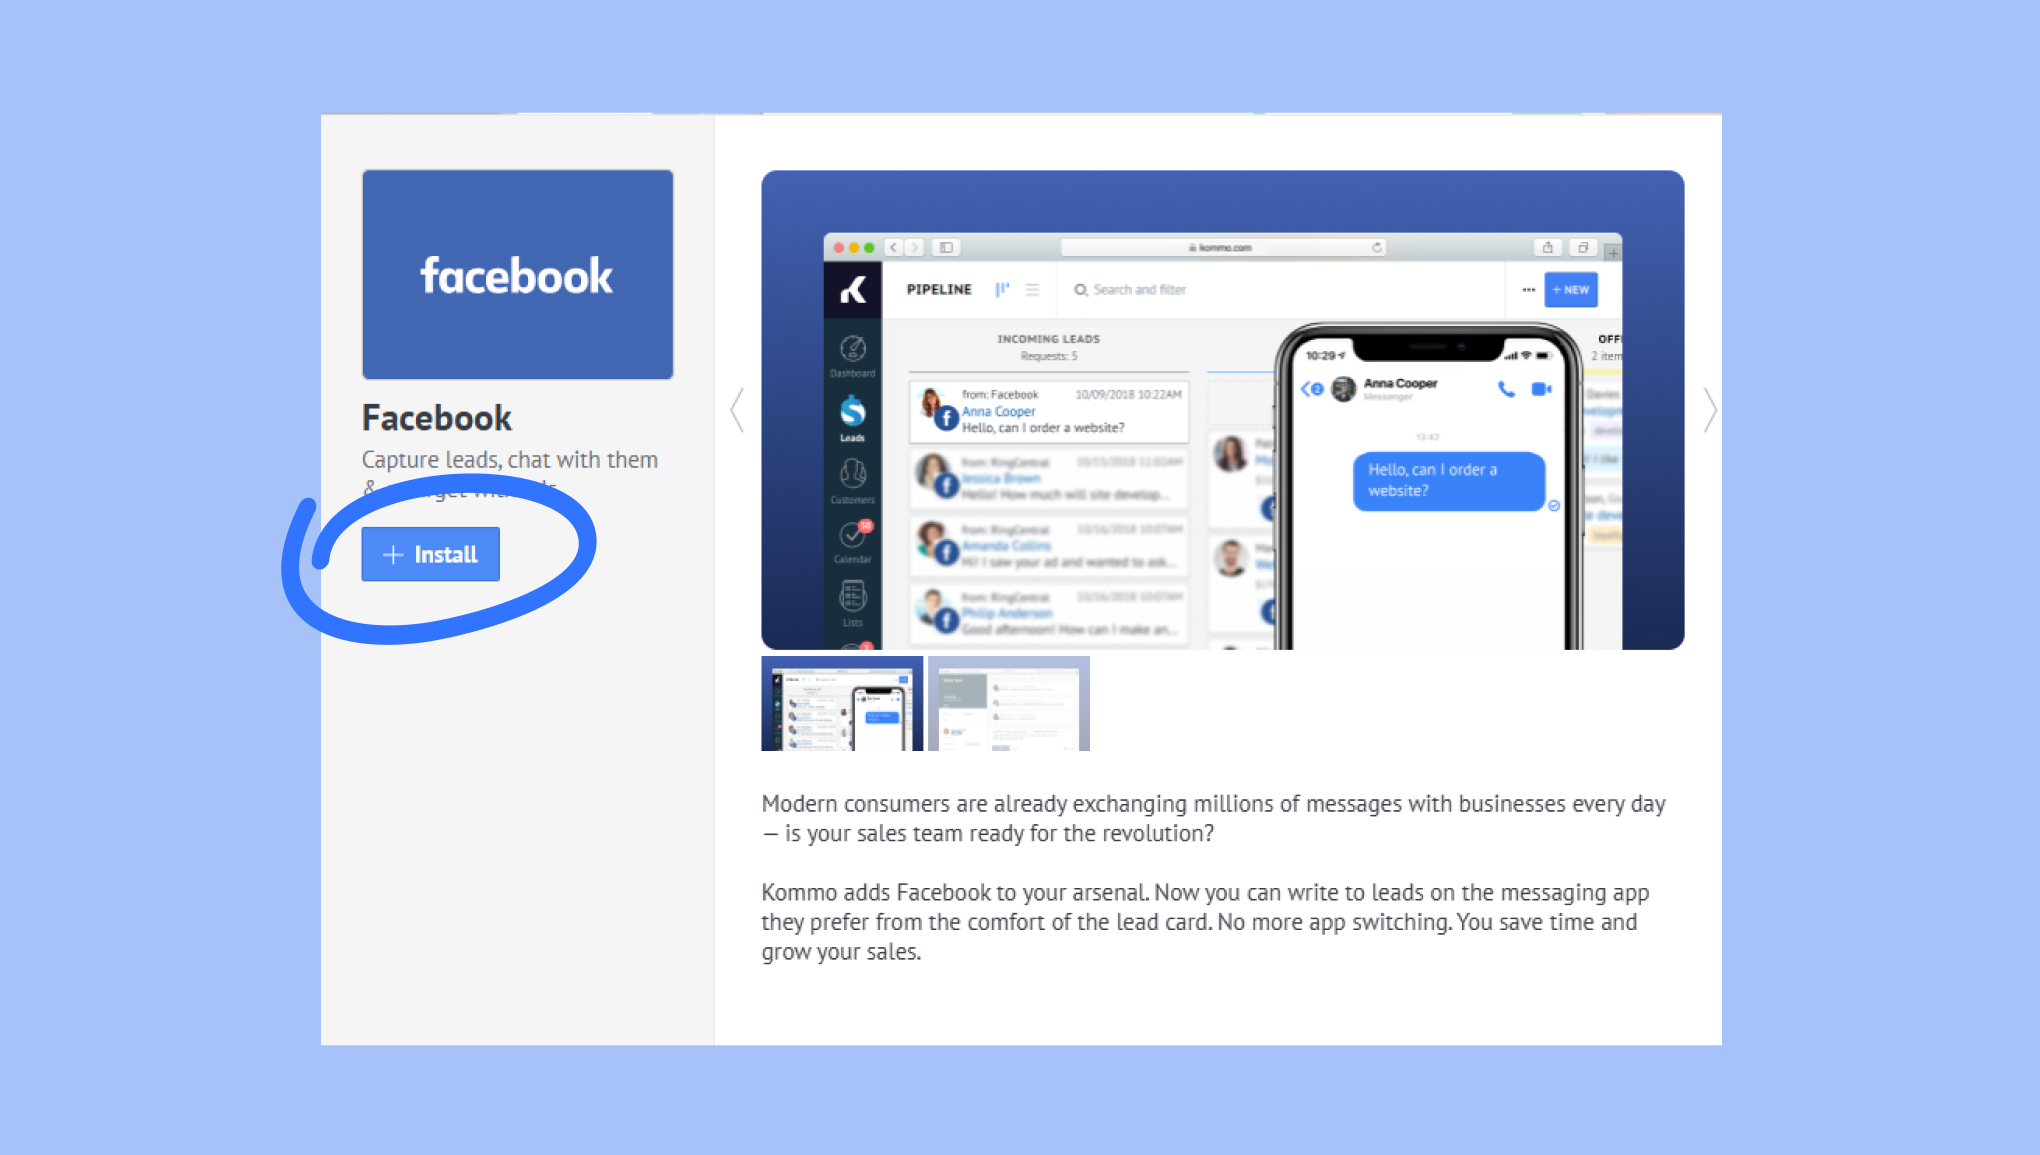
Click Install.
Via marketplace
Go to Settings (gear icon) > Integration marketplace > Facebook.
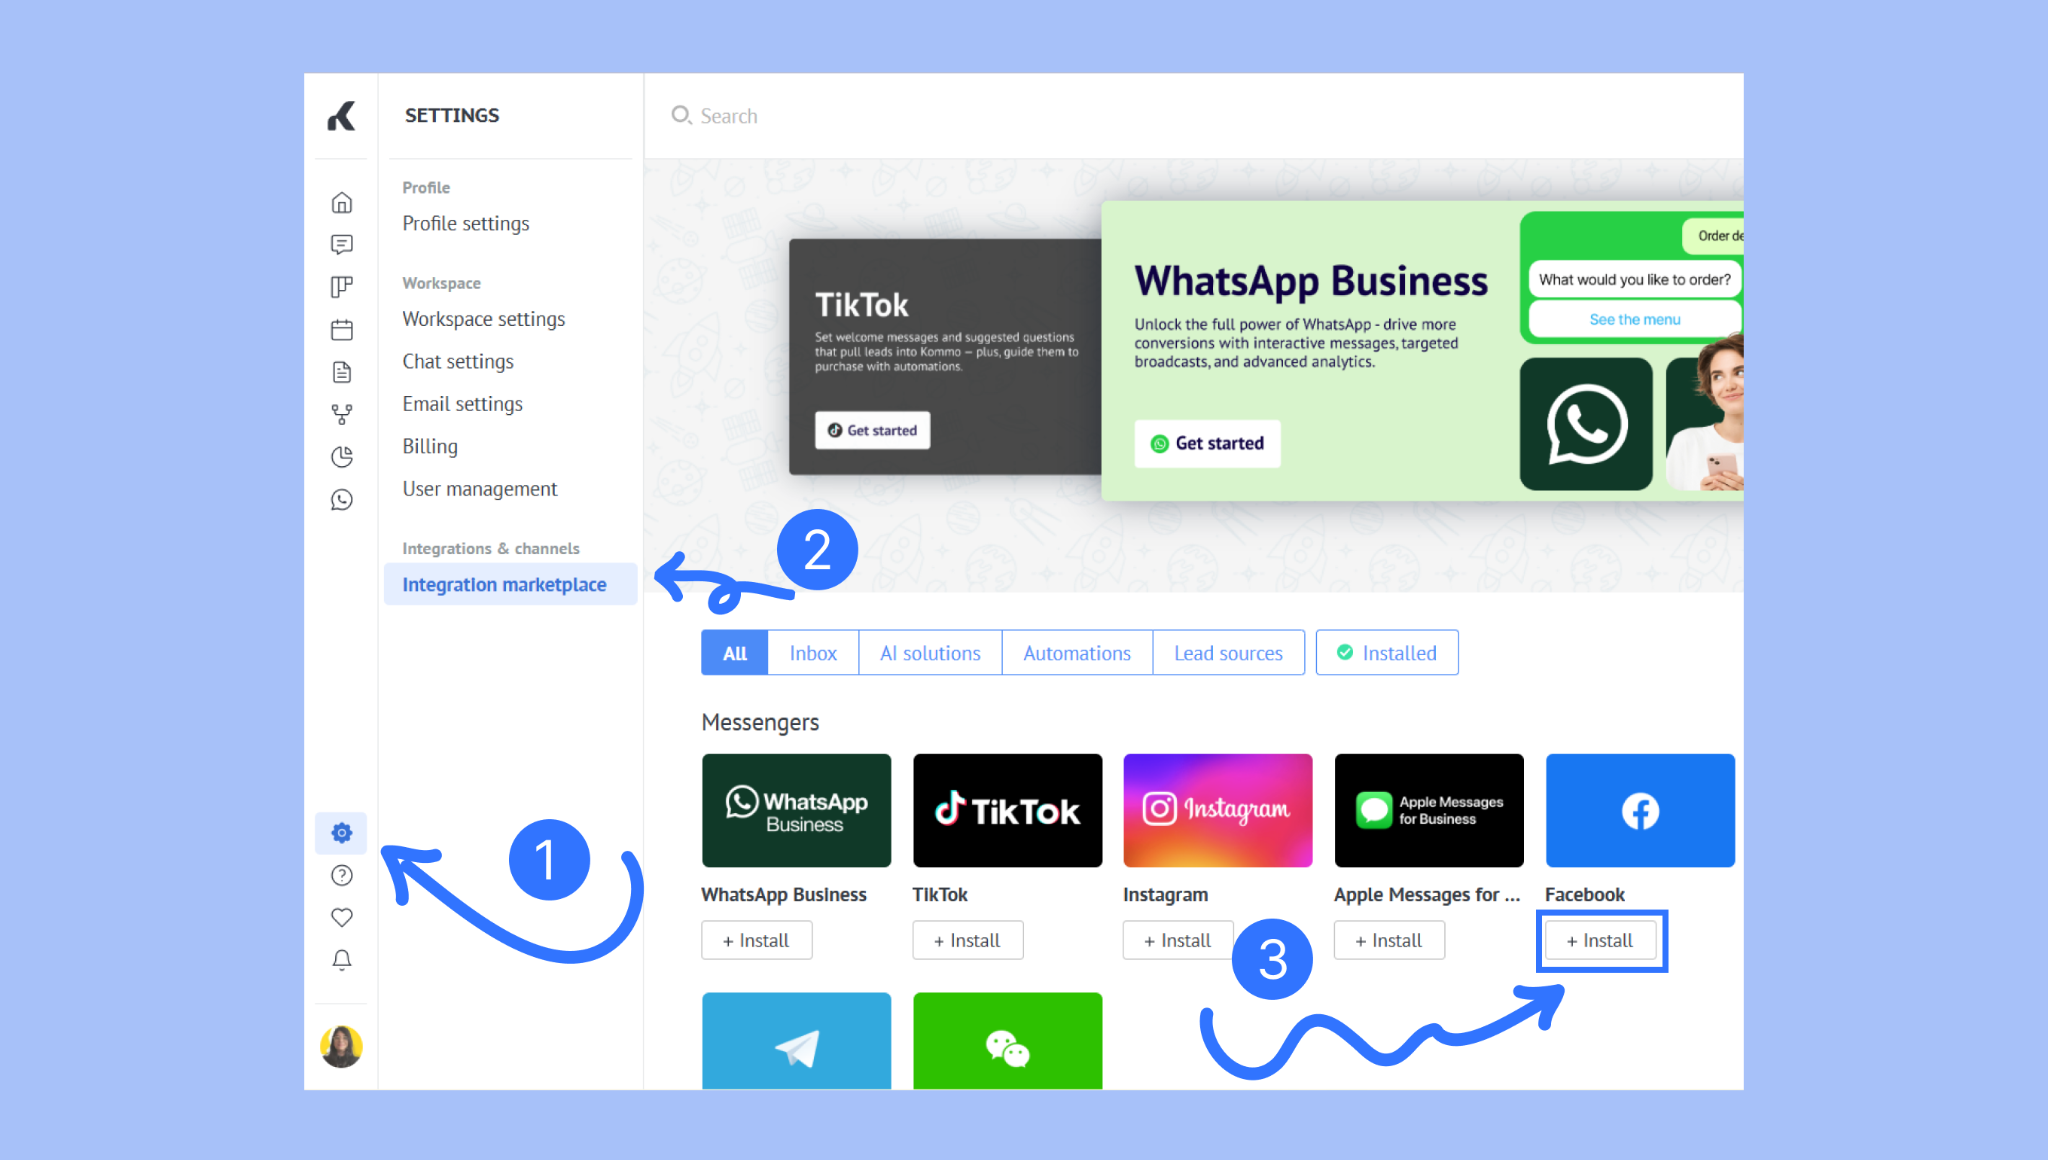
Click Install.

After the integration is installed:
Click the Sign in to Facebook button.
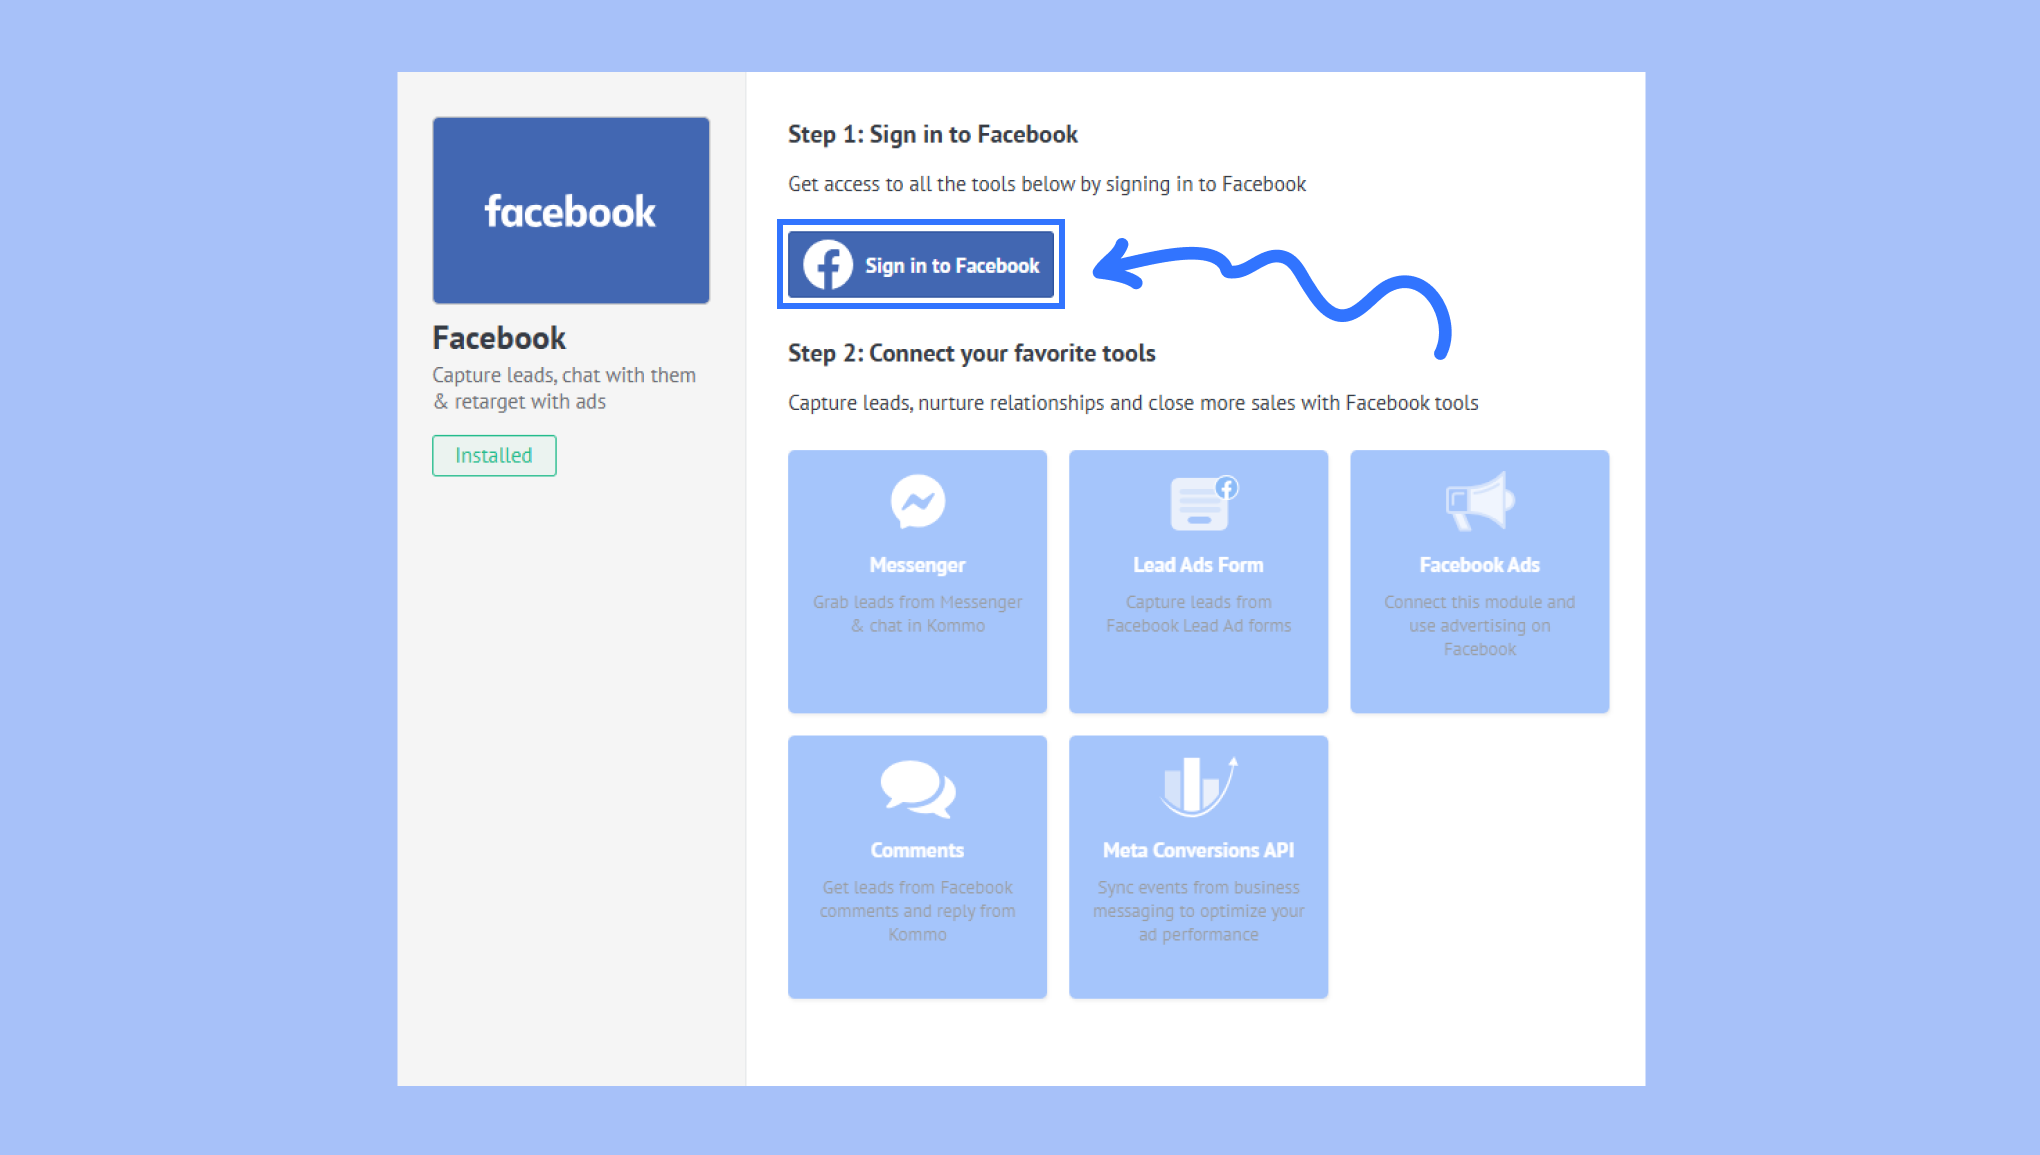
You’ll be directed to Facebook and asked to log in. Grant the needed permissions.
Now that Facebook integration is installed and connected, you’ll see all features available for use in the widget:
Messenger
Comments
Lead Ads Forms
Facebook Ads
Meta Conversion API
To use the feature, click the + button under it.
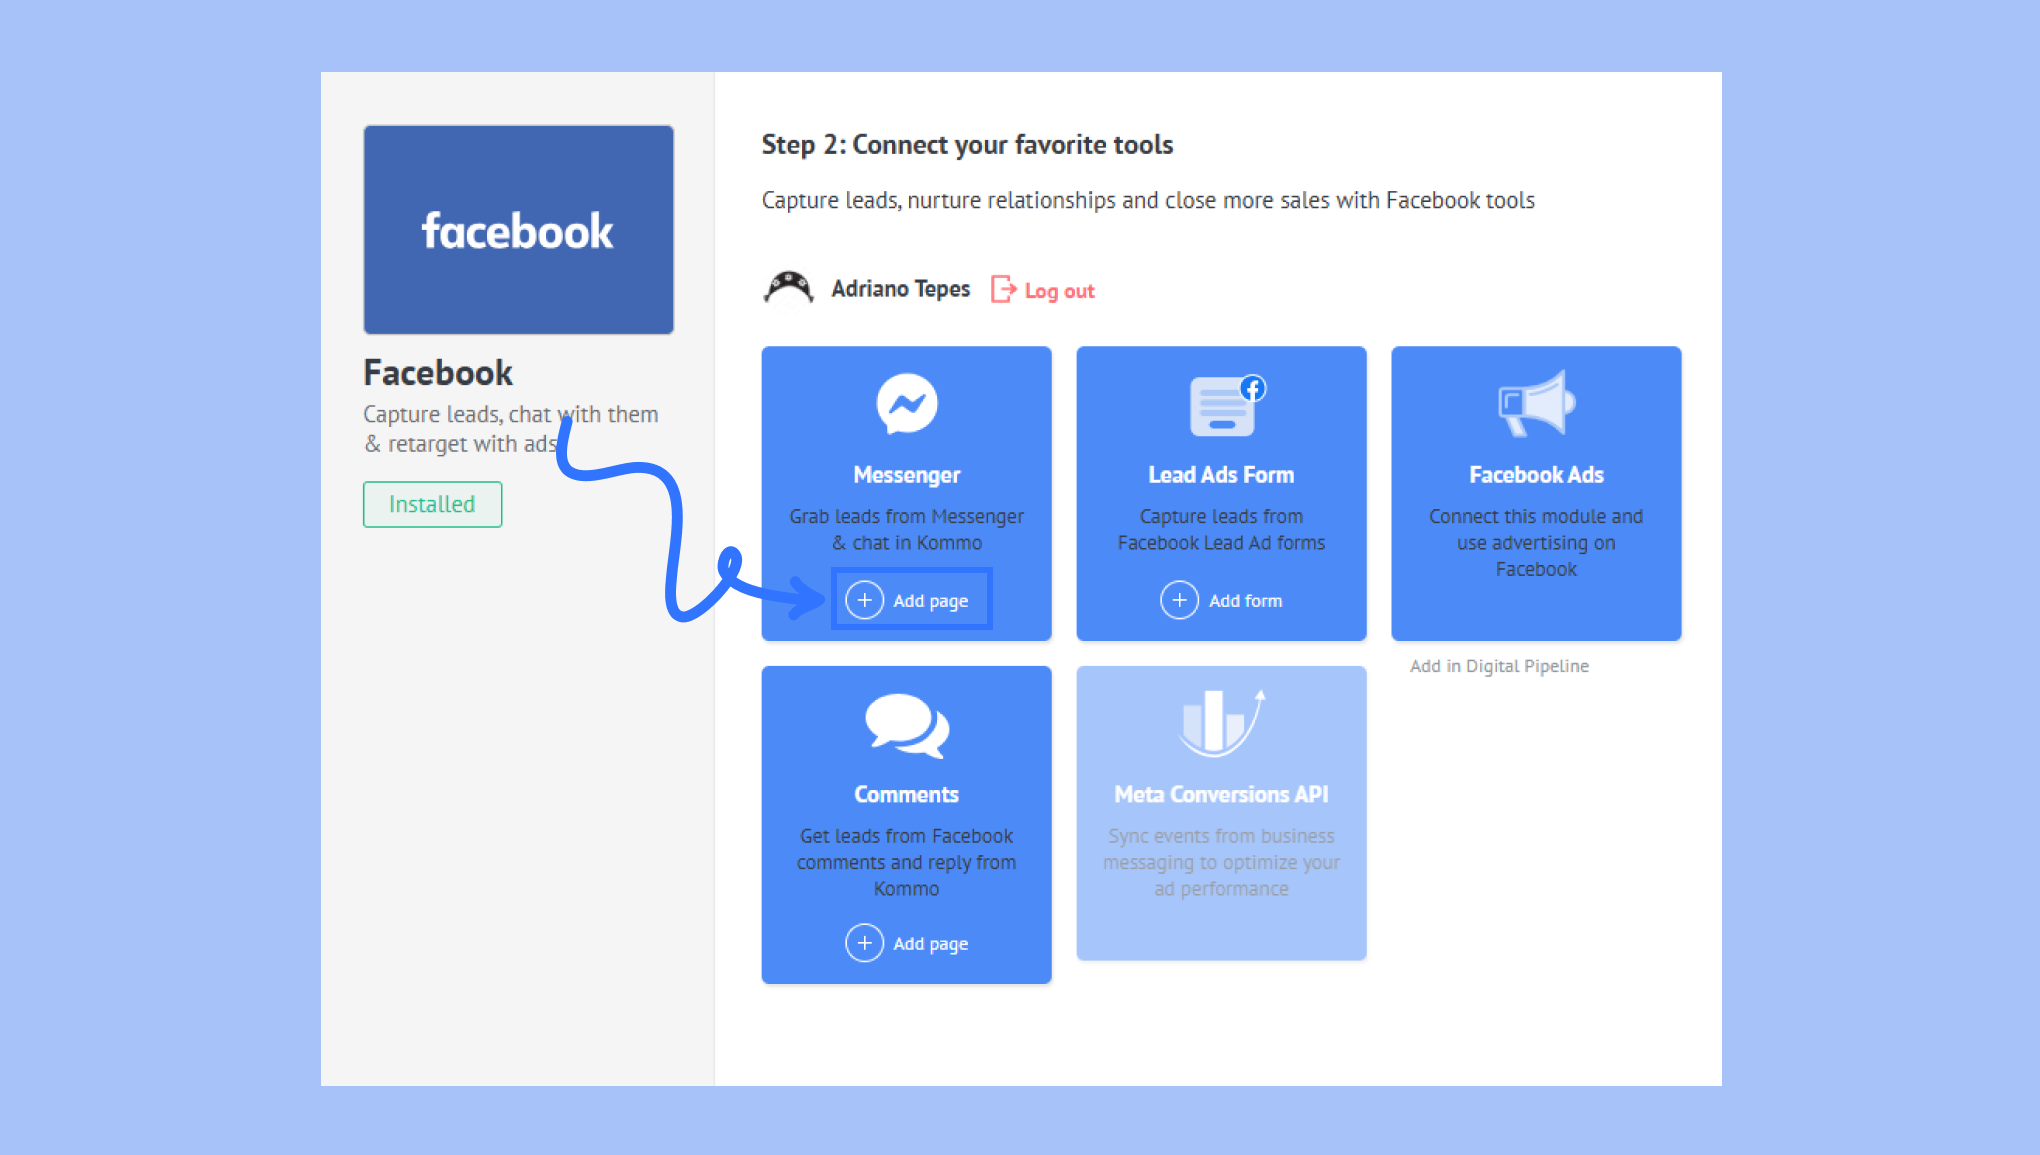
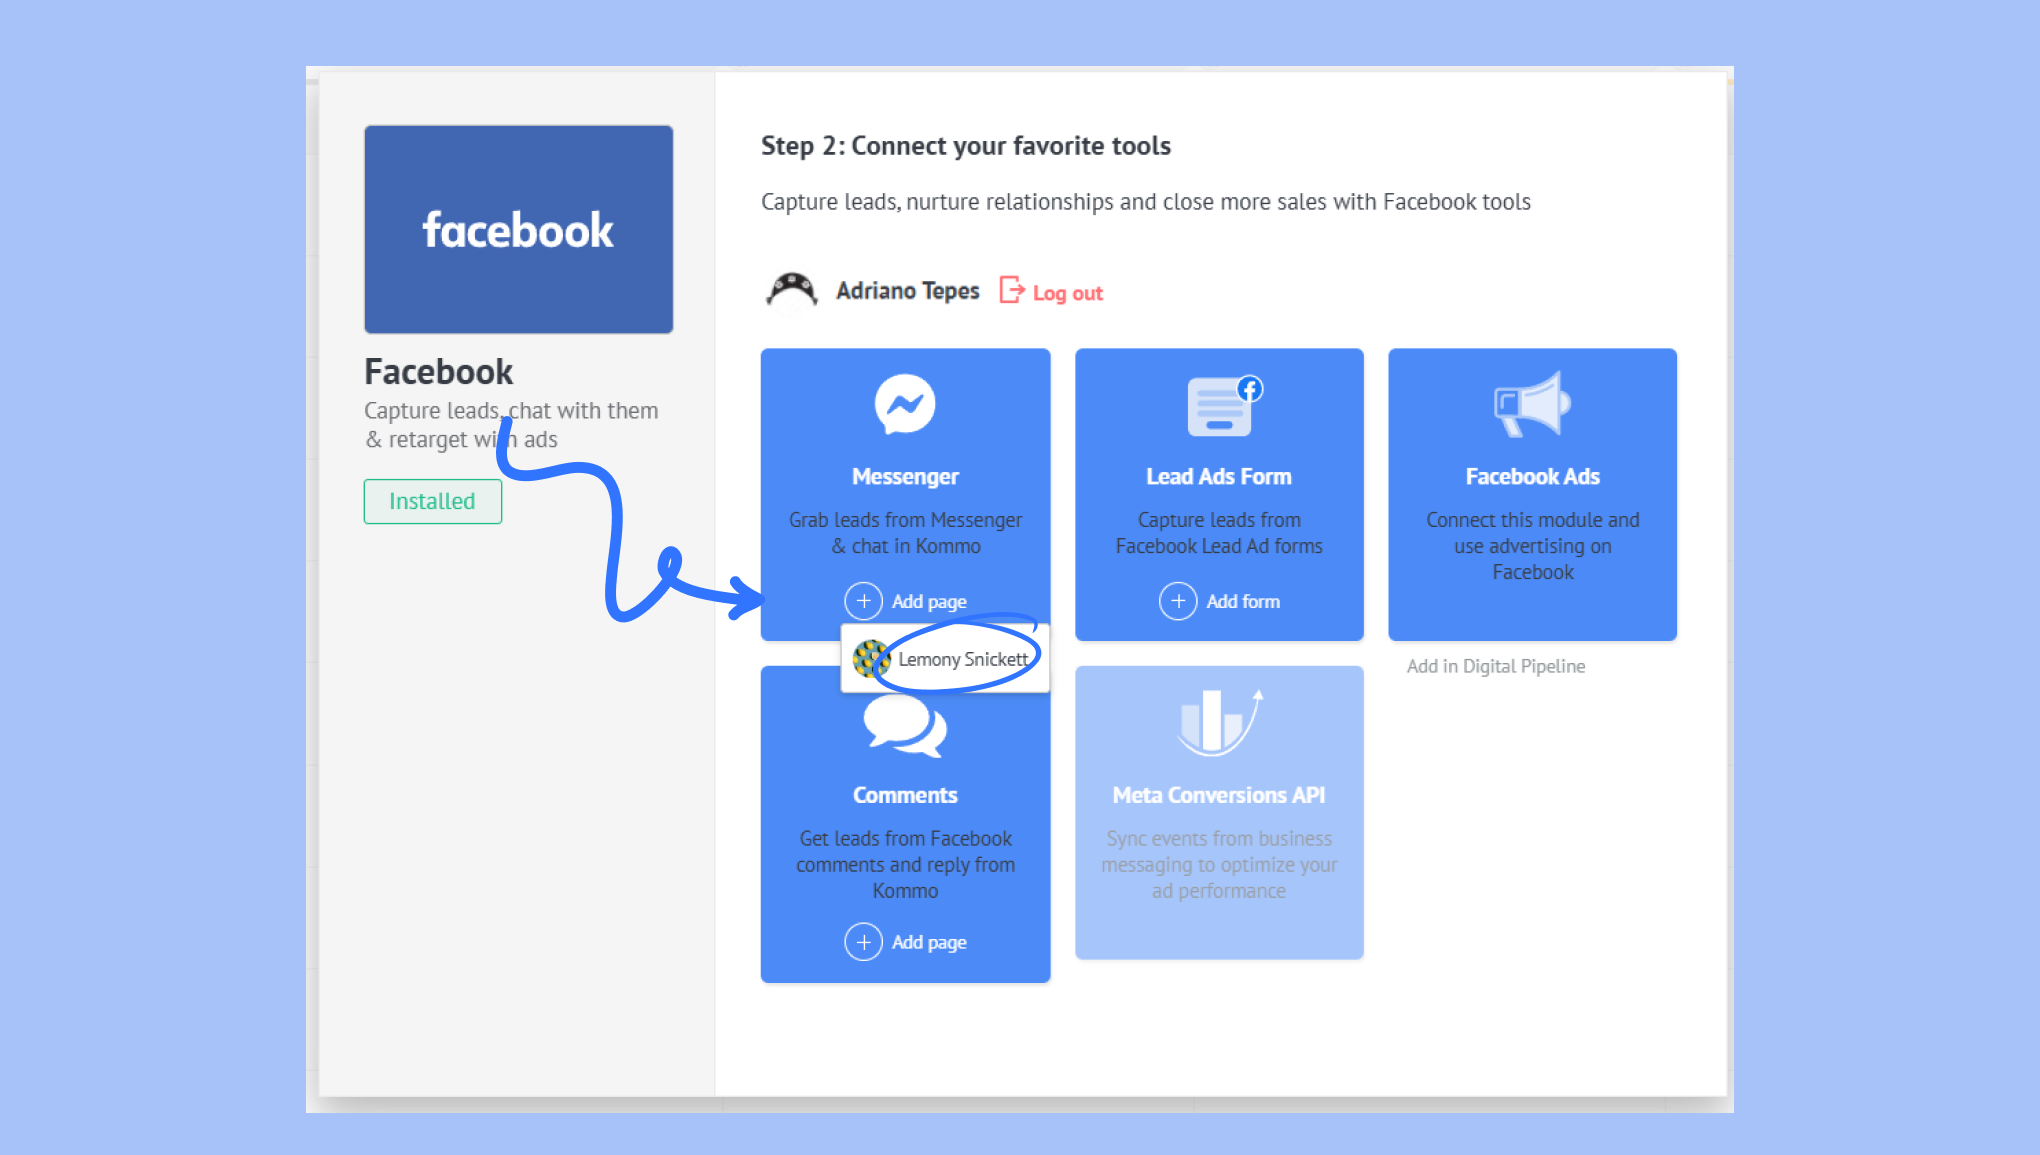
Click the Add page button on Messenger and then select the Facebook page you’d like to connect to. This action will automatically connect the page’s comments as well.
Note: If you have more than one pipeline, you can connect different Facebook Business pages to each one. To do this, just switch to your other pipeline, and repeat the process of connecting Facebook via pipeline as it is explained in the previous section. However, the same Facebook Business page cannot be connected to multiple pipelines.
Verify the connection
You’ll see that the Messenger and Comments of your Facebook page have been connected to your pipeline by going to Pipelines, selecting a pipeline, and clicking Automate > Lead sources.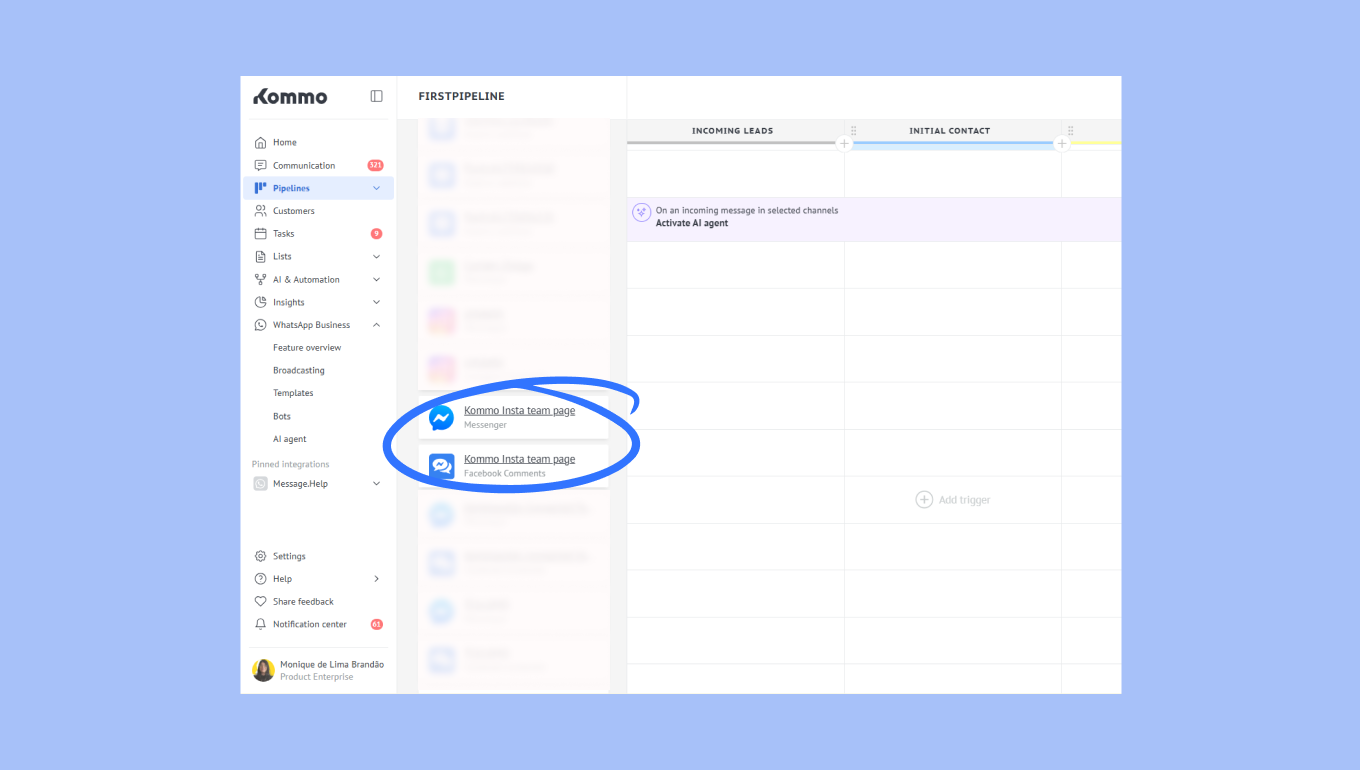
You’ll be able to see DMs sent to you and comments made by your customers on your Facebook page in your Chats section.
To learn more about replying to Facebook messages and comments, see Answer Facebook messages and comments.