What you’ll need:
Any Kommo plan or an active 14-day trial to create Flow templates and send them manually through Chat inbox or the Kommo mobile app.
The Advanced plan or above, or an active 14-day trial, to send Flow templates through Salesbot or Broadcasting.
A verified Meta Business portfolio. Flow templates are available only for verified Meta Business portfolios.
WhatsApp Business integration installed and connected to your number. Learn how to set it up in this guide.
To send chargeable template messages, add a payment method to your WhatsApp Business account in Meta. Learn how to do it here.
Keep in mind:
Only Admins can create, edit, or delete templates in Kommo.
Flow templates are available in both the Marketing and Utility categories.
The template must have the Approved status before you can send it.
Clients must have agreed to receive WhatsApp messages from your business.
Flow forms open only in WhatsApp. If the message is sent through another channel, the client receives only the message text.
Meta may charge for WhatsApp template messages. Learn more about pricing rules in this article.
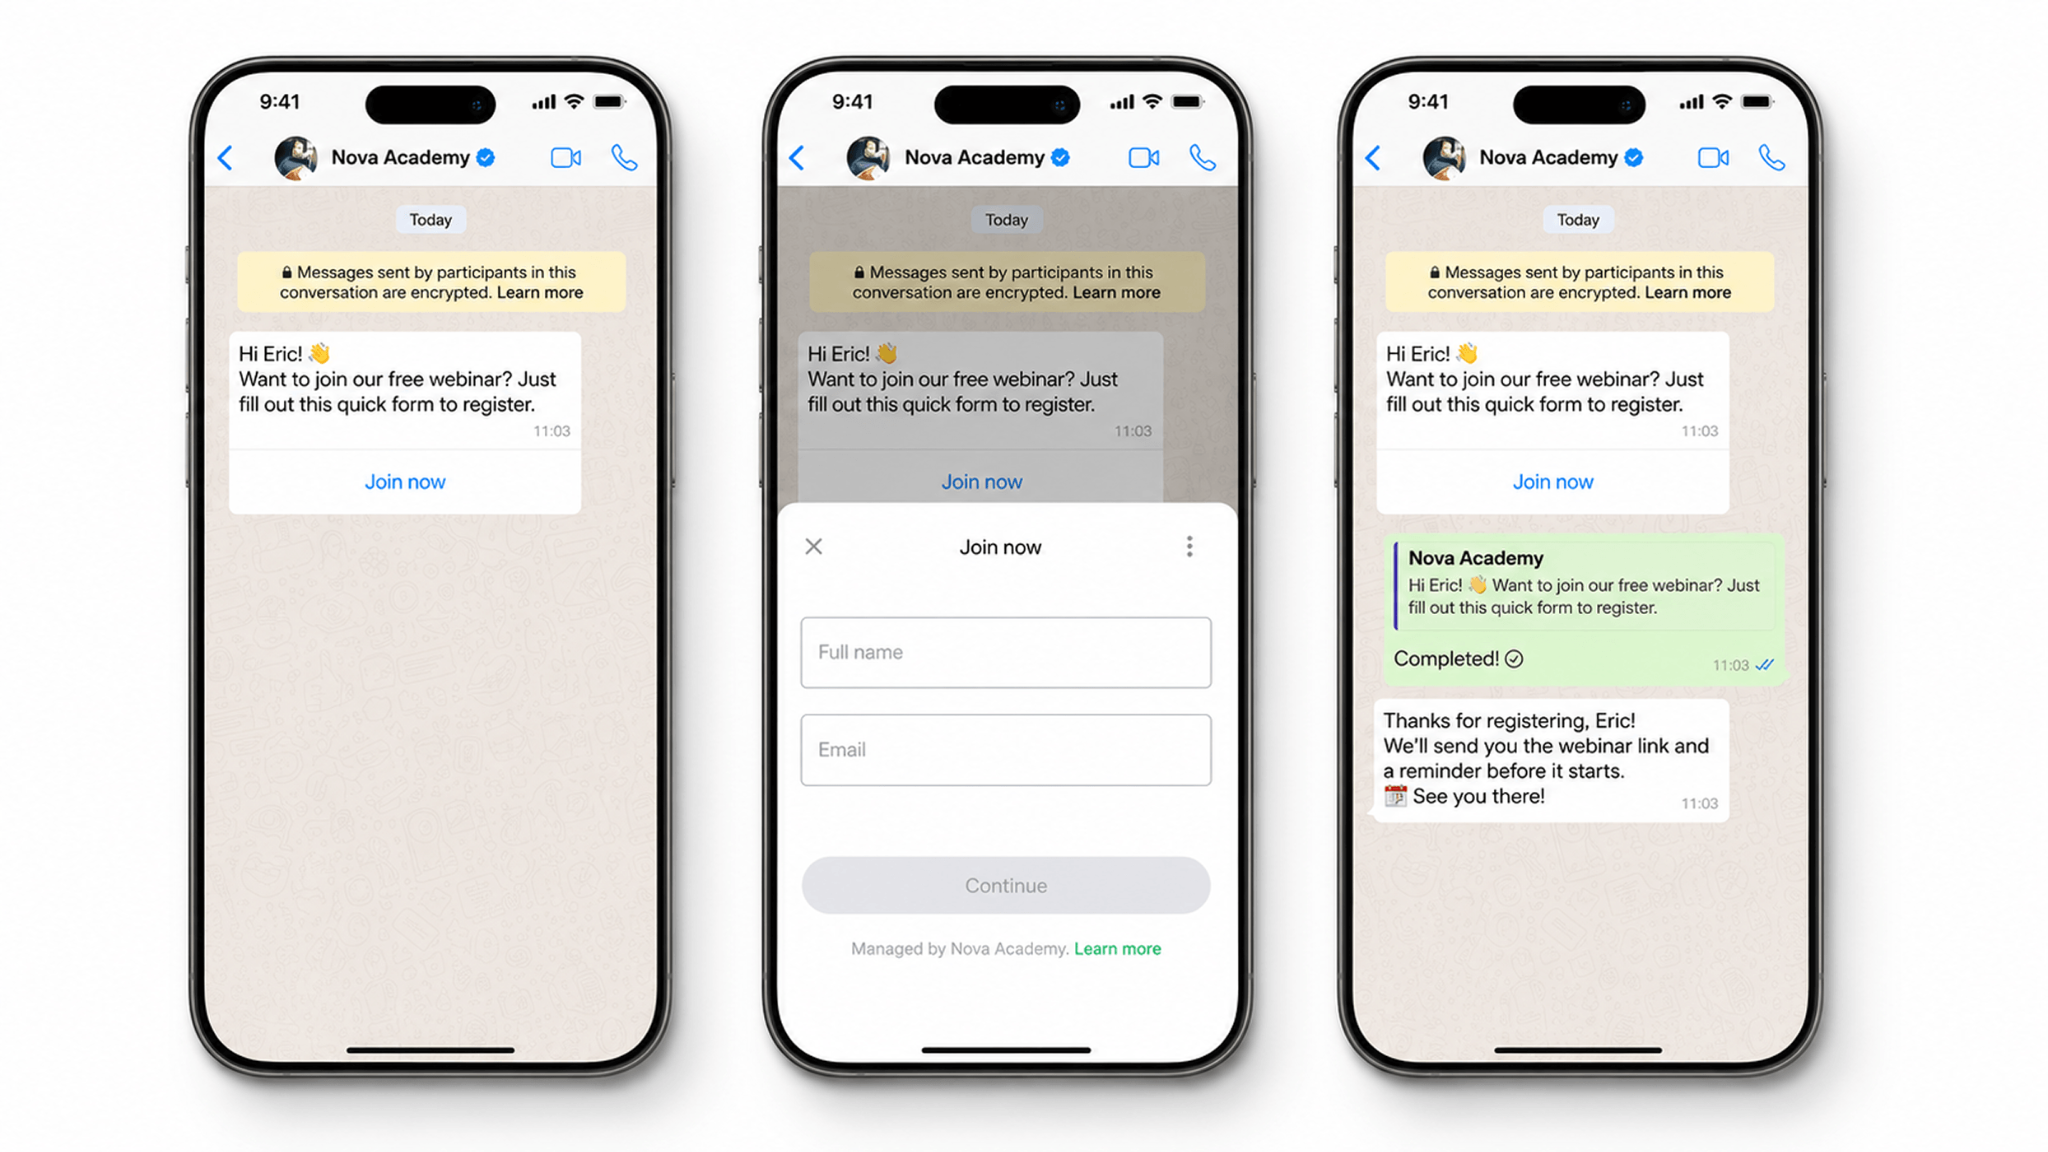
Flow templates are interactive WhatsApp templates that include a form clients can complete without leaving the WhatsApp chat.
When a client taps the Flow button in the message, the form opens directly in WhatsApp. It can guide them through several screens where they can enter information, choose options, select a date, or provide feedback.
You can link the form’s input fields to fields in Kommo. When the client submits the form, their answers are automatically saved to the corresponding lead, contact, or company fields.
Once Meta approves the template, you can use it to:
Message a client first.
Continue a conversation after the 24-hour customer service window closes.
Collect information automatically through Salesbot.
Send forms to multiple clients through Broadcasting.
To compare Flow templates with other WhatsApp template formats, see the WhatsApp templates overview article.
Use cases
Register clients for events — Collect names, contact details, attendance preferences, or additional comments for webinars, workshops, and other events.
Onboard new clients — Collect contact details, service preferences, preferred dates, and required consent in one form.
Gather feedback — Create a short post-purchase or post-appointment survey with ratings, multiple-choice questions, and comment fields.
Qualify leads — Ask a series of questions to understand whether a product or service is suitable for the client.
Guide product selection — Let clients select their preferences and requirements so you can recommend a relevant option.
How Flow templates are structured
A Flow template consists of a template message followed by a form that opens inside WhatsApp.
Template message
The template message appears in the WhatsApp chat before the form opens.
Use it to explain why you are requesting information and what the client can expect after completing the form.
A Flow template message can include:
An optional header with text, media, or a file
A required message body
An optional footer
A Flow button that opens the form
You can also add placeholders to personalize the message with information from a lead, contact, or company card. Each placeholder must include example content for Meta’s review.
Flow screens
A Flow can contain up to 8 screens.
Each screen includes:
A screen title
One button
At least one field or Additional
The button takes the client to the next screen or submits the form on the final screen.
In the Flow builder, you can add, delete, and rearrange screens. The Flow must contain at least one screen.
Fields
Fields collect information from the client and save it to Kommo.
Every field in the Flow must be linked to an existing lead, contact, or company field. Use default fields or create a field in Kommo before adding it to the form.
Each Kommo field can be added to a Flow only once. After you add it, it disappears from the list of available fields.
When you add a field, its title matches the field name in Kommo. You can change the title shown in the form without changing the field name in Kommo.
You can also:
Add an instruction
Make the Field required or optional
Use supported Field formats such as short text, long text, email, phone, number, date, single-choice, and multiple-choice Fields
Additionals
Additionals are extra elements shown to the client but not saved to fields in Kommo.
Use them to provide context or instructions. For example:
“Let us know which categories you’re interested in.”
“Rate our service.”
Additionals can include headings, body text, captions, or images.
Flow presets
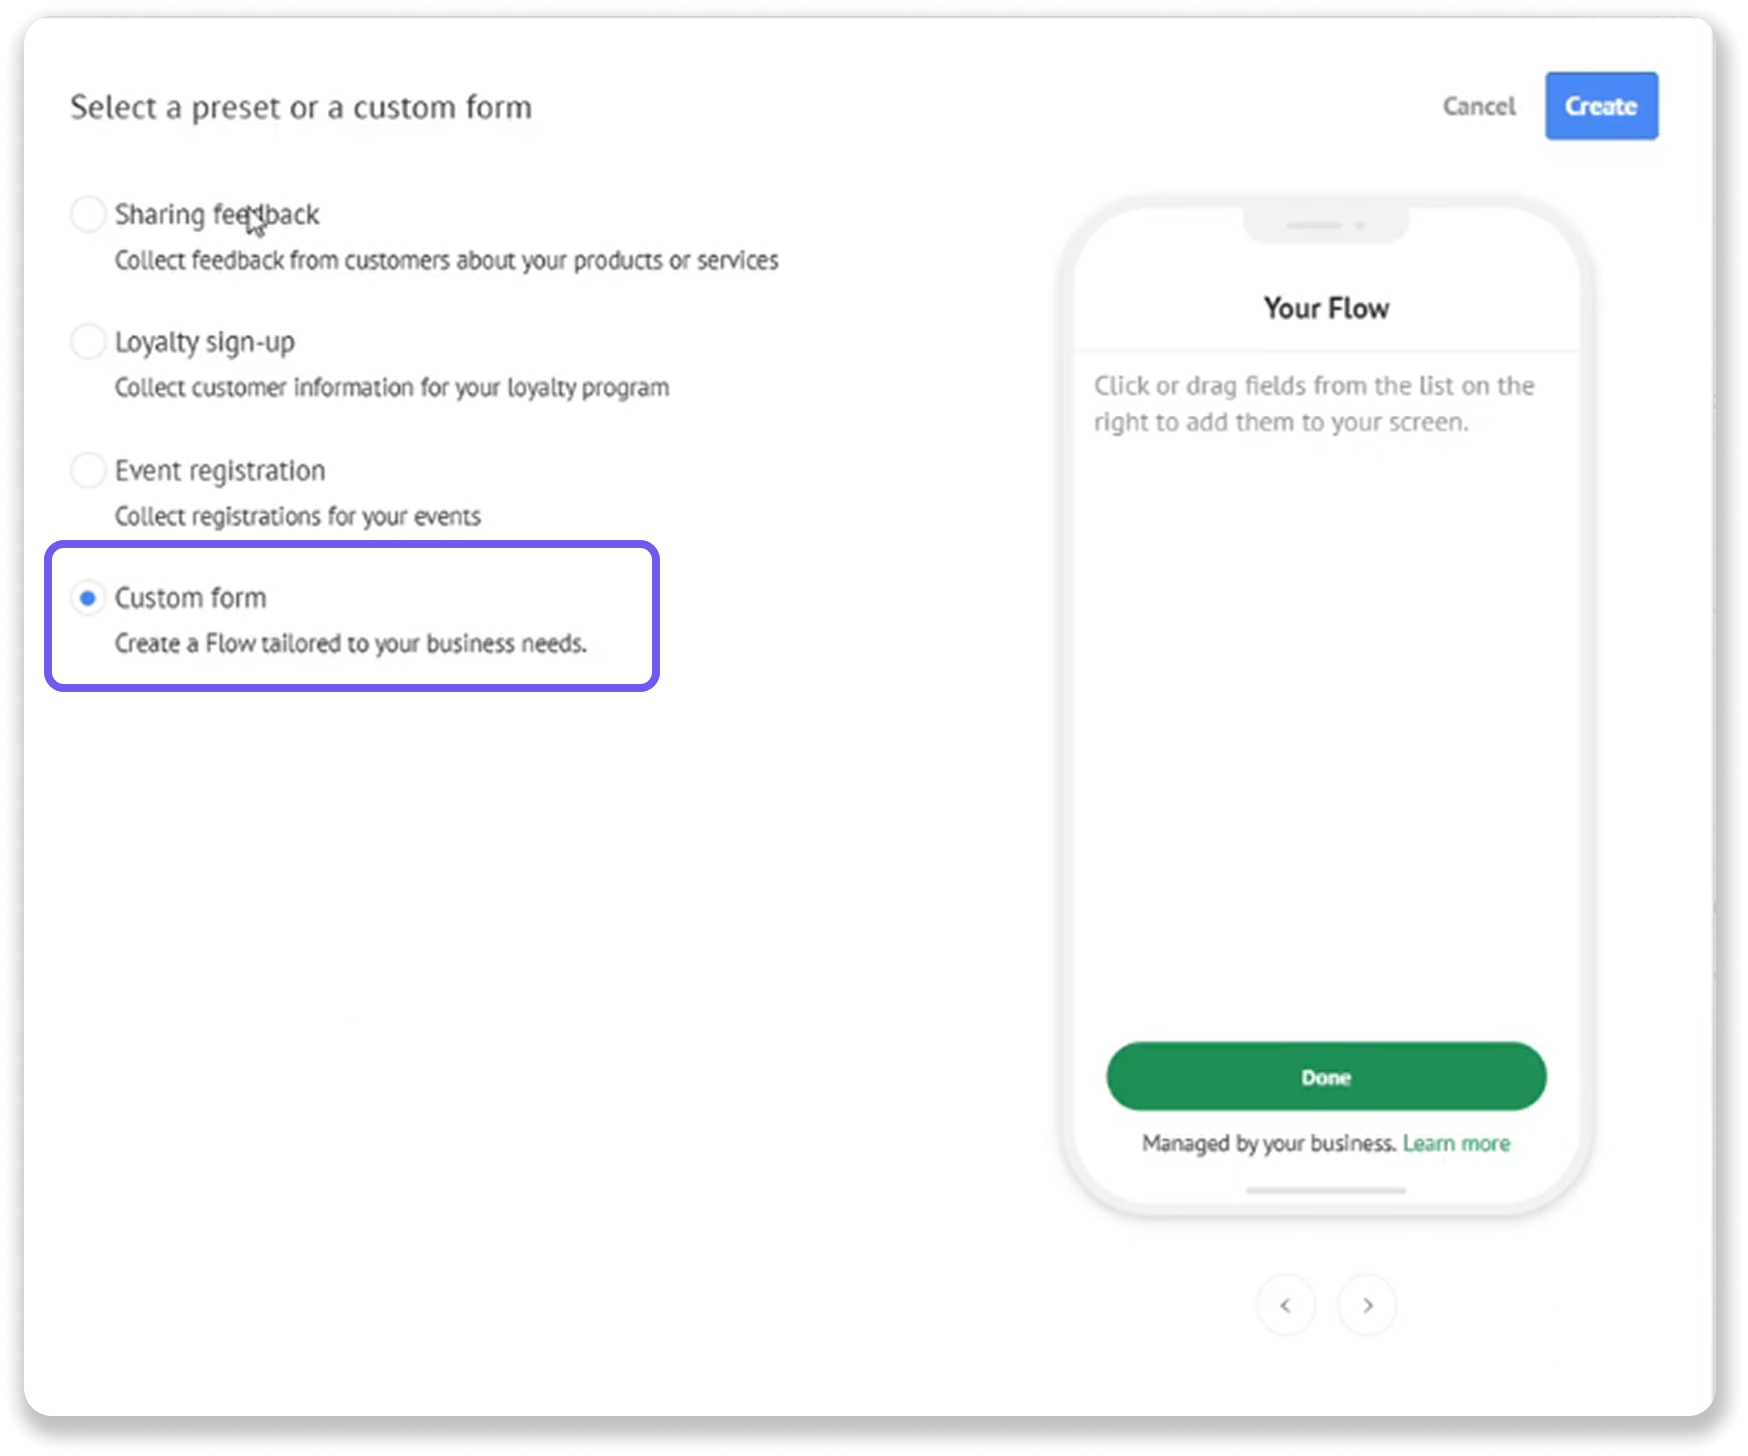
When creating a Flow, you can start from a preset or build your own form from scratch.
Available presets include:
Feedback
Event registration
Loyalty signup
Presets automatically add suggested screens, components, and Kommo fields. You can edit or remove them before submitting the template.
If a preset includes a Field that does not yet exist in your Kommo account, Kommo creates that Field when you submit the template for review. If you later remove the Field from the Flow, it remains available in Kommo and can be added again.
Flow template limitations
Limitation | Details |
|---|---|
Number of screens | A Flow can contain up to 8 screens. |
Number of buttons | Each screen contains one button. |
Components per screen | Each screen can contain up to 8 Fields and Additionals in total. |
Empty screens | Each screen must contain at least one Field or Additional in addition to its title and button. |
Field reuse | Each lead, contact, or company Field can be added to the Flow only once. |
Required text | Screen titles, button labels, Field titles, and Additionals cannot be empty. |
Button labels | The button that opens the Flow can contain up to 25 characters. Each screen button can contain up to 30 characters. |
Text limitations | A Field instruction can contain up to 80 characters. Large and small headings can contain up to 80 characters. Captions and Additional body text can contain up to 4,096 characters. |
How clients interact with Flow templates
Clients can complete the form without leaving WhatsApp. They can:
Go through the form screens
Enter text answers
Add an email address, phone number, or number
Select one or more options
Select a date
Submit the form on the final screen
Each screen has one button. It either opens the next screen or submits the completed form.
How responses appear in Kommo
When a client submits a Flow, their answers are saved to the corresponding lead, contact, or company Fields.
The information is saved as follows:
If a linked Field already contains information, the new answer replaces it.
Phone numbers and email addresses are not overwritten. If the submitted value is different, Kommo adds it as a separate phone or email entry.
If the linked Field was deleted after the Flow was created, the answer is not saved.
The submitted answers also appear with the client’s response message in the lead chat. Only Kommo users can see them.
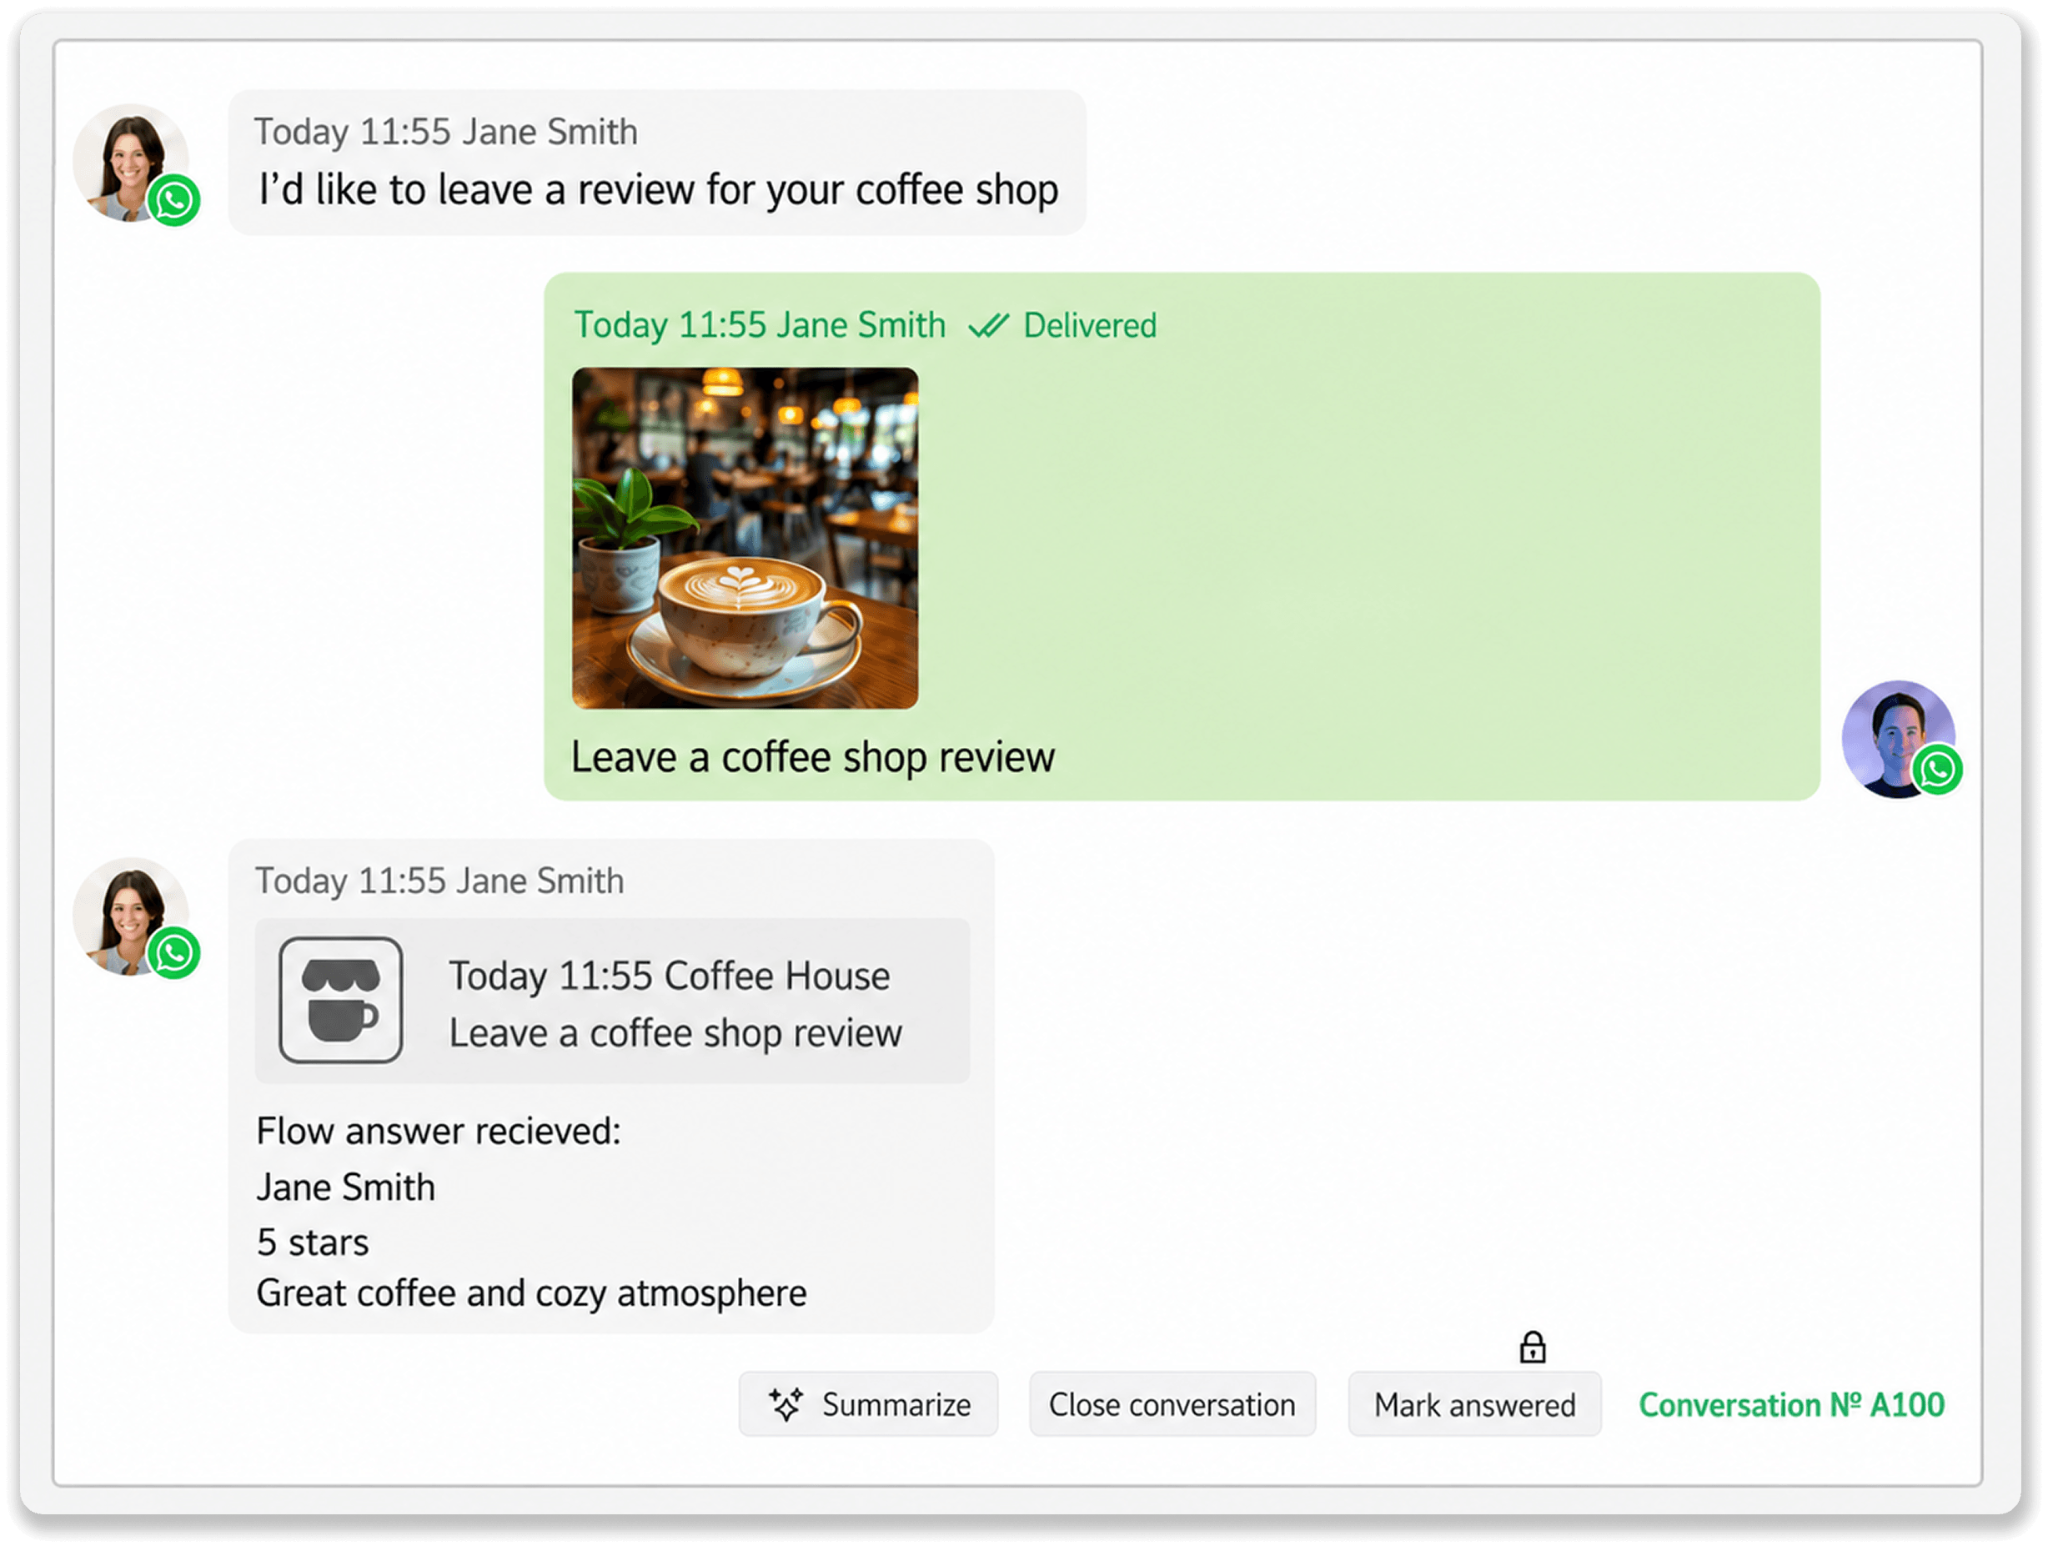
Before sending the Flow to clients, test it with a test lead and confirm that each answer is saved to the correct Field.
Create a Flow template in Kommo
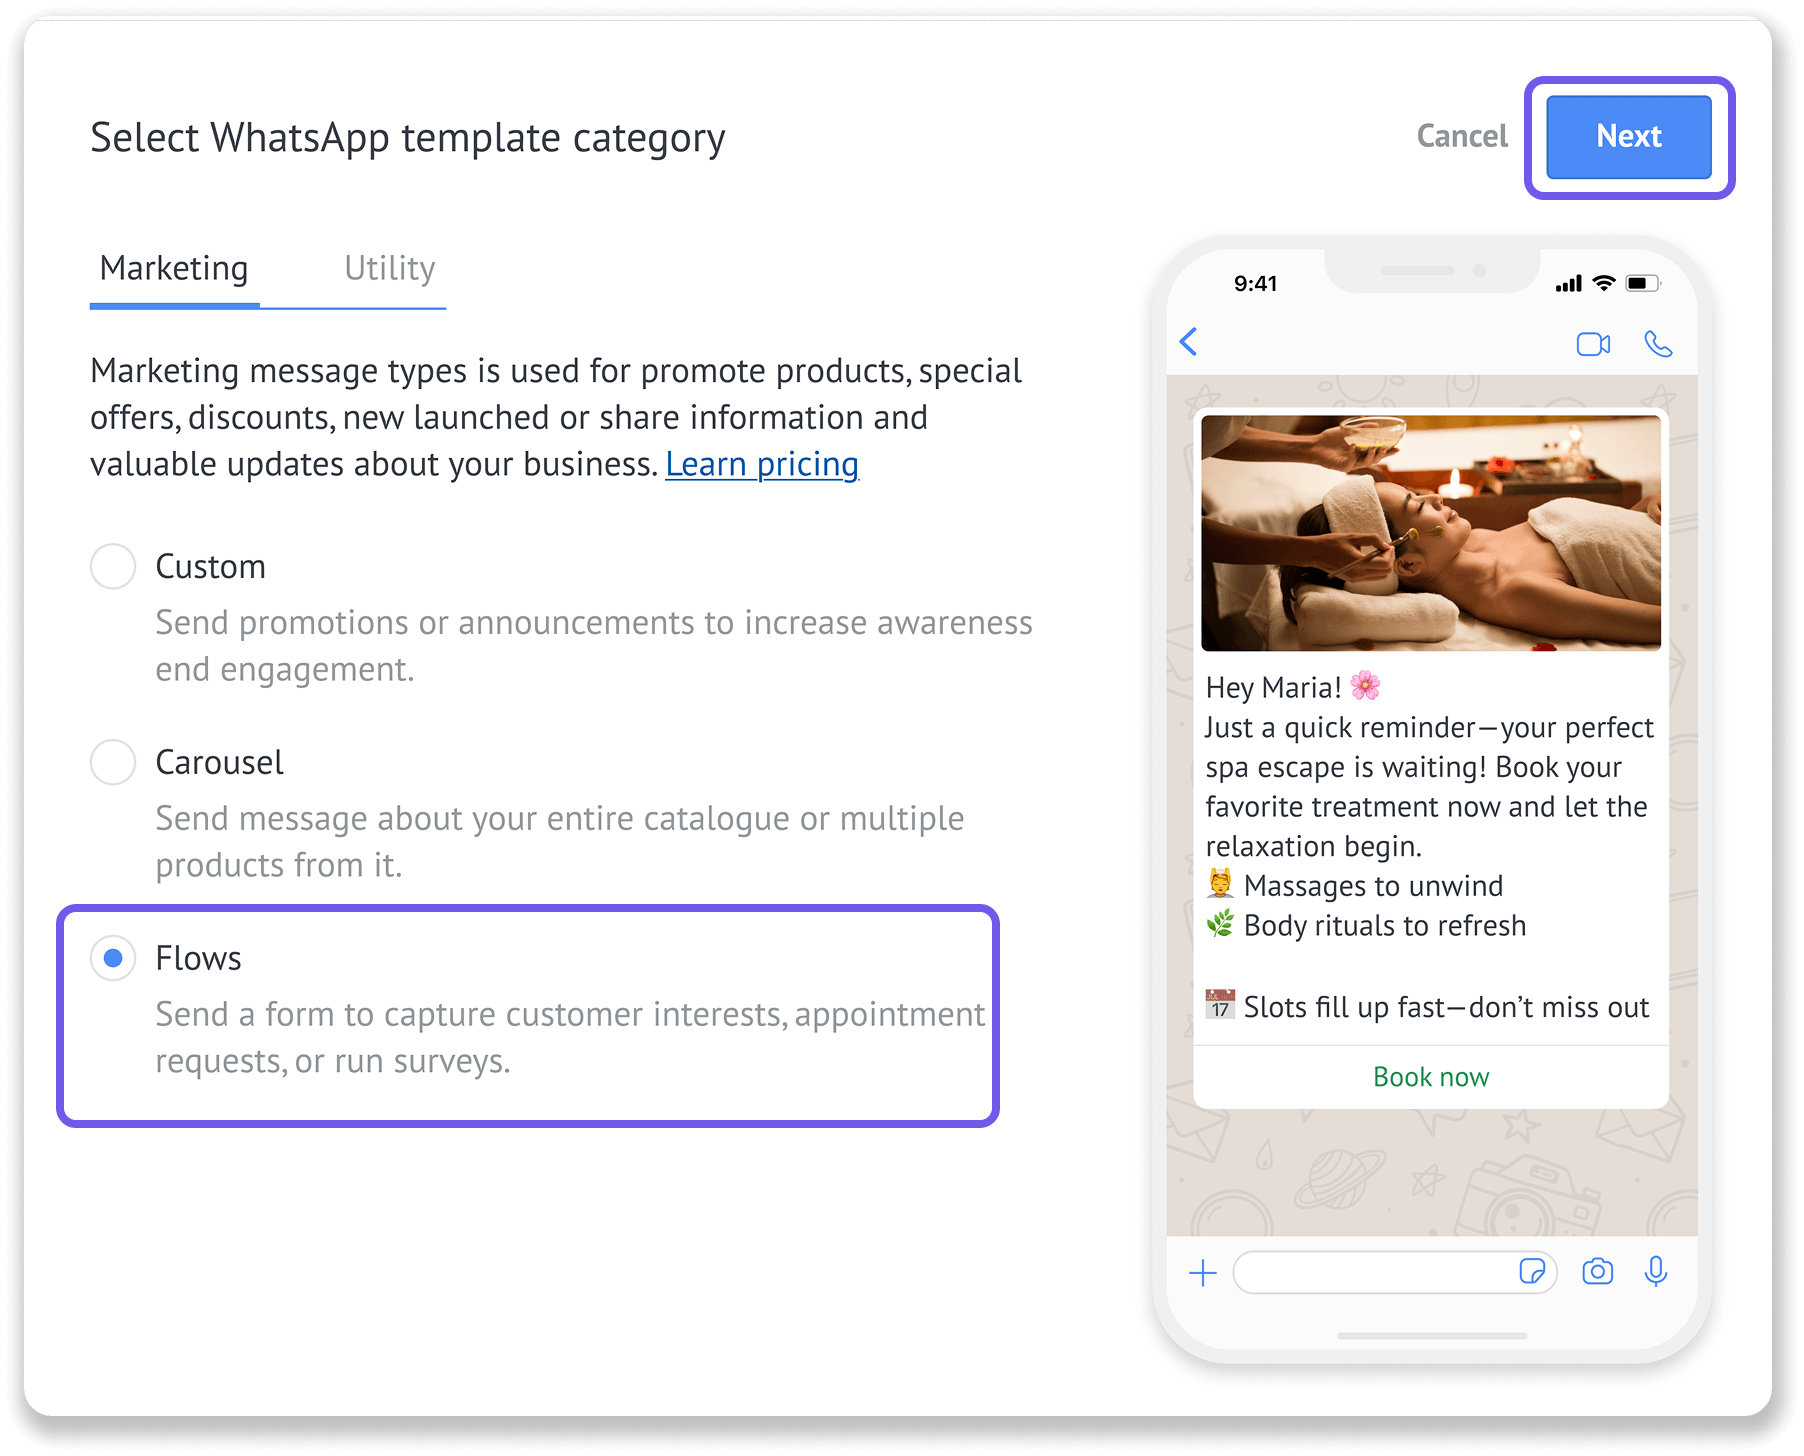
Choose the template type
Go to Automations → Templates → Chat templates.
Click + New template.
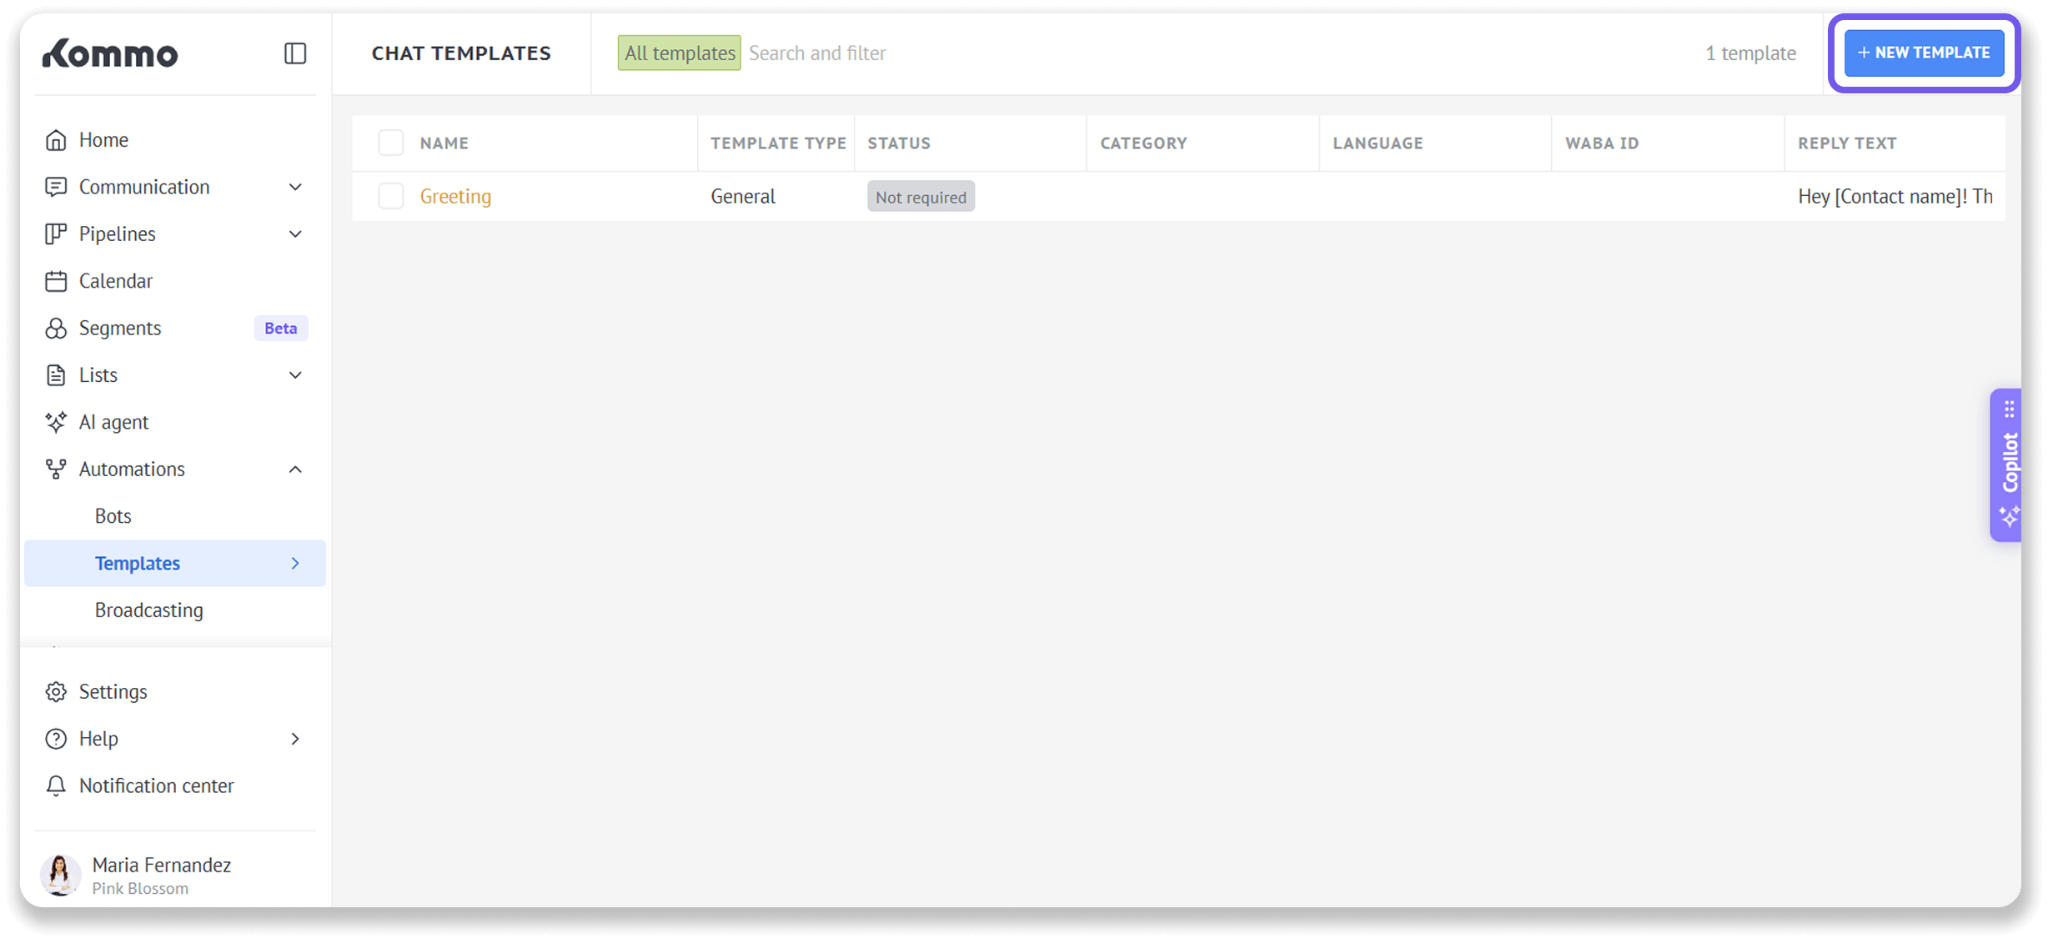
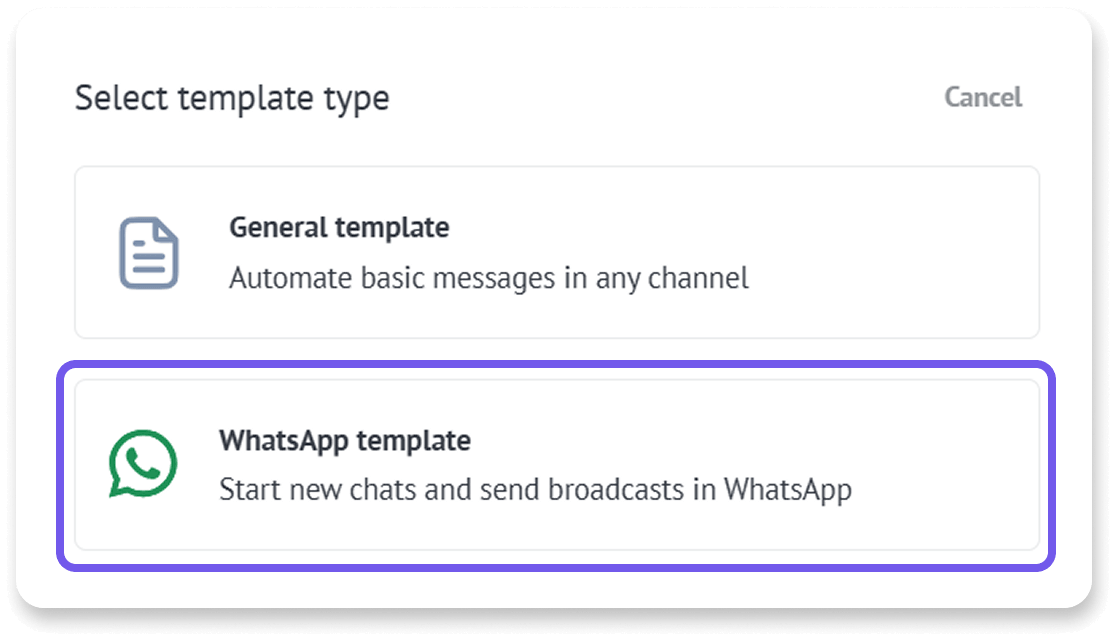
Select WhatsApp template.
Select Marketing or Utility.
Select Flow, then click Next.
Set up the template
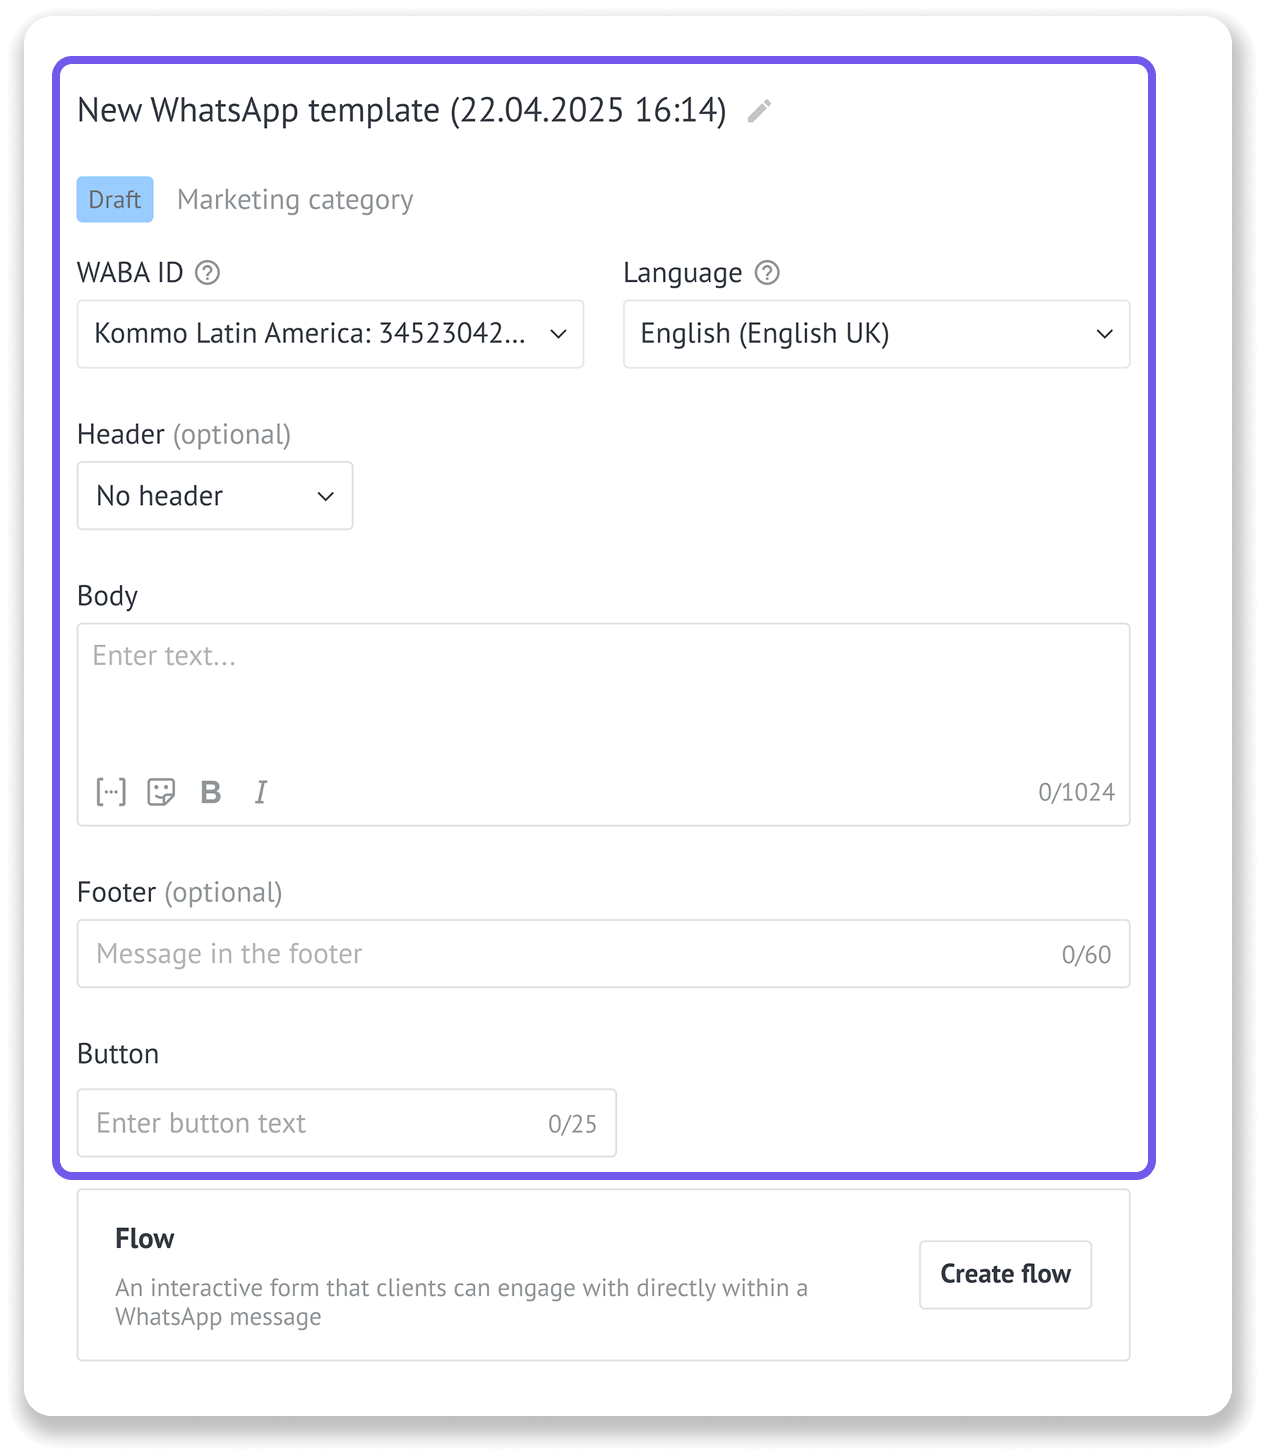
Review the automatically generated template name and edit it if needed.
Select the WABA ID for the WhatsApp Business account you want to use.
Select the message language.
Make sure the selected language matches the template content. Otherwise, Meta may reject the template.Set up the message clients will see before opening the form:
Add an optional header with text, media, or a file.
Enter the message body.
Add an optional footer.
Add placeholders to personalize the message with lead, contact, or company data. Include an example for every placeholder.
Enter the Flow button label.
Build the form
Click Create flow.
Select a preset or start from scratch.
Add, remove, or rearrange the Flow screens.
Edit the title and button label on each screen.
Add Fields:
Click Contacts, Companies, or Leads.
Select the Fields you want to add.
Hover over a Field and click the pencil icon to change its displayed title, add an instruction, or make it required or optional.
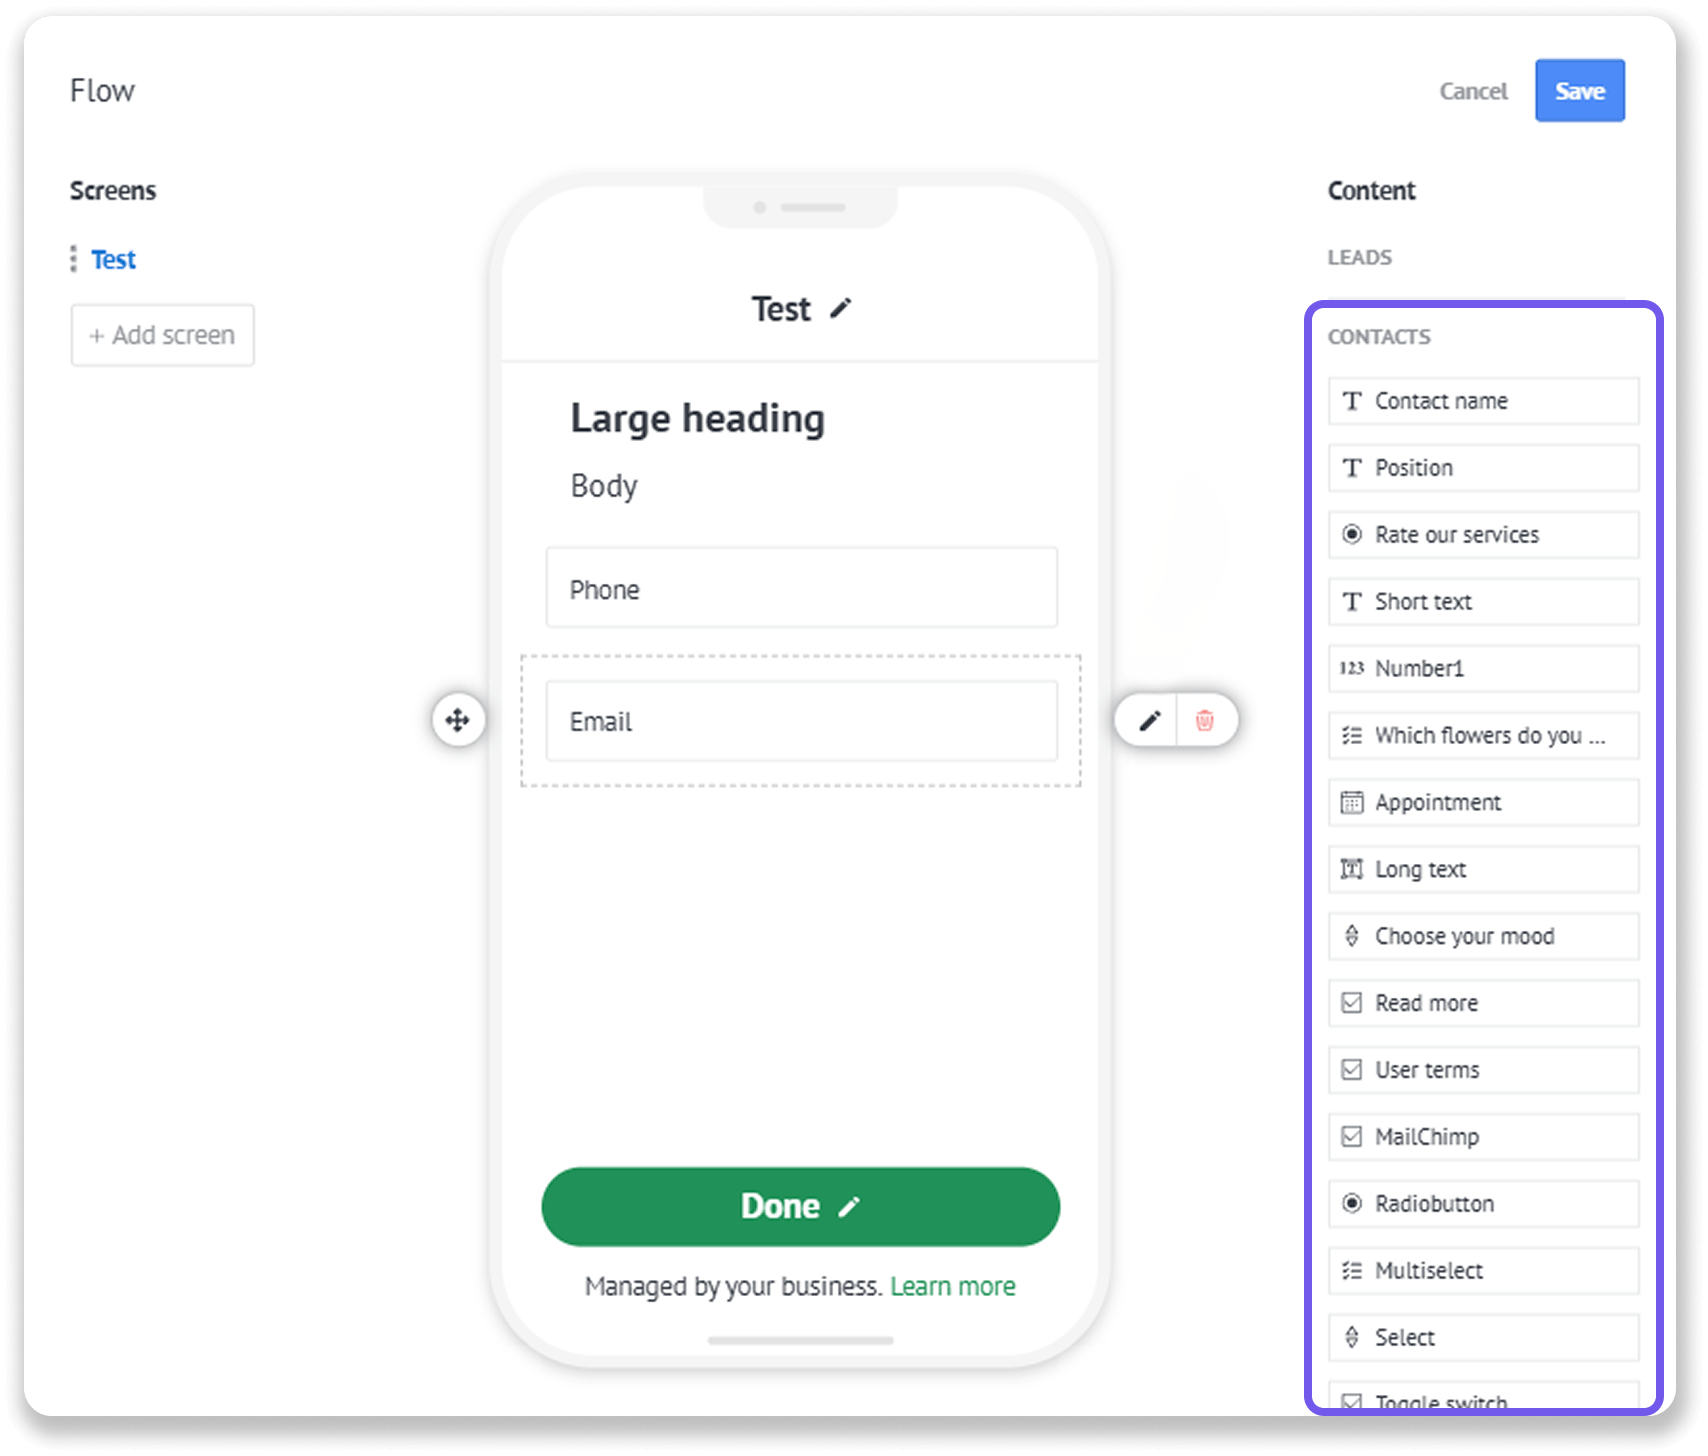
Click Additional to add headings, body text, captions, or images.
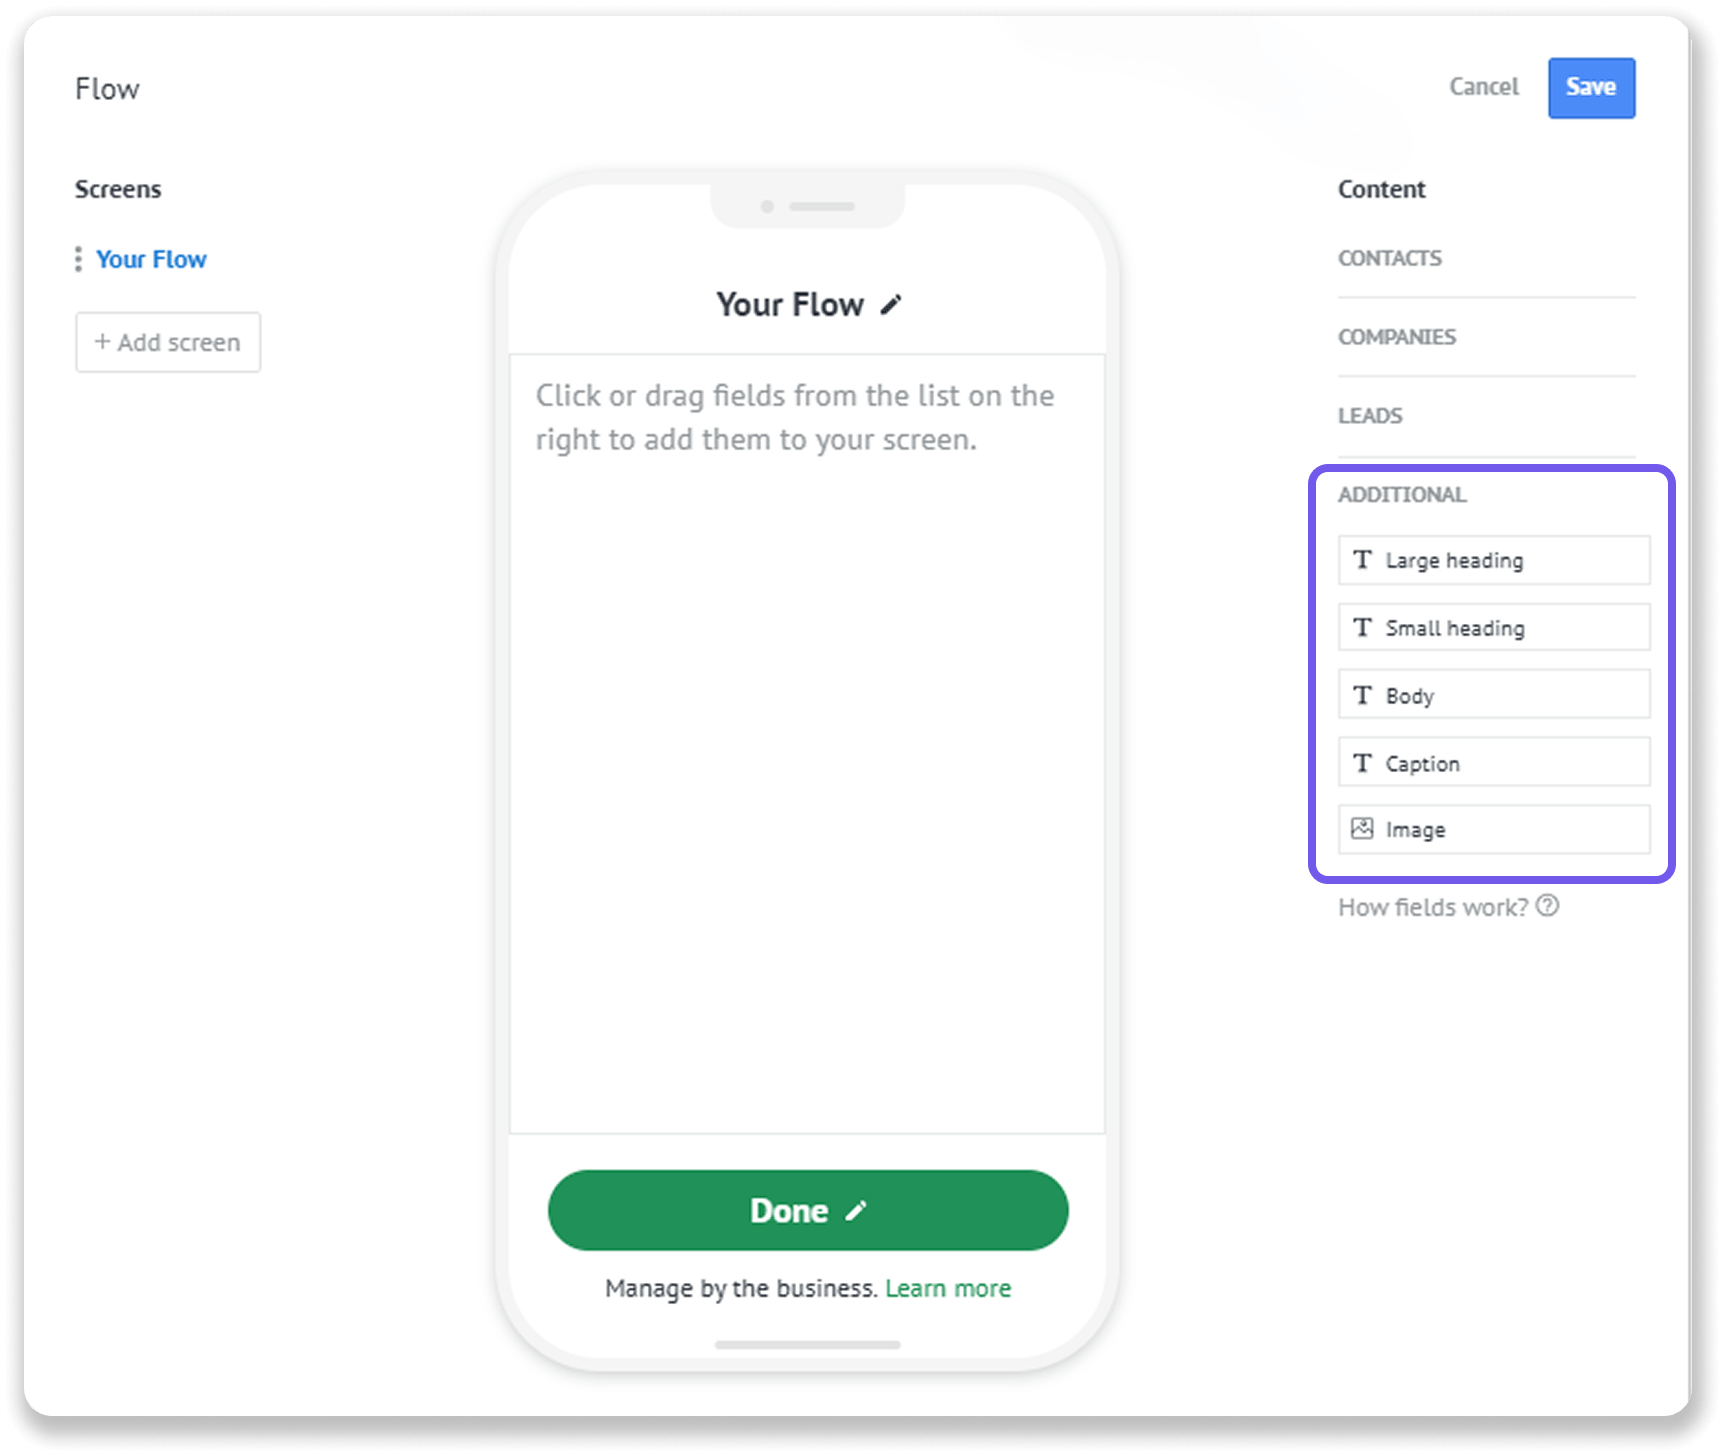
Click Save when the Flow is ready.
Save or submit the template
Review the template preview.
The preview shows the template message and Flow button. To review or edit the form itself, open the Flow builder again.
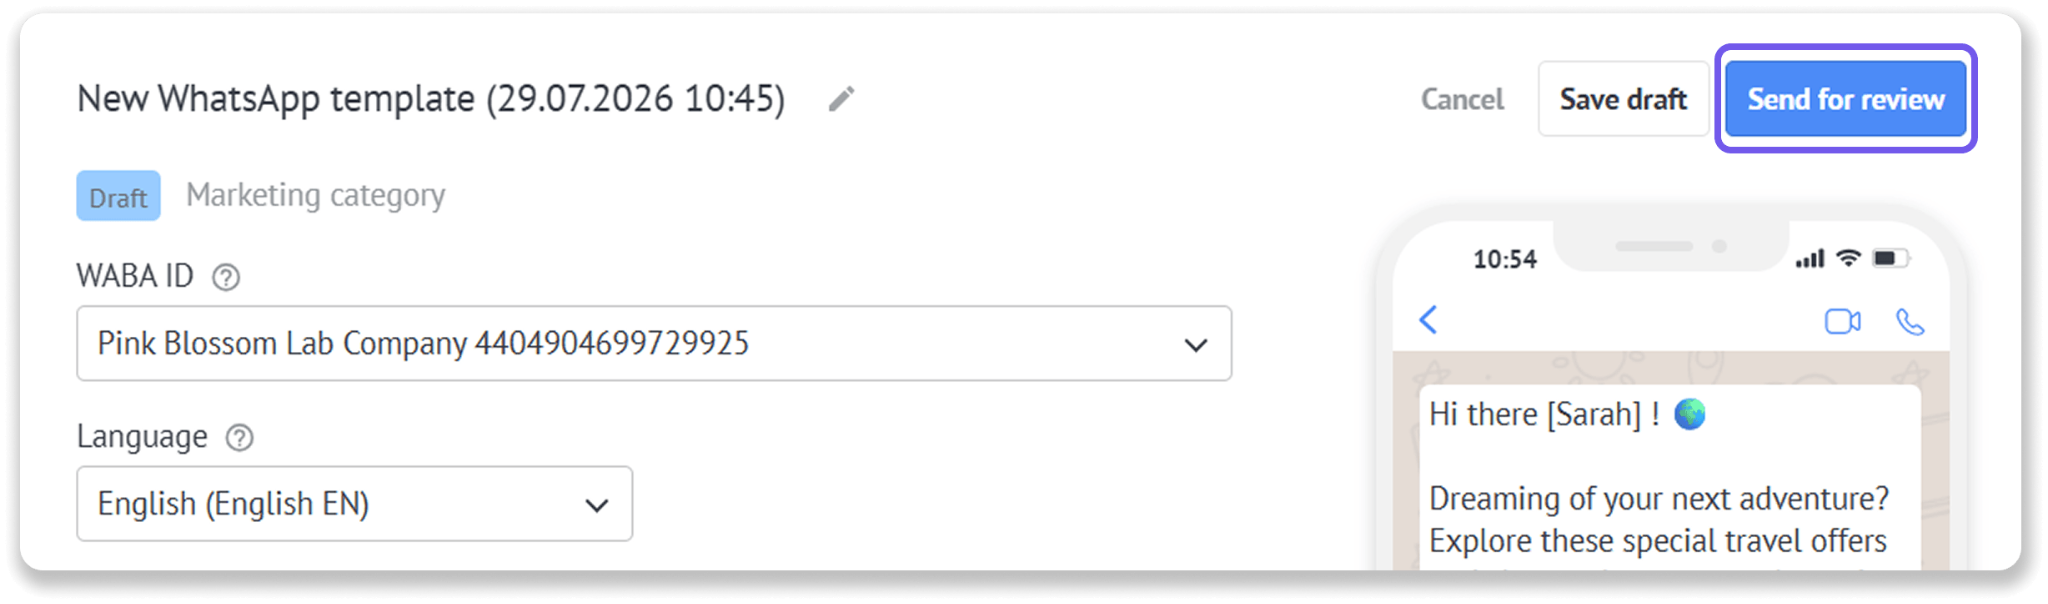
Click:
Save draft to continue working on the template later.
Send for review to submit the template to Meta.
What happens after you submit the template
After you click Send for approval, the template status changes from Draft to In review.
Meta checks that the template follows WhatsApp policies and reviews its category, language, content, button, and Flow details.
The review typically takes from one minute to 48 hours. You cannot edit the template while it has the In review status.
If Meta approves the template, its status changes to Approved, and you can start sending it to clients.
If Meta rejects the template, its status changes to Rejected. Hover over the status to see the rejection reason, correct the template, and submit it again.
For recommendations that can help your template get approved, see the Create and manage WhatsApp Business message templates article.
Test before launching
Before sending a Flow to clients:
Create a test lead and send the template to yourself.
Complete every screen and check the navigation.
Confirm that each answer is saved to the correct Field in Kommo.
Review the message and form in WhatsApp.
How to send Flow templates
Once approved, Flow templates can be sent from different places in Kommo:
Chat inbox — Send a template manually during a conversation with a client.
Salesbot — Send a template automatically as part of a chat flow.
Broadcasting — Send a template to multiple clients at once.
Kommo mobile app — Send a template from your phone when you need to reply or follow up on the go.
Flow templates must be created and approved before you can add them to Salesbot or Broadcasting.
For step-by-step sending instructions, see the Send templates with WhatsApp Business article.