What you’ll need:
Any Kommo plan (Base, Advanced, Pro, Enterprise, or 14-day trial)
Admin access for workspace-wide settings
A clear example of how a real inquiry becomes a completed sale
Keep in mind:
Plan one main workflow first instead of configuring every team, product, and channel at once
Your first setup can be improved after your team starts using it
A simple plan helps you avoid unnecessary stages, duplicate fields, and automations that do not match your real process. Before changing settings, decide how leads enter Kommo, what information your team needs, and what should happen at each step.
Outcome
By the end of this guide, you will have a short setup plan covering:
Your main business goal
Your first lead source
Your pipeline stages
The information your team needs to store
User responsibilities
One workflow to test from start to finish
Who should complete this
The person responsible for configuring the workspace should complete this plan with input from the people who manage leads every day. This is usually an Admin, sales manager, business owner, or implementation lead.
1. Choose the first problem to solve
Start with one clear result. For example:
Respond to new messages faster
Stop losing leads from website forms
Replace a spreadsheet with a shared sales process
Make follow-ups visible to the whole team
Track where deals slow down
Avoid using a broad goal such as “set up the CRM.” Choose a result you can test.
You’re done when: You can describe the first problem in one sentence and explain how you will know it is solved.
2. Choose how leads will enter Kommo
Select the source that brings your business the most important inquiries today. This can be a messaging channel, email, website form, advertising platform, import, or manual entry.
Choose the setup path that matches your business.
You’re done when: You have selected one primary lead source for the first setup.
3. Map the client journey
Write down the main steps a client passes through from the first inquiry to the final result. Focus on changes in the client’s status, not every task your team performs.
Example:
New inquiry → Contacted → Needs confirmed → Offer sent → Decision
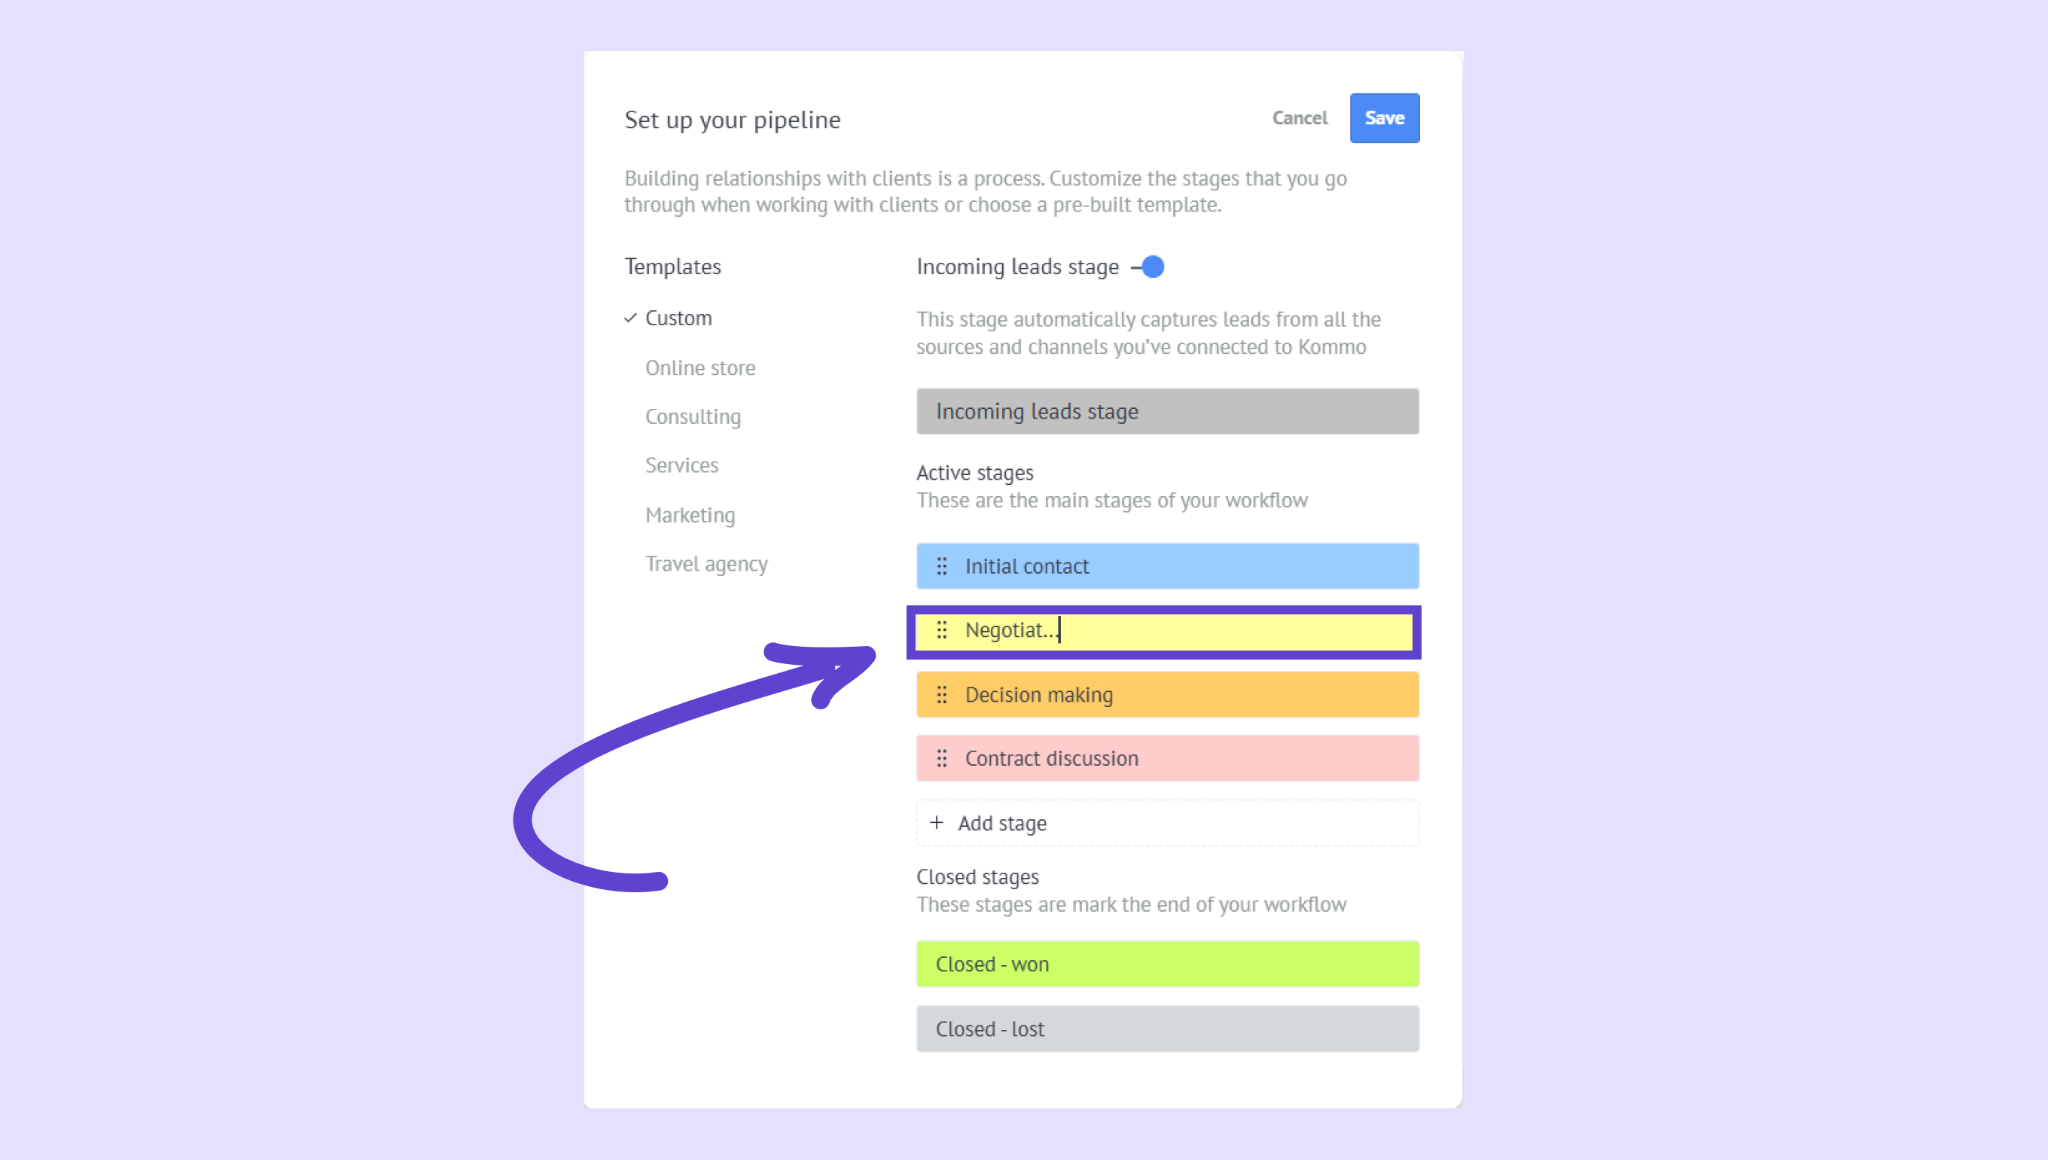
For each step, define:
What must be true before a lead enters the stage
What your team should do next
What must happen before the lead moves forward
You’re done when: Each stage has a clear purpose and two teammates would move the same lead in the same way.
4. Decide what information matters
List only the information your team uses to make decisions, personalize communication, assign work, segment leads, or report on results.
Separate the list by record type:
Lead: Opportunity details, expected value, product or service, source, next step
Contact: Person’s name, phone, email, preferred contact method
Company: Organization name, industry, website, address, account details
Learn how to choose what information to store.
You’re done when: Every planned field has a clear owner and a reason to exist.
5. Define team responsibilities
Decide who will:
Review new leads
Own each lead
Reply to clients
Create and complete follow-up tasks
Move leads through stages
Update workspace settings and automations
You’re done when: Each important action has one responsible role, even if one person fills several roles.
6. Choose one automation for later
Do not automate the full process yet. First, identify one repetitive action that has a clear trigger and result, such as creating a task when a lead enters a stage.
Configure it only after the manual workflow has been tested.
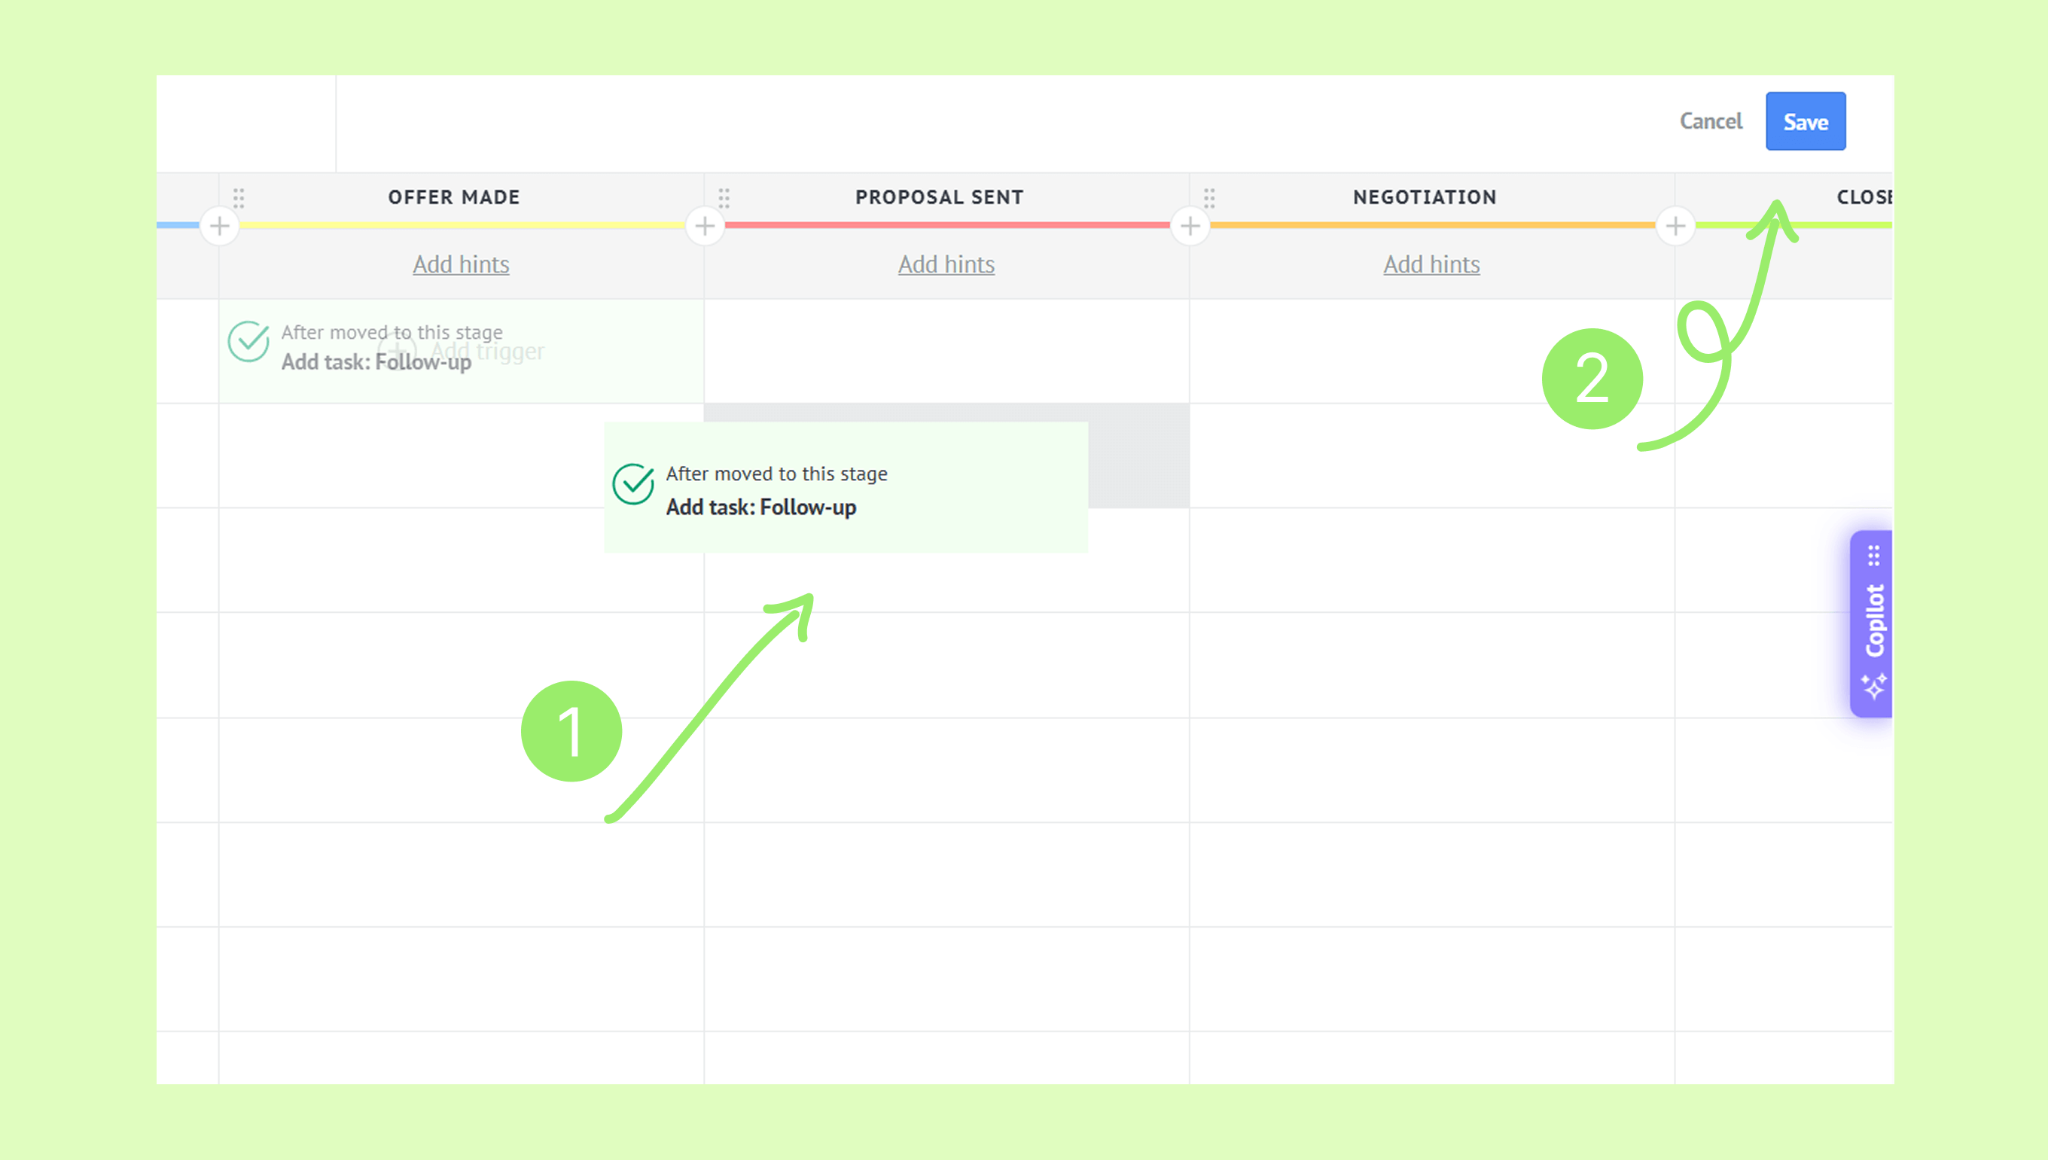
You’re done when: You can describe the automation as “When this happens, Kommo should do this.”
7. Prepare a test scenario
Choose one realistic example that your team can process before launch. Include:
Where the lead comes from
What information should appear
Who should receive it
Which stages it should pass through
Which task or message should be created
What the final result should be
You’re done when: Someone who did not configure the workspace can follow the scenario and confirm whether it works.
Your setup plan
Decision | Your answer |
|---|---|
First problem to solve | Describe the result you need |
Main lead source | Choose one source |
Pipeline stages | List the main client steps |
Required information | List only essential fields |
Responsible roles | Assign ownership |
First test scenario | Describe one complete journey |
Next step
Use your plan to set up your first sales pipeline.