Description: Create a simple pipeline that reflects your real sales process and makes each lead’s next step clear.
What you’ll need:
Any Kommo plan (Base, Advanced, Pro, Enterprise, or 14-day trial)
Admin access in Kommo
A short list of the main steps in your sales process
Keep in mind:
Only Admins can create, delete, or reorder pipelines and stages
Start with one pipeline unless your teams or processes are genuinely different
Moving a lead can trigger automations, so test changes before using the pipeline with real leads
Your pipeline should show where each lead is in the client journey and what must happen next. A simple structure is easier for your team to understand, maintain, and report on.
Outcome
By the end of this guide, you will have one pipeline with clear stages, agreed movement rules, and a test lead that can pass through the full process.
1. Choose the process to represent
Use one pipeline for one consistent workflow. For example:
New sales
Renewals
Appointments
Orders
Partner applications
Create separate pipelines only when the stages, responsible teams, or outcomes are meaningfully different.
You’re done when: You can describe the pipeline’s purpose in one sentence.
2. Choose how to create it
You can:
Use the default pipeline
Apply a pipeline template
Create a new pipeline from scratch
Use the option that requires the fewest changes for your first workflow.
Learn how to create and manage pipelines.
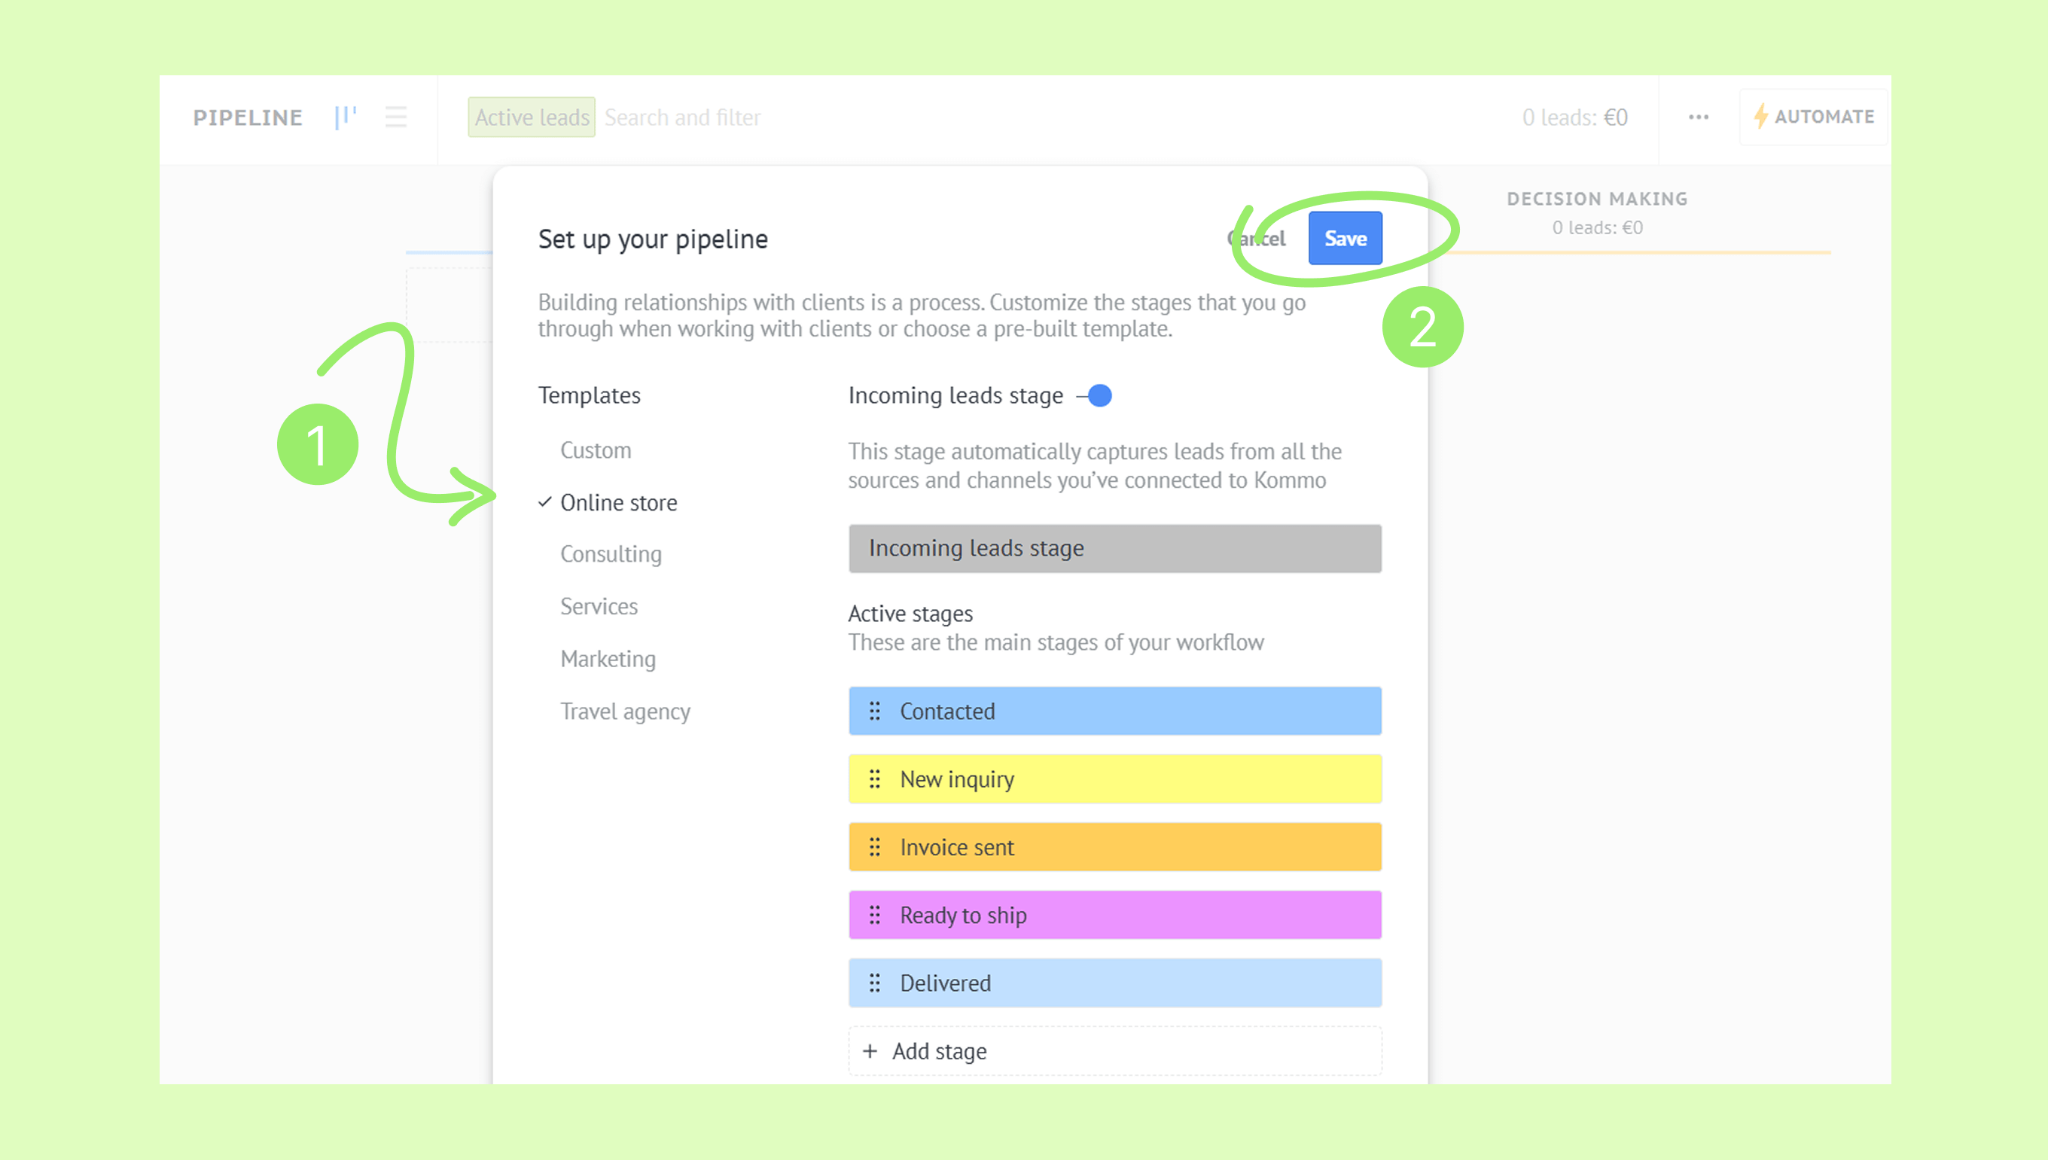
3. Define the active stages
Each active stage should represent a real change in the lead’s progress. Use short, specific names that your team already understands.
Example:
New inquiry → Contacted → Needs confirmed → Offer sent → Decision
Avoid stages that only describe internal activities, such as “Call tomorrow” or “Send email.” Use tasks for those actions instead.
For each stage, answer:
Why is the lead here?
What should the responsible user do?
What must happen before the lead moves forward?
You’re done when: Each stage has one clear meaning and no two stages describe the same situation.
4. Understand the default stages
Kommo pipelines can include an Incoming leads stage for new inquiries from connected sources. Use it to review new requests before accepting them into your active process.
The final won and lost stages record the result of each lead and support reporting. Use them consistently so completed deals do not remain in active stages.
Learn how to add, rename, and manage stages.
5. Add stage rules for your team
Document the minimum information or action required at important stages.
Stage | Lead enters when | Lead moves forward when |
|---|---|---|
New inquiry | A new request is accepted | The first response is sent |
Needs confirmed | The client’s request is understood | The correct offer is prepared |
Offer sent | The client receives the offer | The client responds or a follow-up is completed |
These rules help teammates make consistent decisions and make pipeline reports more reliable.
6. Add one test lead
Create a sample lead and move it through every active stage. At each stage, check that:
The stage name still makes sense
The next action is obvious
The required information can be recorded
The lead can be closed as won or lost
Ask someone who did not build the pipeline to repeat the test. Their questions often reveal unclear stage names or missing rules.
Verify your pipeline
Your first pipeline is ready when:
It represents one clear workflow
Each active stage reflects client progress
Your team agrees when to move leads
Won and lost outcomes are used correctly
A test lead can move from start to finish without confusion
Next step
Decide which details should appear in each record in Choose what information to store in Kommo.