What you’ll need:
Admin role in Kommo.
Availability depends on your plan:
Manual segments — available on Advanced, Pro, Enterprise, Trial, or Pro Trial plans.
Automated segments — available on Pro, Enterprise, Trial, or Pro Trial plans.
Learn more about Kommo plans here.
Keep in mind:
Segments aren’t available on the Base plan. If Pro Trial is available and activated, segments are available for the duration of the trial.
Segments already created in the account will continue working as manual segments and can’t be converted to automated segments.
Automated segments have the following limits:
Segments — Up to 10 for each user in the account, with a maximum of 250 per account.
This limit is shared across all users (e.g., if an account has 2 users, it can have up to 20 automated segments. One user can create all 20, but no more segments can be created once the account reaches this limit).Conditions — Up to 50 per segment and 10 per group.
Actions — Up to 10 when a lead enters the segment and 10 when a lead leaves the segment.
Note: During the trial, the user-based limit doesn’t apply. You can have up to 250 automated segments per account, regardless of the number of users. After the trial, the standard limit based on the number of users applies.
TikTok Ads Manager needs to be connected before it can be selected as an action.
In this article, you’ll learn how to create manual and automated segments, define their conditions, and configure actions for automated segments.
To learn what segments are, see our article.
Create a segment
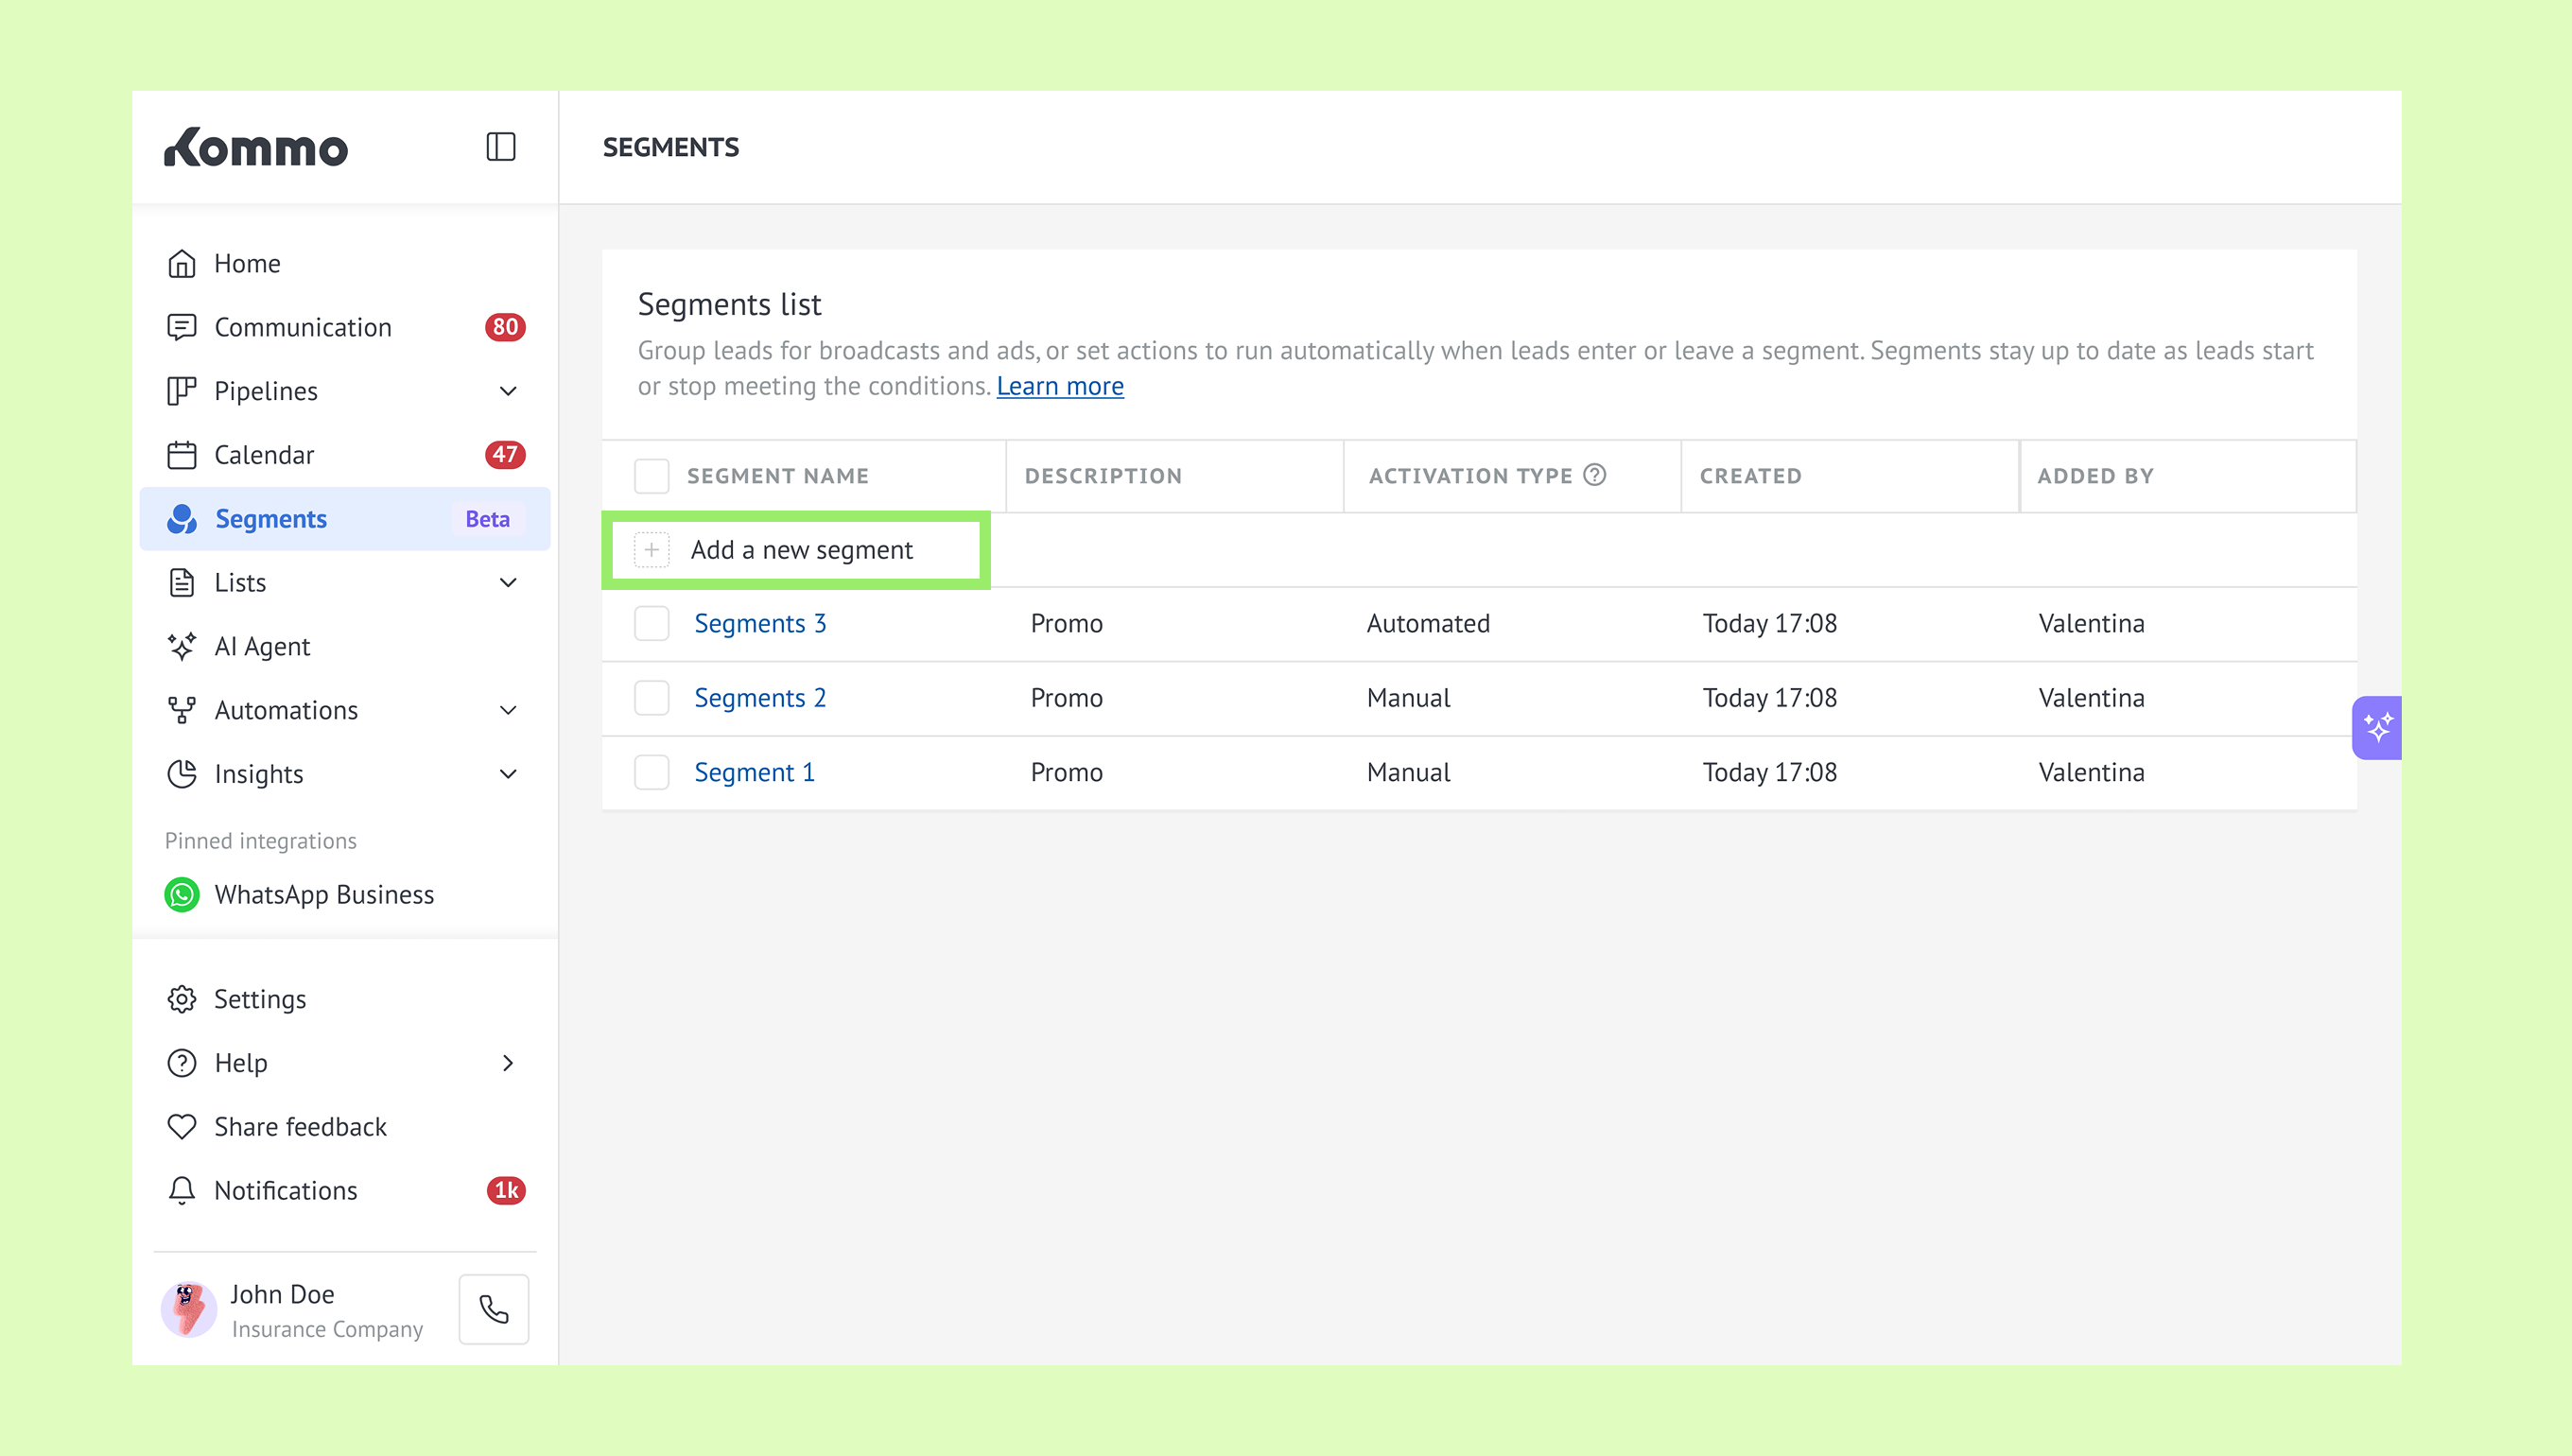
To create a new segment, go to Segments → click Add a new segment.
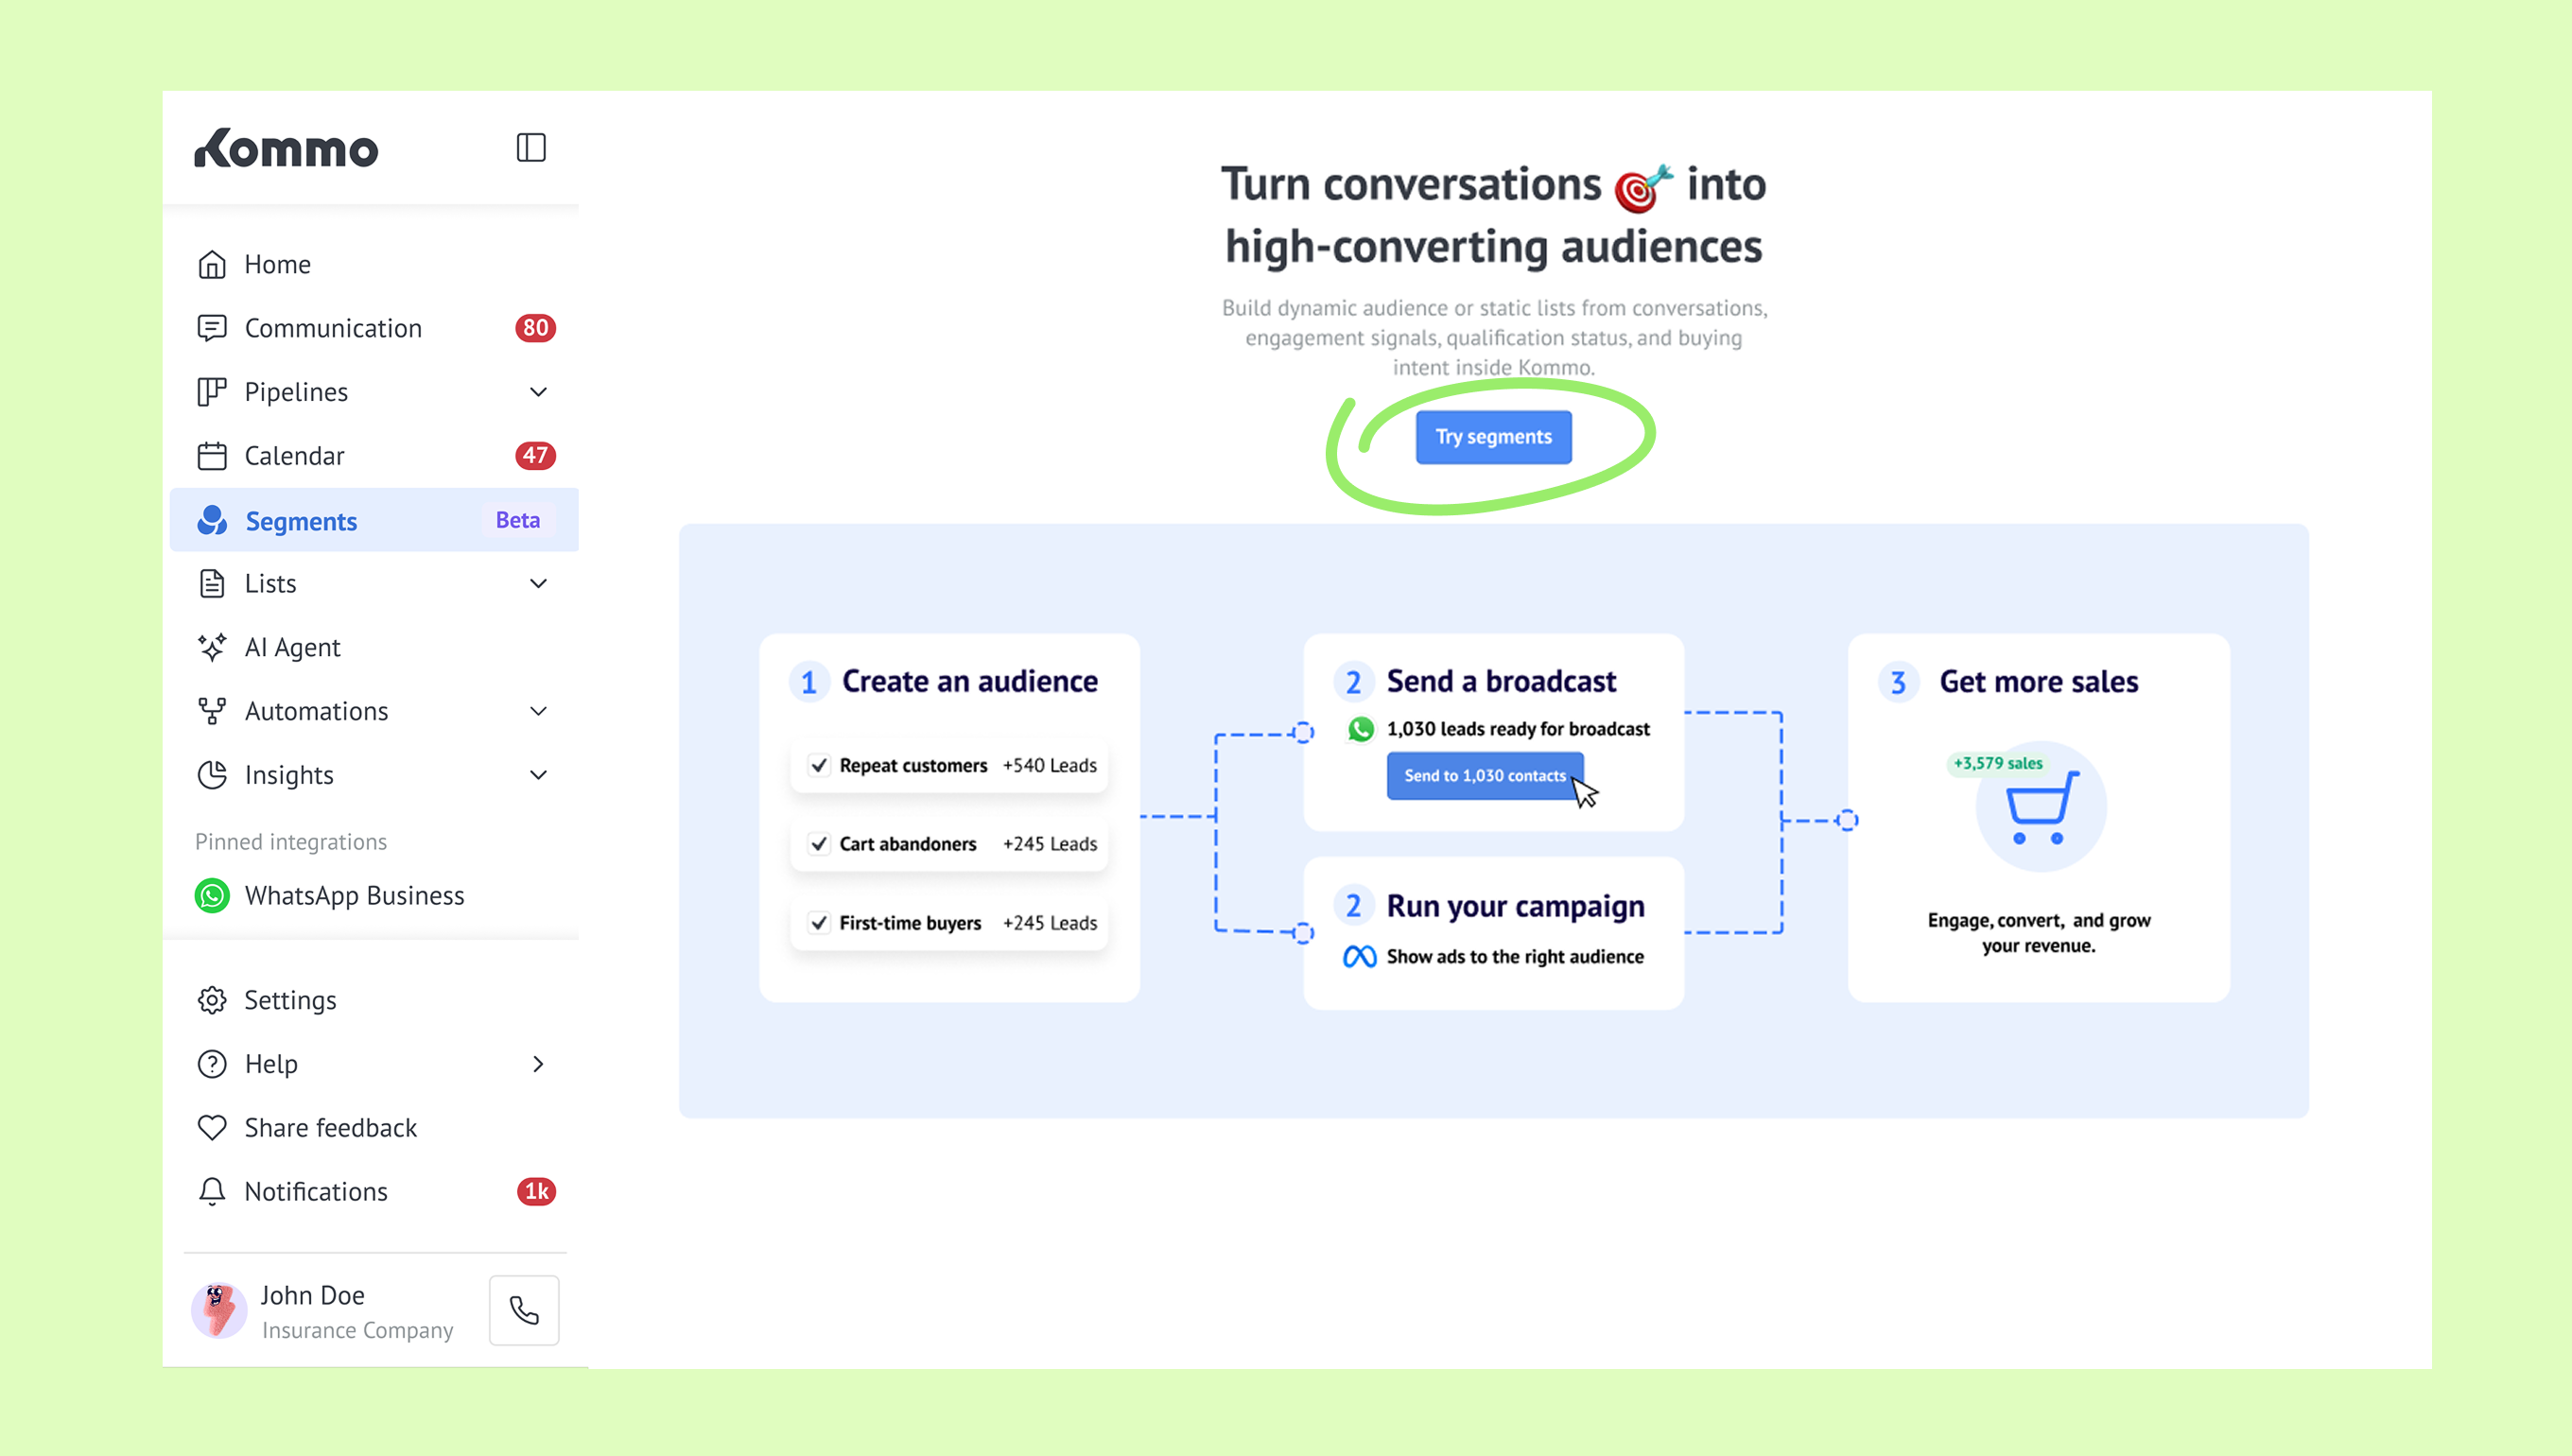
If you don’t have any Segments yet, click Try segments on the welcome screen instead.
Then, in the window that opens, choose the type of segment you want to create:
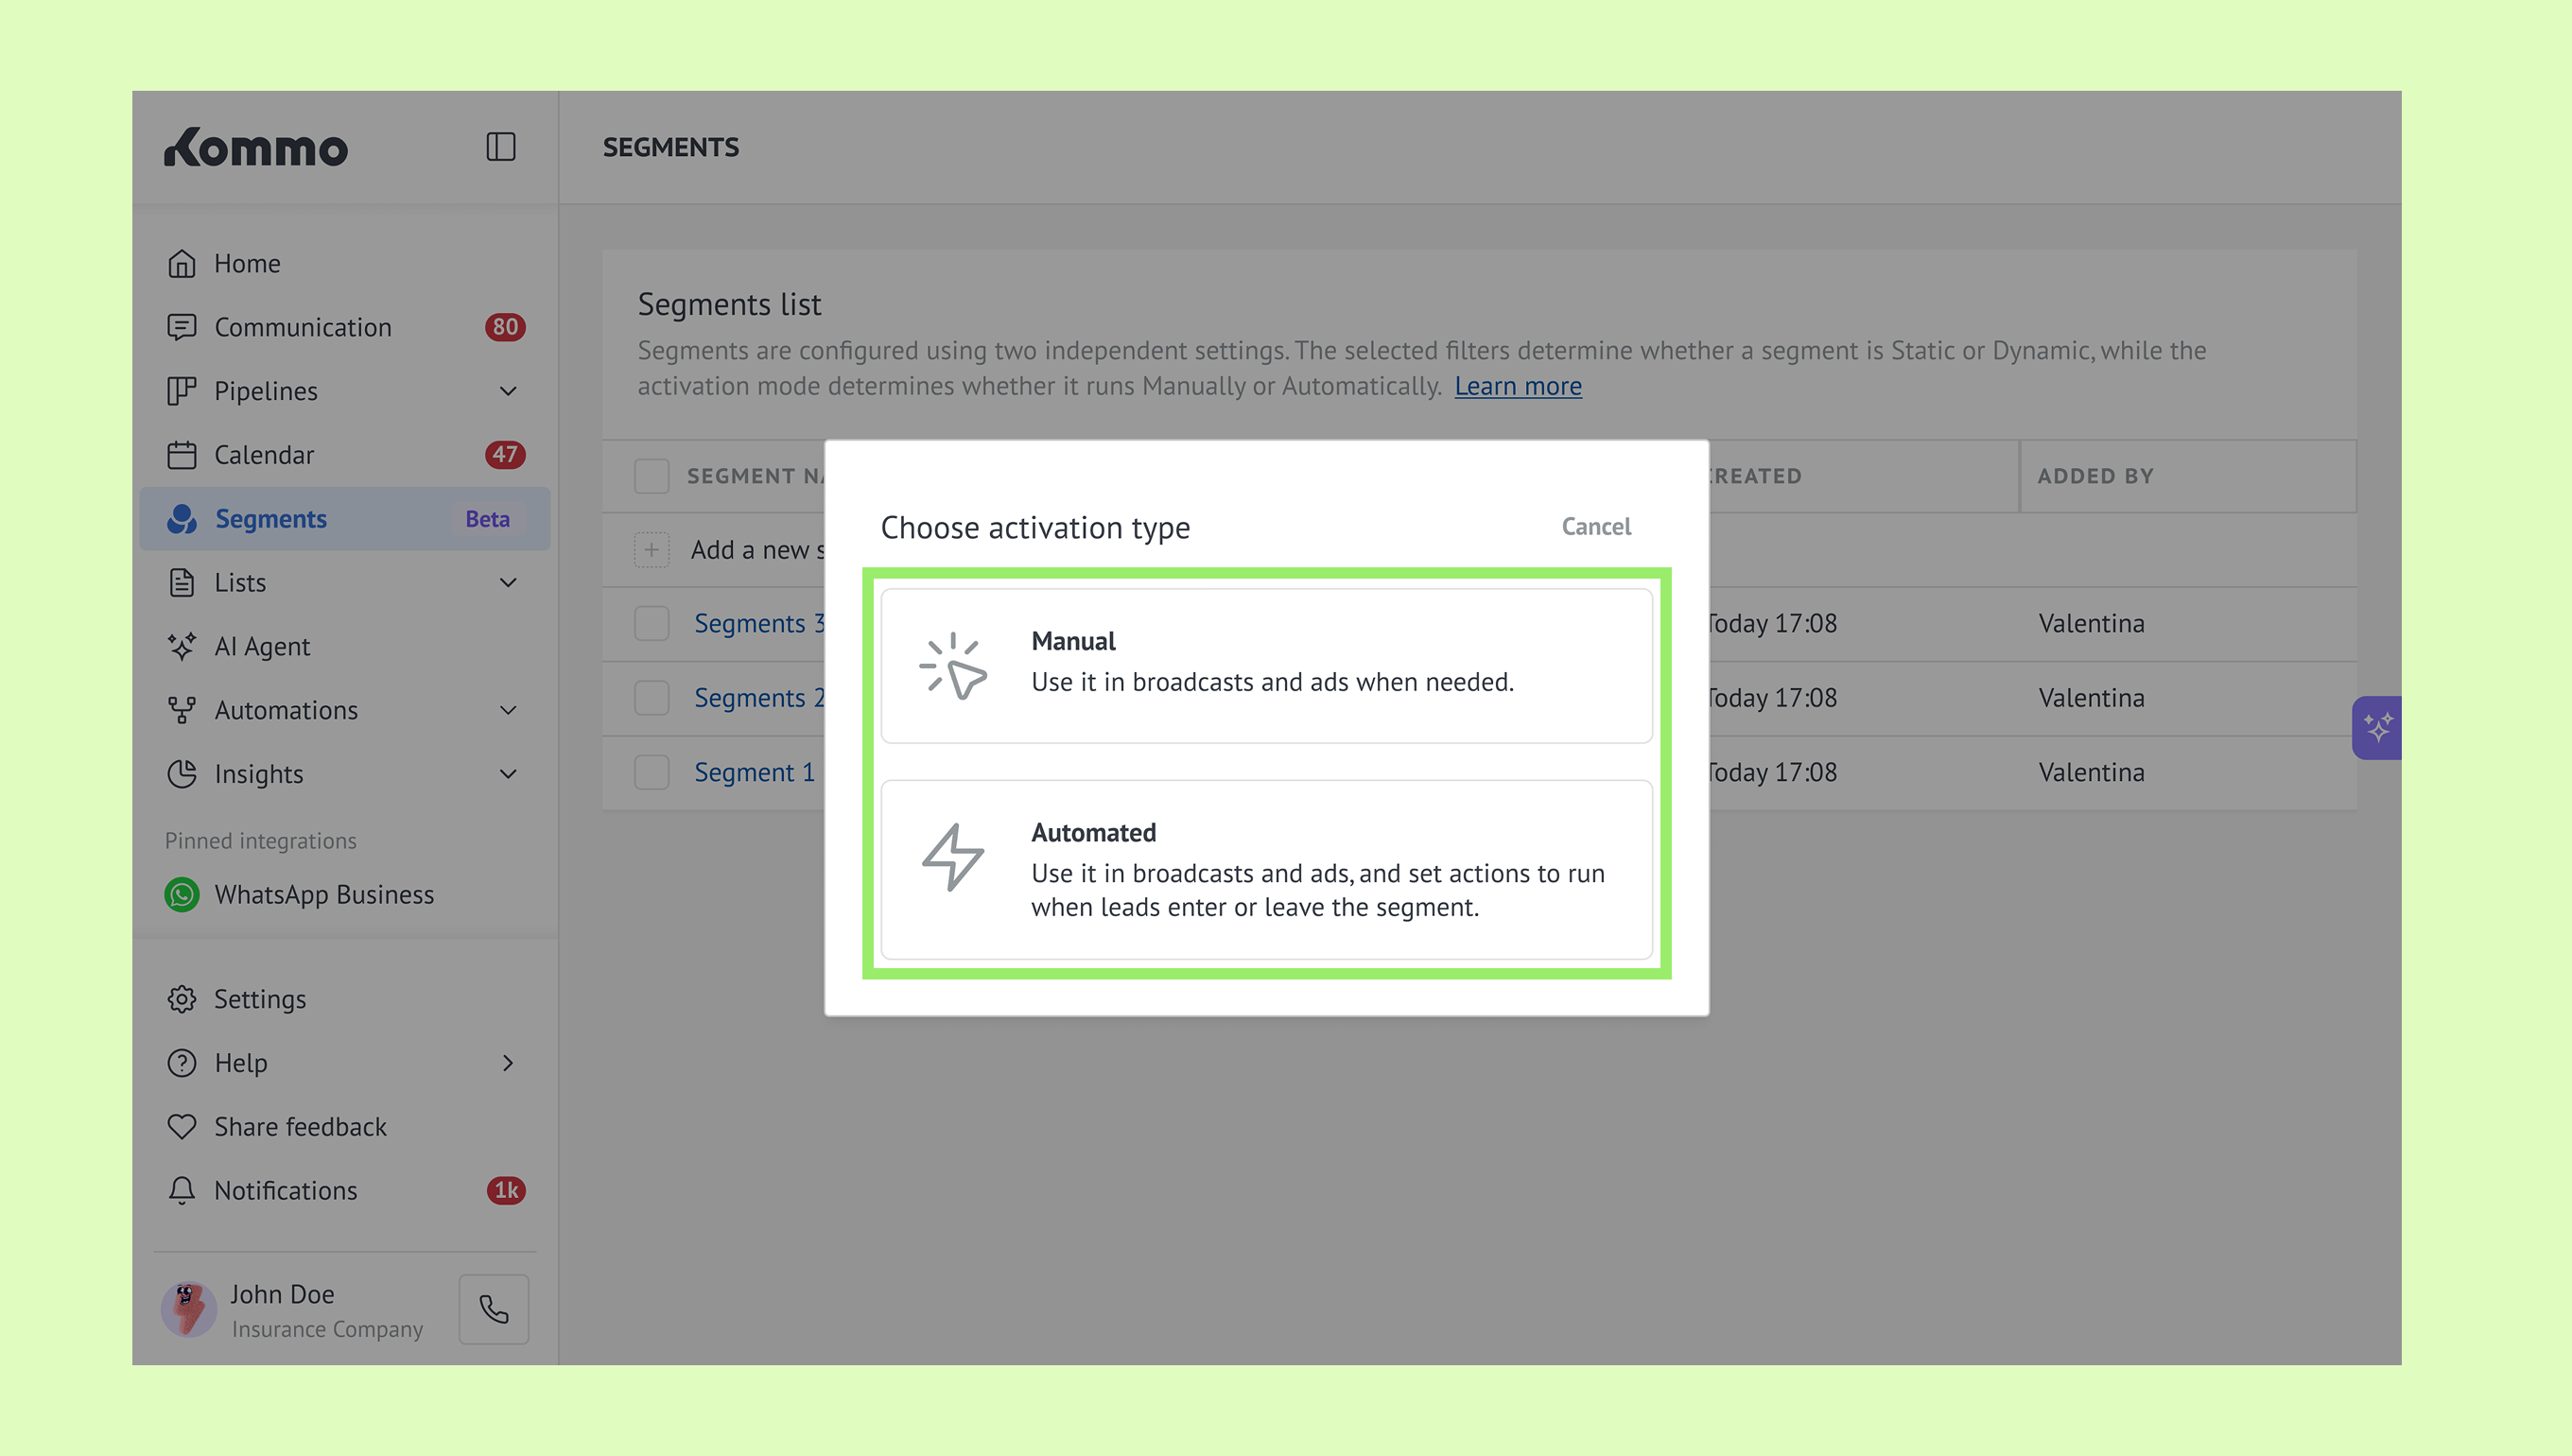
A) Create a manual segment
Select Manual segment.
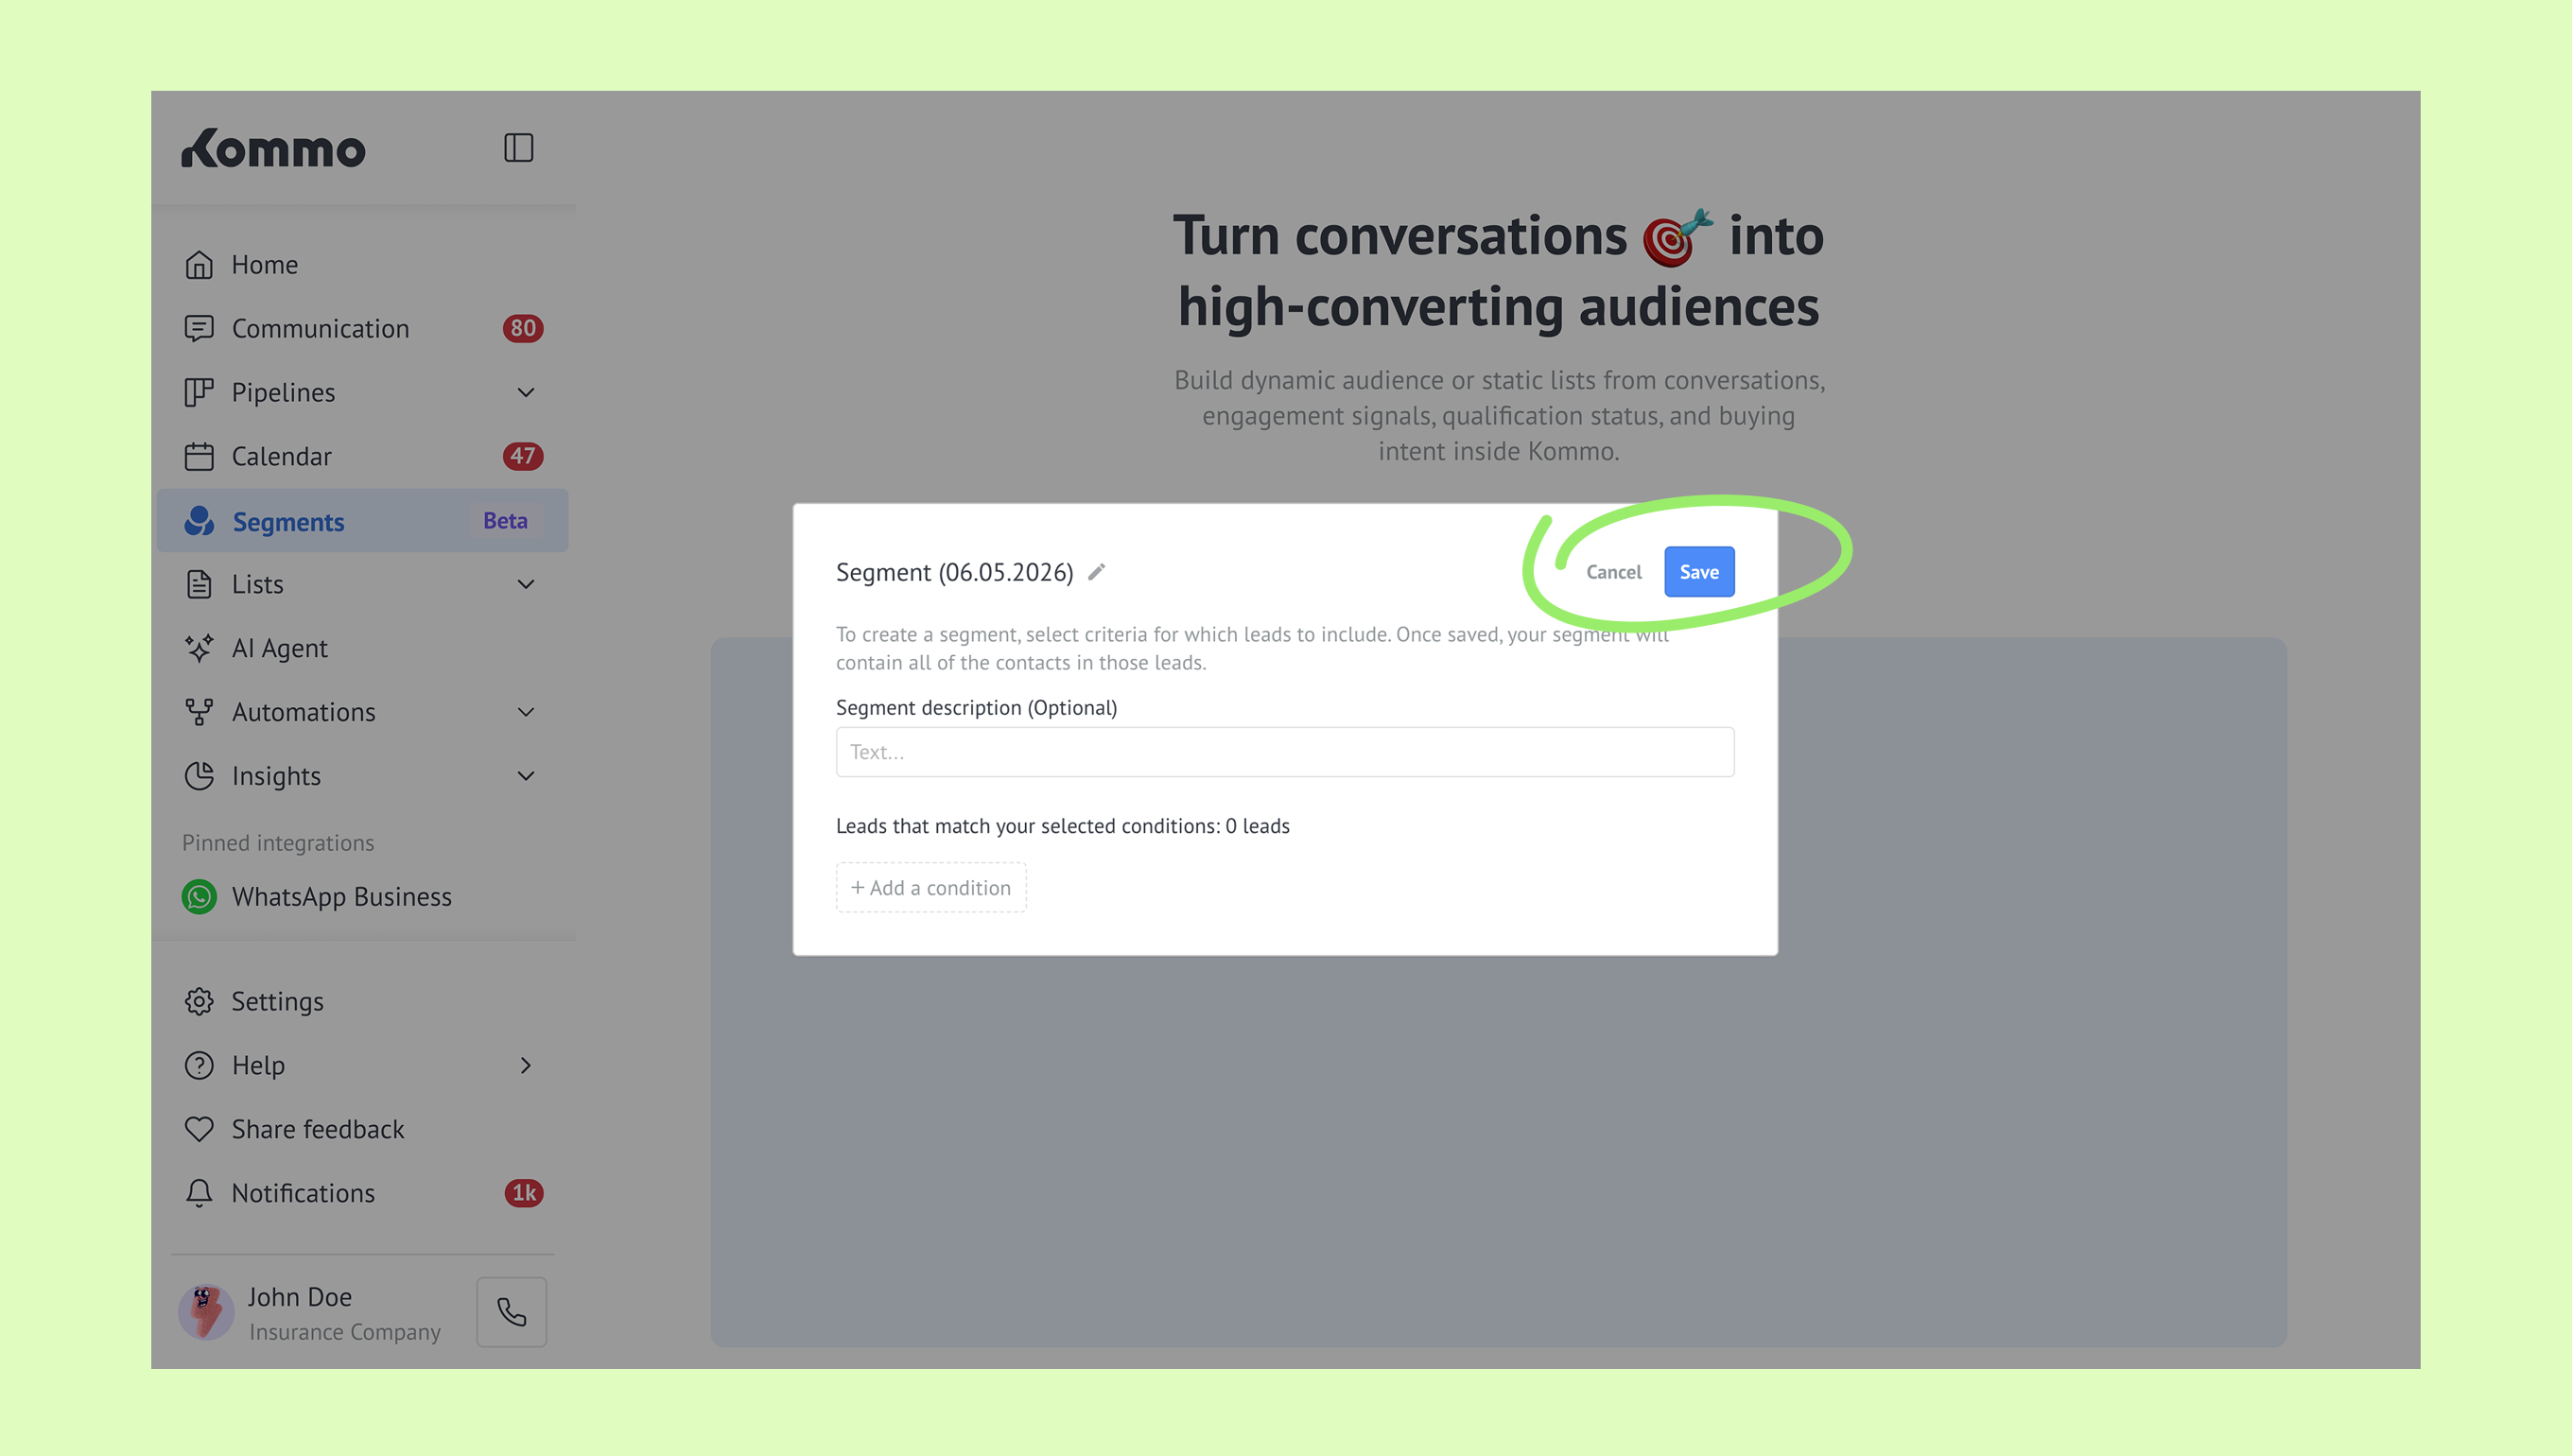
Edit the segment name if needed.
In the Segment description field, add any additional details.
Click Add a condition to set your rules such as lead name, sales value, lead source, pipeline stage, conversation date, and more.
Click Save.
After saving, you can immediately:
Use the segment for a broadcast.
Use the segment for ads.
Close the success window and continue later.
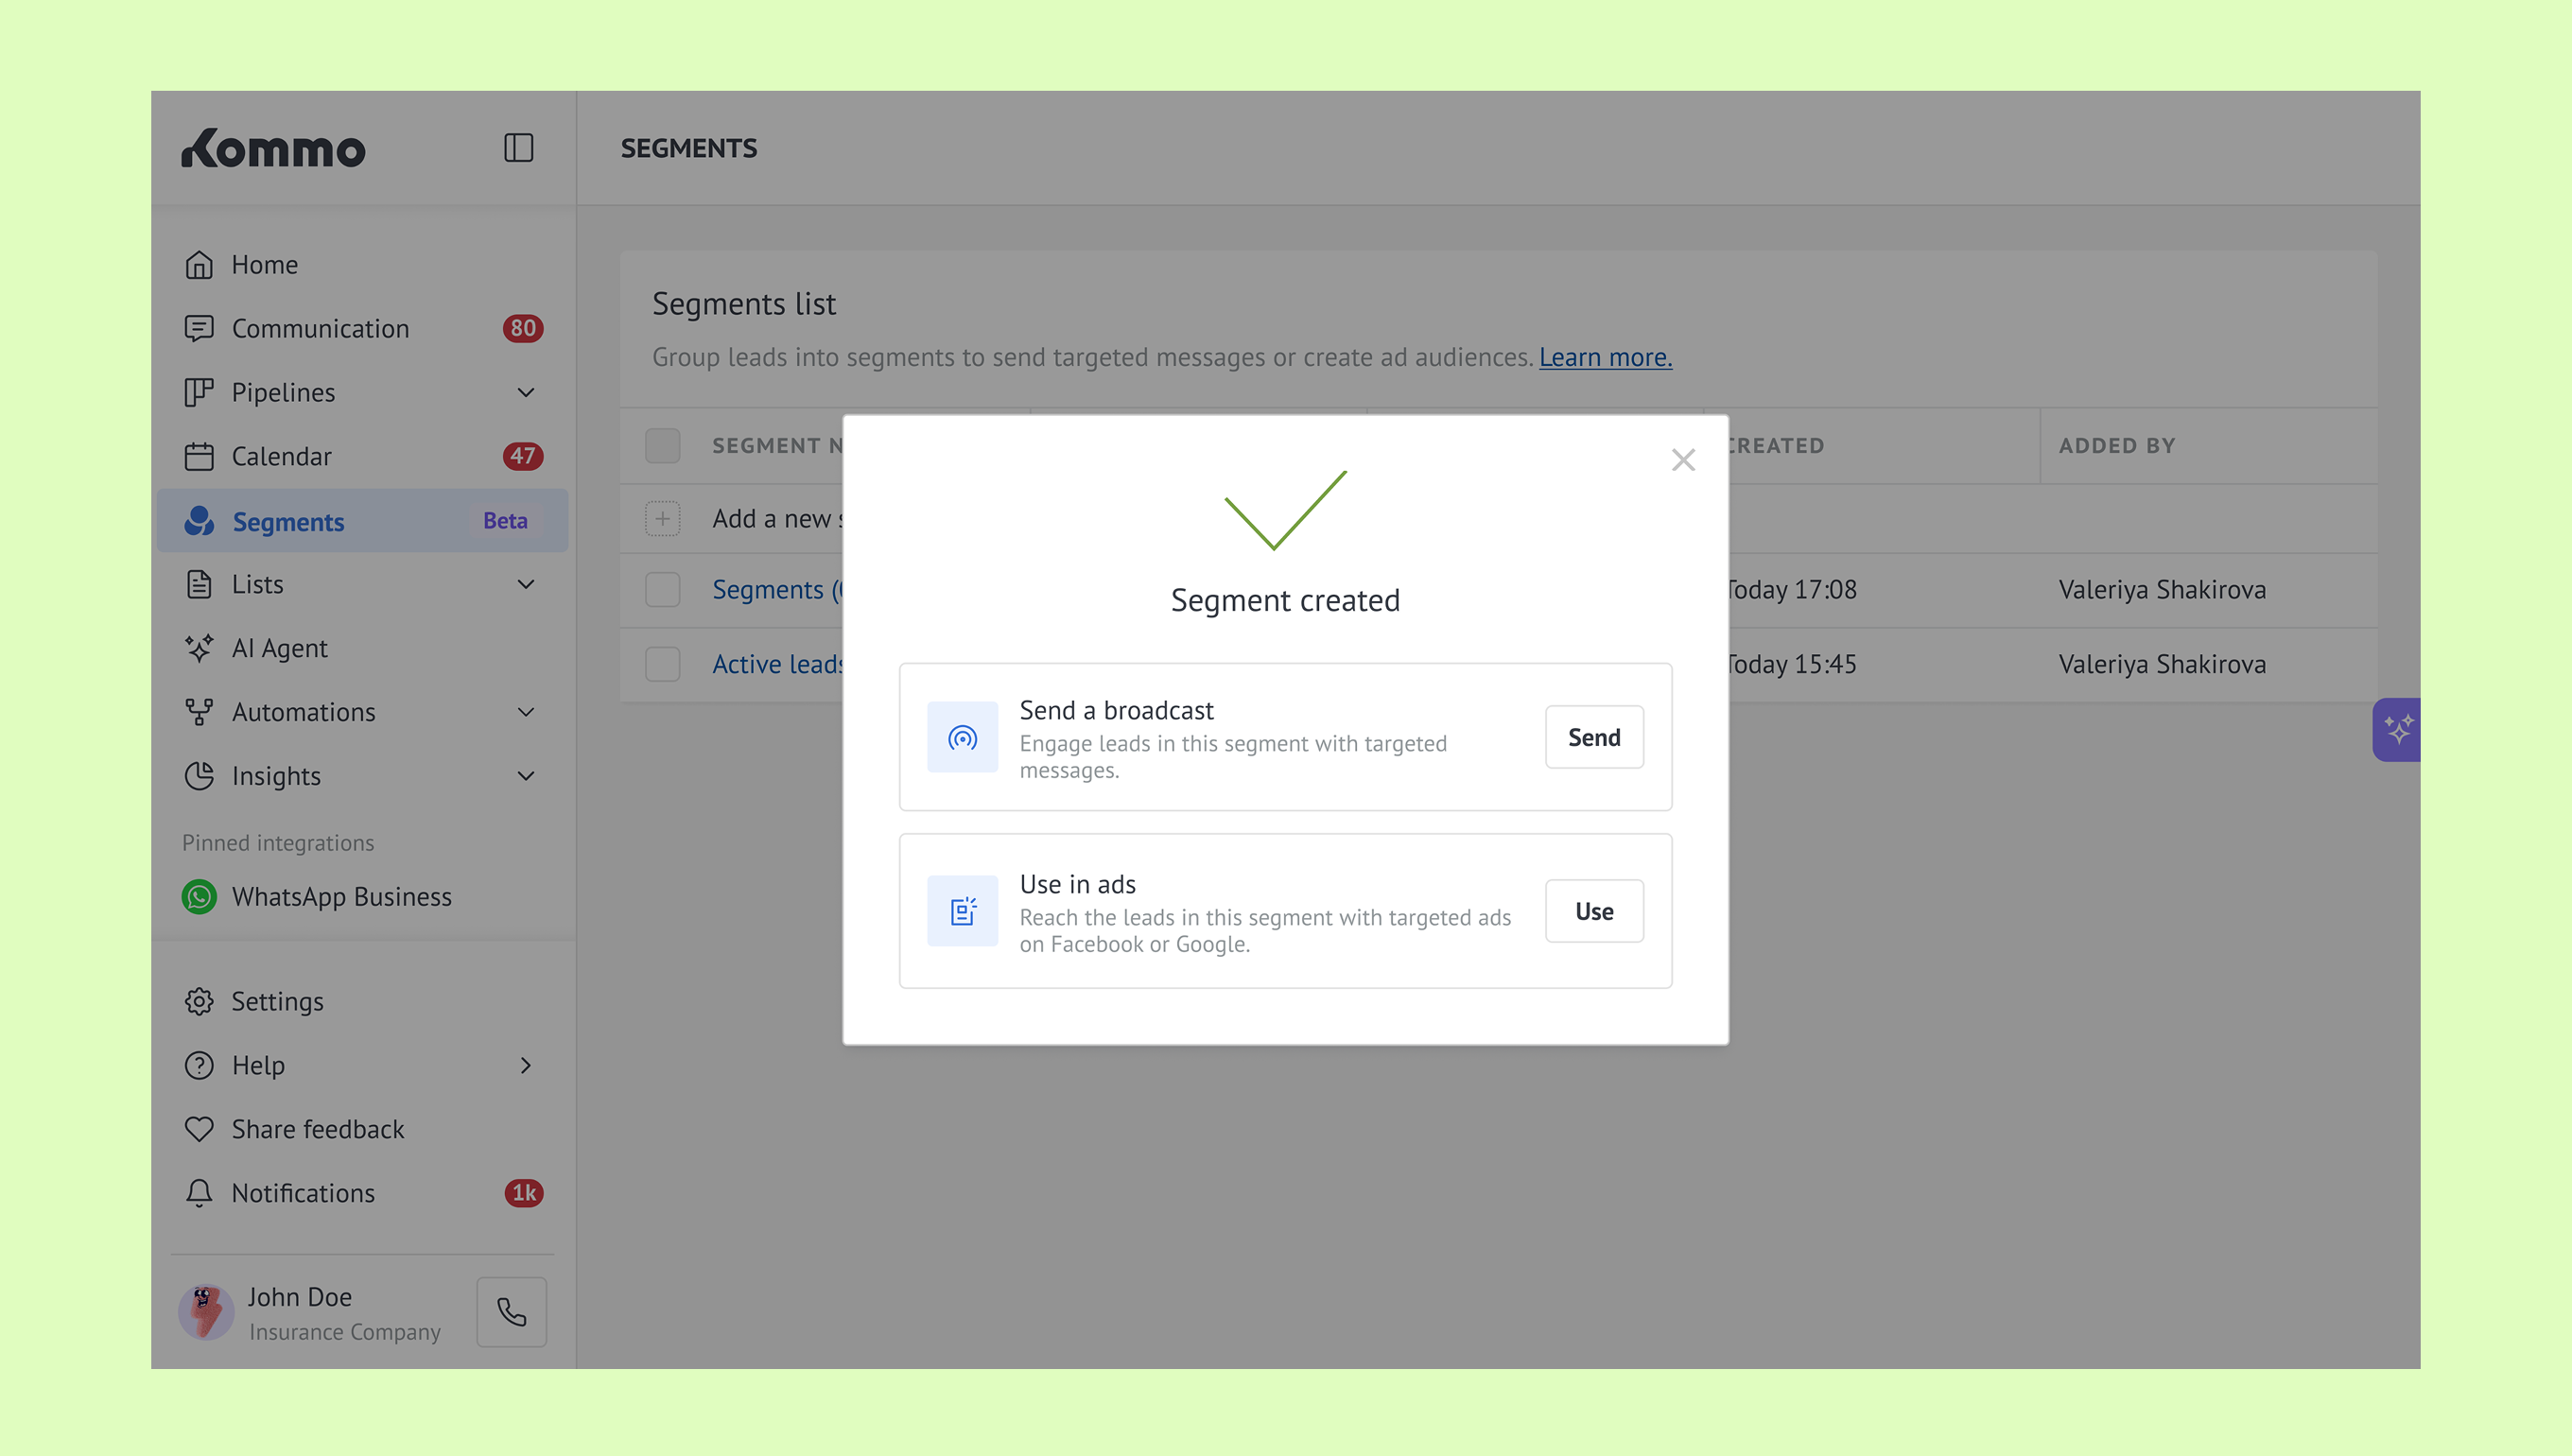
Note: The Use in ads option is available on Pro and Enterprise plans. You can also test this functionality during the 14-day free trial or Pro trial.
Back in the Segments section, you’ll see the segment in the table with Manual as its activation type.
B) Create an automated segment
When you select Automated segment, you’ll need to set up two tabs in the modal: Conditions and Actions.
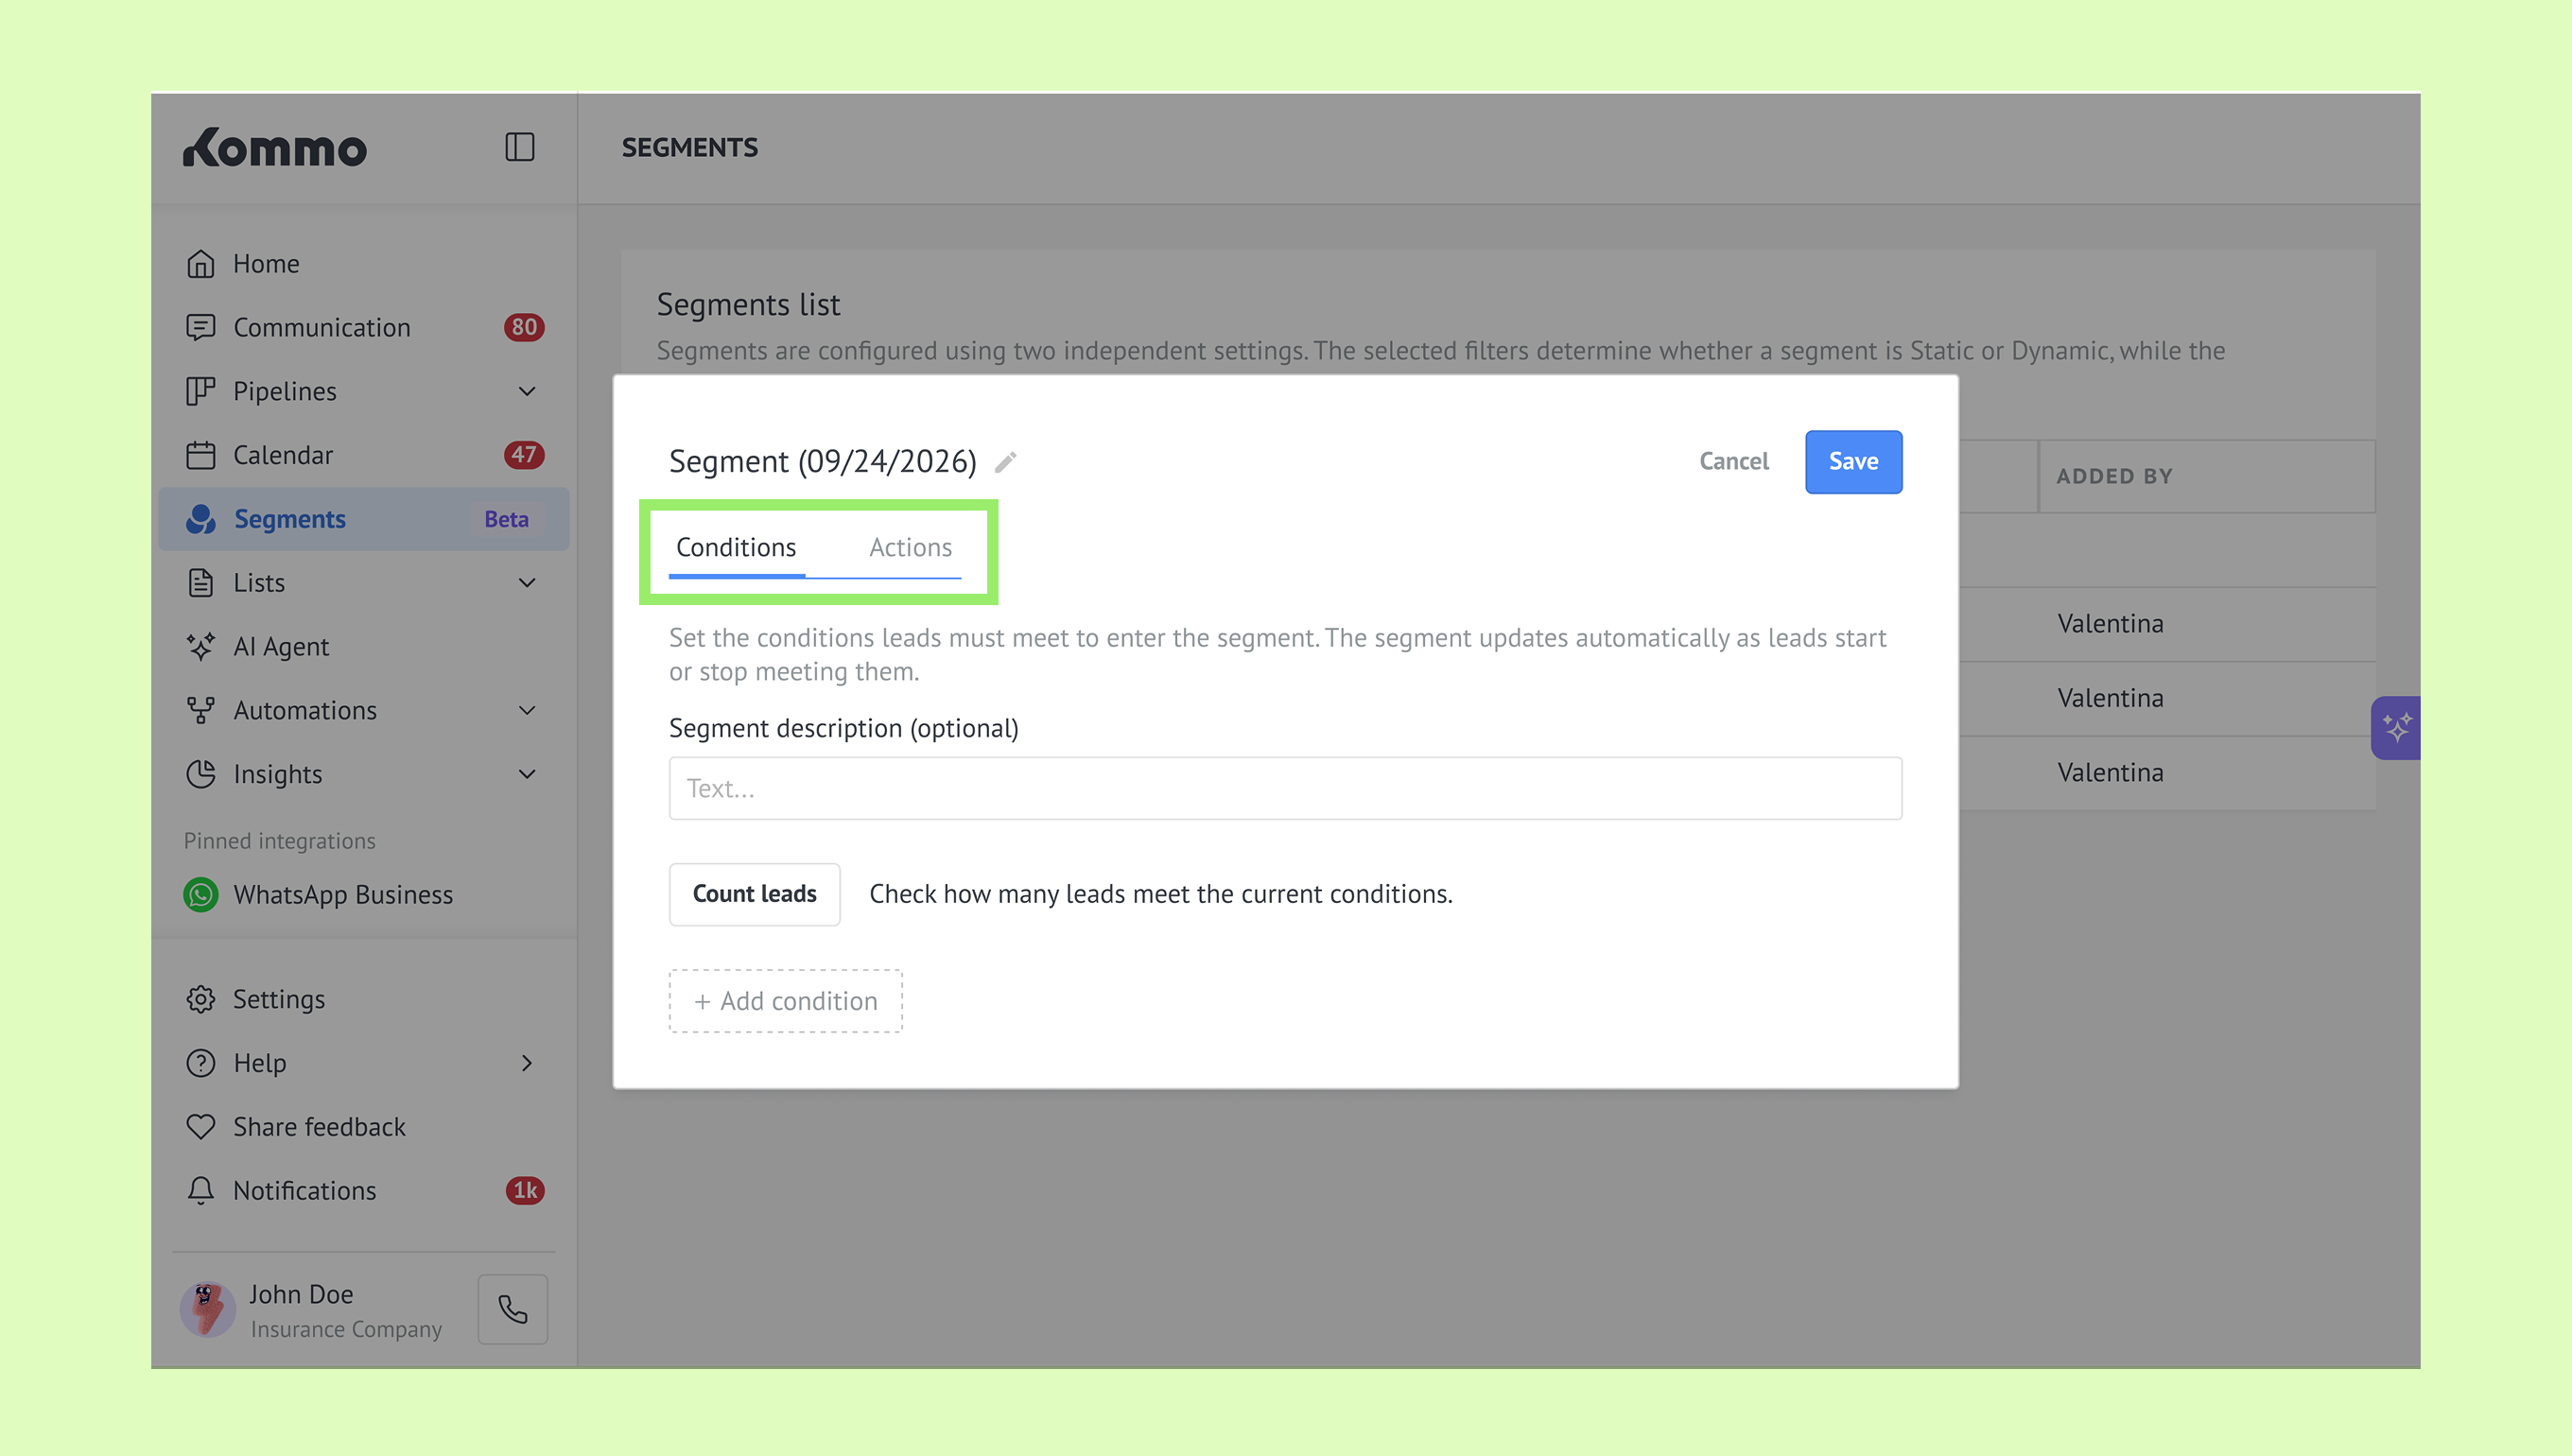
Conditions
On the Conditions tab, edit the segment name and add an optional description.
Click + Add condition to define which leads belong to the segment.
For each condition group:Select a filter — what you want to filter leads by (e.g., Lead name, Tags, or Lead sources).
Enter or select a value — the specific value the filter should match (e.g., if the filter is Tag, the value could be New lead).
If you add another condition to the same group, select an operator to define how the conditions should work together:
AND — leads must match all conditions in the group.
OR — leads must match at least one condition in the group.
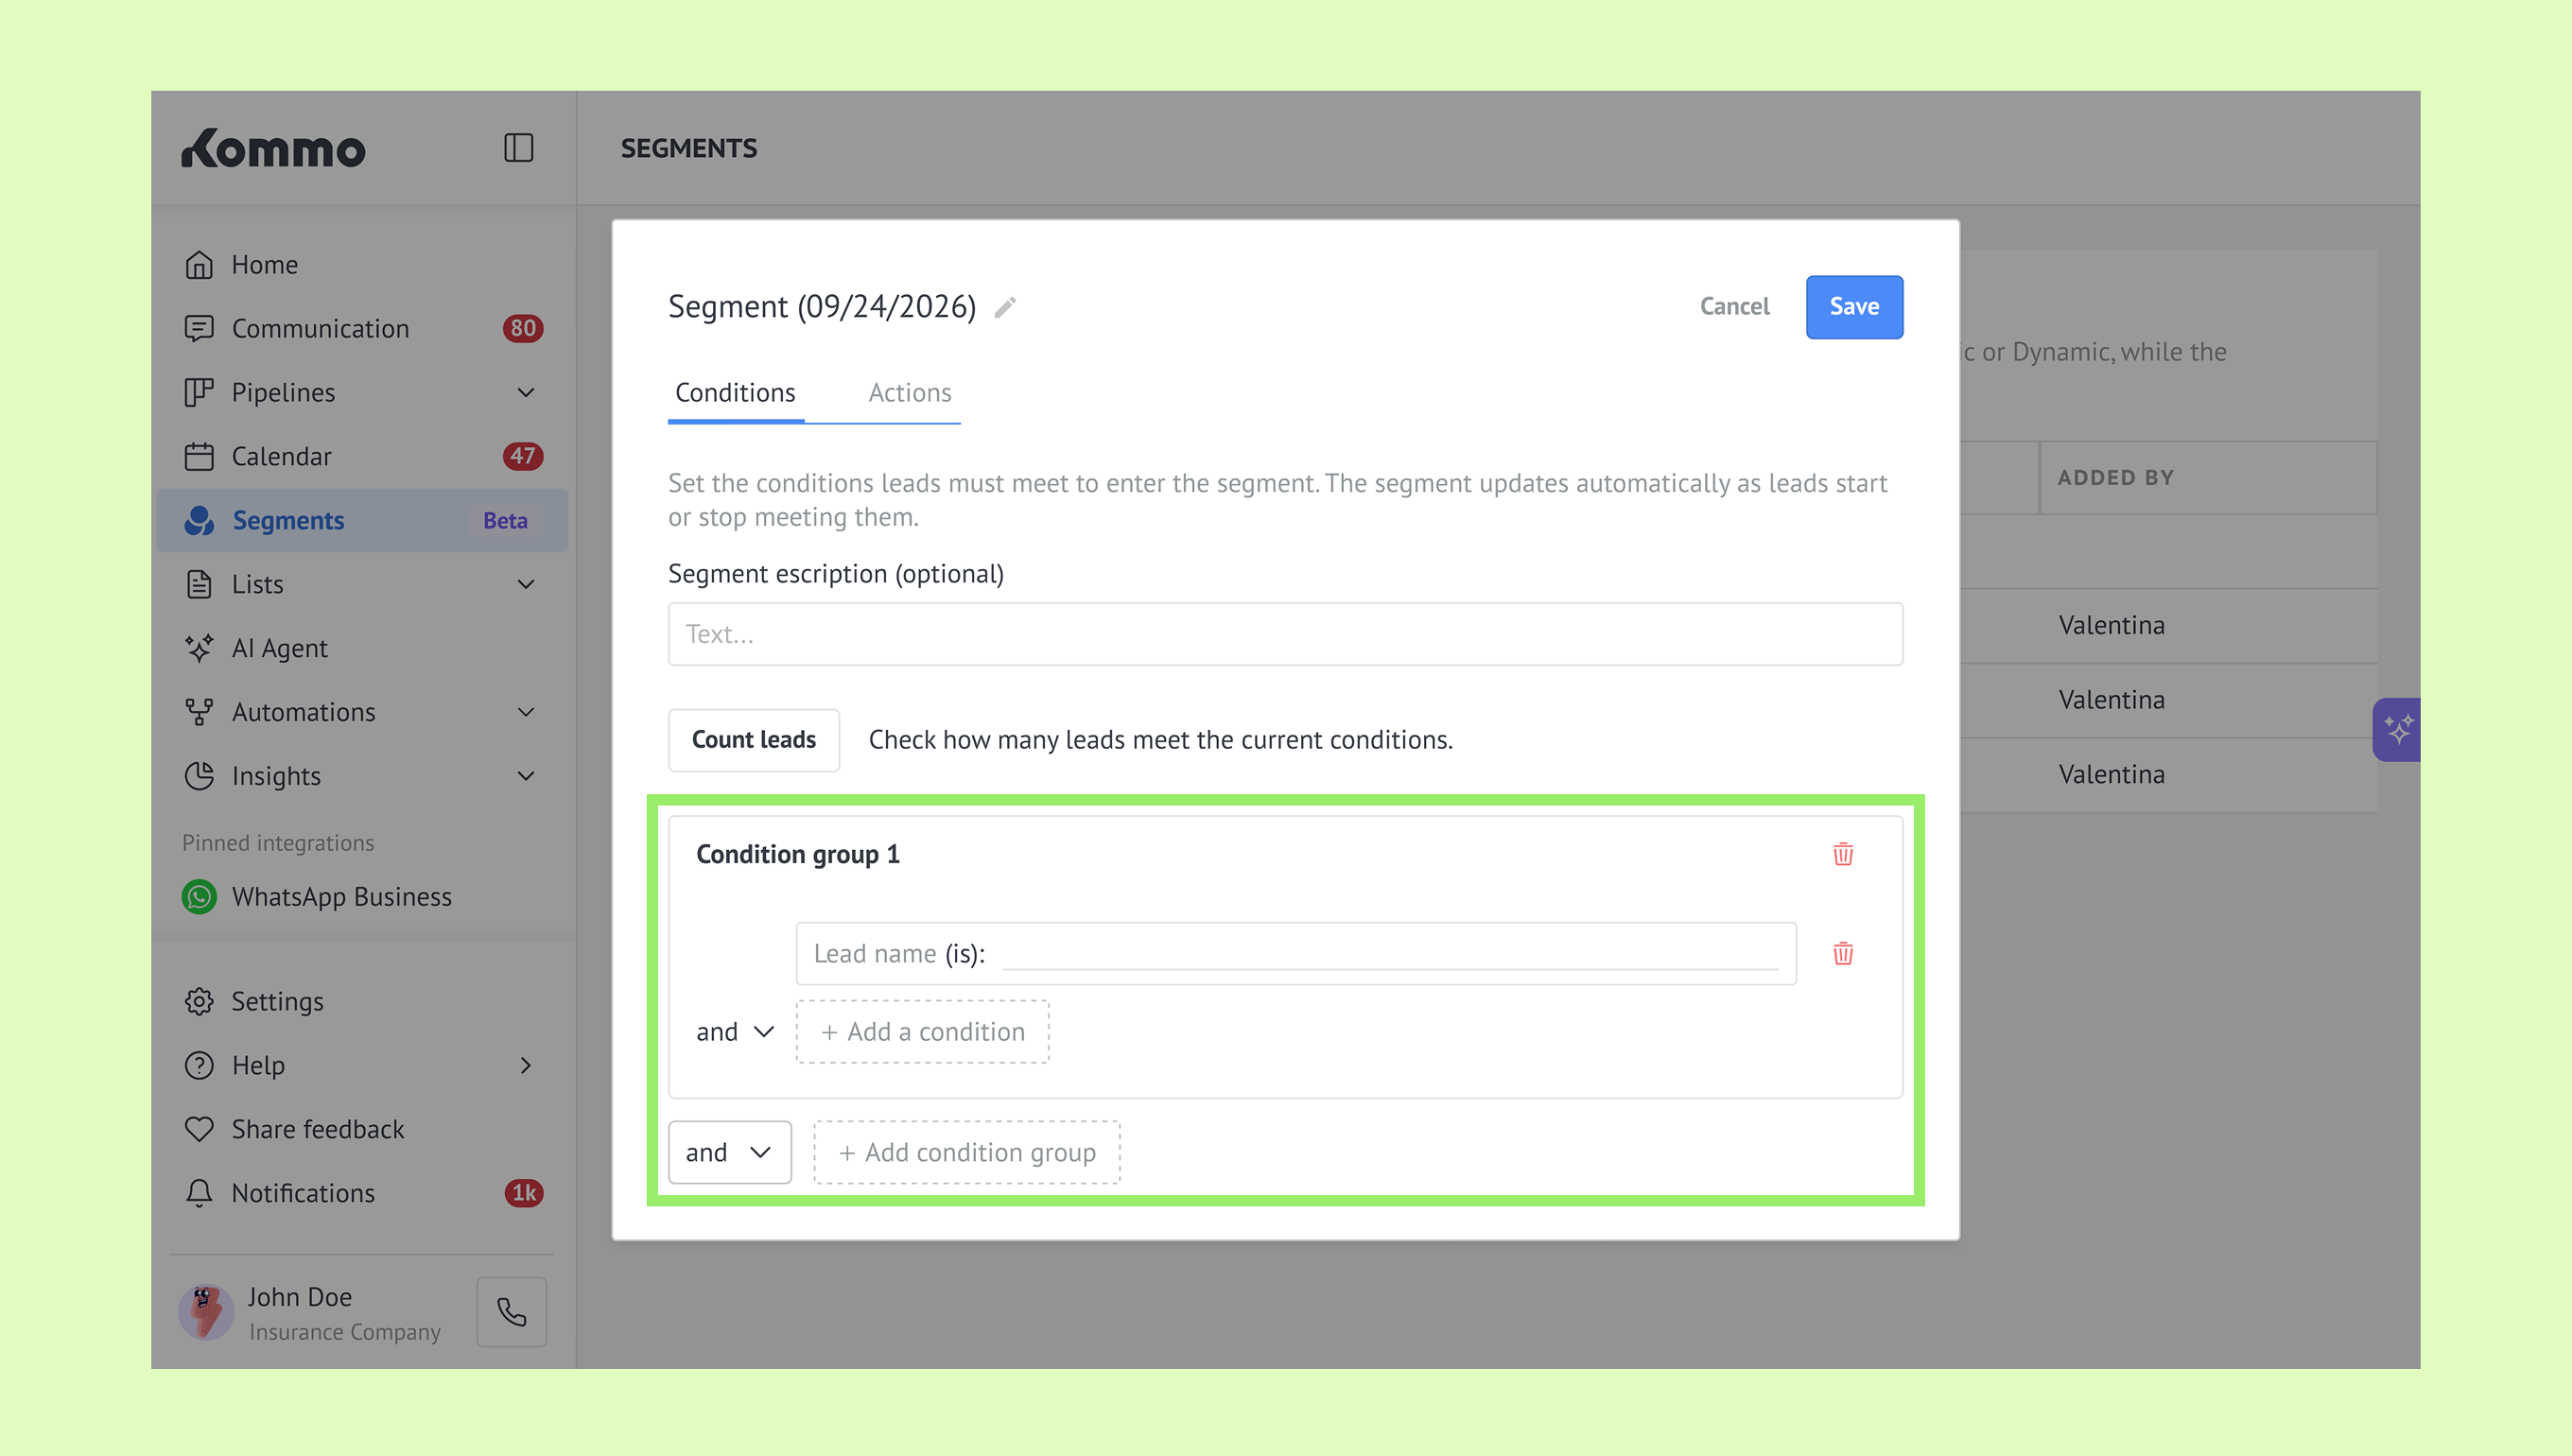
You can also click Add condition group to create additional groups. Select AND or OR to define how the groups work together.
Note: You can use only one operator (AND or OR) within each group and between groups. For example:
If you use AND within Group 1 → all conditions in Group 1 need to use AND.
If you connect Group 1 and Group 2 with OR → any additional groups need to be connected with OR too. To use AND instead, change the operator between all groups to AND.
To delete a condition or condition group, click the delete icon next to it.
Click Count leads to check how many leads currently match the conditions.
Important: Counting may take longer in accounts with more leads or complex conditions.
Then, click the resulting number to open the segment page and view the matching leads.
Note: The lead count does not update automatically after you change the conditions. Click Count leads again to update it.
Actions
Once you’ve finished setting up the conditions, open the Actions tab.
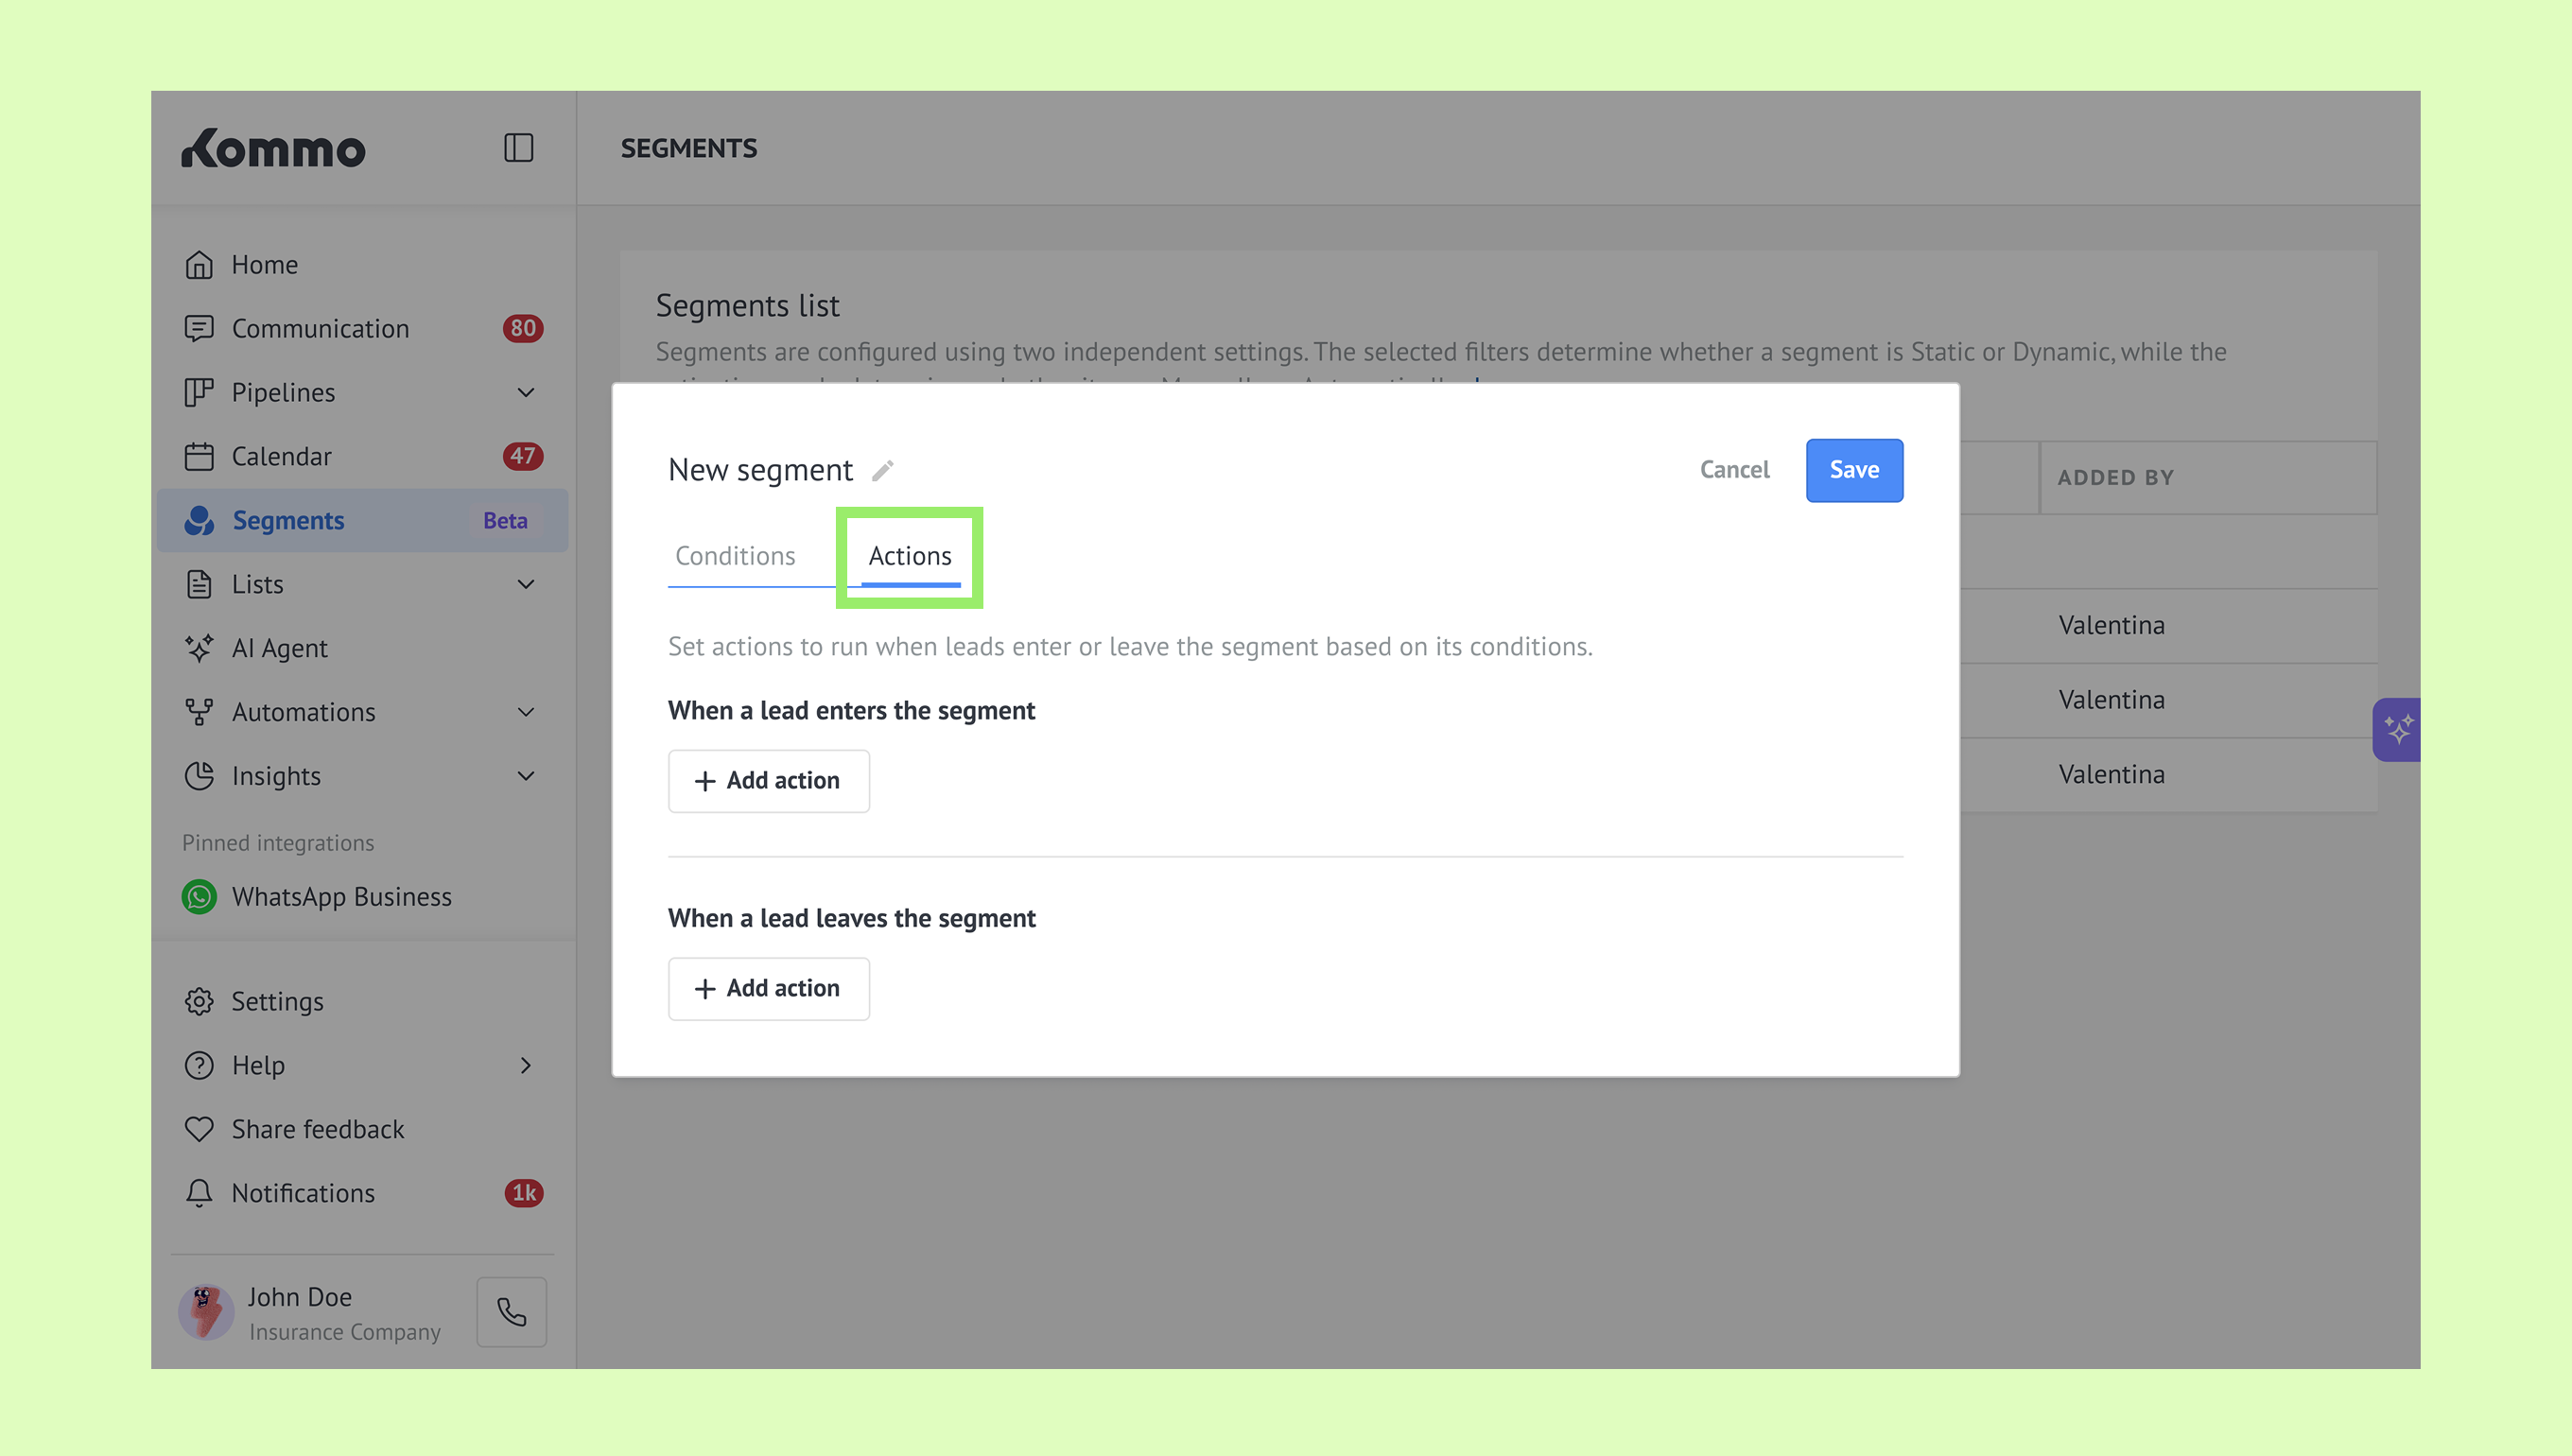
Click + Add action under:
When a lead enters the segment
When a lead leaves the segment
Important: You can add multiple actions to either section.
Select the action you want to run:
Salesbot
Meta Ads
Google Ads
TikTok Ads Manager
In the next modal, under Execute, choose when the action should run after the lead enters or leaves the segment.
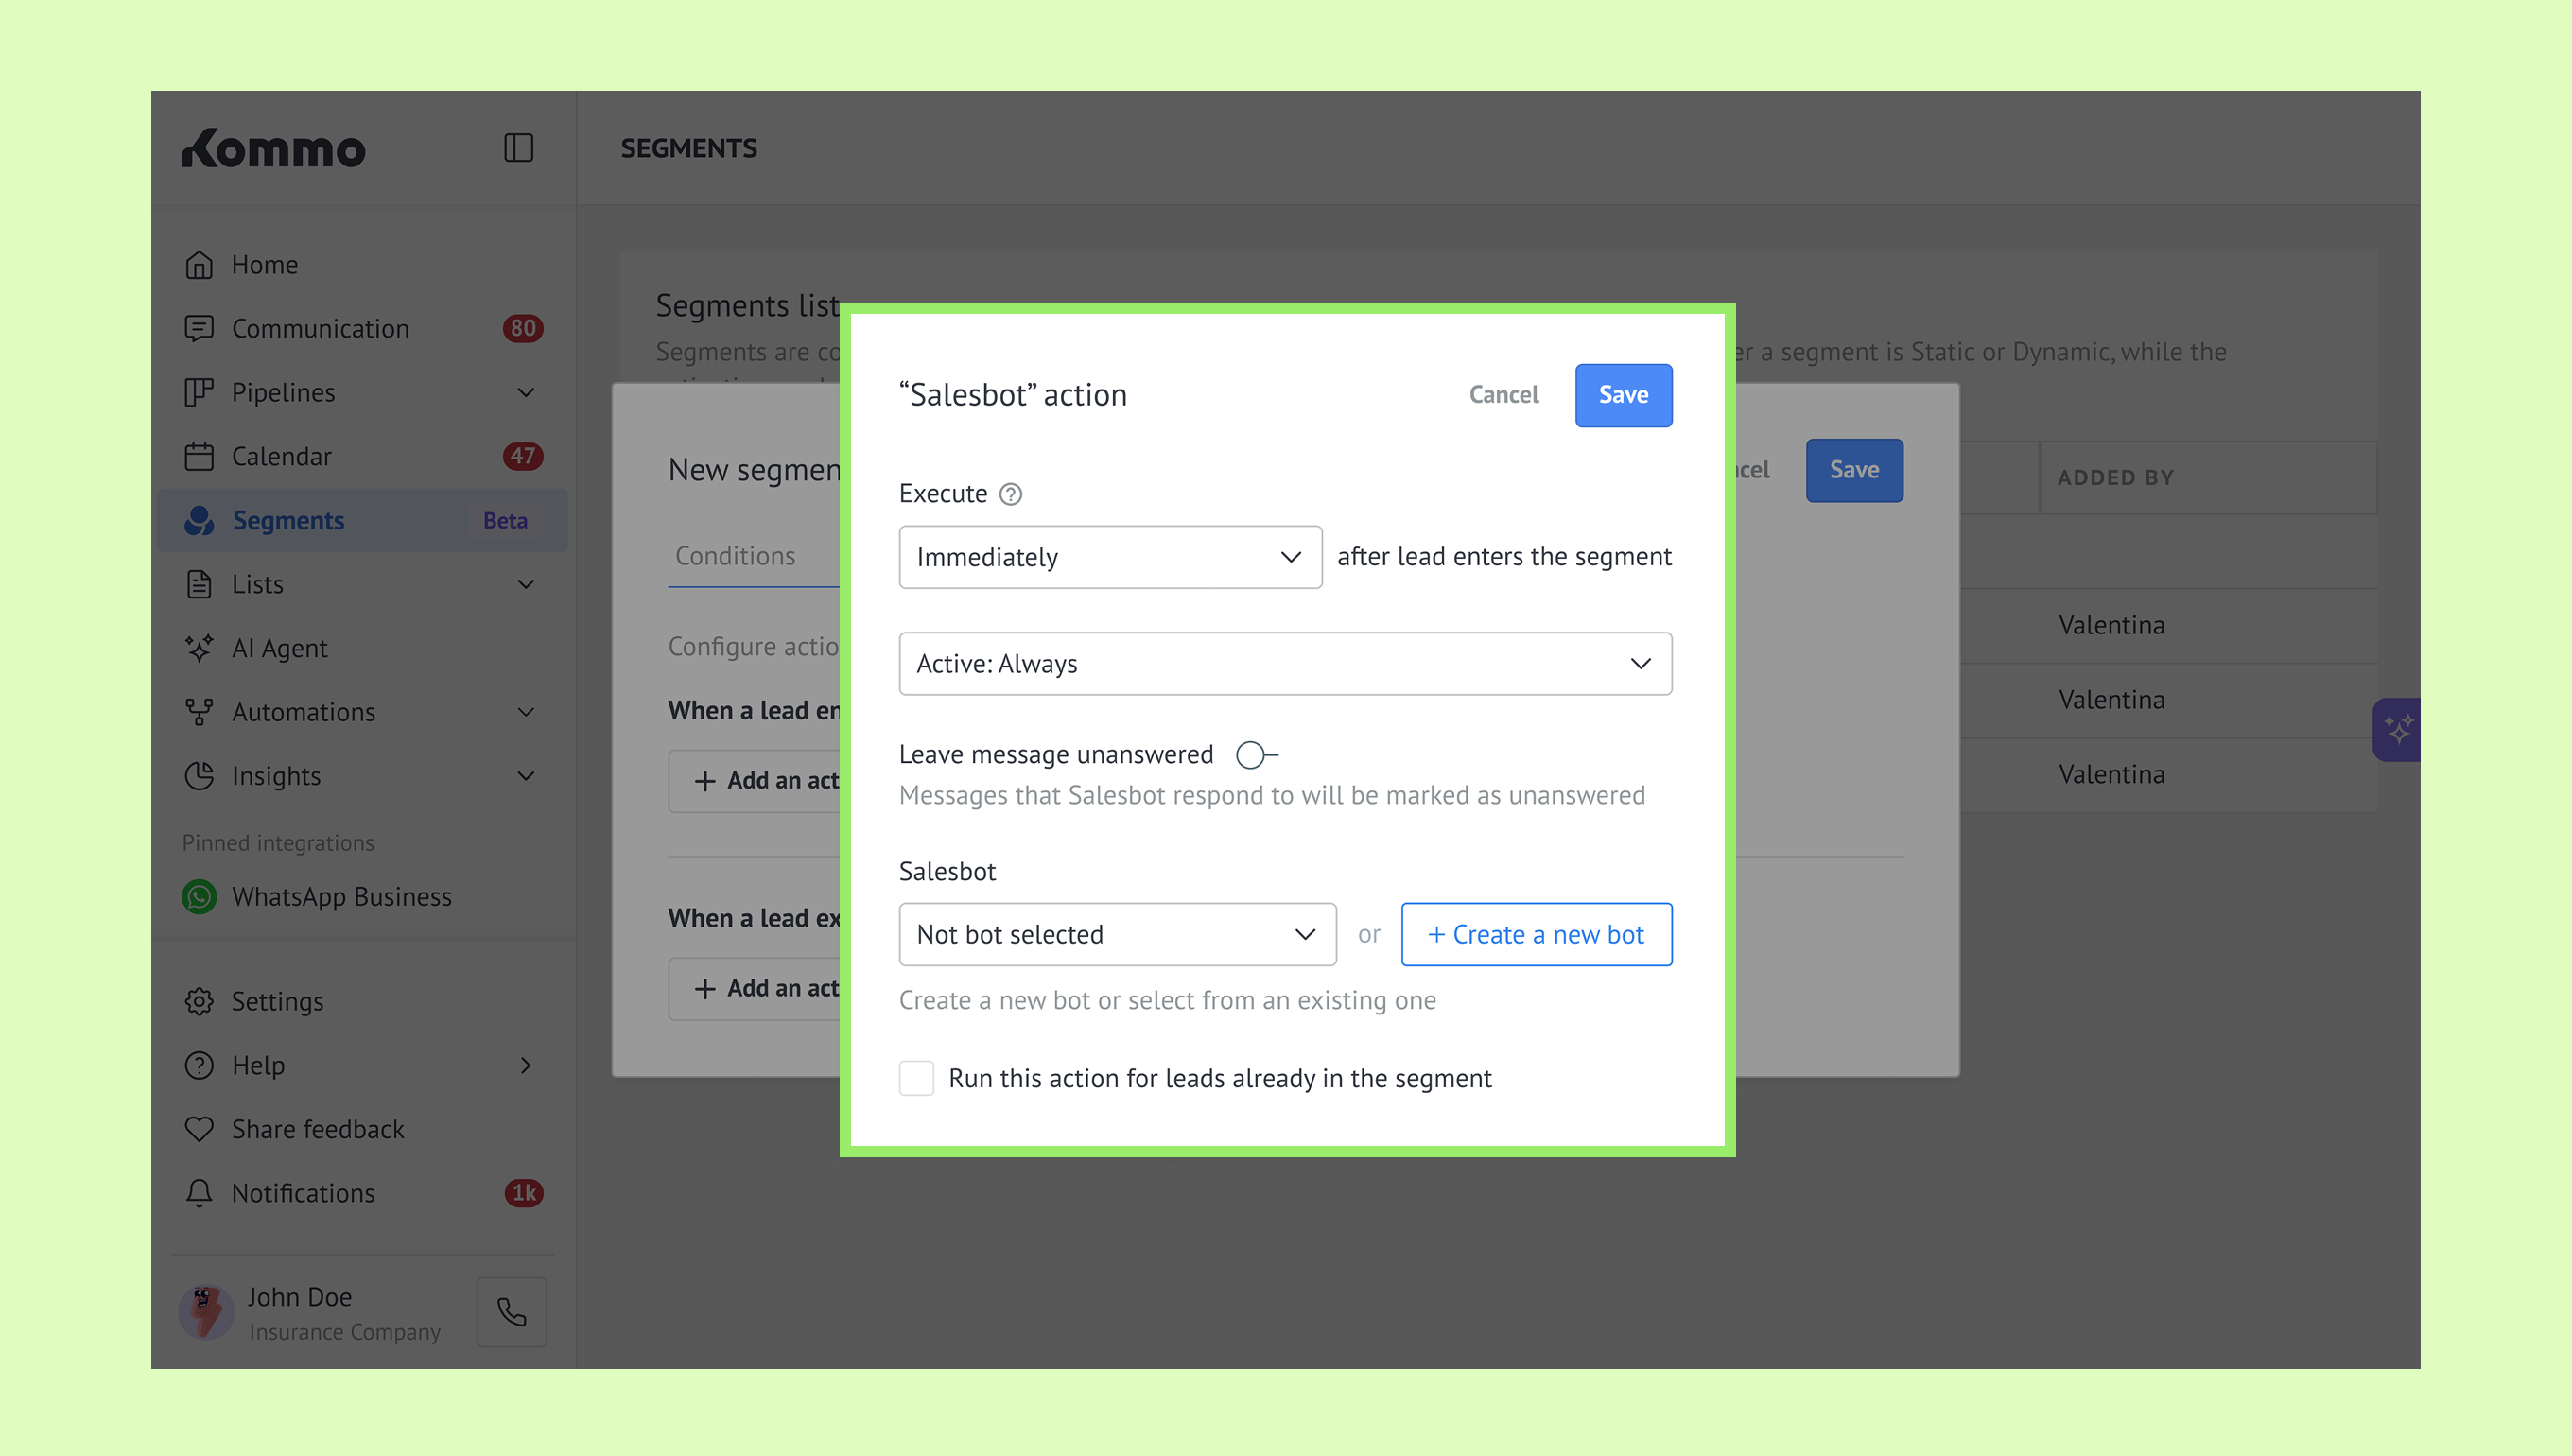
To run the action for leads that already match the segment conditions, enable Run this action for leads already in the segment.
Click Save.
Add more actions if needed. When you’re finished, click Save to save the segment.
You’ll also see the segment in the segments table with the Automated type. Kommo will track when leads enter or leave the segment and run the actions you’ve set up.
Important: You can save an Automated segment without adding any actions. It will still keep its list of matching leads updated, and you can add actions later by editing the segment.
Once you’ve created your segments, you can use them to reach your leads through broadcasts and ad campaigns.