What you’ll need:
A Kommo account on any plan or an active 14-day trial.
Admin access in Kommo.
A Lovable website project that you can edit.
For a website chat button, any messaging channels you want to display must be connected to Kommo.
Keep in mind:
Test the complete setup before publishing your website.
Lovable is an AI-powered platform that lets you build and update websites using natural-language prompts. In the project chat, describe the page, layout, content, or functionality you need, and Lovable generates the changes for you.
You can connect your Lovable website to Kommo by adding a Kommo website chat button or webform. This sends website conversations and submitted information to your Kommo workspace, where your team can continue chats and follow up with leads.
This guide explains how to add a Kommo website chat button or webform to your Lovable project and test that the connection works correctly.
Use cases
Answer visitor questions — Let visitors contact your team without leaving your Lovable website.
Offer several contact options — Let visitors start a live chat or use a connected channel such as WhatsApp Business, Facebook Messenger, or Instagram.
Capture demo or consultation requests — Use a webform to collect the information your team needs before following up.
Qualify leads — Add fields for details such as name, email address, phone number, company, location, service interest, or budget.
Organize website leads — Add the chat button to the correct pipeline and choose the destination pipeline and stage for webform submissions.
Choose how to connect Lovable to Kommo
Kommo provides two ways to capture conversations and submitted information from a Lovable website:
Option | Best for | What happens in Kommo |
|---|---|---|
Website chat button | General questions, support requests, and live conversations | The conversation appears as a new chat and a new incoming lead in Kommo. Learn how to create a website chat button in this article. |
Kommo webform | Contact, quote, demo, consultation, and registration requests | Kommo creates a lead in the selected pipeline. Client’s details are saved in the corresponding lead, contact, and company fields. |
You can add either option or use both. For example, add the chat button across your website for general questions and place a webform on a dedicated contact or demo page.
Add the website chat button to Lovable
Kommo gives you two ways to add the website chat button to Lovable. You can copy the installation code and include it in your own prompt, or use the ready-made Kommo prompt. In both cases, send the prompt in the Lovable chat, and Lovable will add the button to your project.
To add the website chat button:
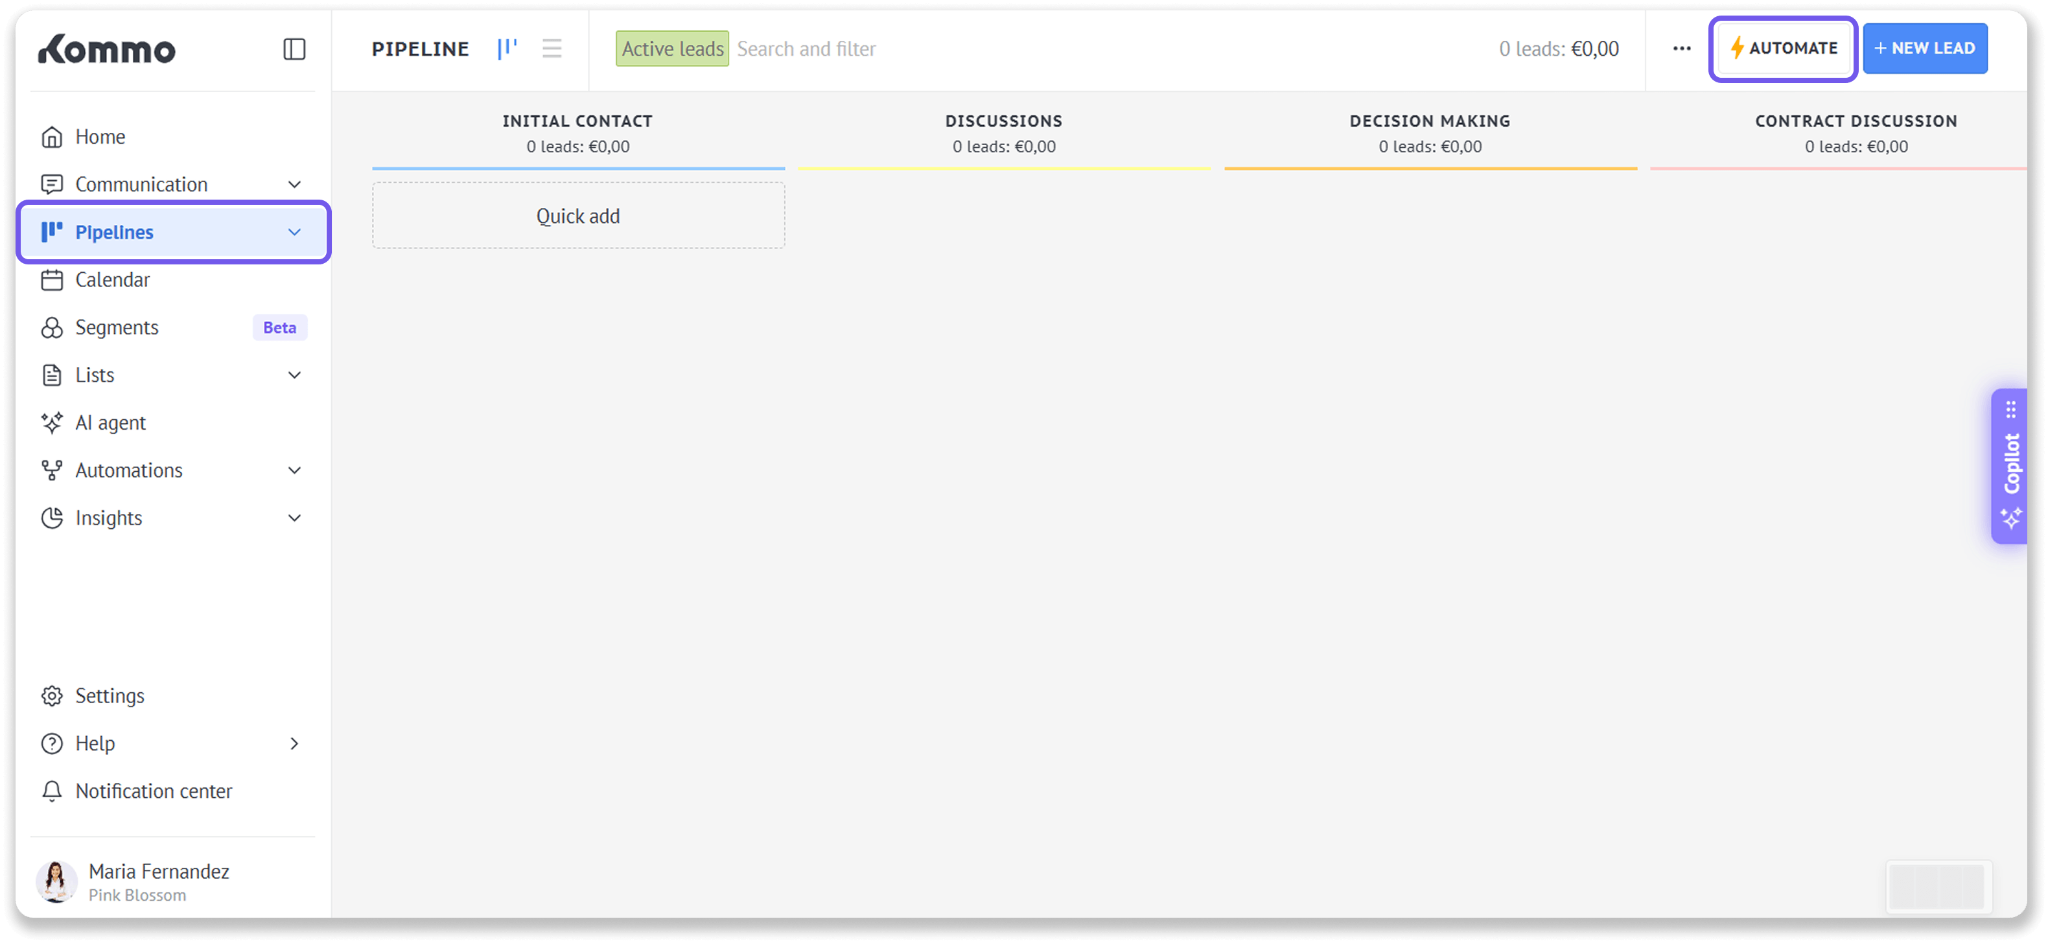
In Kommo, go to Pipelines. Open the pipeline where you added the website chat button. Click Automate.
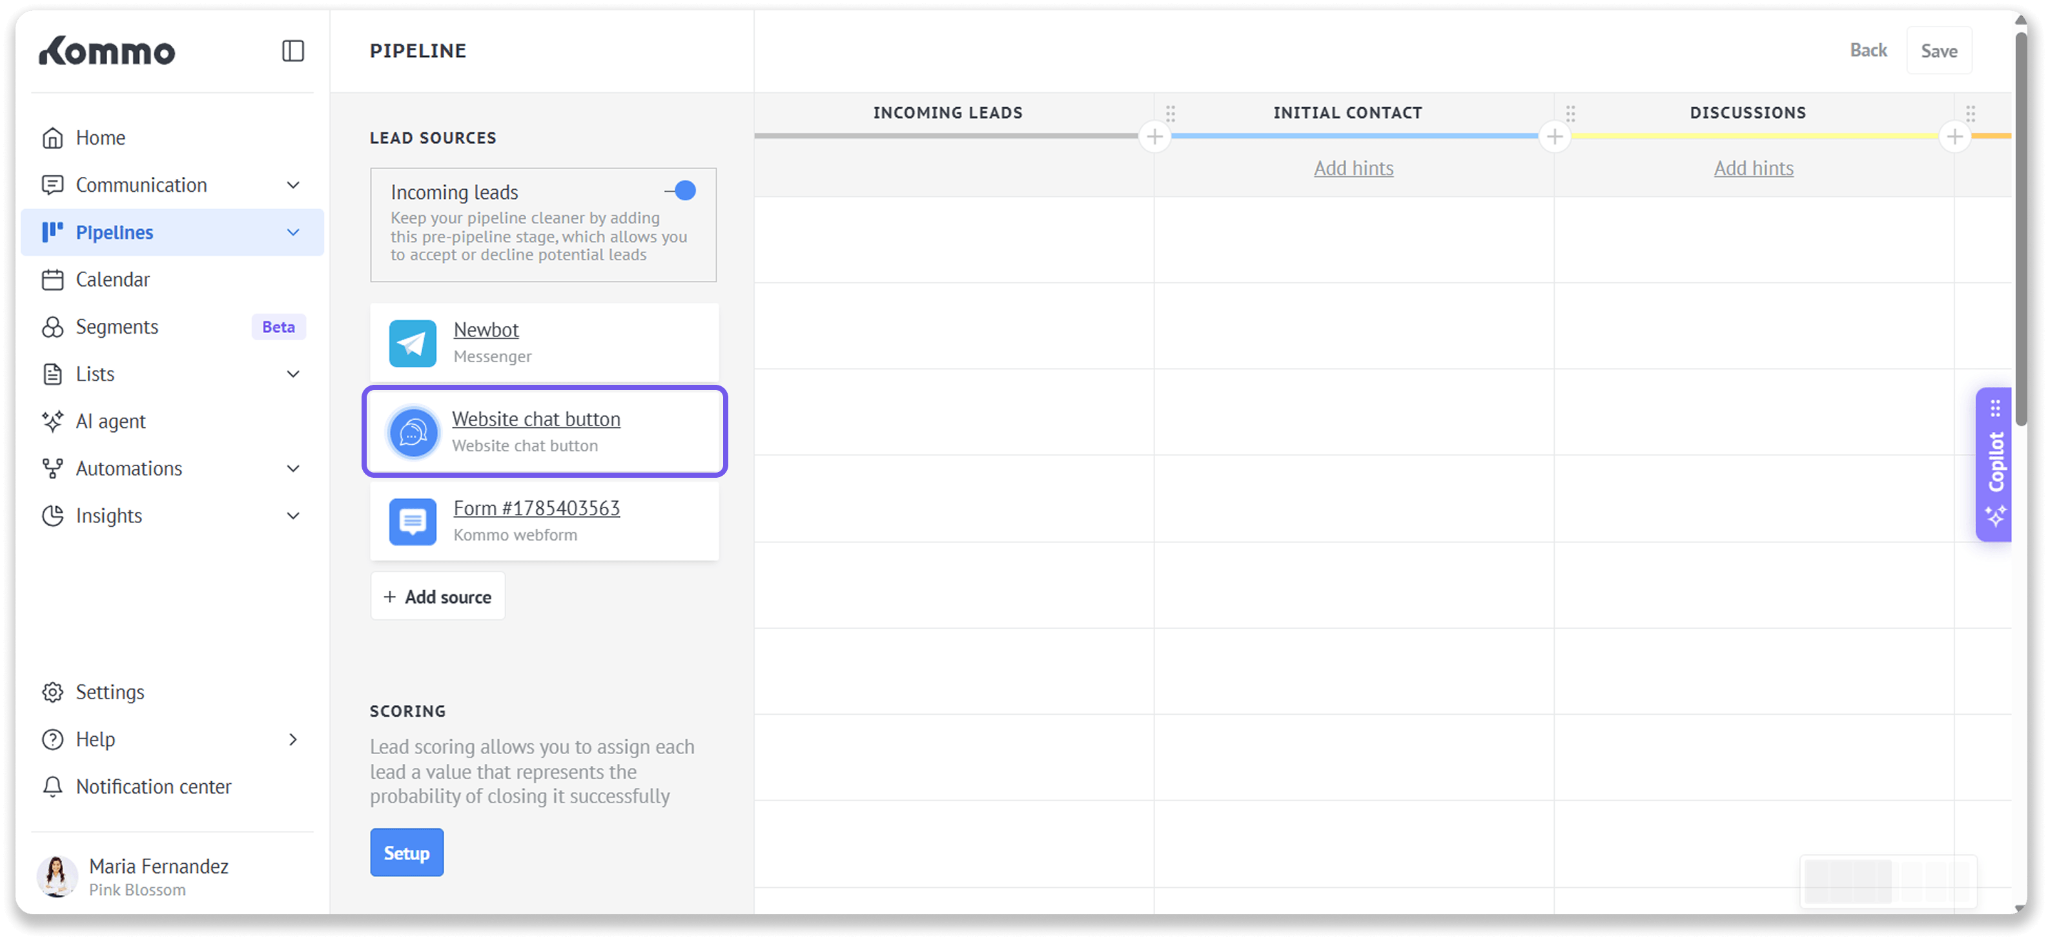
Click the button name to open its settings.
Open the Installation tab.
You can then add the button to Lovable in one of two ways.
Use your own prompt:
In the Paste in the code of your website section, copy the code from the box.
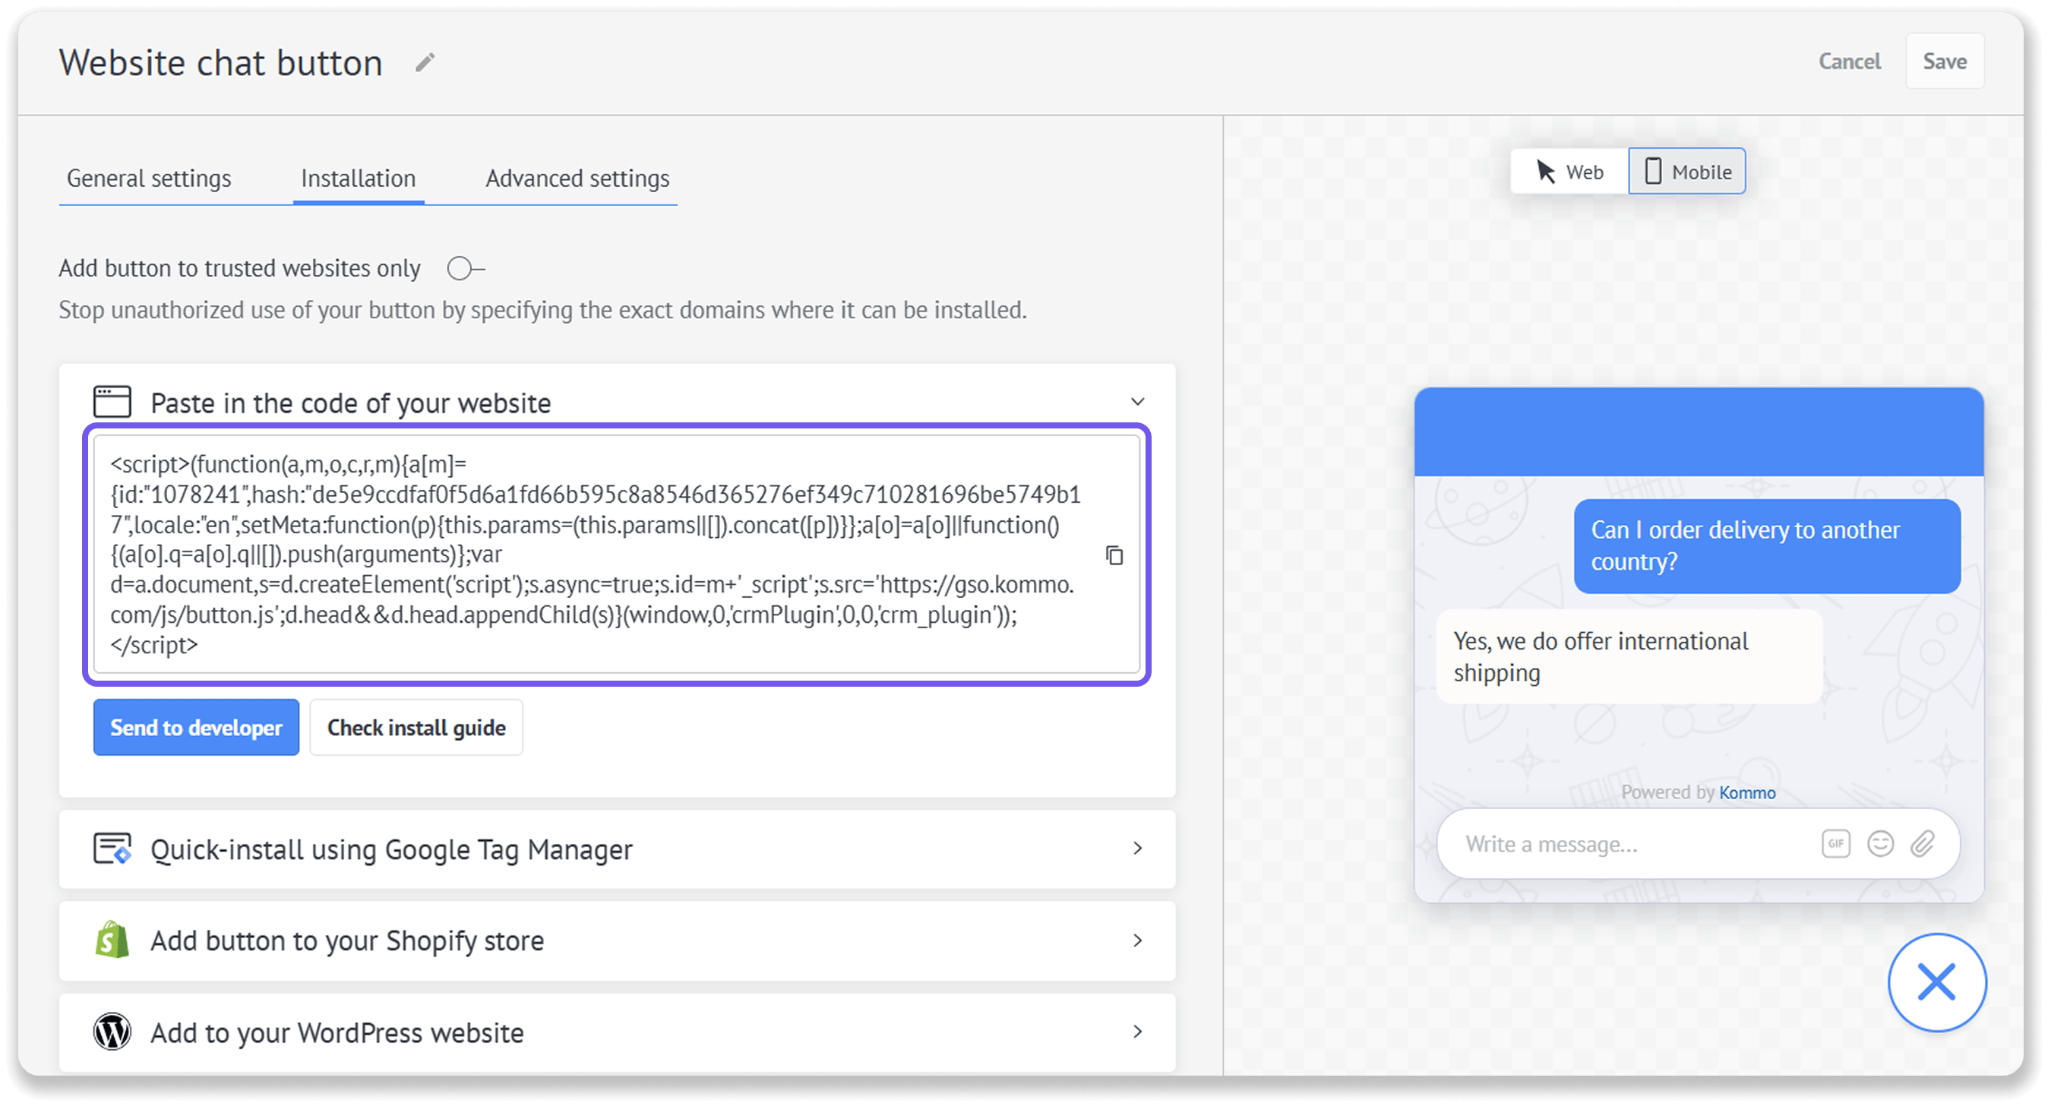
Add the code to your own prompt and describe where or how you want the button to appear.
For example:
Add this Kommo website chat button to the bottom-right corner of every page on my website:[Paste the website chat button code]Send the prompt in the Lovable chat.
Use the ready-made Kommo prompt:
Scroll down to Add to your Lovable website and click it to open the section.
Copy the ready-made prompt from the box.
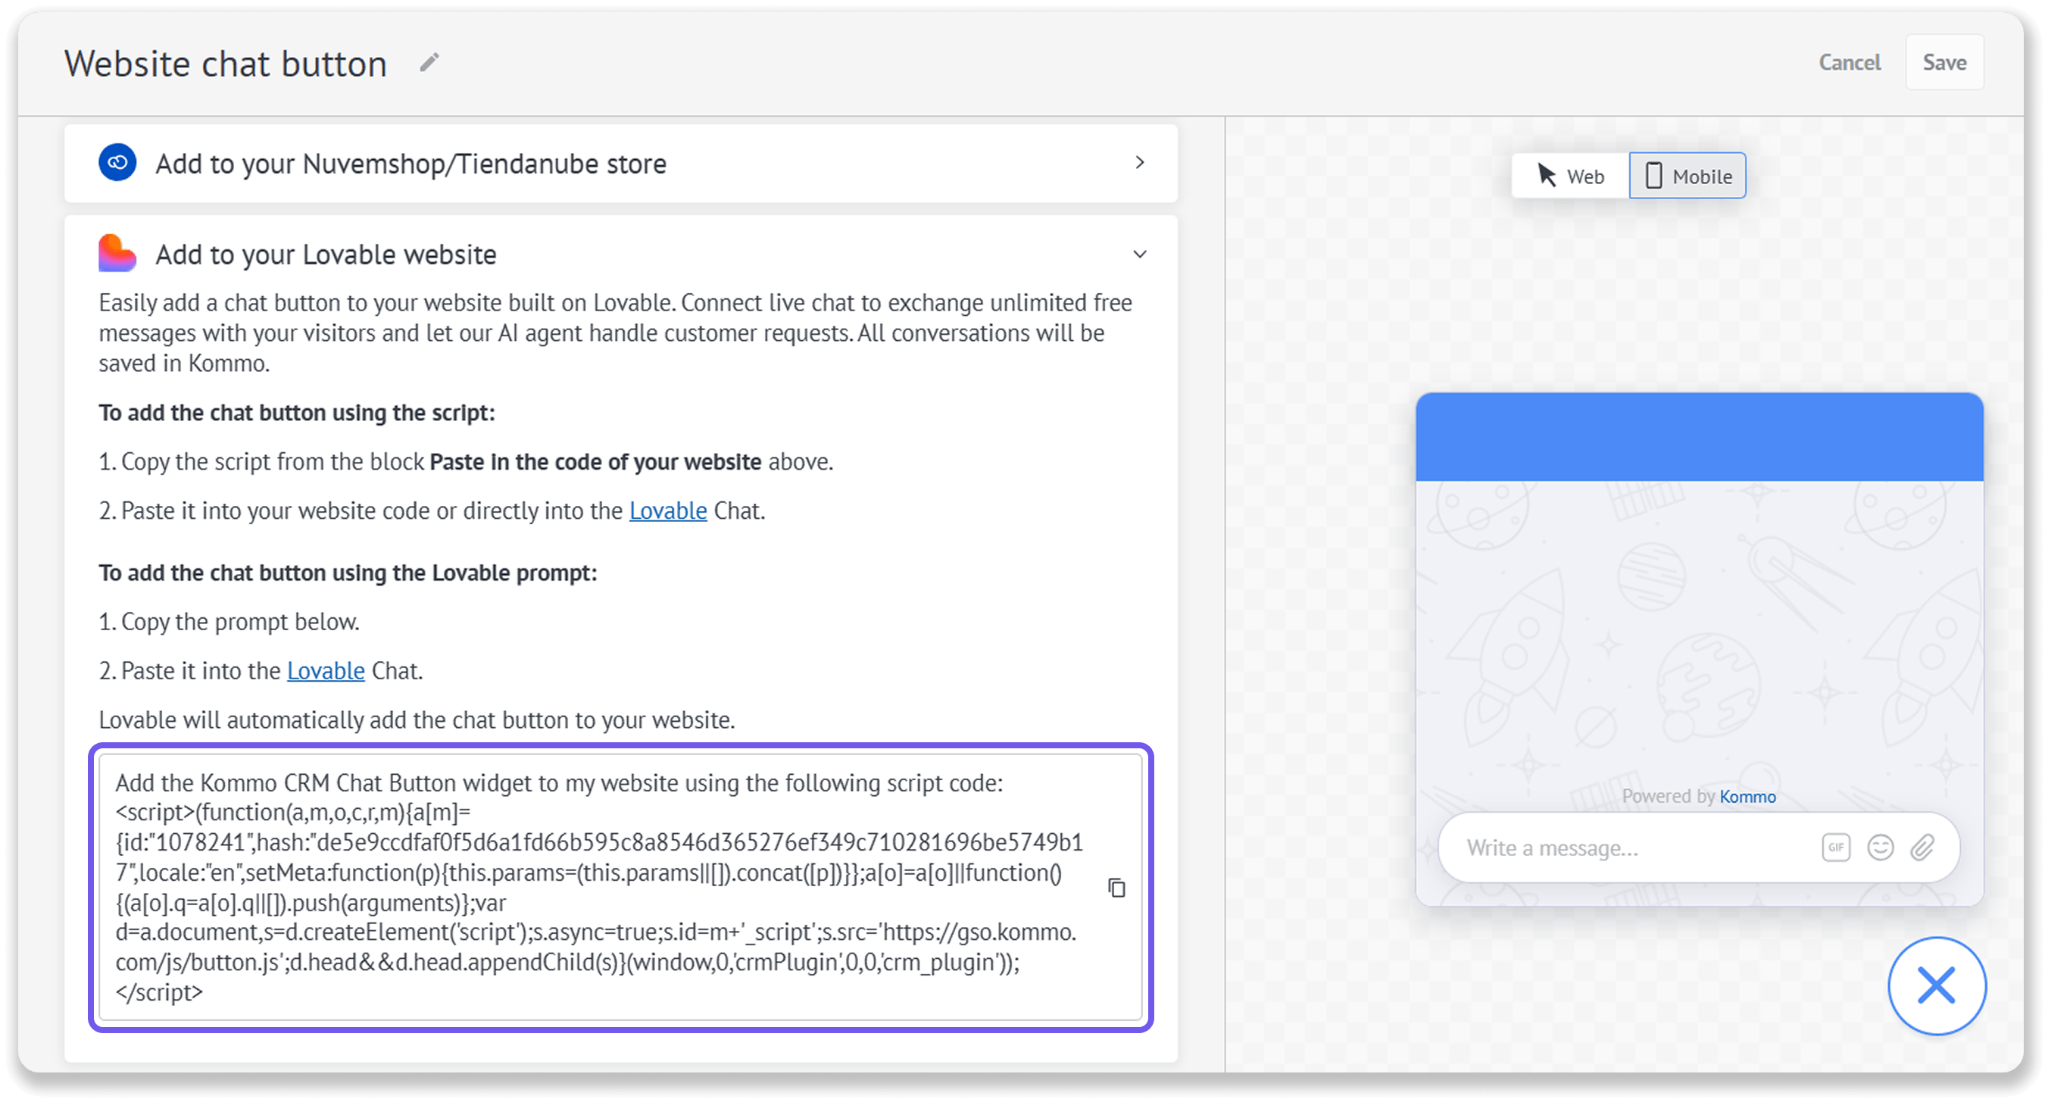
Paste and send it in the Lovable chat.
Lovable adds the website chat button to your project automatically.
Open the website preview and check that the button appears in the correct position. Visitors can use it to start a live chat or choose one of the messaging channels connected to the button.
Tip: After adding the chat button to your site, send a test message. In Kommo, go to Communication → Chat inbox and confirm the message appears there. If you have the Incoming Leads stage enabled, check that a new lead is created in the correct pipeline.
Add a Kommo webform to Lovable
Kommo provides the webform code that Lovable needs to add the form to your website. Copy the code, paste it into the Lovable chat, and describe where you want the form to appear. Lovable will then add the webform to your project.
To copy the form code:
In Kommo, go to Pipelines.
Open the pipeline containing the webform.
Click Automate.
Select the webform.
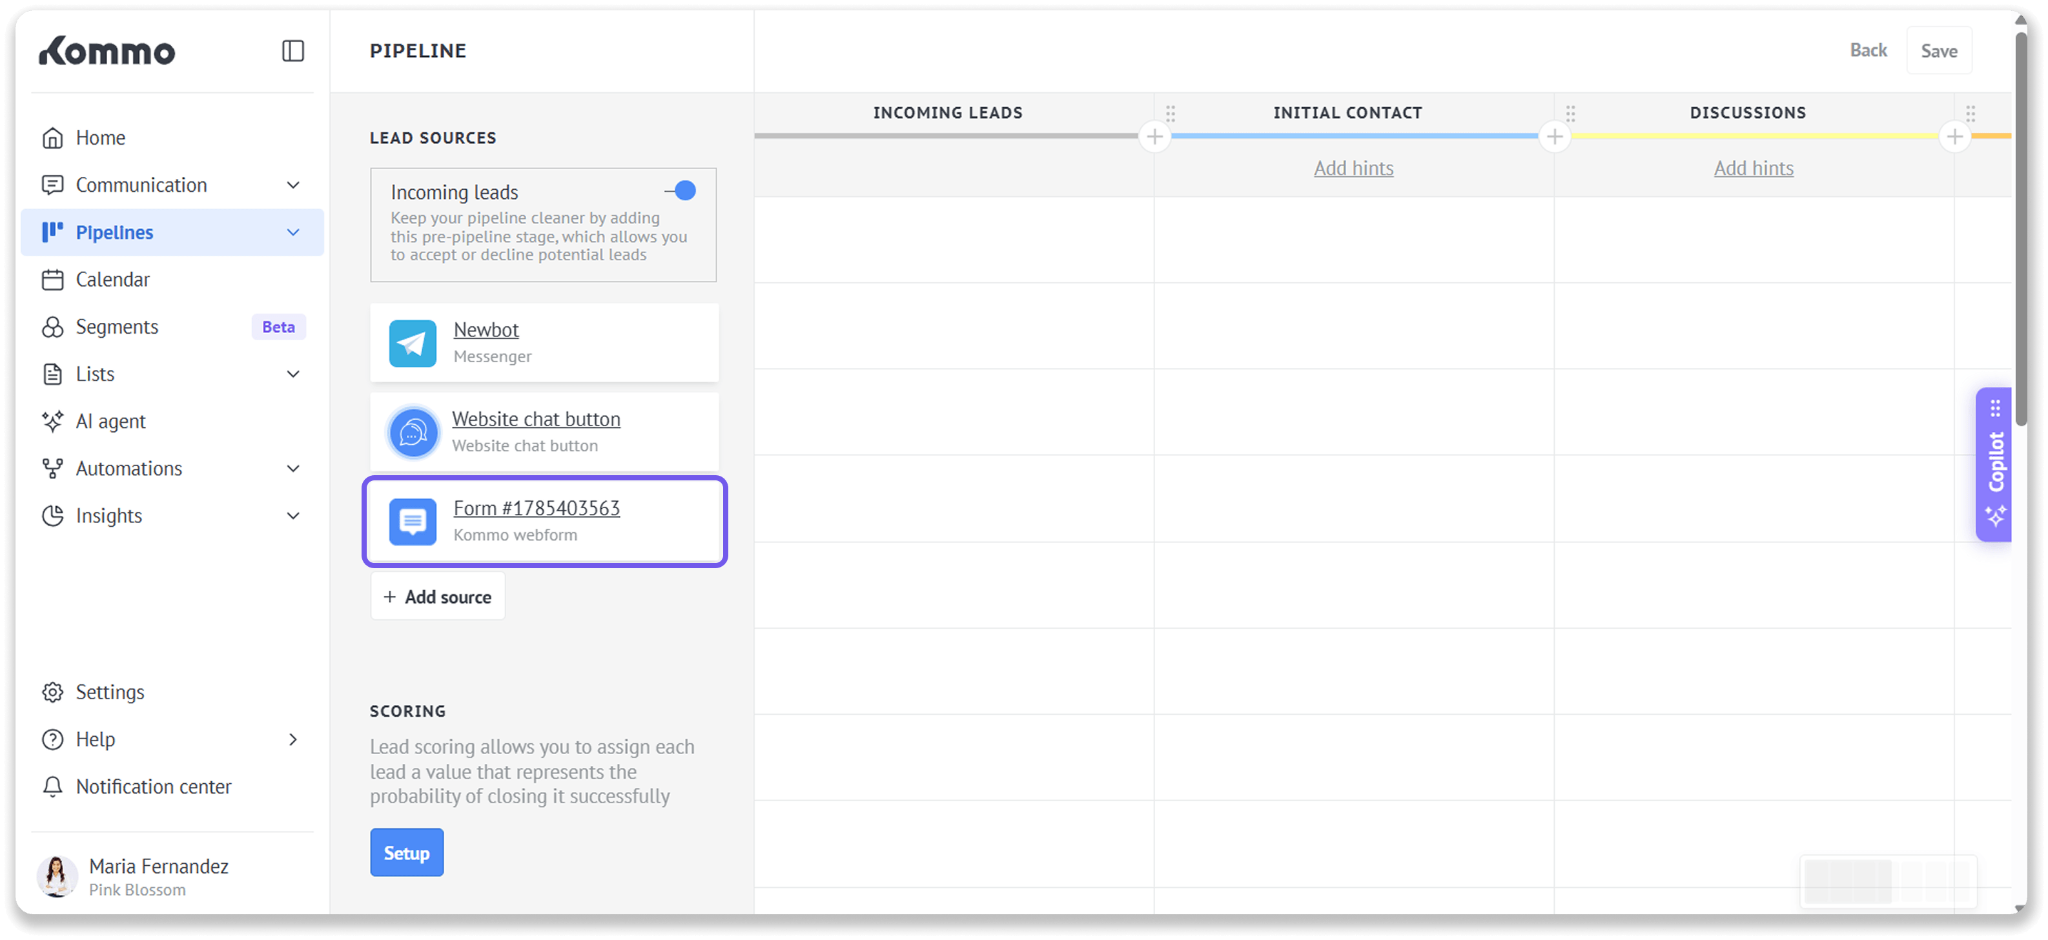
Open the Form placement tab.
Copy the code from the box.
To add the form in Lovable:
Open your website project in Lovable.
In the Lovable chat, describe where the form should appear.
For example:
Add this Kommo webform to the Contact us section of my website: [Paste the Kommo webform code]Paste the Kommo webform code into the same message.
Send the prompt.
Review the generated page and confirm that the complete form appears in the correct place and matches the rest of your website.
Tip: After adding the webform to your site, test it by submitting it with sample contact details. Check that a new lead is created in Kommo and all details appear in the correct fields.