Forms are an essential tool for lead capture, and we know it really well. That’s why we’ve made it easy for our customers to make forms in Kommo. You can easily create forms and insert them on your website without any coding skills at all. Customize the forms to your needs, play with the layout, and decide where the leads will arrive in Kommo. The forms are fully customizable.
How to create a Webform
To start the setup, let’s go to the Leads section and click on the “Setup” button in the upper right corner.
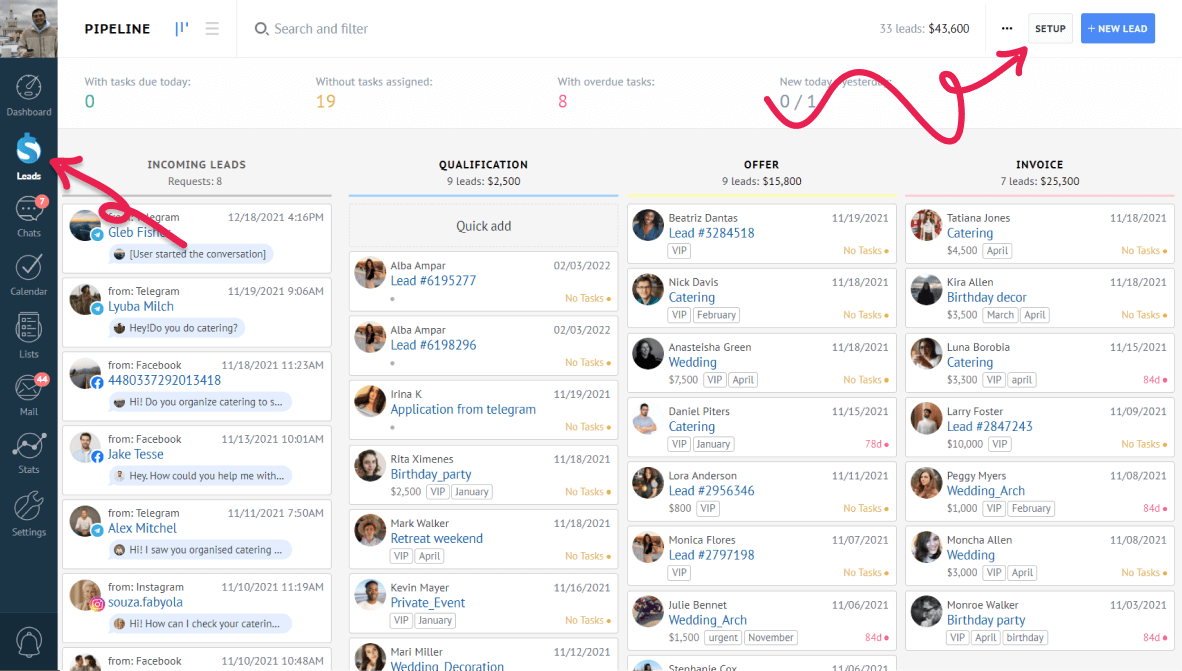
You should see the stages of your pipeline on the right and your lead sources on the left. To add a feedback form, click on “Add source” and select “Kommo webform”.
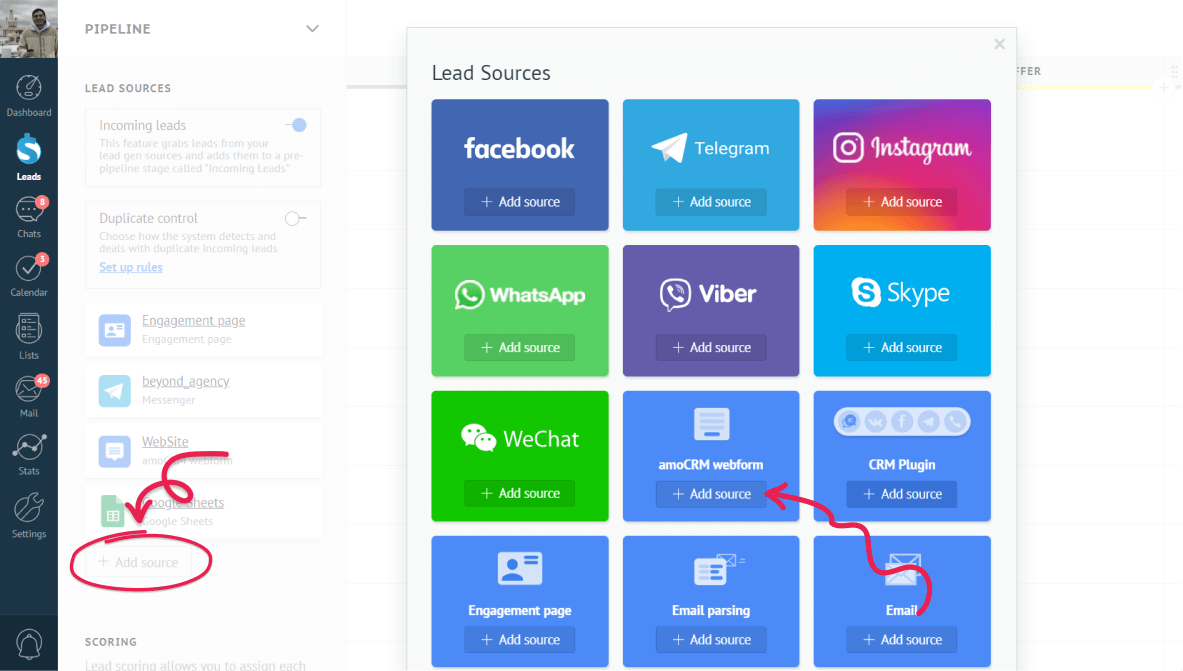
Once you click the button, you can see the templates that you can choose from.
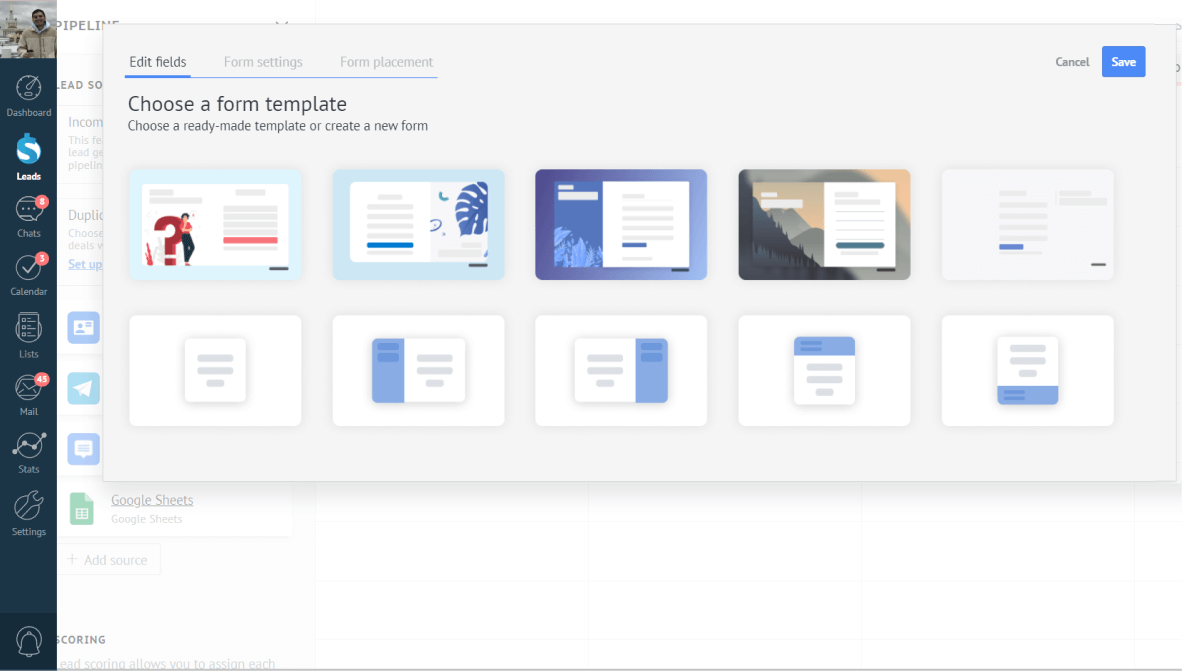
The form builder has 3 tabs – Edit fields, Form setting, and Form placement. Let’s analyze each of them.
Edit Fields
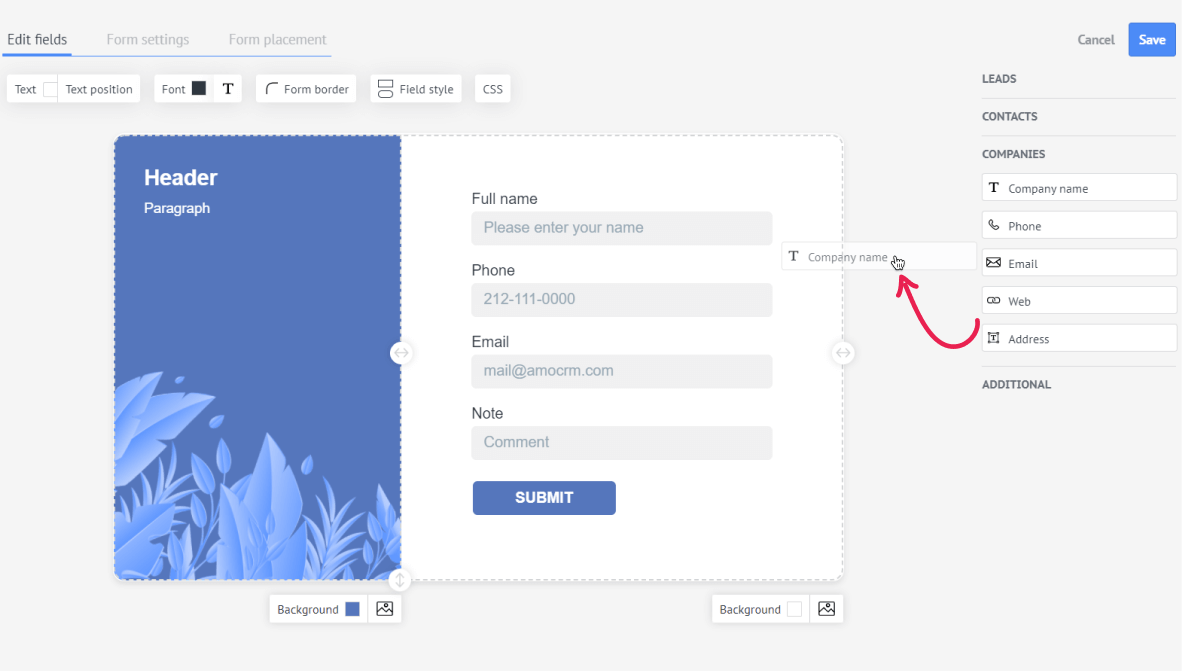
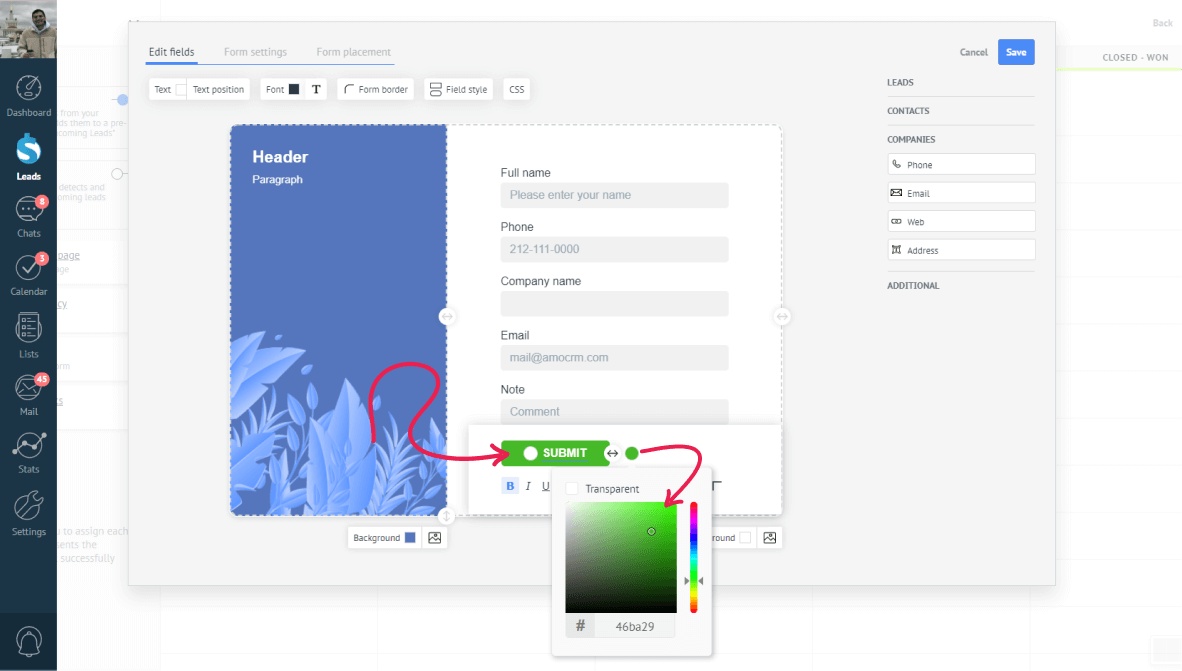
Here you can customize the design of the form. You choose themes, the text layout, background, font color, and the fields that your leads will fill out. Let’s add the “Company name” field from the “Companies” section and change the color of the “Submit” button.
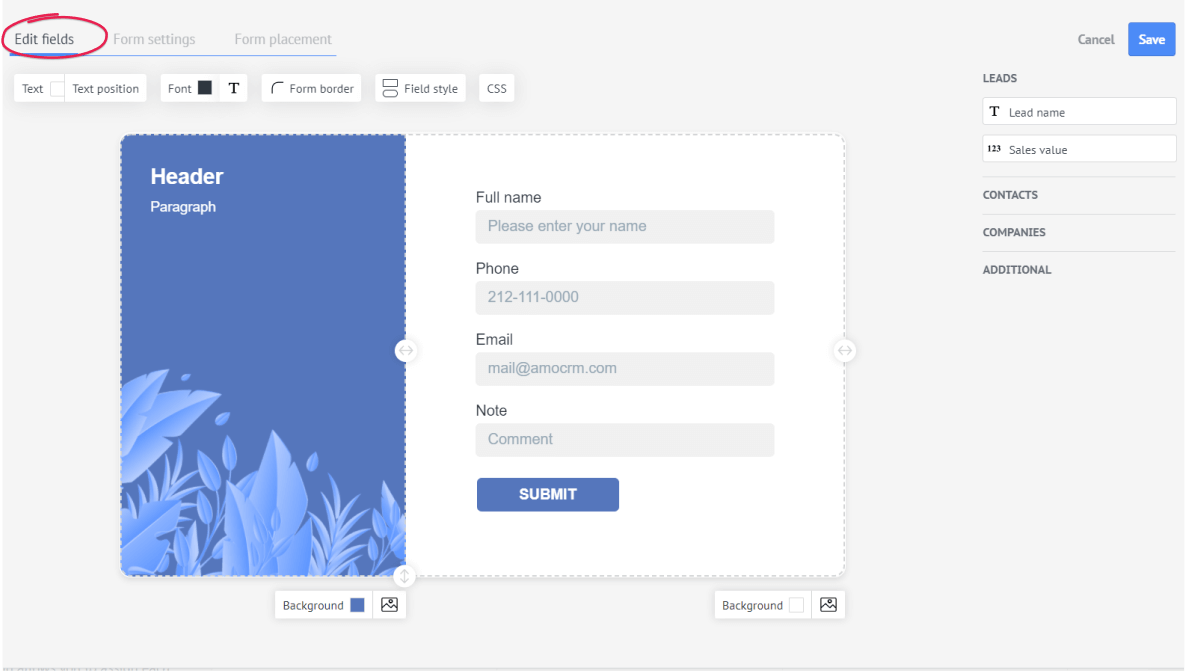
To add a field, drag it from any of the sections (Leads, Contacts, Companies, and Additional) and drop it on the form.
To edit the “Submit” button, just click on it. A small menu that allows you to edit its color, font and location will appear just below it.
Click the “Save” button to save your form.
.png)
Beneath the Edit field, Form settings and Form placement options you can find additional design settings for your form.
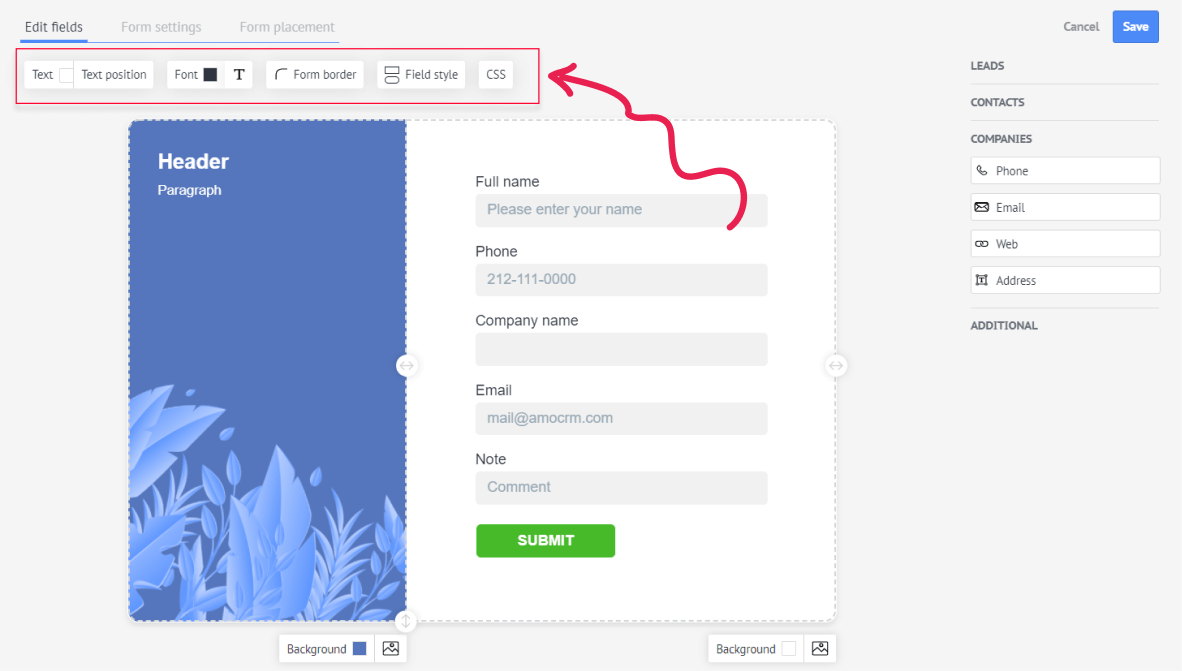
Text position – Select if the field name should be in the center of a field or at the side of it.
Font color and Font family – Choose the font name and the color
Margins – Choose whether to use margins for the fields in your form or not
Field style – Choose what kind of borders to use for the fields – round or square
Form border - You can choose the form border radius, select the border color or apply shadow
CSS - It is a great option if you want to code your own design. Just click and enter the text of your CSS-code
Form Settings
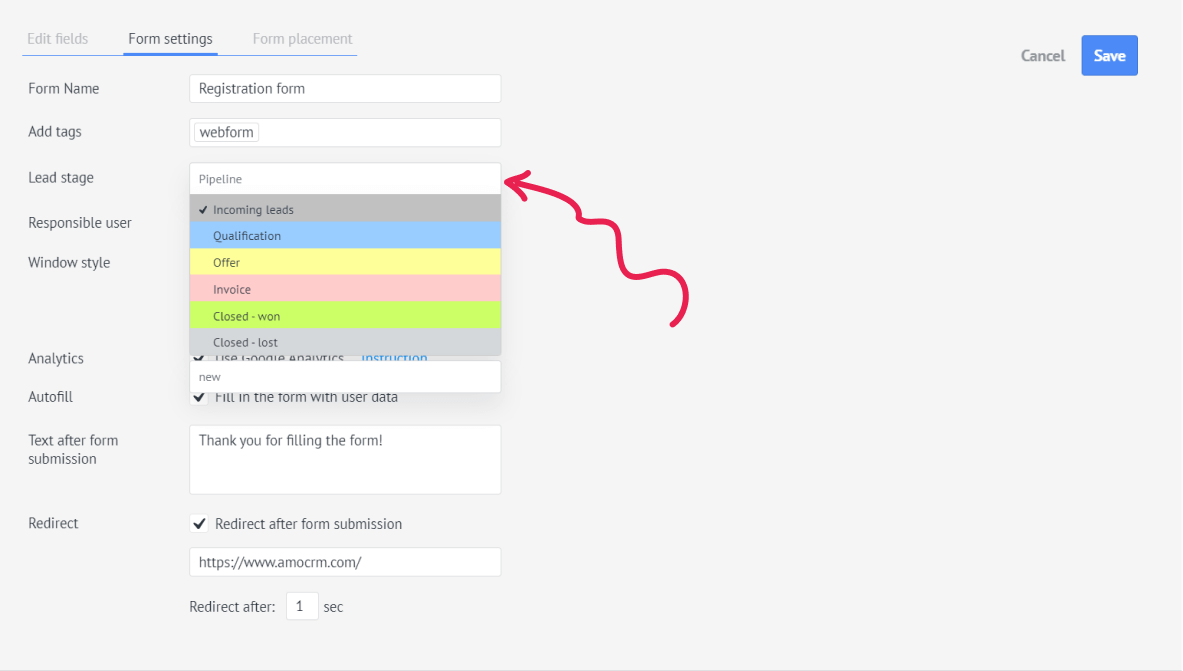
In this tab, you can change the form name, add tags, select the pipeline stage to which the lead will arrive. You can also configure how the form will be displayed on your website and the use of Google Analytics. Just click the autofill box, if you want the form to be filled with user data. You can also set a redirect page and configure the redirect time.
Let’s change the name of the form to “Registration Form” and assign the “webform” tag to all the leads that will be created after filling out this form.
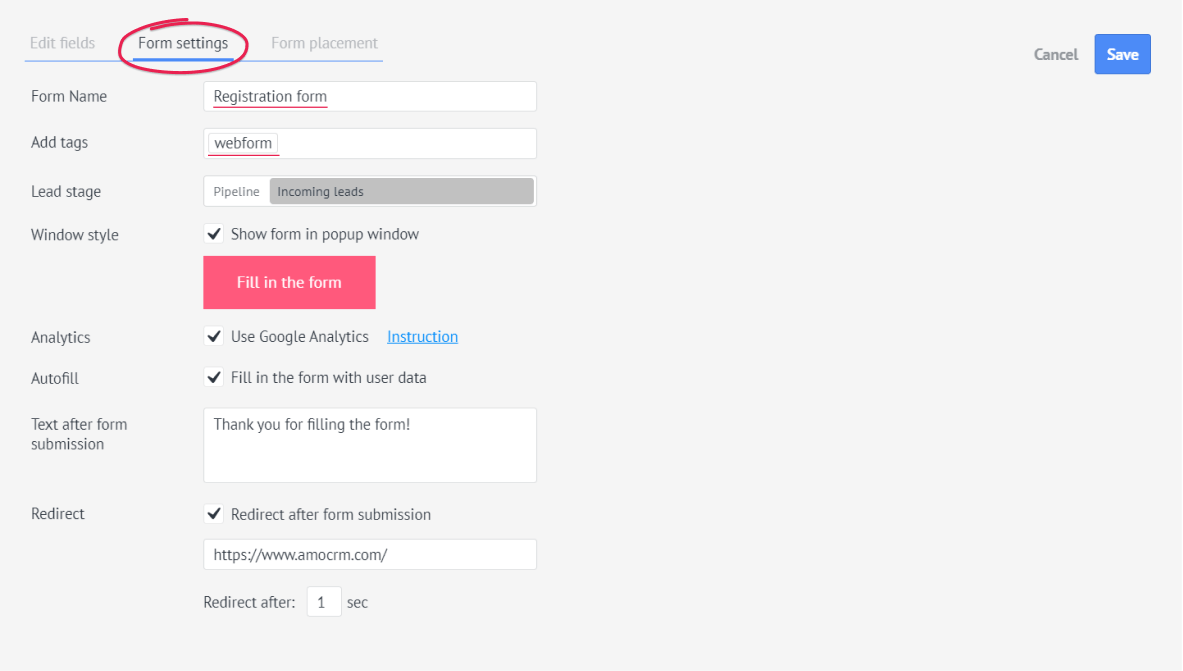
You can also use Google Analytics with your form and write a Form submission. Form submission will show when your client will successfully submit the form.
Lead Status
You can customize the form so that it places applications as leads at a certain stage of your pipeline. To do this, you must specify the lead status under the “Form setting” tab.
Use Google Analytics
Starting June 1, this integration is available on the Pro plan only. If it was previously connected on your Base or Advanced plan, it will remain available unless you switch plans.
Use Google Analytics statistics, to get more information. Just click the checkbox in the settings form to use Google Analytics.
For a more detailed analysis of the advertising campaigns, adjust the additional settings in Google Analytics. Click on Instruction near Analytics Checkbox to read the information on how to make your form even better for data collection.
Deleting a form
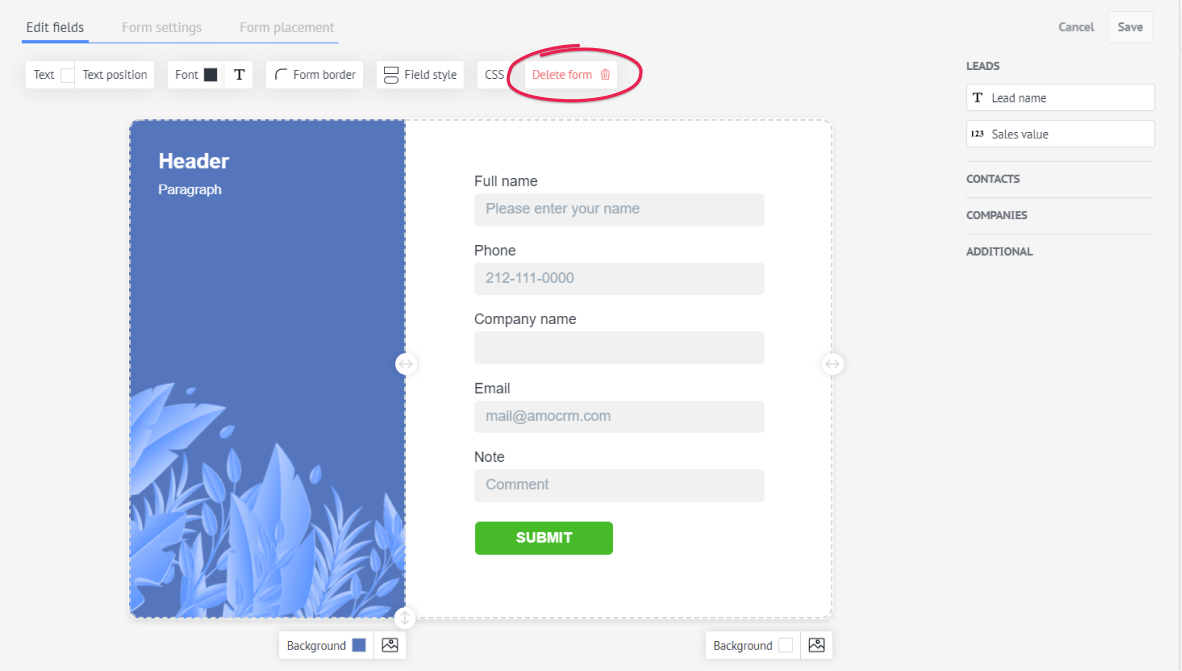
To delete a form, click on the form, go to the “Edit fields” tab and click on “Delete form” above the form.
Form Placement
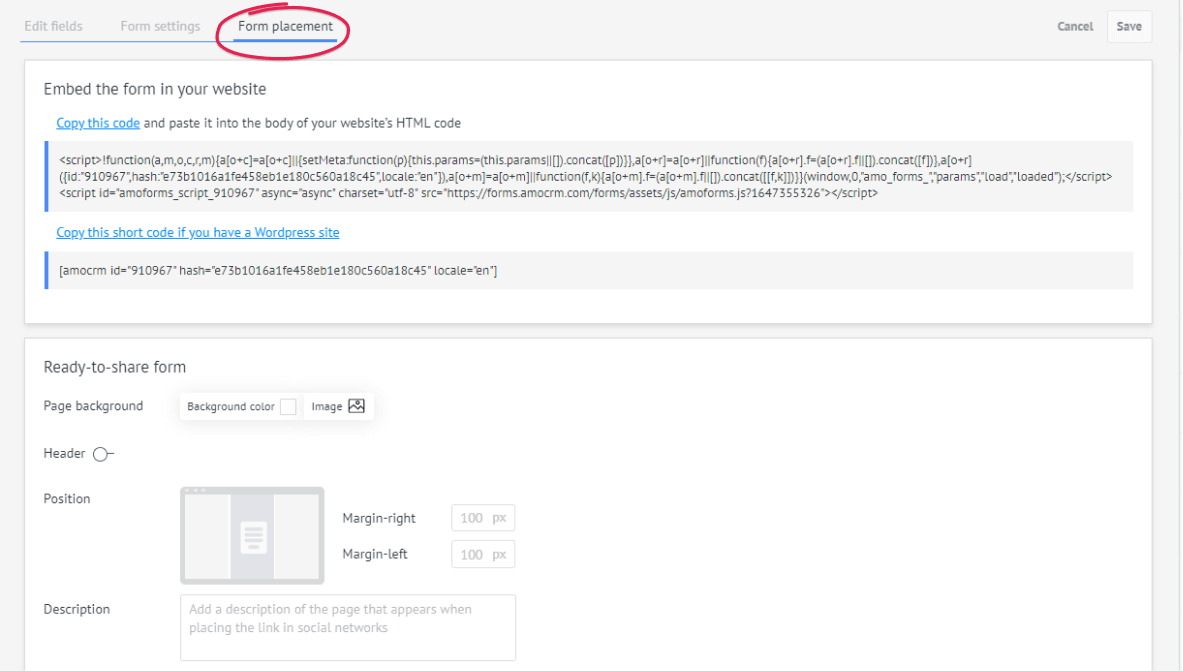
You can place your form in several ways: by placing the code in the HTML-code of your webpage or you can customize a special page with a form, and copy the link to the form in order to insert it on your website.
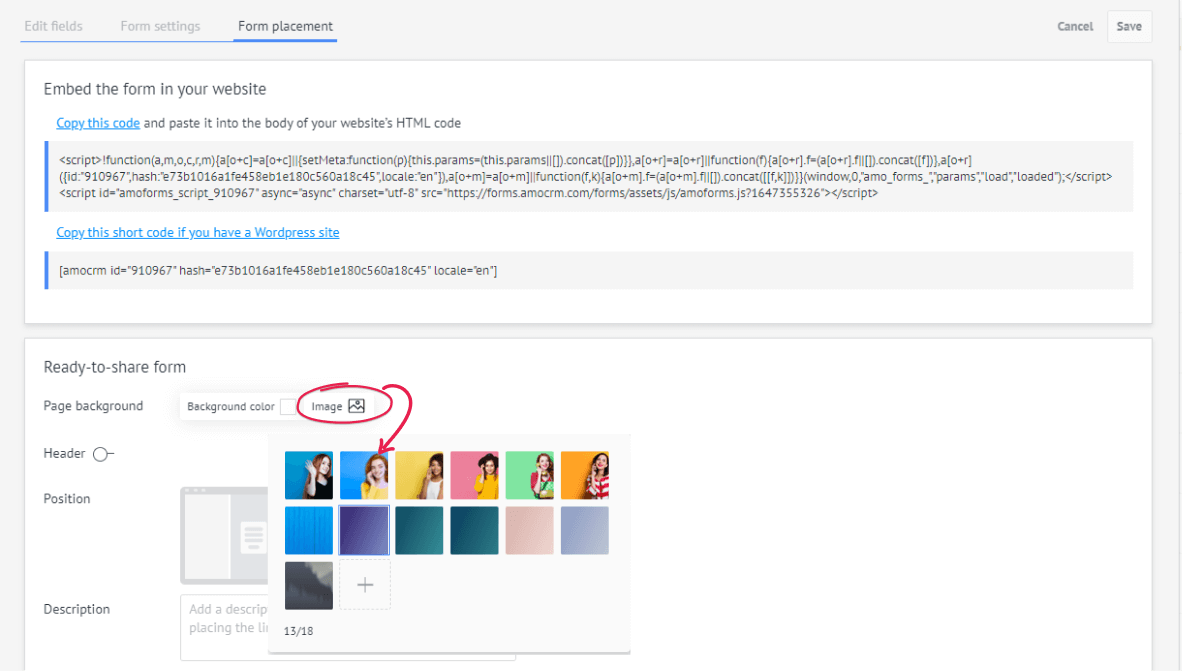
Let’s change the image of the page and save it.
Now let’s go to the page with our form and see how it looks.
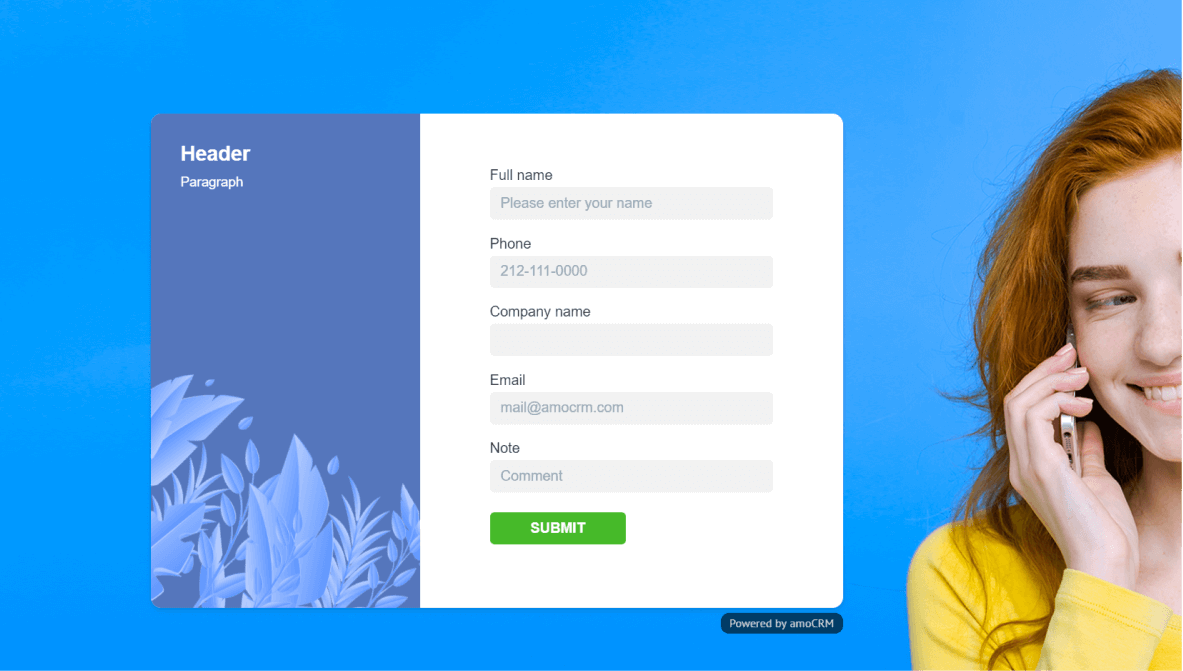
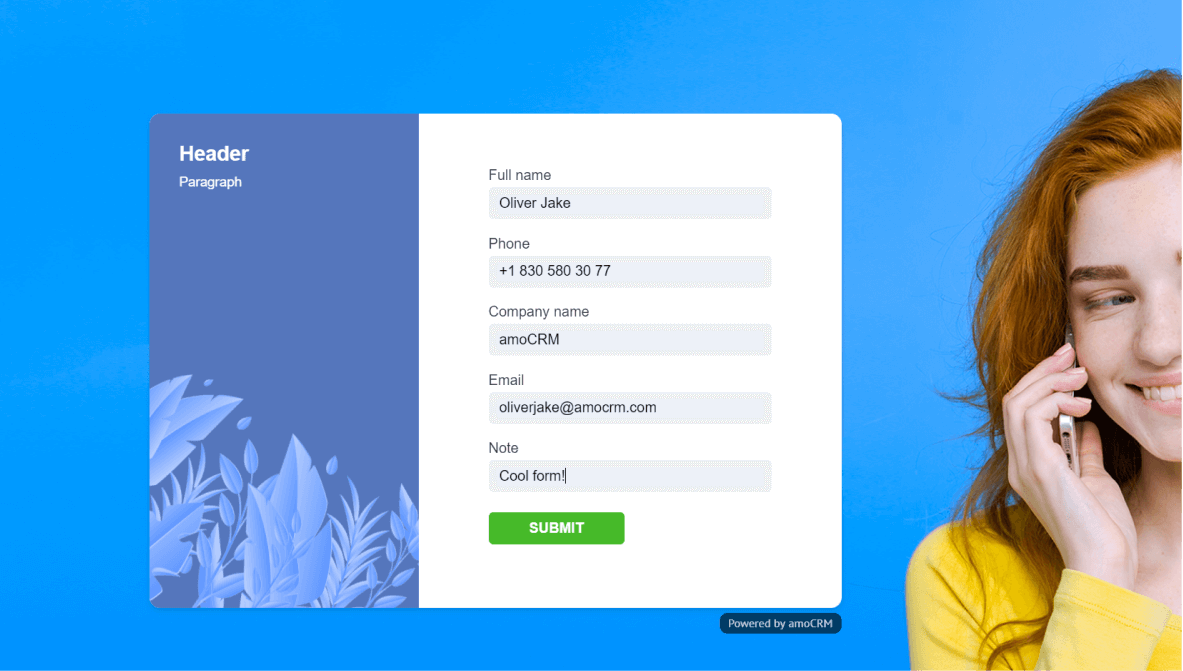
And now let’s fill out the form like a potential customer.
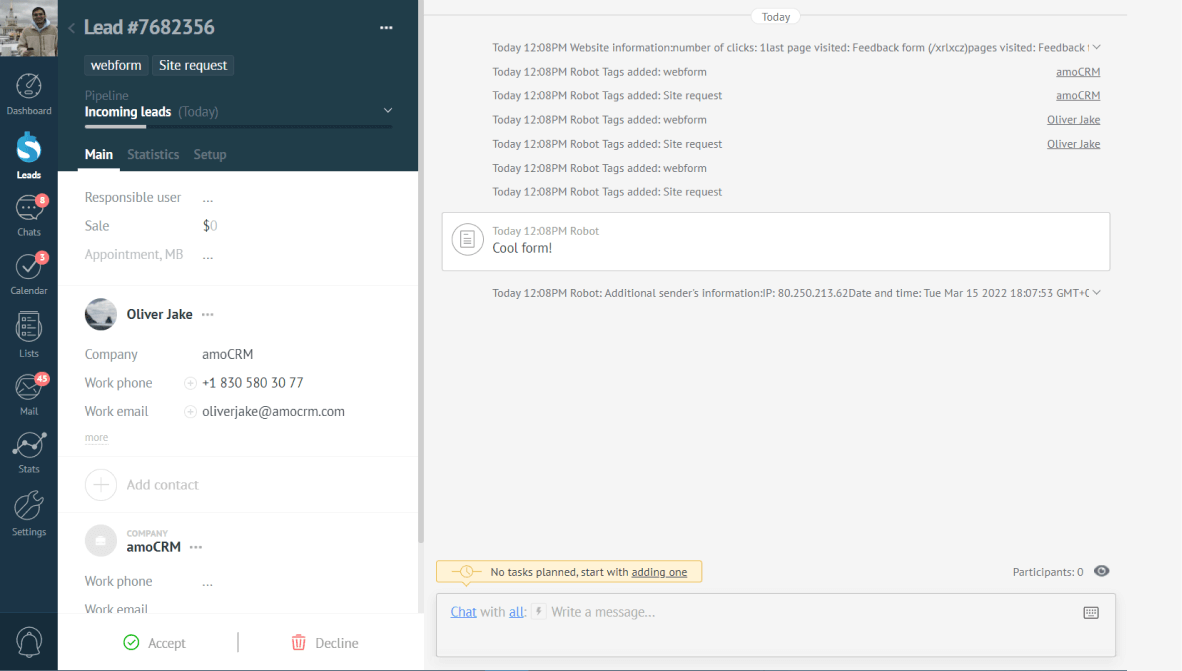
Once you go to our Kommo account, in the “Leads” section you can find our application in the pre-pipeline stage called “Incoming Leads”.
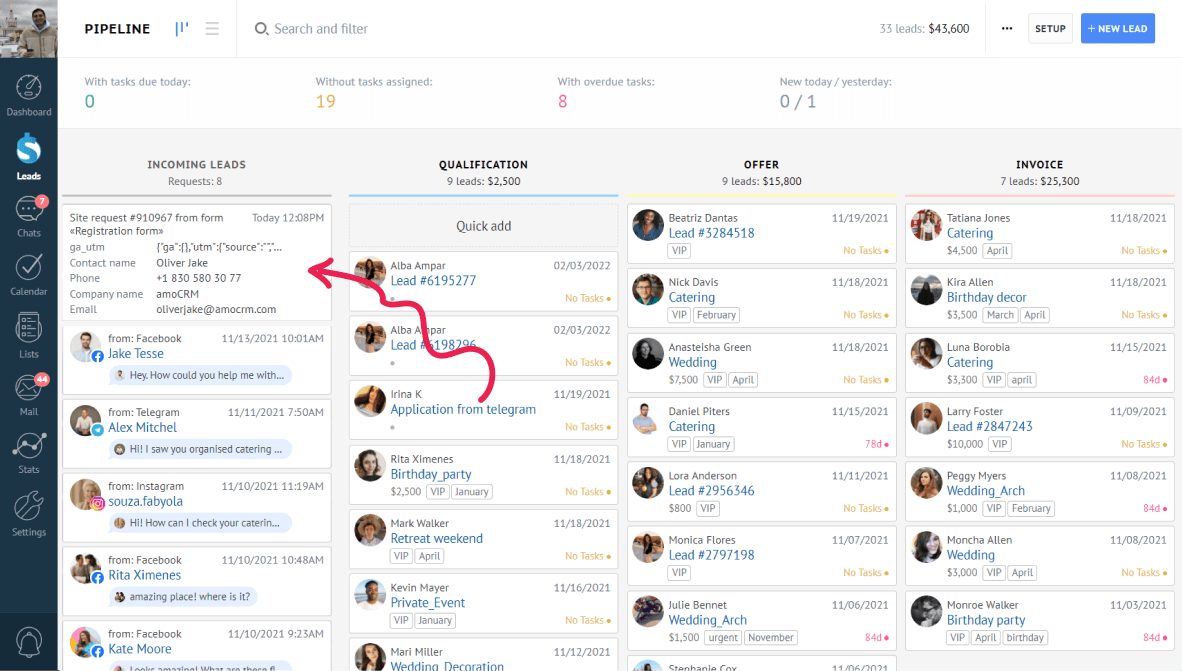
To create a lead from it, click on the green “Check” icon or just drag it to the desired stage in your pipeline.
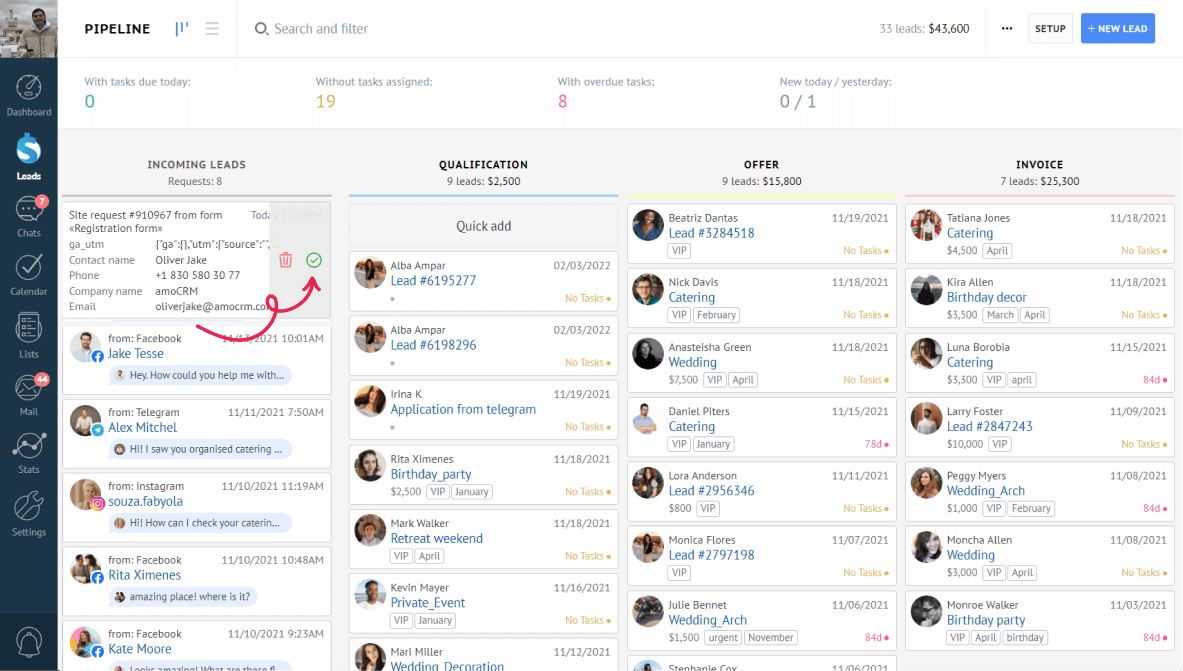
Click on the lead, and all the entered information is already in the lead card: your client’s name, company name, phone, and email address.
How to place the Webform in your Wordpress account
If your website is built with WordPress, you can place your amoCMR webform in your web page in just a few seconds.
Note: Make sure to have a WordPress Pro plan and activate the Pro features to be able to install the webform HTML code into your website. You can activate the Pro plan features inside your Wordpress account by going to Dashboard - Settings - Hosting configuration. There, you can find the ‘Activate’ button in the middle of the screen, if the Pro features are not already activated.
To install the HTML code of the Webform on your Website:
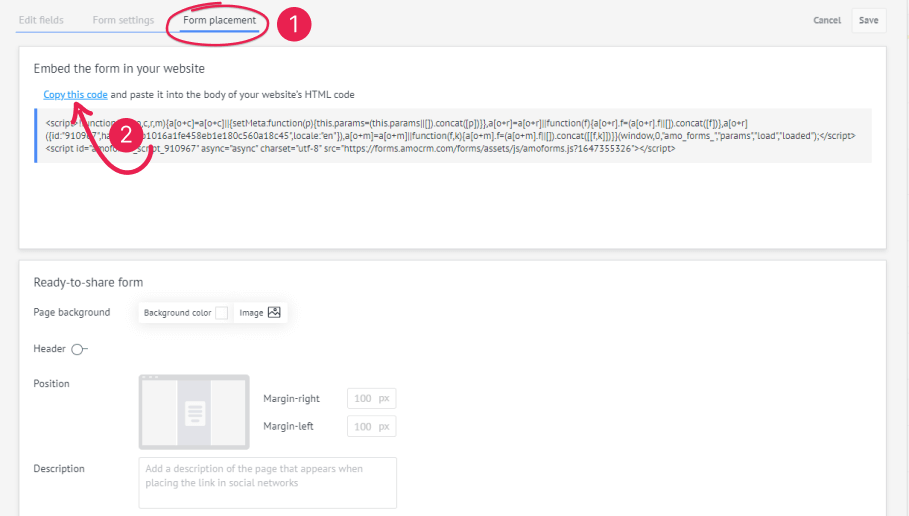
Open the form that you want to place in your website and head over to the ‘Form placement’ section. There, you can find the HTML code of the form. Just copy it by clicking the ‘Copy this Code’ action
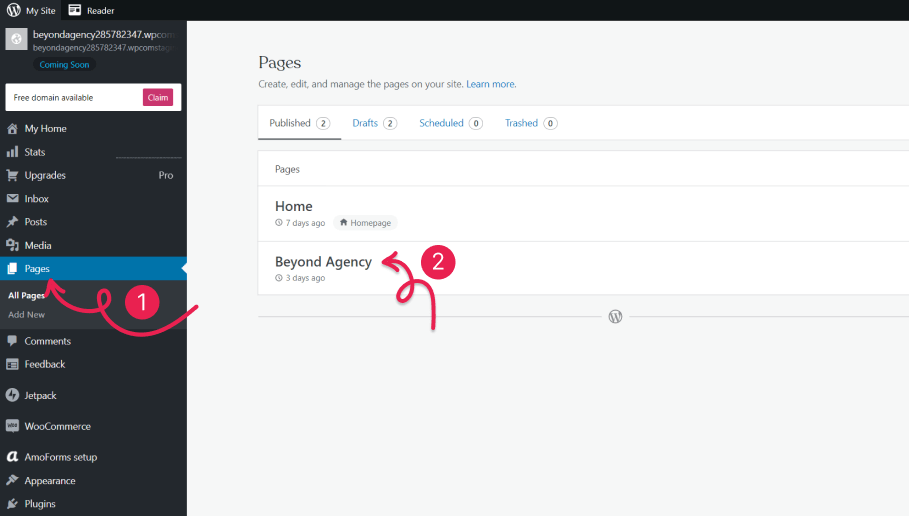
Next, log in to your WordPress account and inside the Dashboard choose the page that you want to place the form on. For example, I want to place it on my ‘Beyond Agency’ page
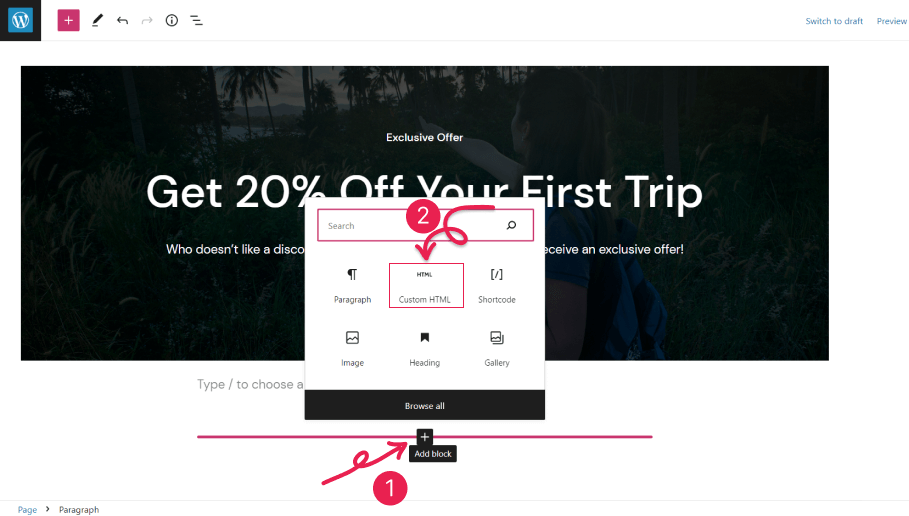
Create a new HTML bloc where you want to place the form. You can create a HTLM bloc by just clicking the ‘+’ (Add bloc) and selecting the ‘Custom HTML’
Finally, paste the code copied from your webform and hit the ‘Update’ button in the upper-right corner of the page.
When you update the changes, you will be able to preview your website to see if the form looks properly.
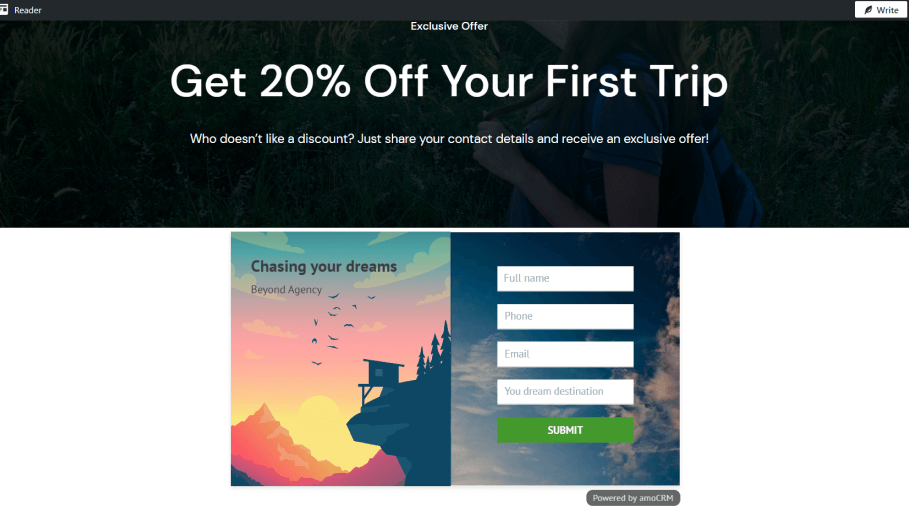
When you place the Webform on your website, it is automatically connected to your Kommo account. Once someone fills in the form, you will receive a new incoming Lead in your Pipeline.
Already Created a Form?
If you already created a form and installed it on the site, you can set up integration with our system through the API. We have open documentation, which contains not only possible methods but also examples that will make the integration process even easier.
Need more help in setting up or troubleshooting? Contact us by sending an email to support@kommo.com or write to us on Facebook.
Not a user yet? Visit our tour page or contact us for a demo.