What you’ll need:
Any Kommo plan (Base, Advanced, Pro, Enterprise, or a 14-day trial)
Administrator (Admin) access in Kommo
Keep in mind:
Administrators have full access to the workspace
Any user can be assigned the Administrator role
There’s no limit to how many Admins you can have
Setting permissions in Kommo lets you assign roles, control who can view or edit leads, and limit access to pipelines, automations, and more. Once configured, each user will only see and do what their role allows.
Administrator (Admin)
The first user in a Kommo account becomes an Administrator by default. Admins can:
Add, edit, disable, or remove users
Assign roles
Set permissions and access levels
As an admin, you can assign the Admin role to anyone, and there’s no limit to how many Admins you can have.
Set a user as an Admin
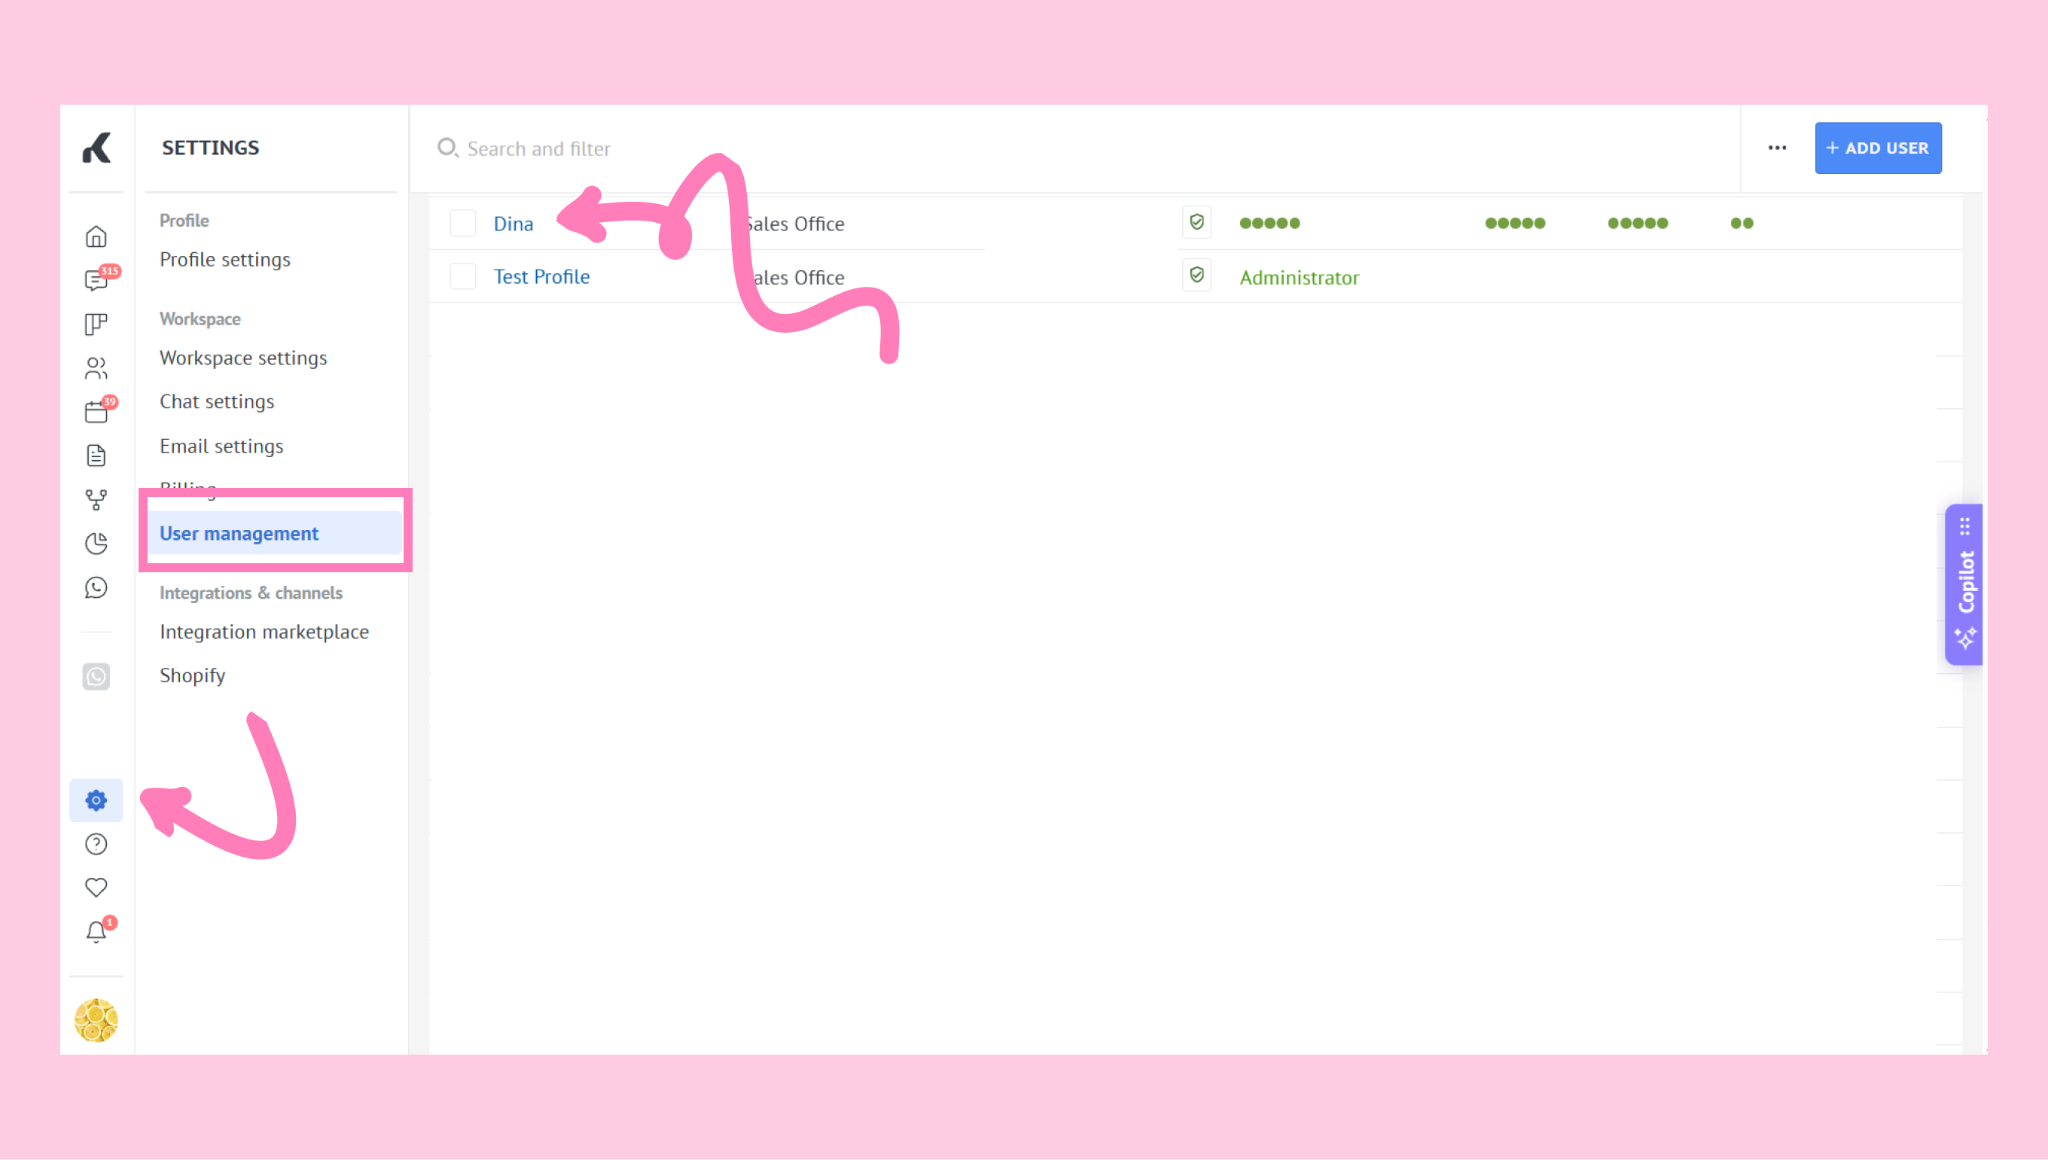
Go to Settings → User management → open the user’s profile.
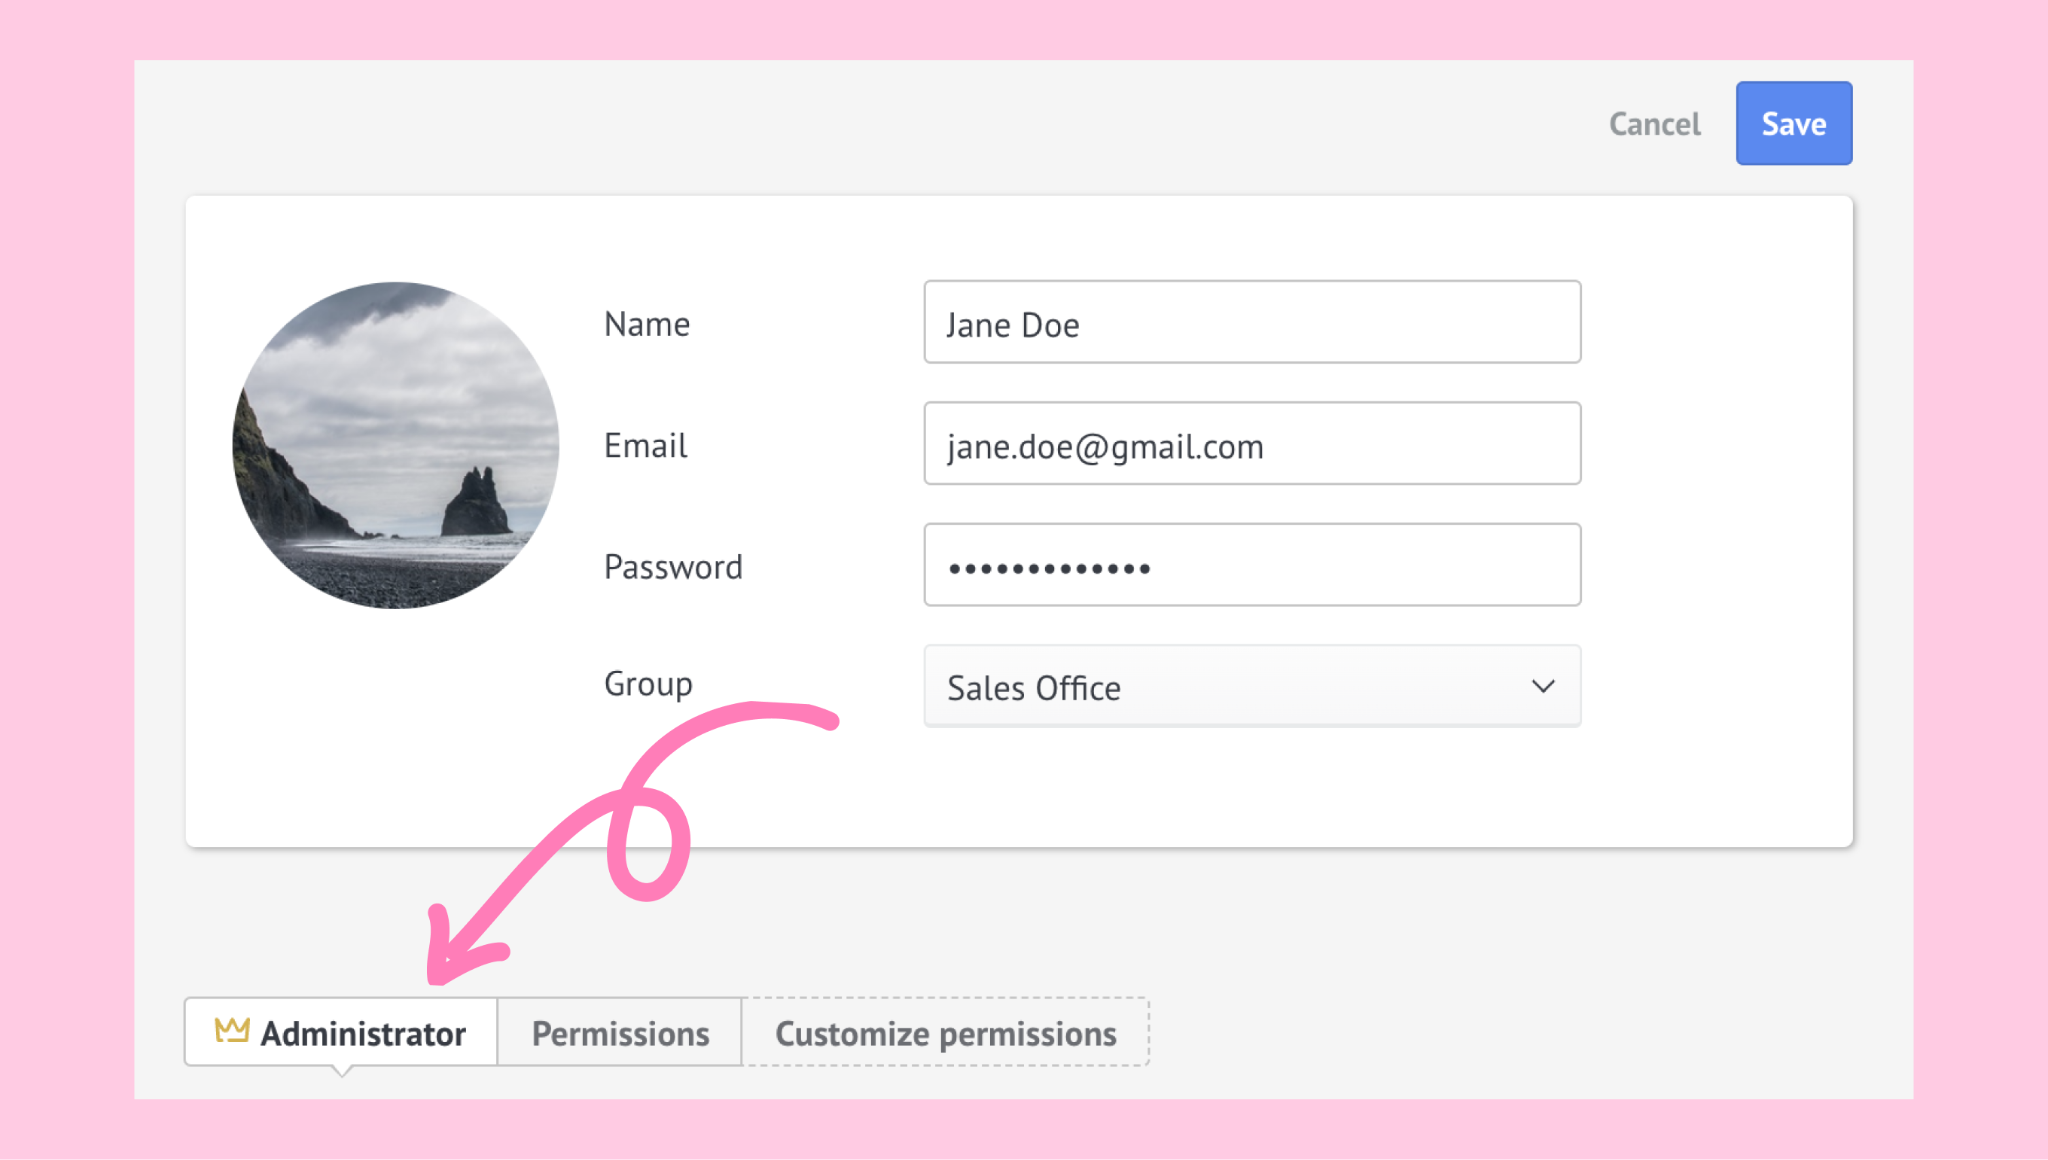
Switch to the Administrator tab → click Save.
Custom permissions (custom roles)
Custom permissions let you fine-tune what each user can access — without creating fixed role types.
Set custom permissions for a user
Go to Settings → User management.
Click the user’s name.
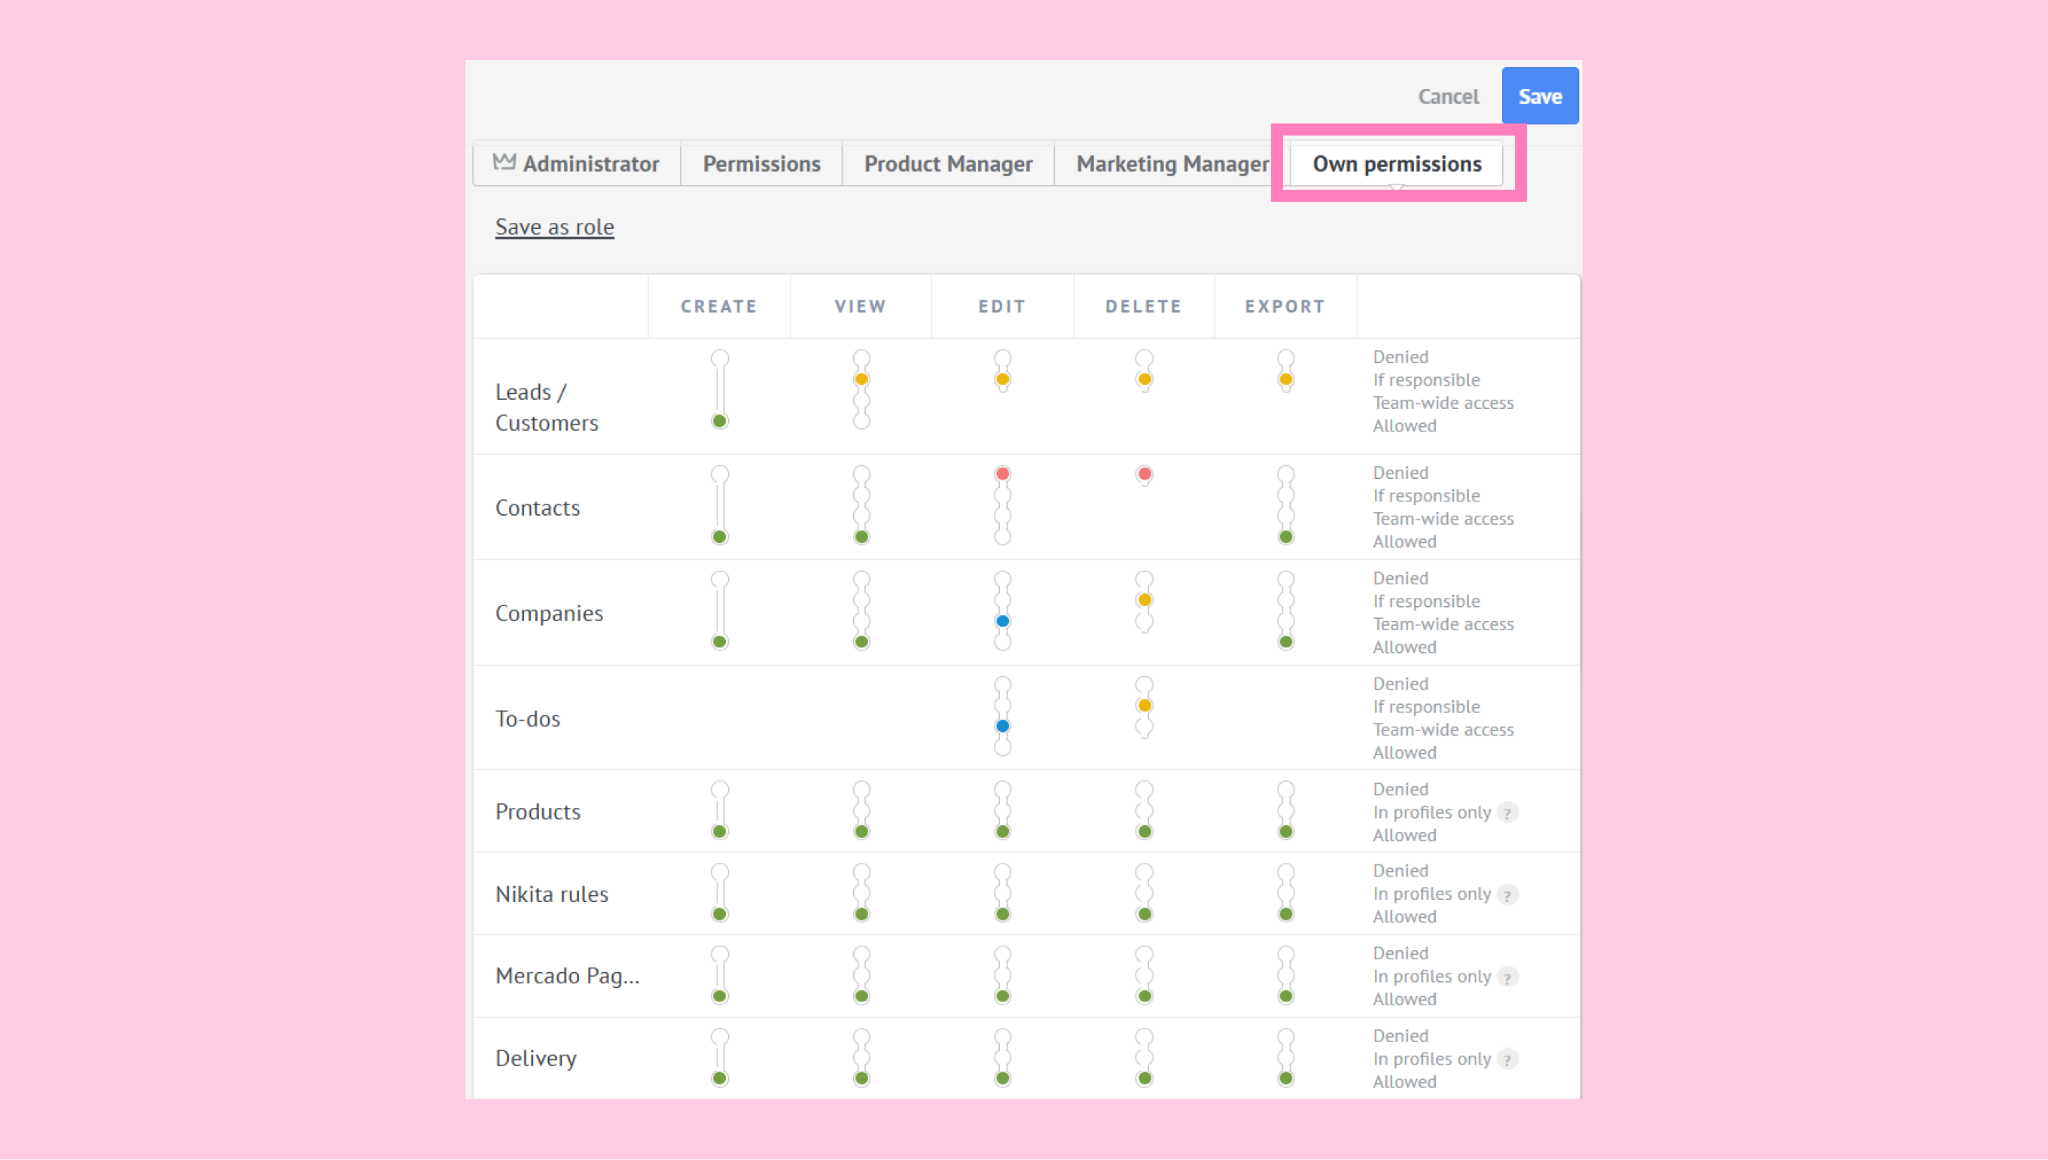
Open the Customize permissions tab (it will change to Own permission once enabled).
Adjust access for leads, contacts, companies, and other features. Here’s what each color means:
Red - The user has no access. They can’t view, create, edit, delete, or export this item.
Orange: The user can access only items they’re responsible for. For example, they can view or edit only their own leads, not the team’s.
Blue: The user can access items assigned to their team or group, but not the entire workspace.
Green: The user has full access to all items in the workspace, regardless of ownership.
Advanced permission controls
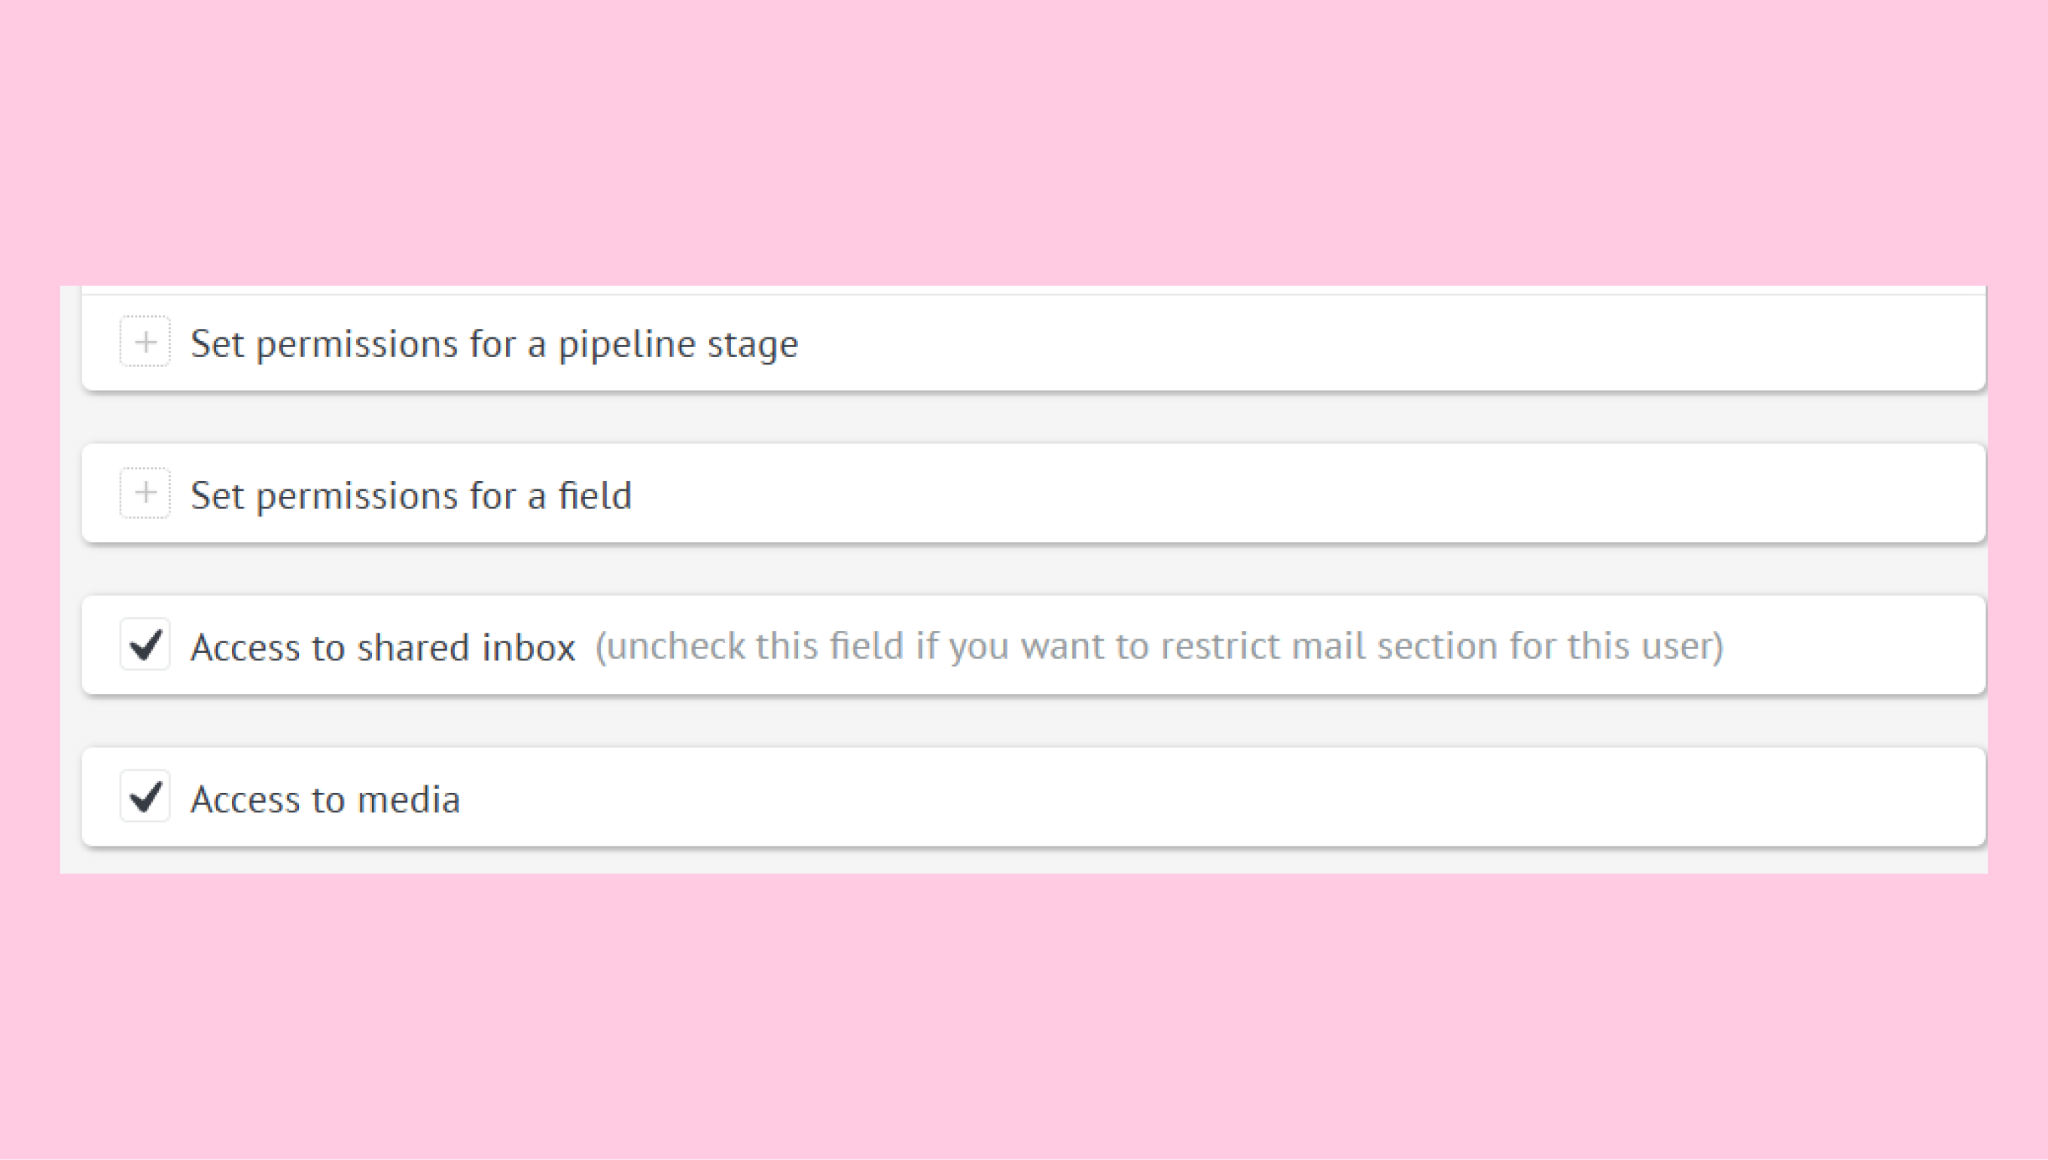
Scroll down to configure additional access options:
Pipeline stage access: Restrict specific stages
Field permissions: Limit visibility or editing of fields
Shared inbox access: Control who sees shared emails
Media access: Manage access to files, images, and attachments
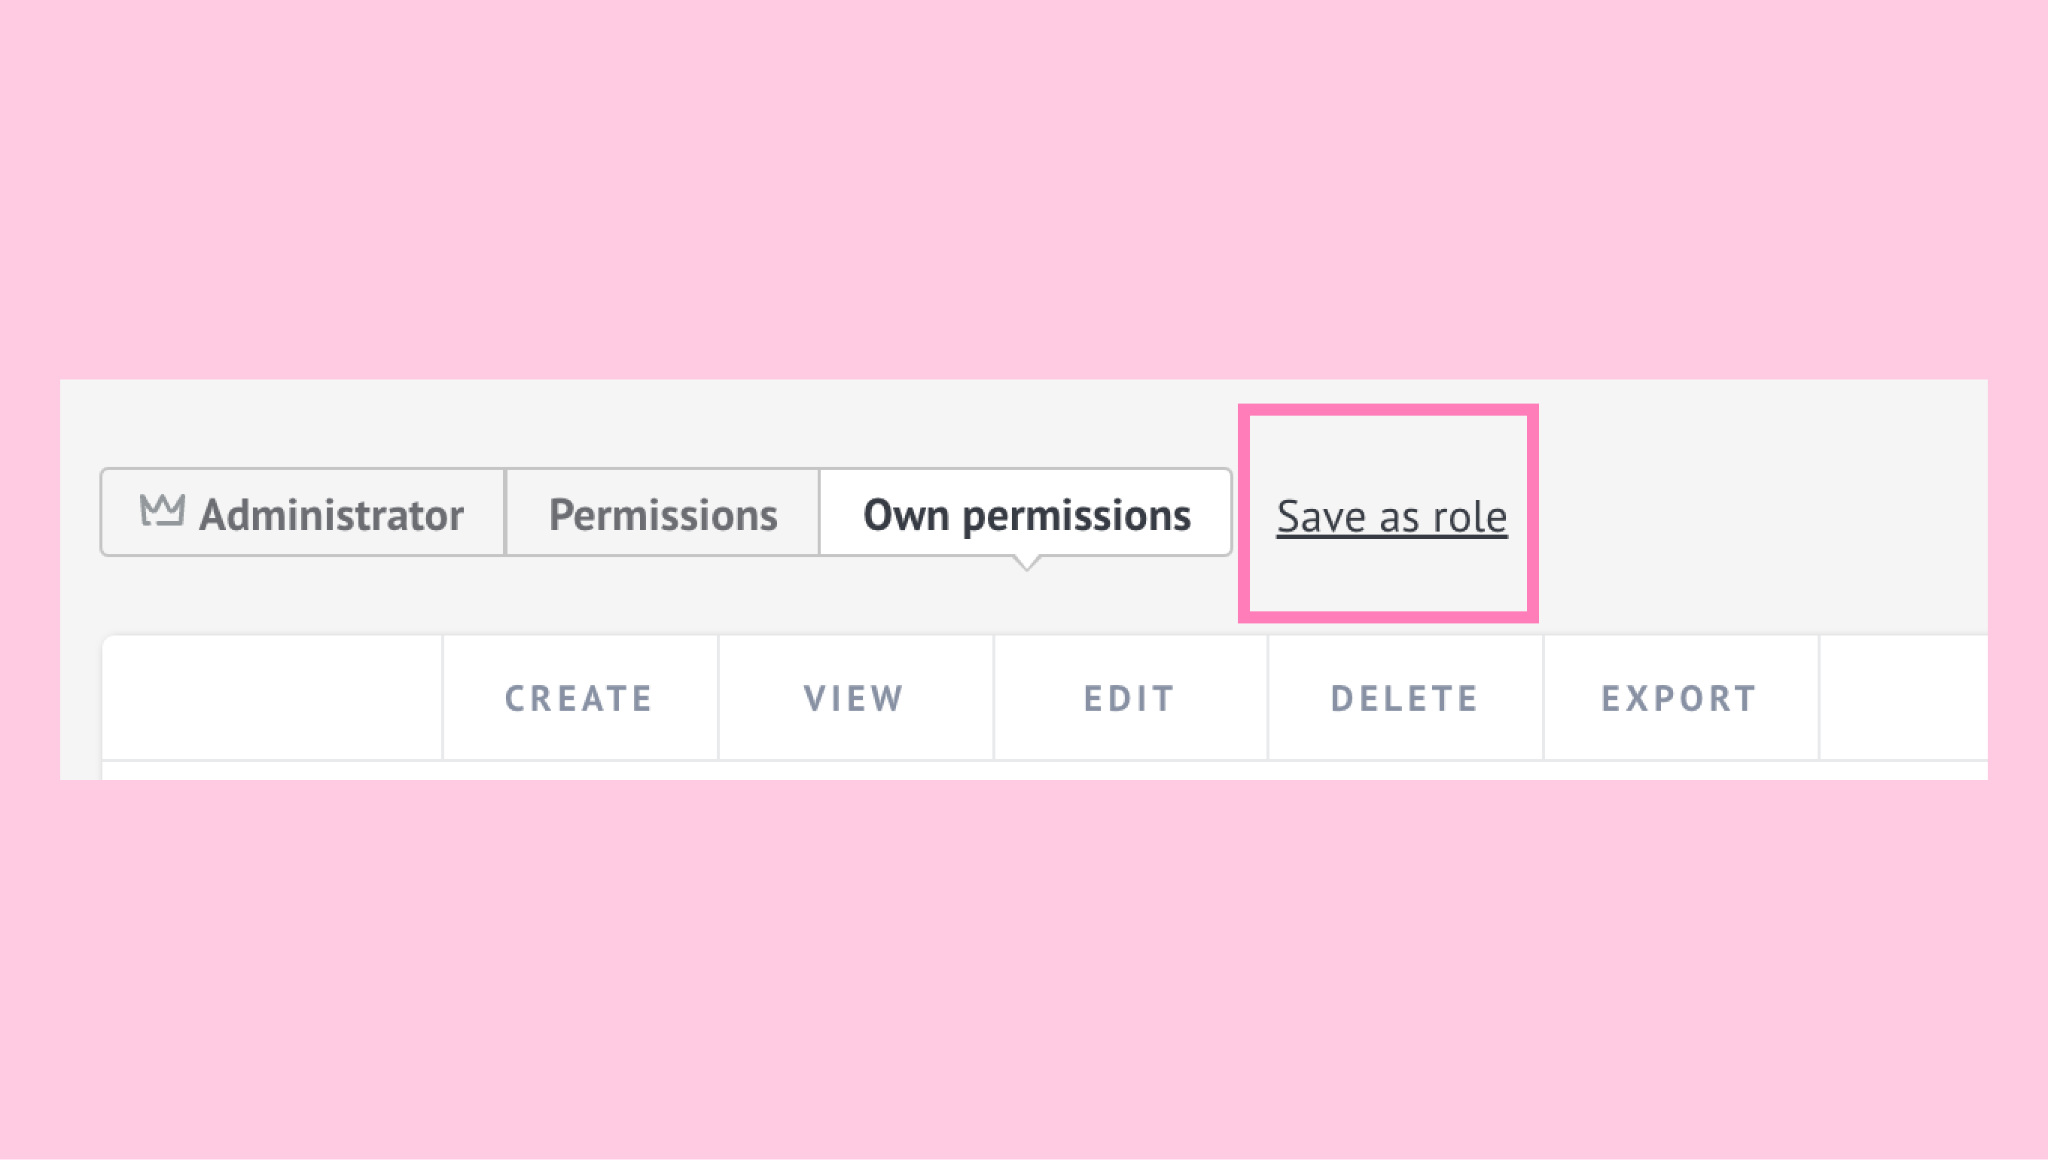
Save permissions as a role
Click Save as a role to store your settings as a reusable custom role. You can assign this role to other users or groups later.
Verify user access
After saving permissions, confirm that access works as expected:
Ask the user to log out and log back in
Have them open Pipelines, Chats, or other sections relevant to their role
Confirm they can see and perform only the actions you allowed
If something doesn’t look right, return to User management and adjust the permission colors.
If you need more help with setup or troubleshooting, feel free to reach out to our support chat or contact us via WhatsApp. You can also hire a Kommo partner to do all the hard work for you.
Not a user yet? Sign up for our 14-day free trial or book a free live demo.