What you’ll need:
Any Kommo plan (Base, Advanced, Pro, Enterprise, or a 14-day trial)
Administrator (Admin) access in Kommo
A valid email address for each new user
Keep in mind:
A user email can’t be used in more than one Kommo account
Disabled users move to the Inactive tab and can be reactivated anytime
Removing a user permanently deletes them after data reassignment
This guide explains how to add new users, disable inactive accounts, and remove users from your Kommo workspace. Use these steps to keep your seat allocation accurate and up to date.
Add a new user
Use this option to give a new team member access to your workspace:
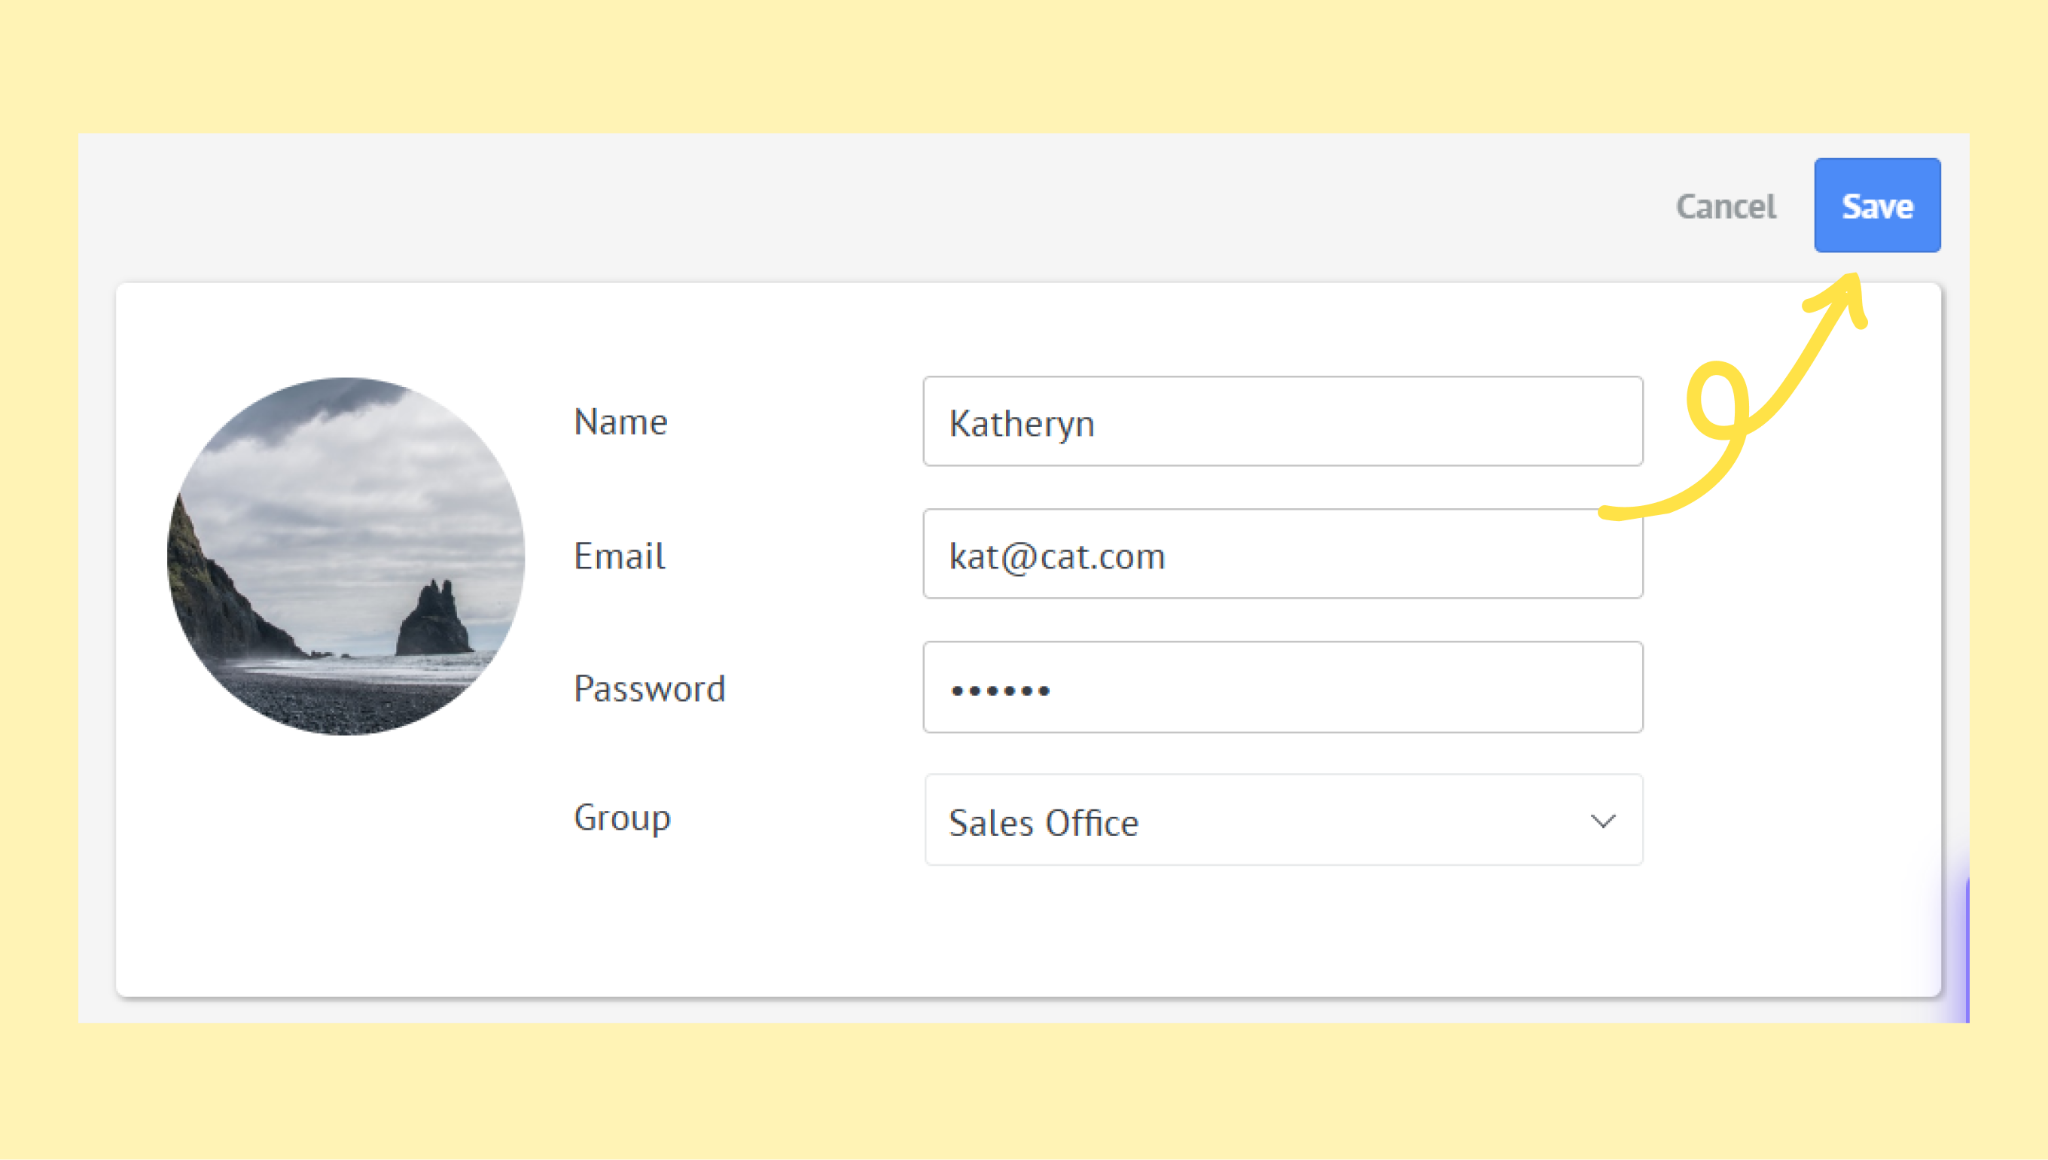
Go to Settings → User management. Click Add user in the top-right corner.
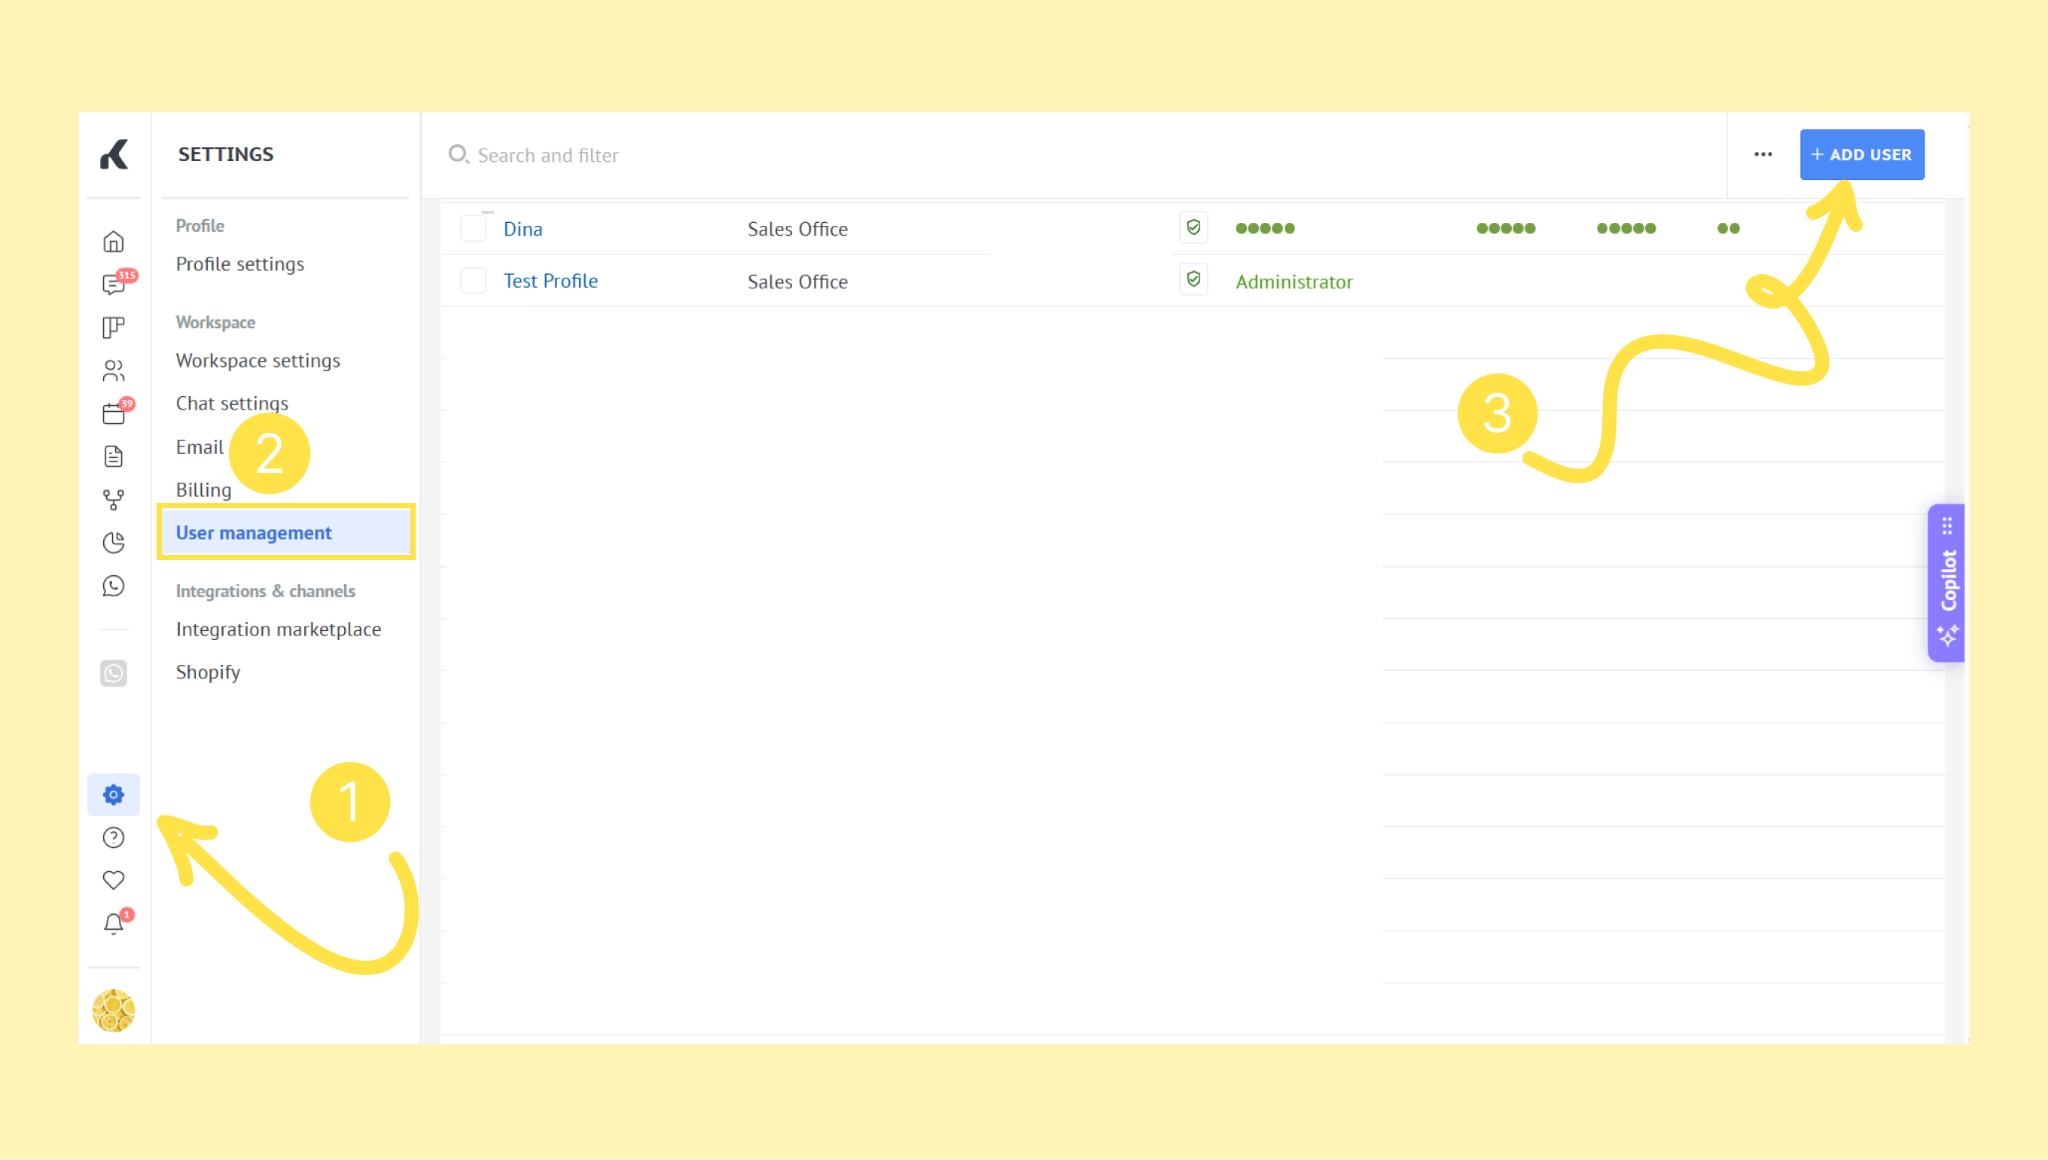
Enter the user’s name, email, and password. Assign a group and set user permissions. Click Save.
Note: When a user is disabled, their leads, contacts, customers, and tasks can be reassigned to another active user. Conversation history and notes remain in the system.
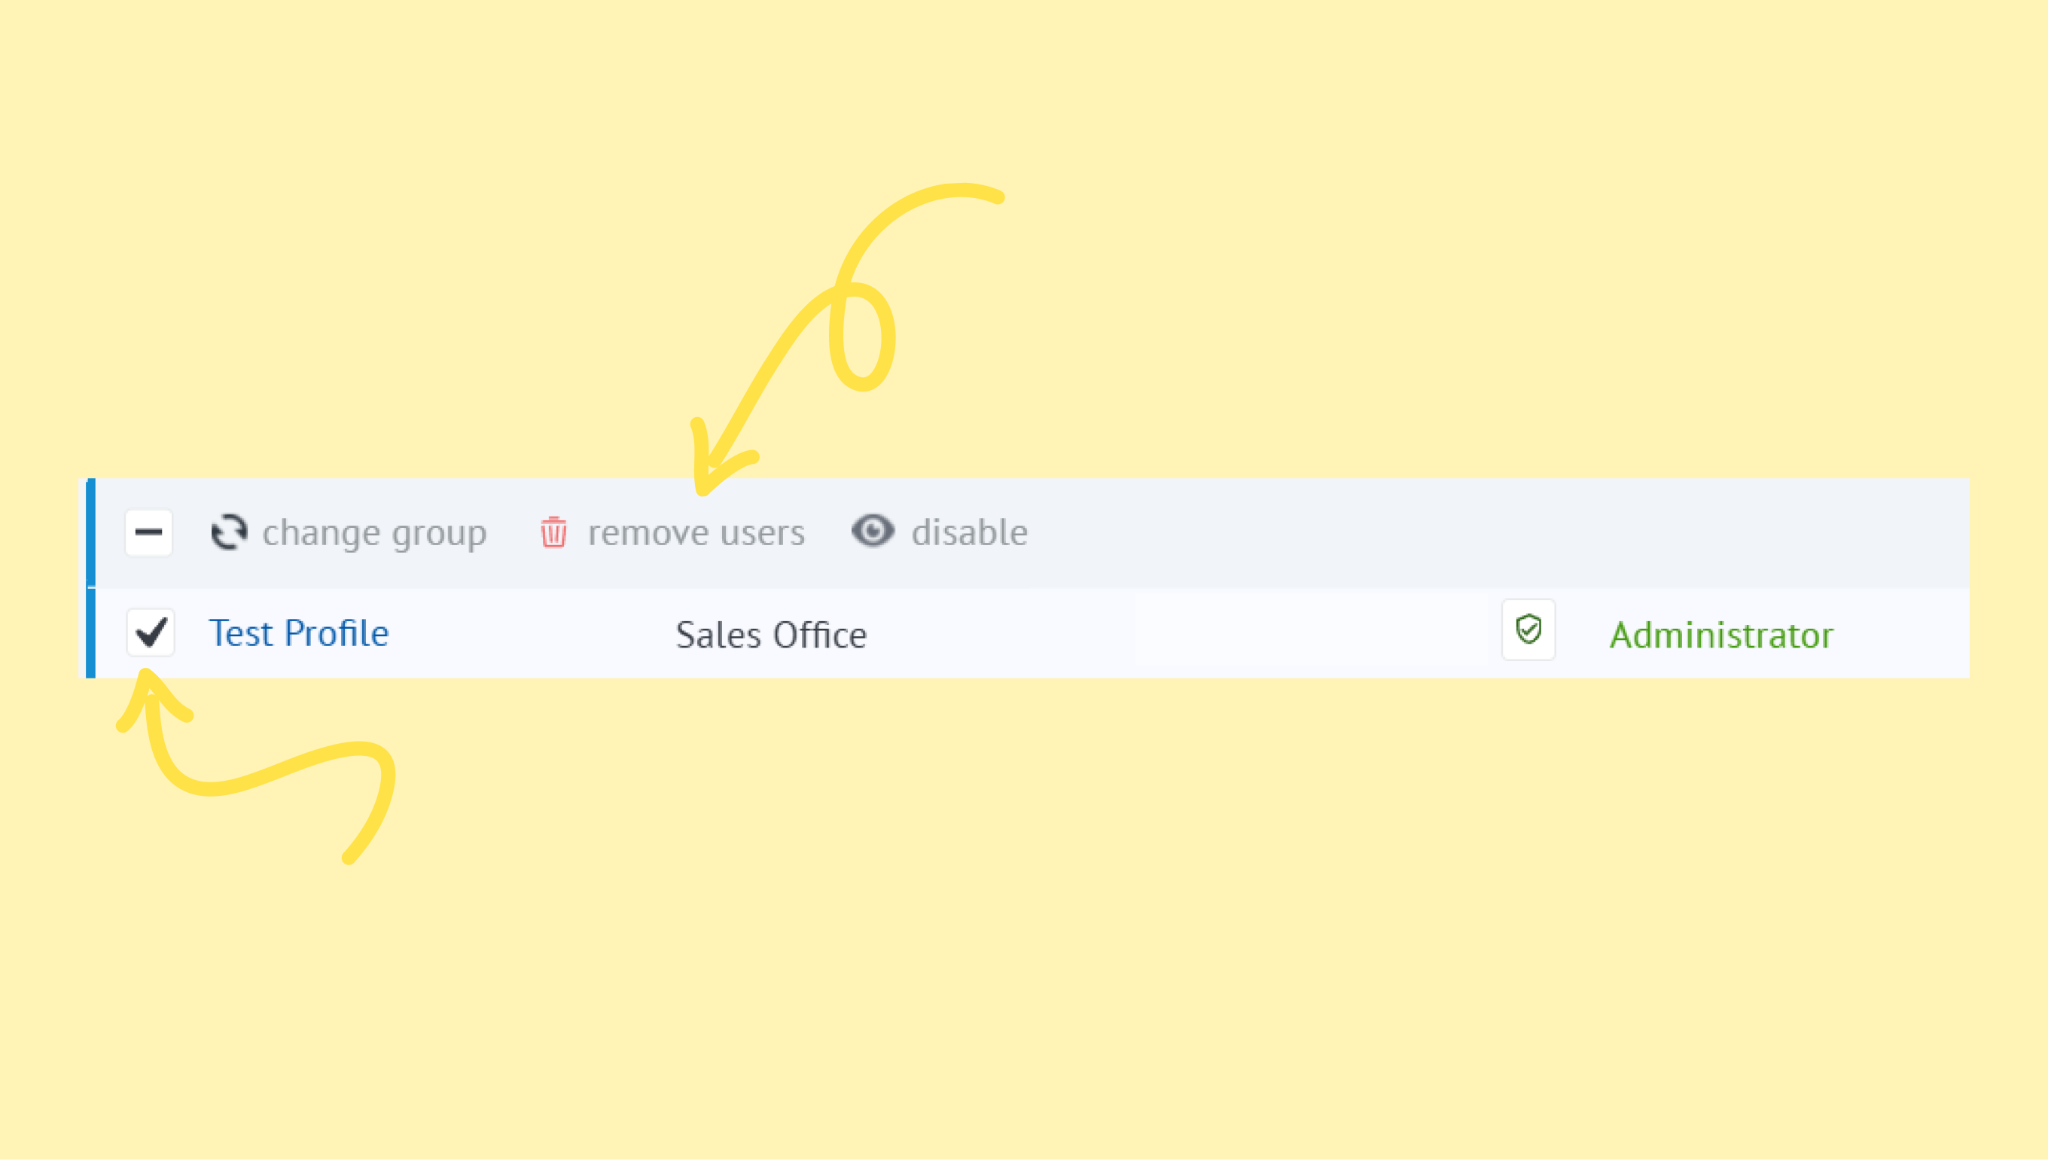
Disable a user
Disable users who no longer need active access but may return later.
Important: Disabling or removing a user does not automatically reduce billing. Your subscription is based on the number of seats in your plan. To change billing after disabling users, review your subscription in Billing or contact Kommo support for recalculation.
Go to Settings → User management.
Select the user using the checkbox. Click Disable.
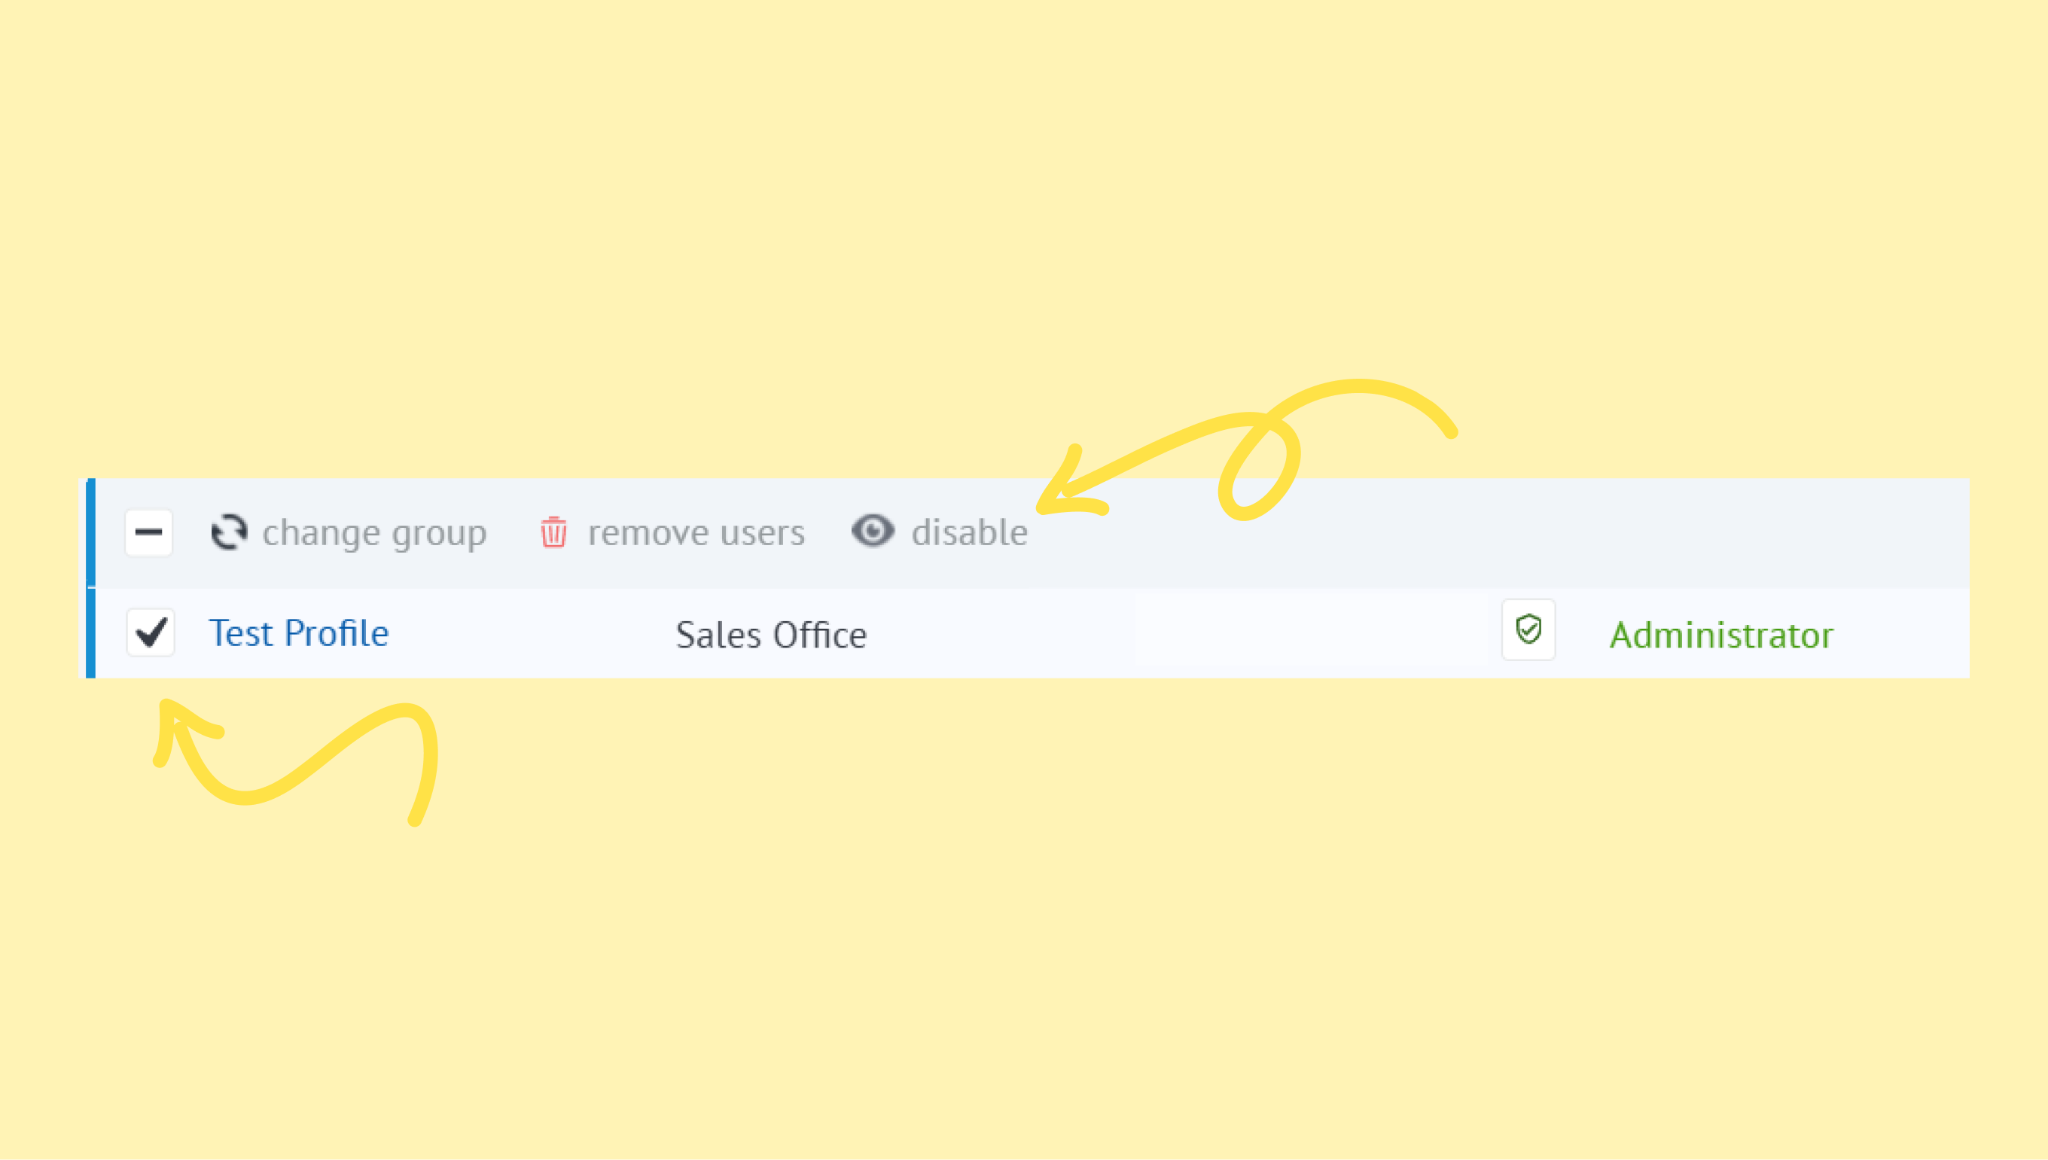
Reassign the user’s data (leads, contacts, tasks and their conversation history) to another active user (optional). Click Save.

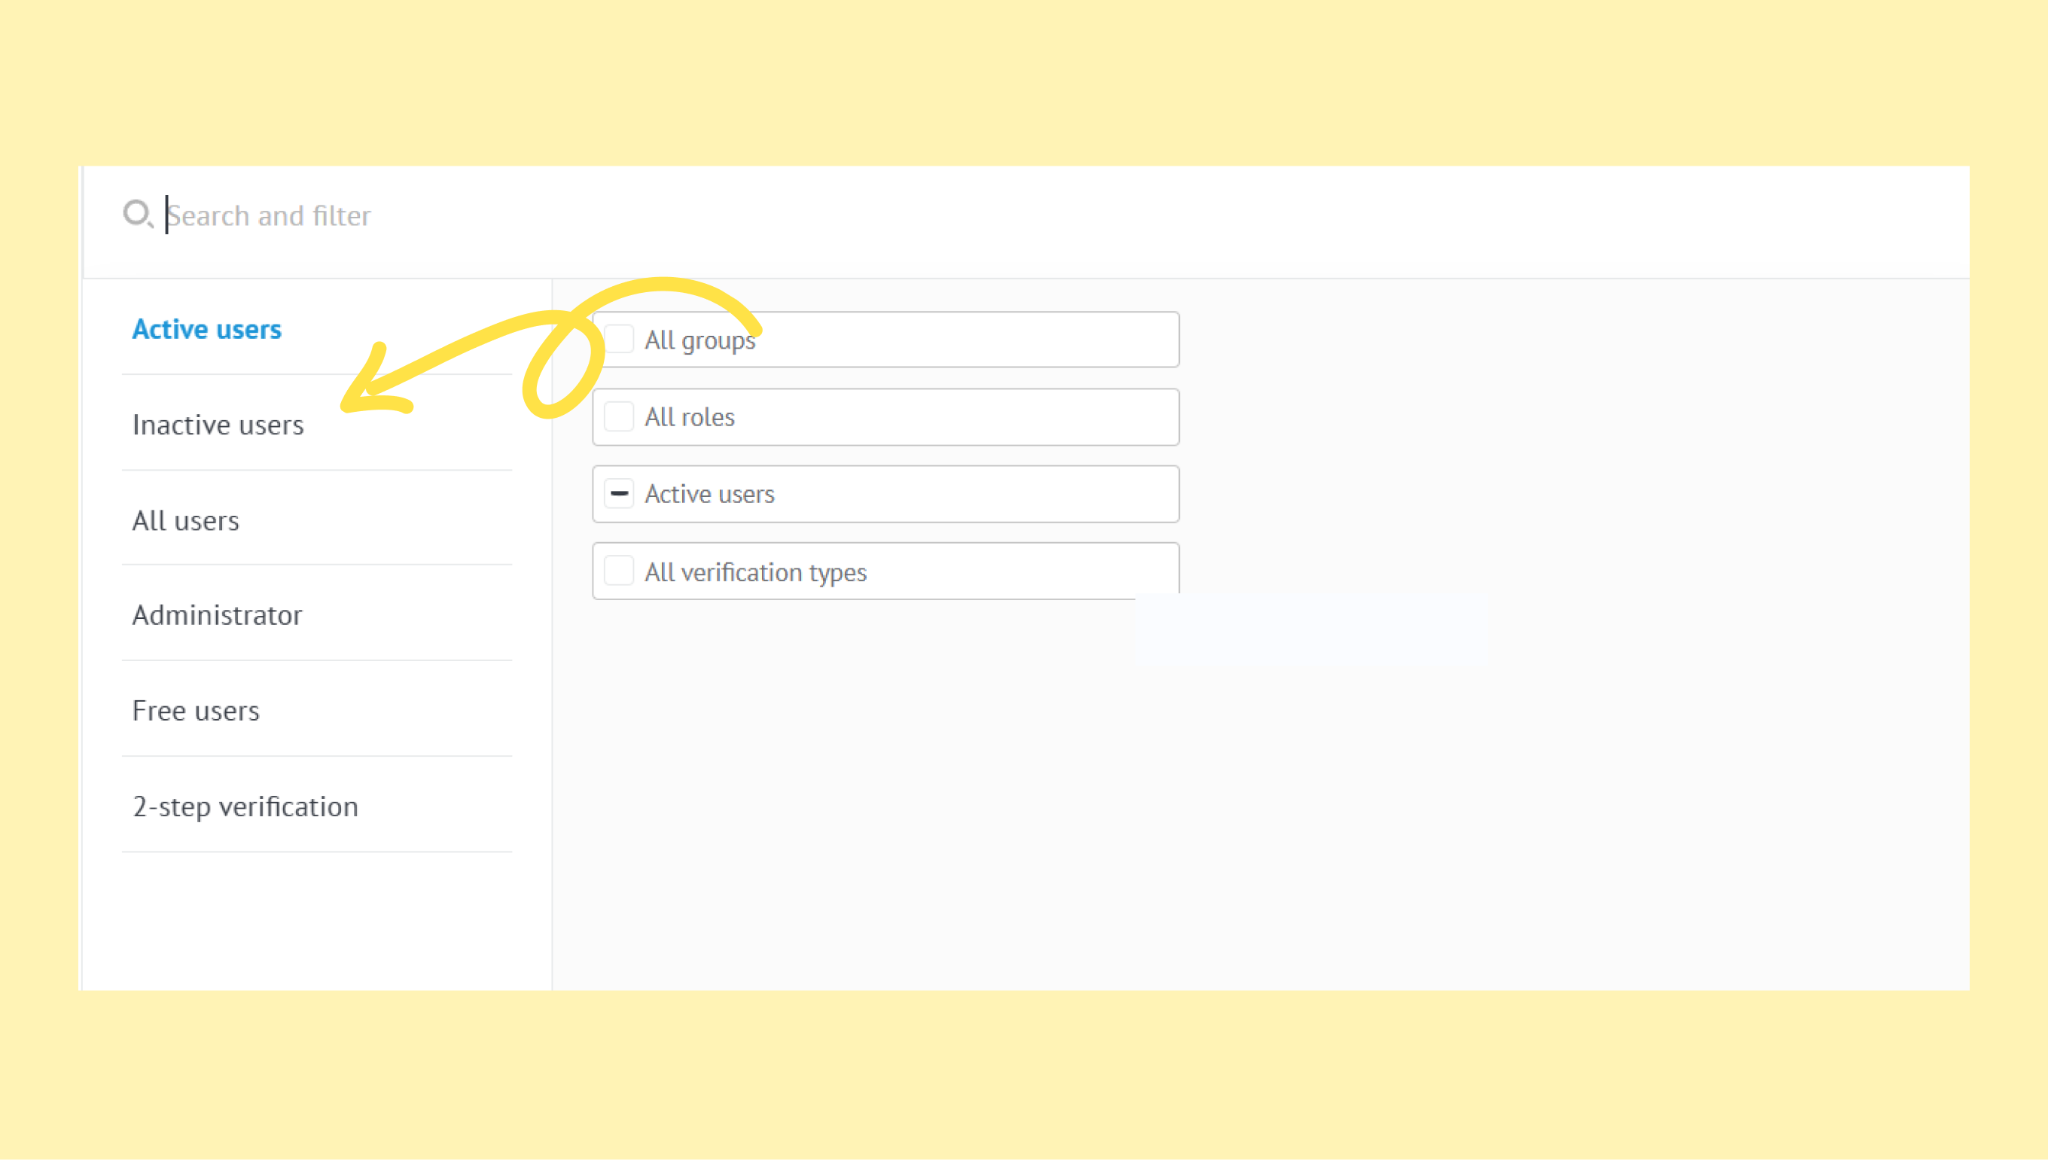
The user will move to the Inactive tab (available via Search and filter).
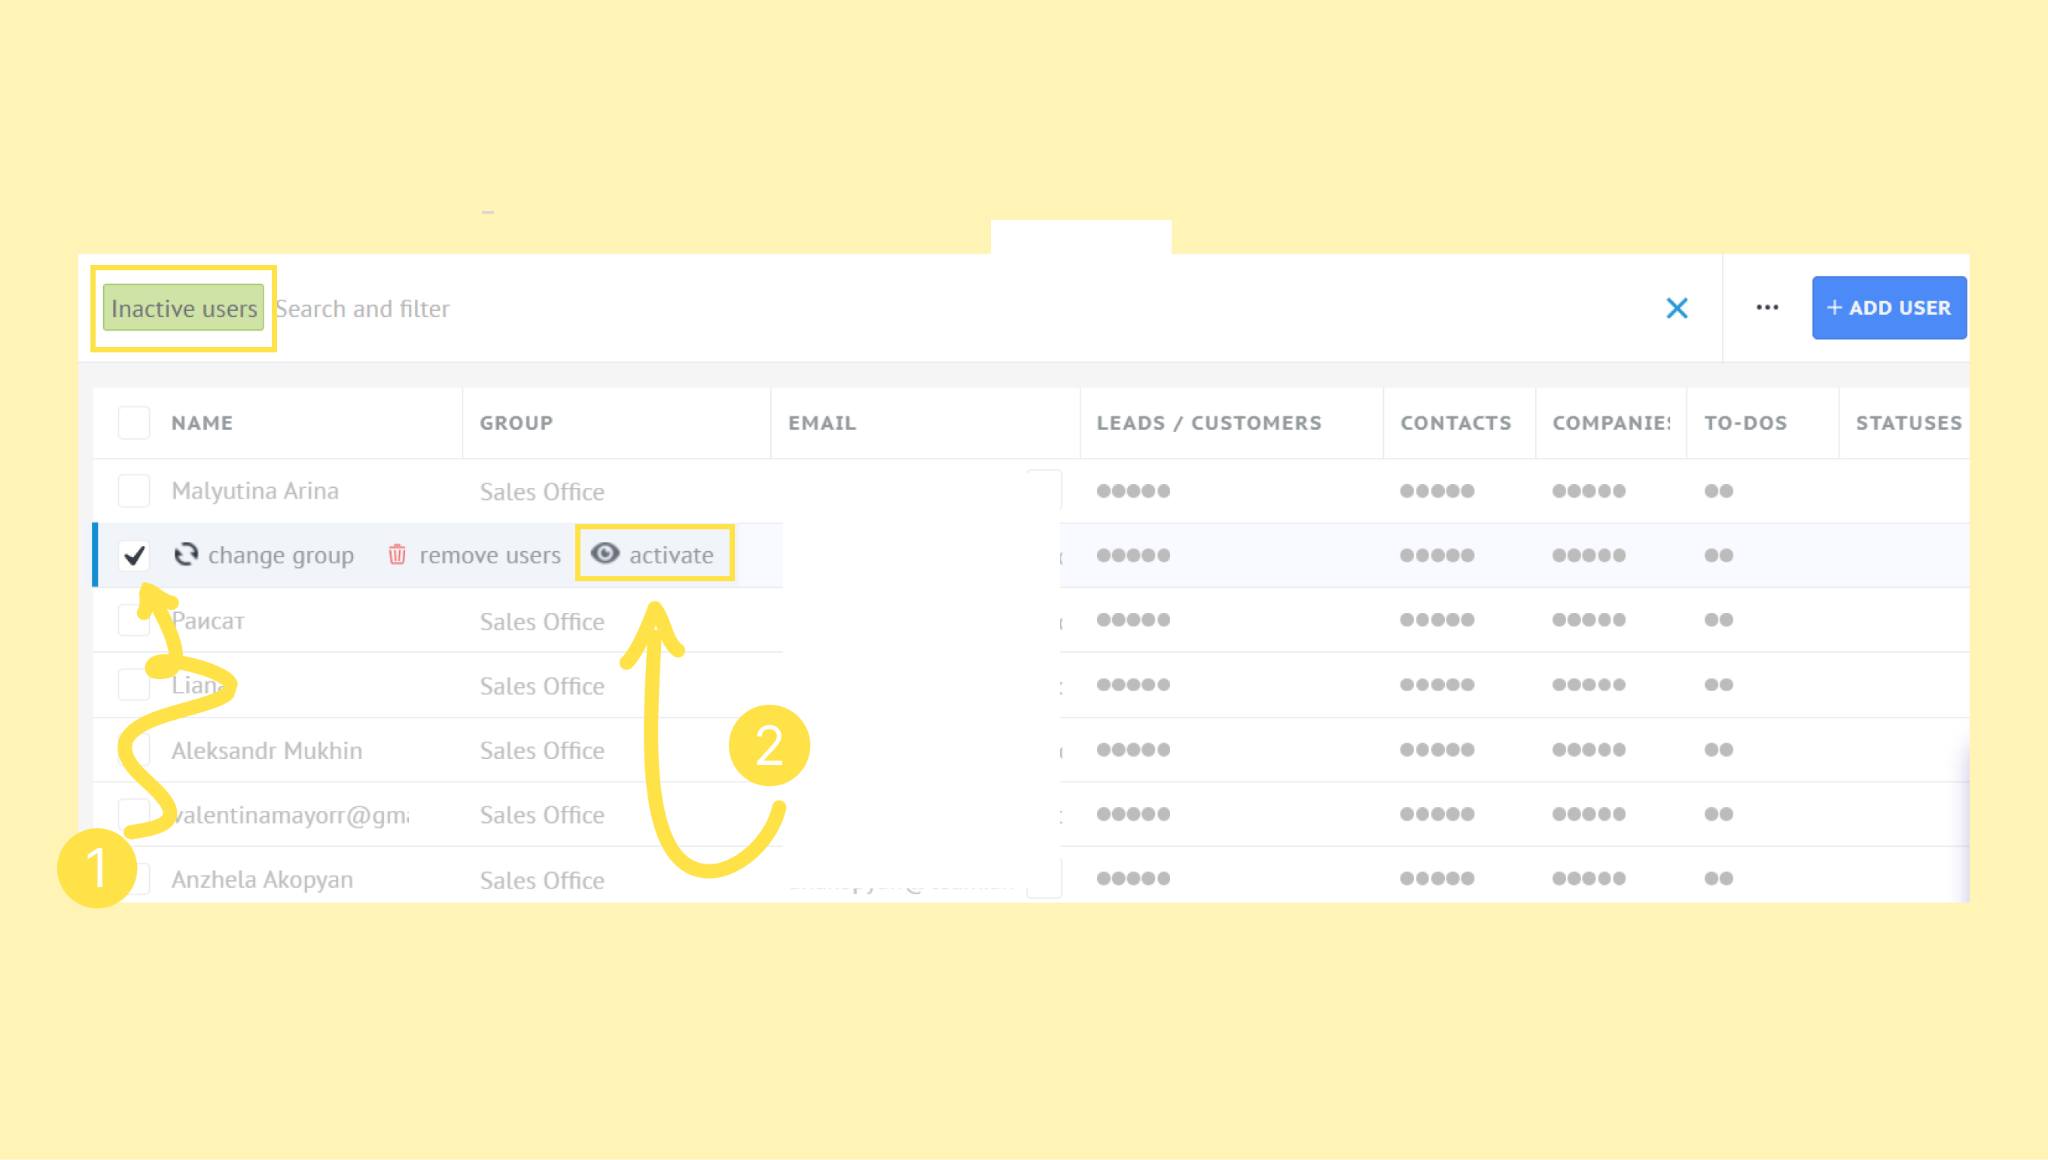
Reactivate a disabled user
Bring back access for users who were previously disabled:
Go to Settings → User management.
Open the Inactive tab using Search and filter.
Select the user and click Activate.
Remove a user
Permanently remove a user who no longer needs access:
Go to Settings → User management. Select the user using the checkbox. Click Remove users.
Reassign all user data to another active user.
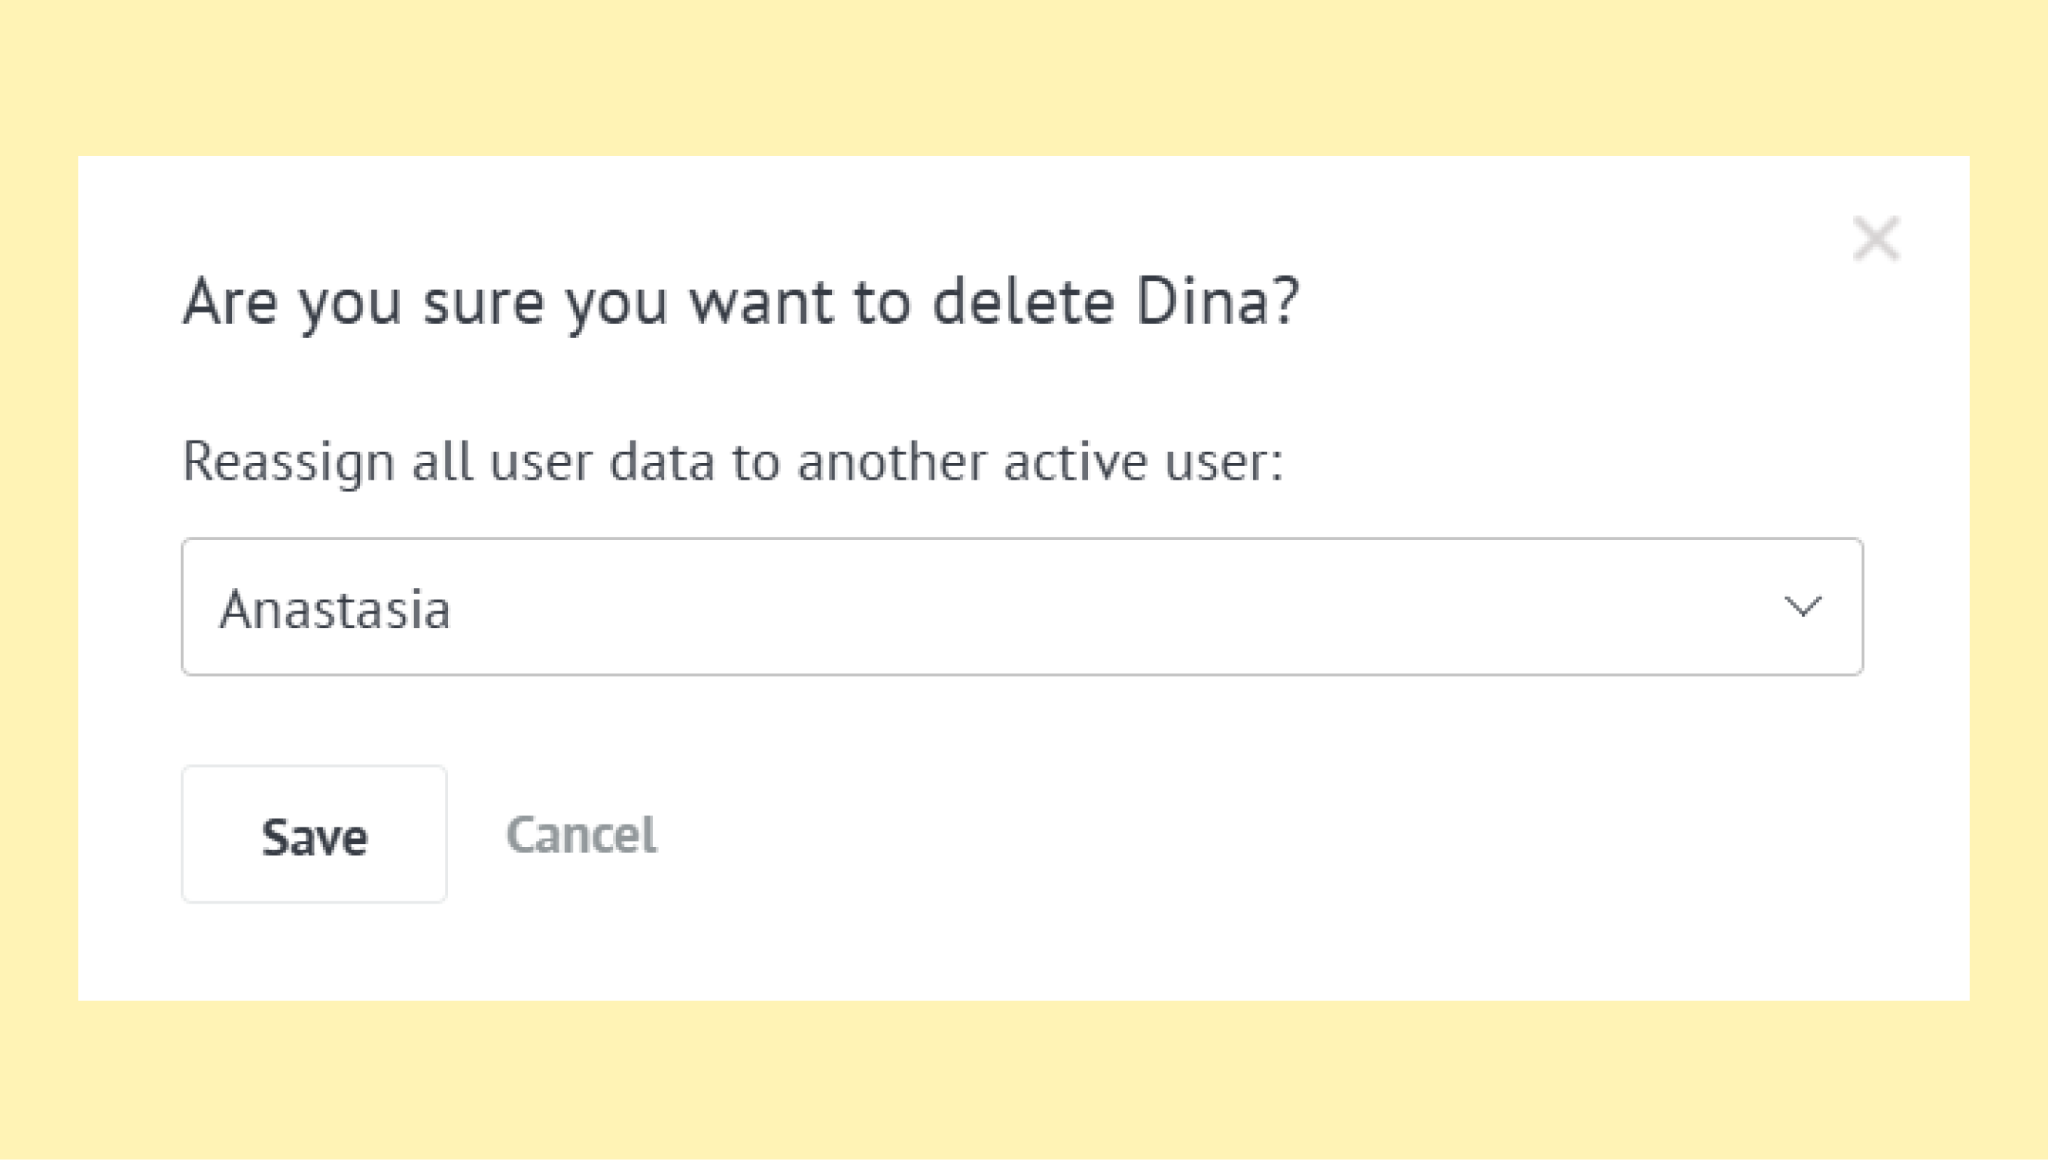
The user will be permanently removed from your workspace.
Verify seat updates and billing impact
After adding, disabling, or removing a user, confirm both access and billing:
User status
New users appear as Active
Disabled users appear in the Inactive tab
Removed users no longer appear in any list
Billing
Adding a user increases the number of active seats and may create a billing change
Disabling a user frees up a seat but does not automatically change your subscription
Removing a user also frees a seat, but billing updates depend on your plan and billing cycle
To review or adjust billing:
If you need more help with setup or troubleshooting, feel free to reach out to our support chat or contact us via WhatsApp. You can also hire a Kommo partner to do all the hard work for you.
Not a user yet? Sign up for our 14-day free trial or book a free live demo.