What you’ll need:
Any Kommo plan (Base, Advanced, Pro, Enterprise, or 14-day trial).
Keep in mind:
Only users with the Admin role can create new task types.
In Kommo, tasks help organize your work. You can create tasks, assign responsible users, set deadlines, and track progress to ensure everything gets done on time.
Add a new task type
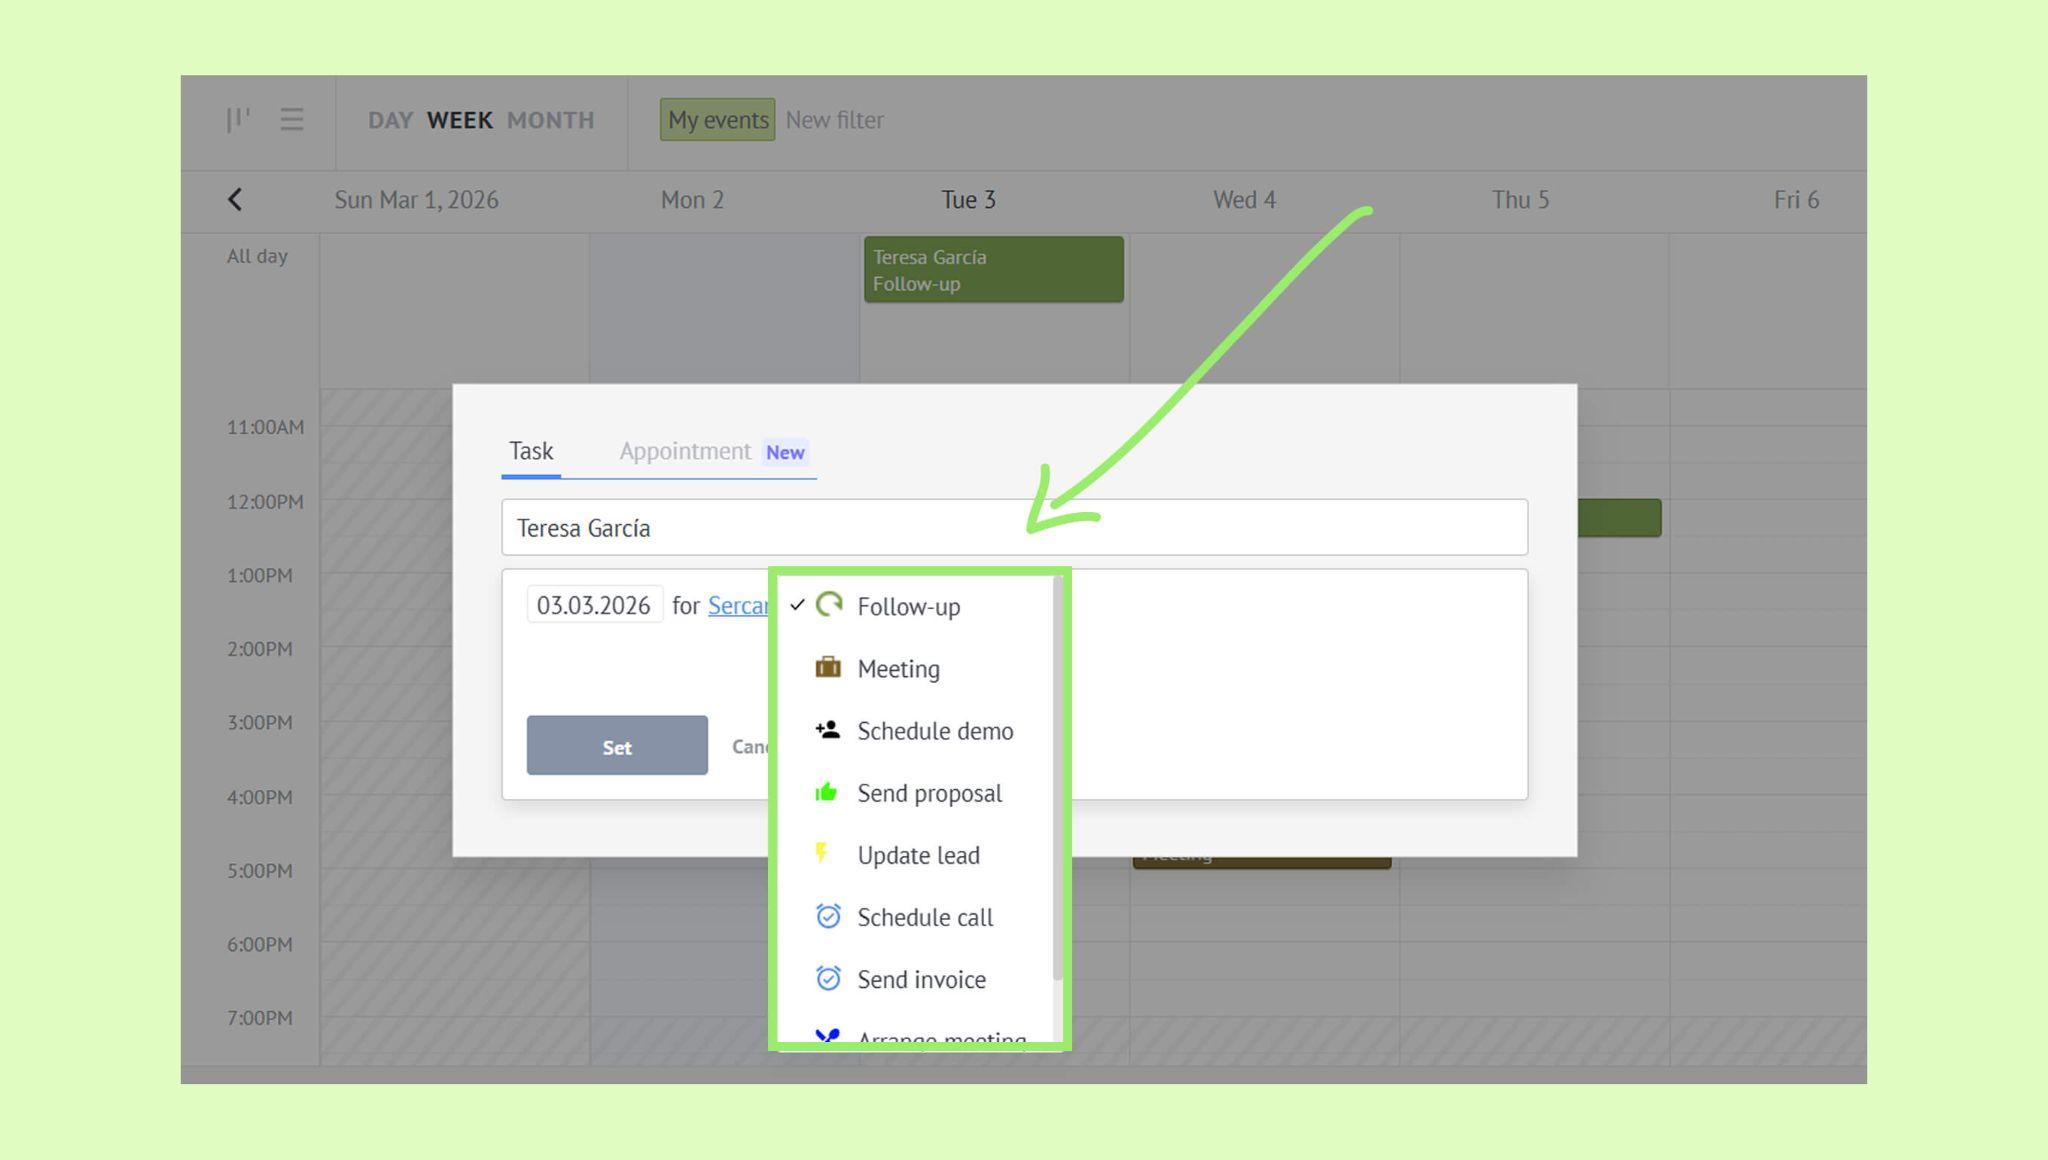
By default, Kommo includes two task types: Follow-up and Meeting. You can also create custom task types to match your workflow. To add a new task type:
Go to Calendar → … → Manage event types.

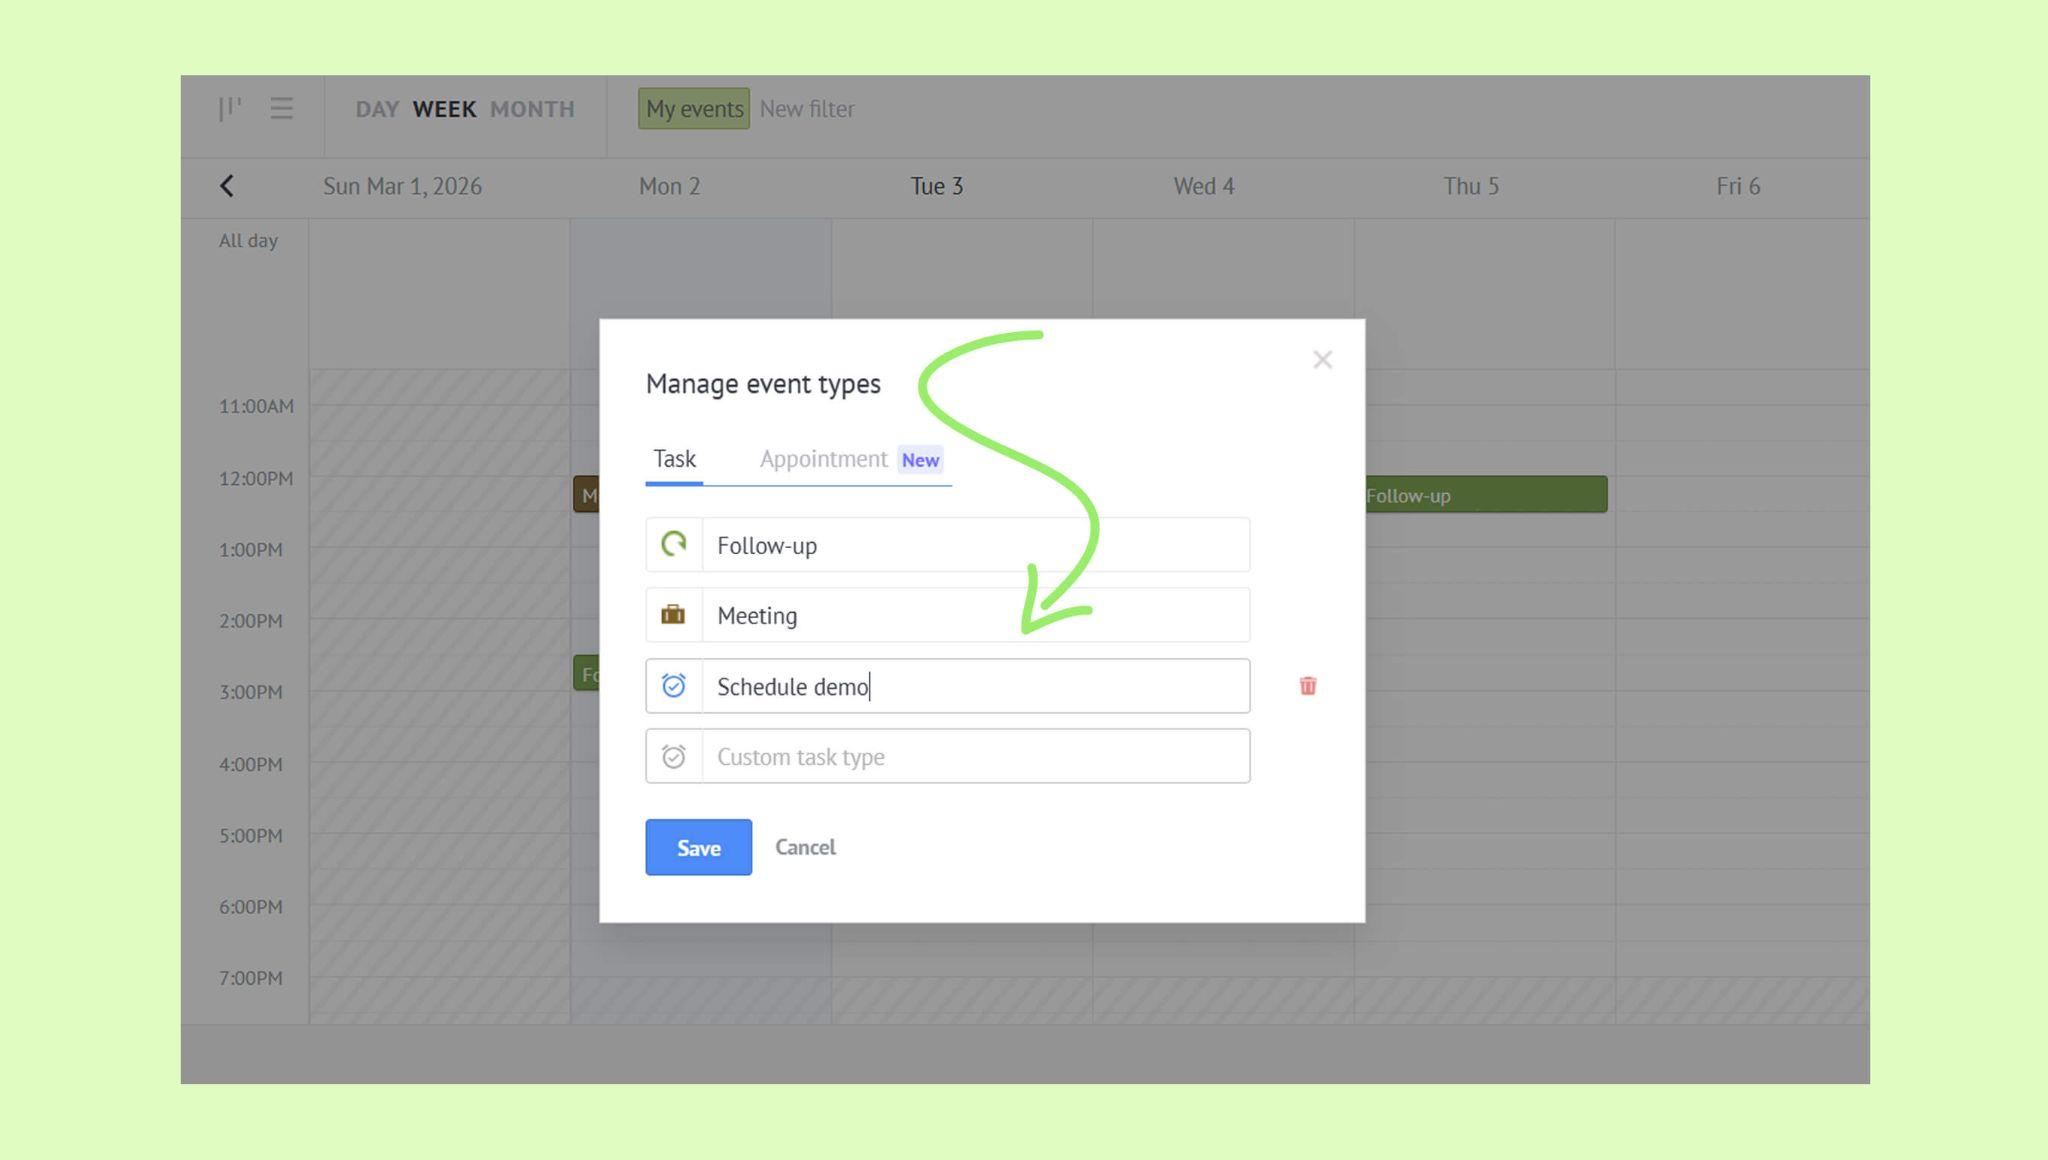
Click the Custom task type field.
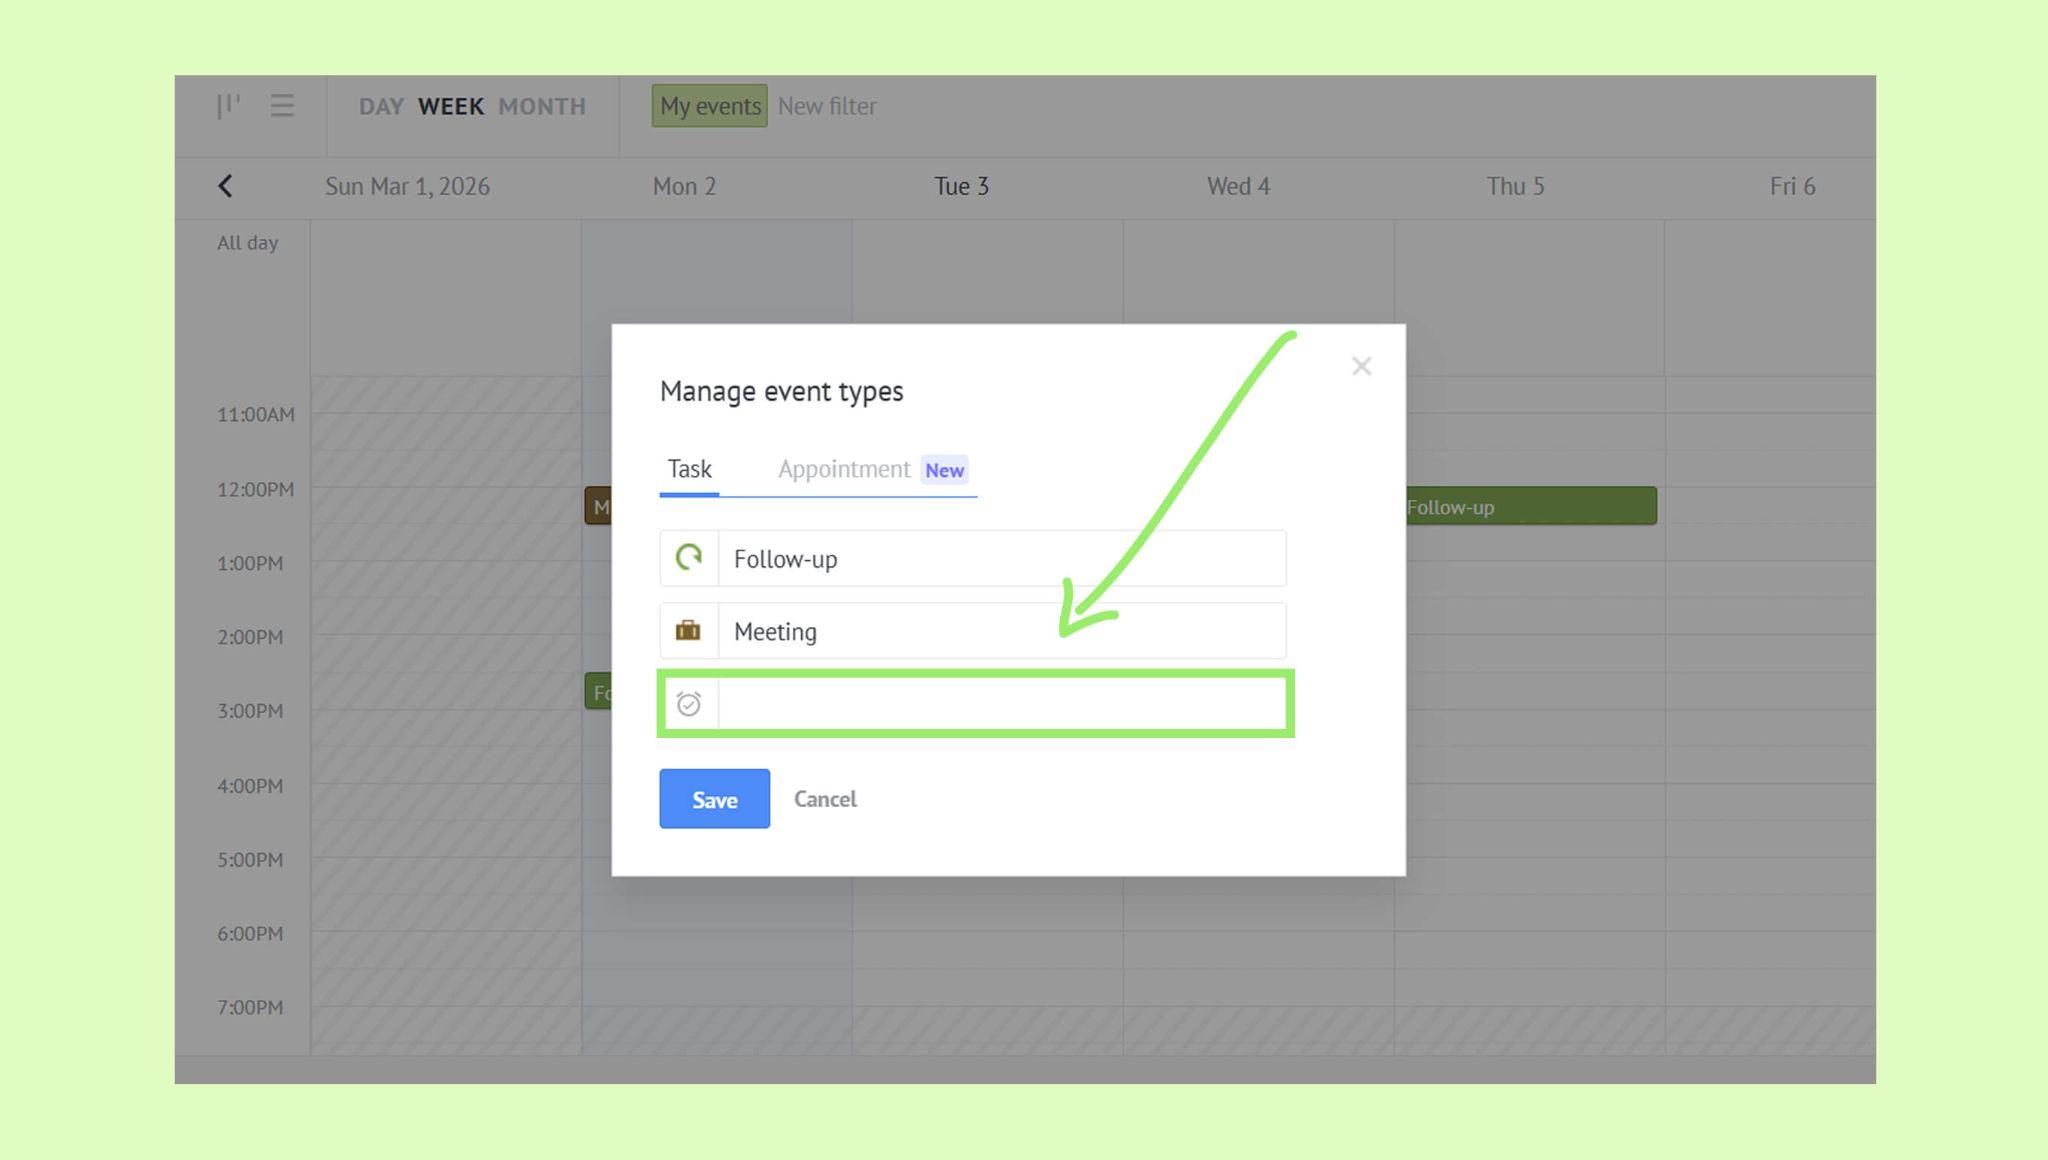
Enter a name for the task type.
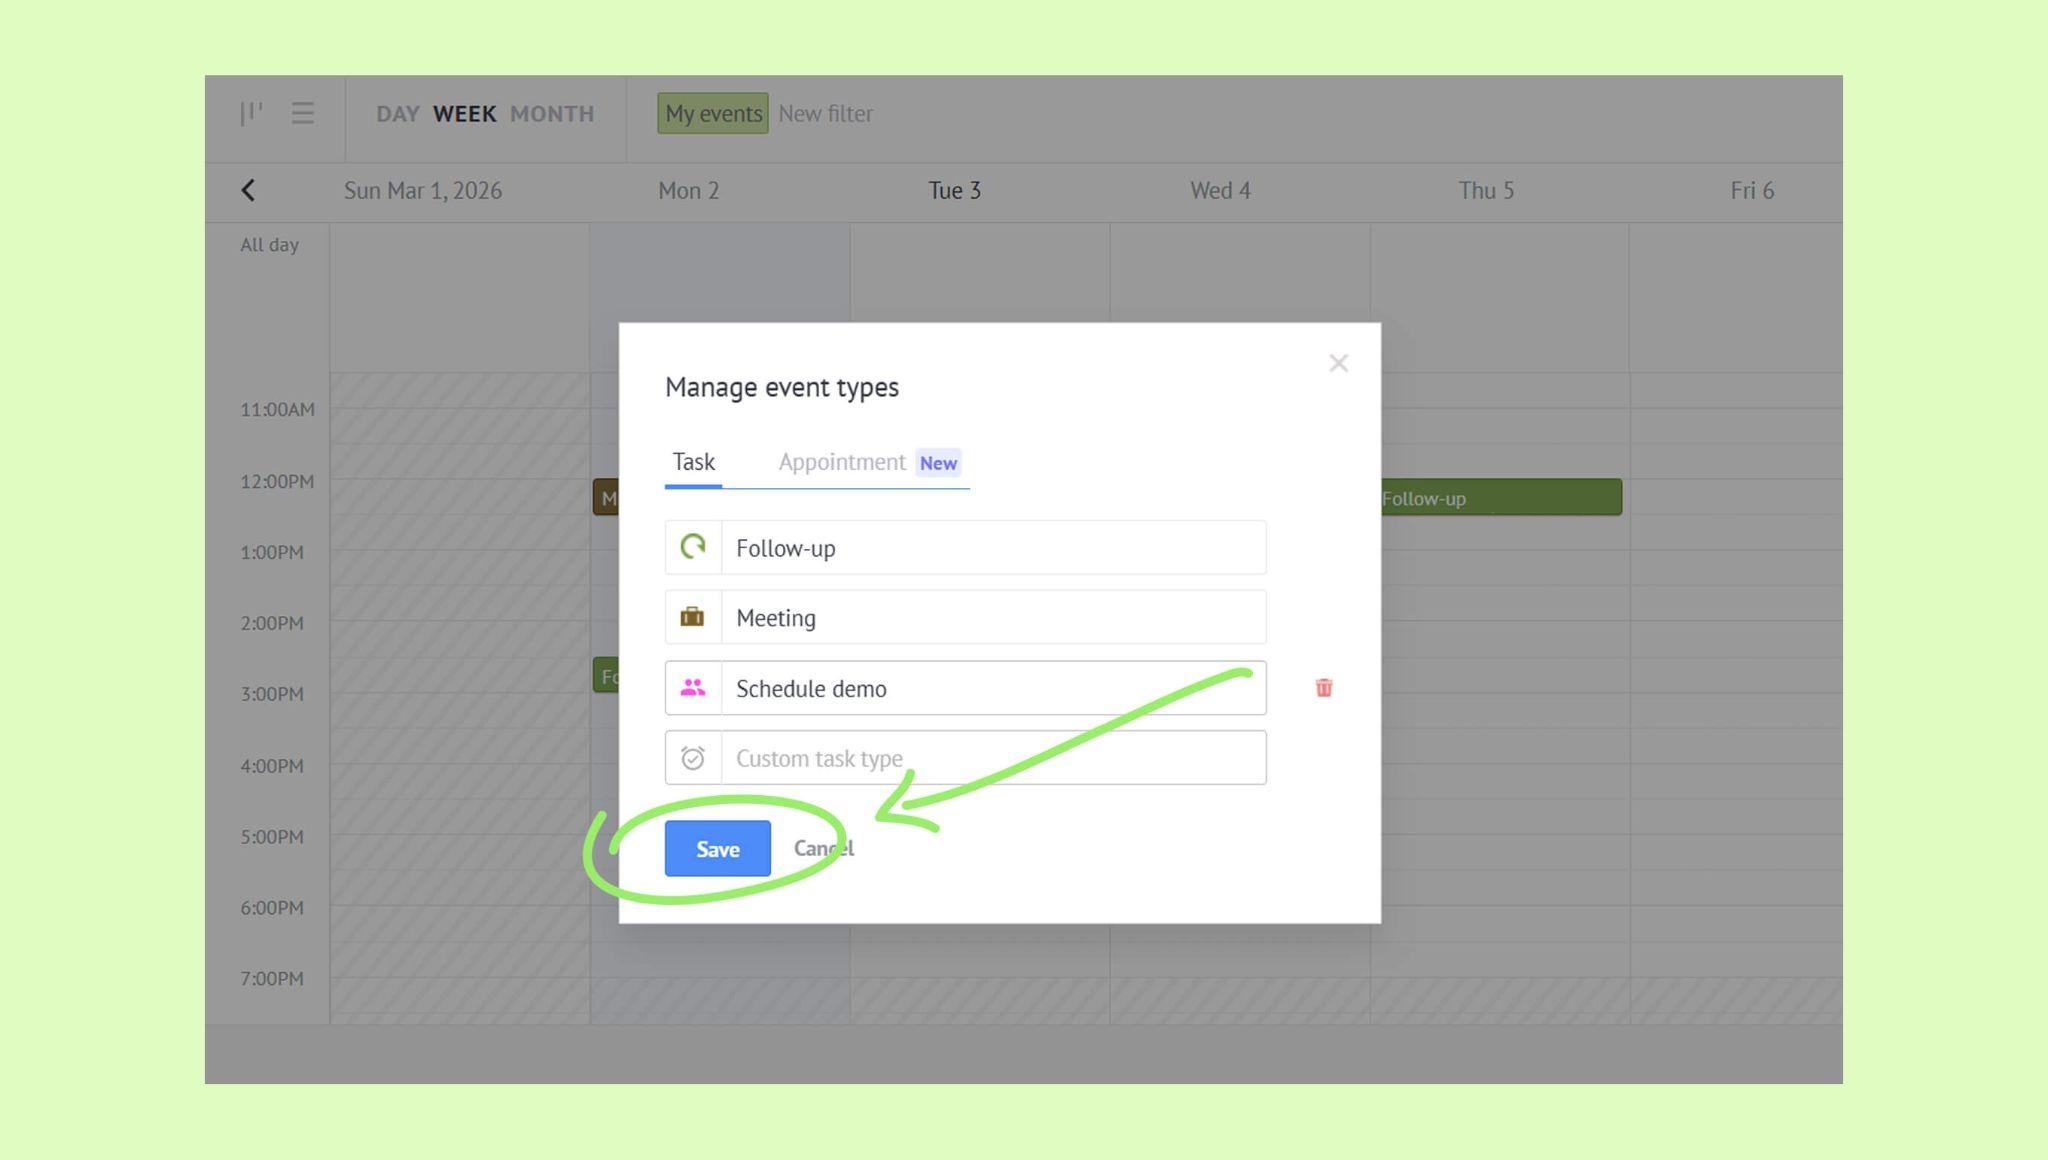
Click Save.
Create a task manually
You can create tasks in several ways. Below are two common options: from the calendar and from a lead card.
Create a task from the calendar
Go to Calendar → New event. The Task tab will open.

Select a lead or contact.
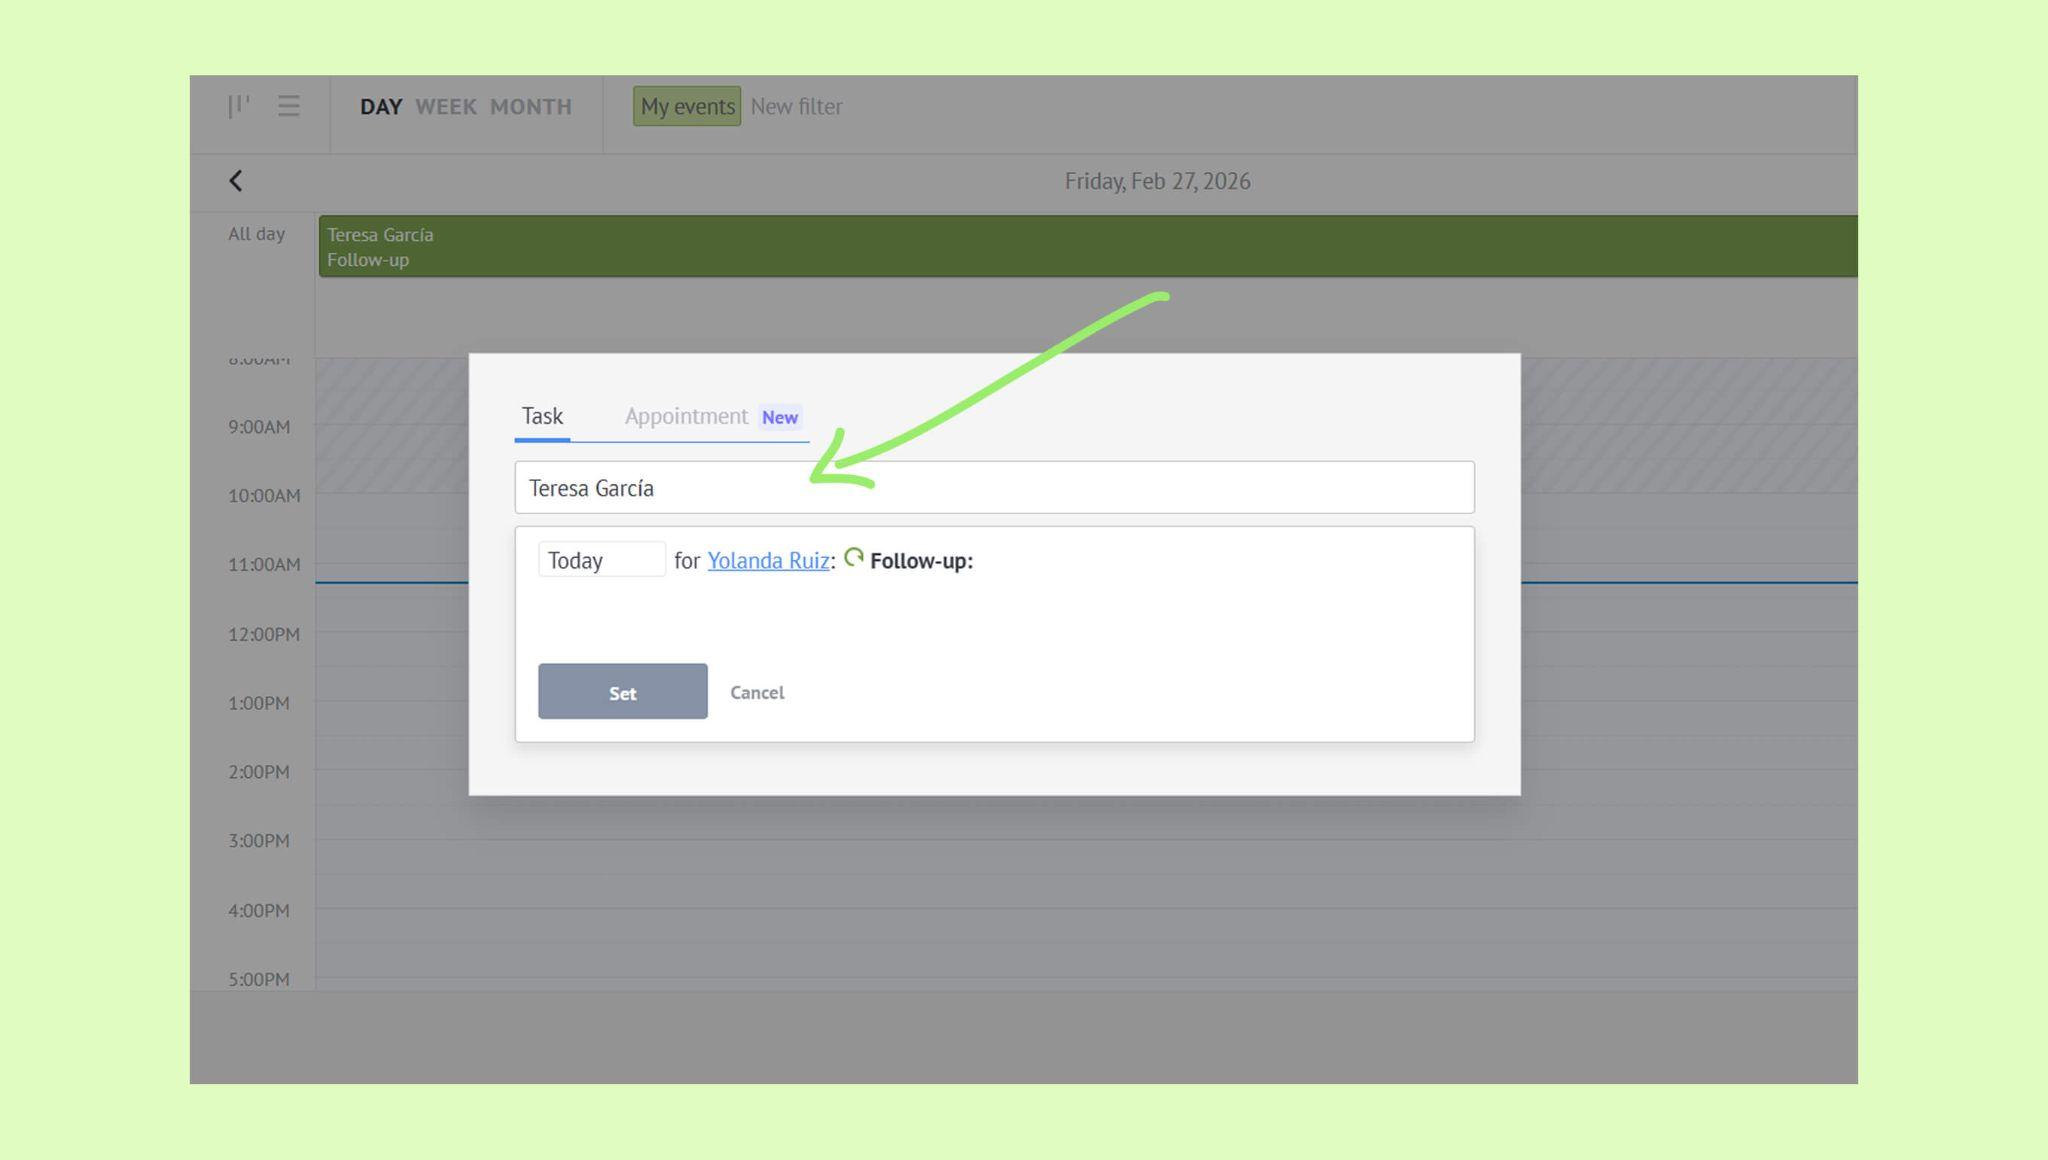
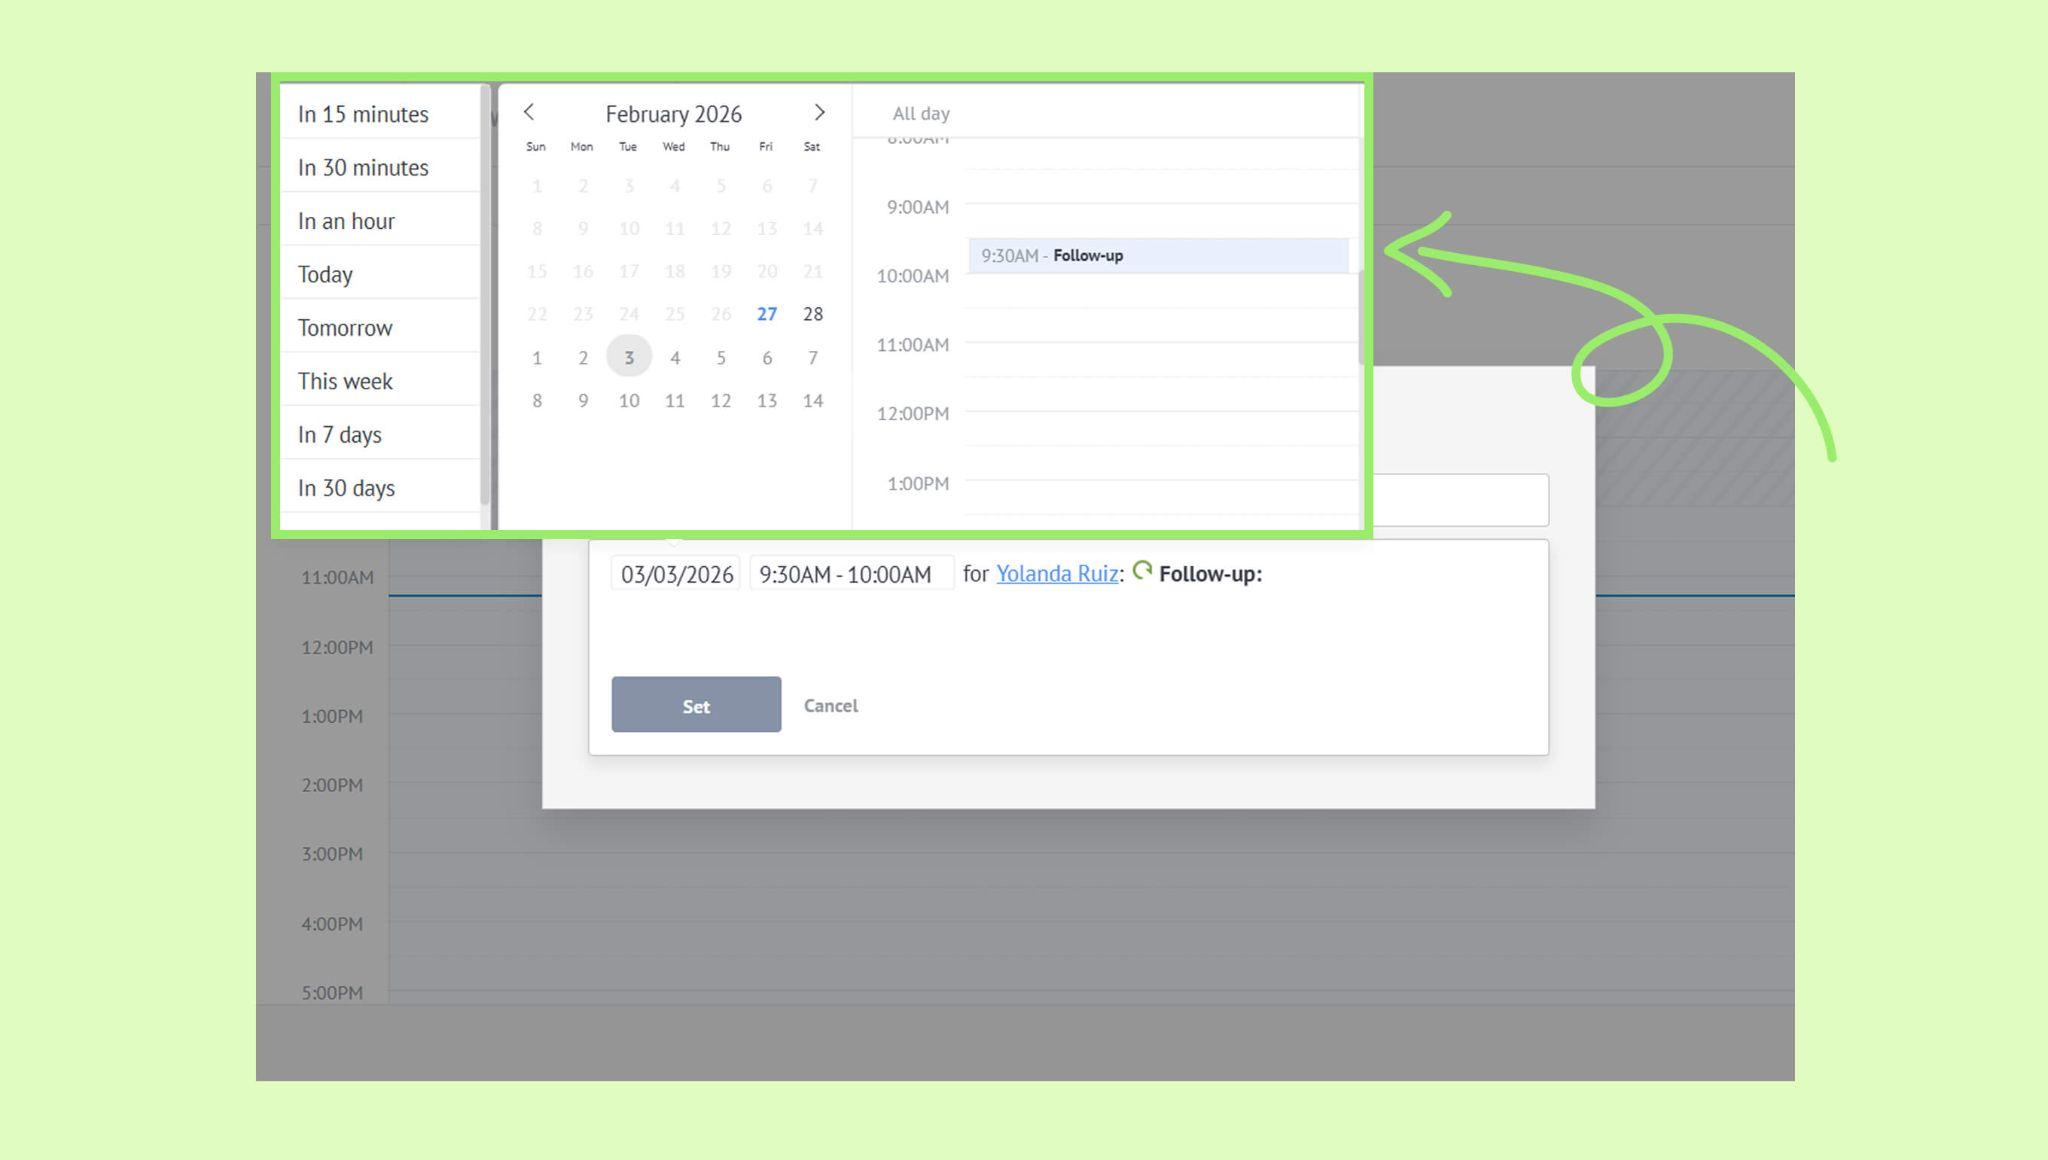
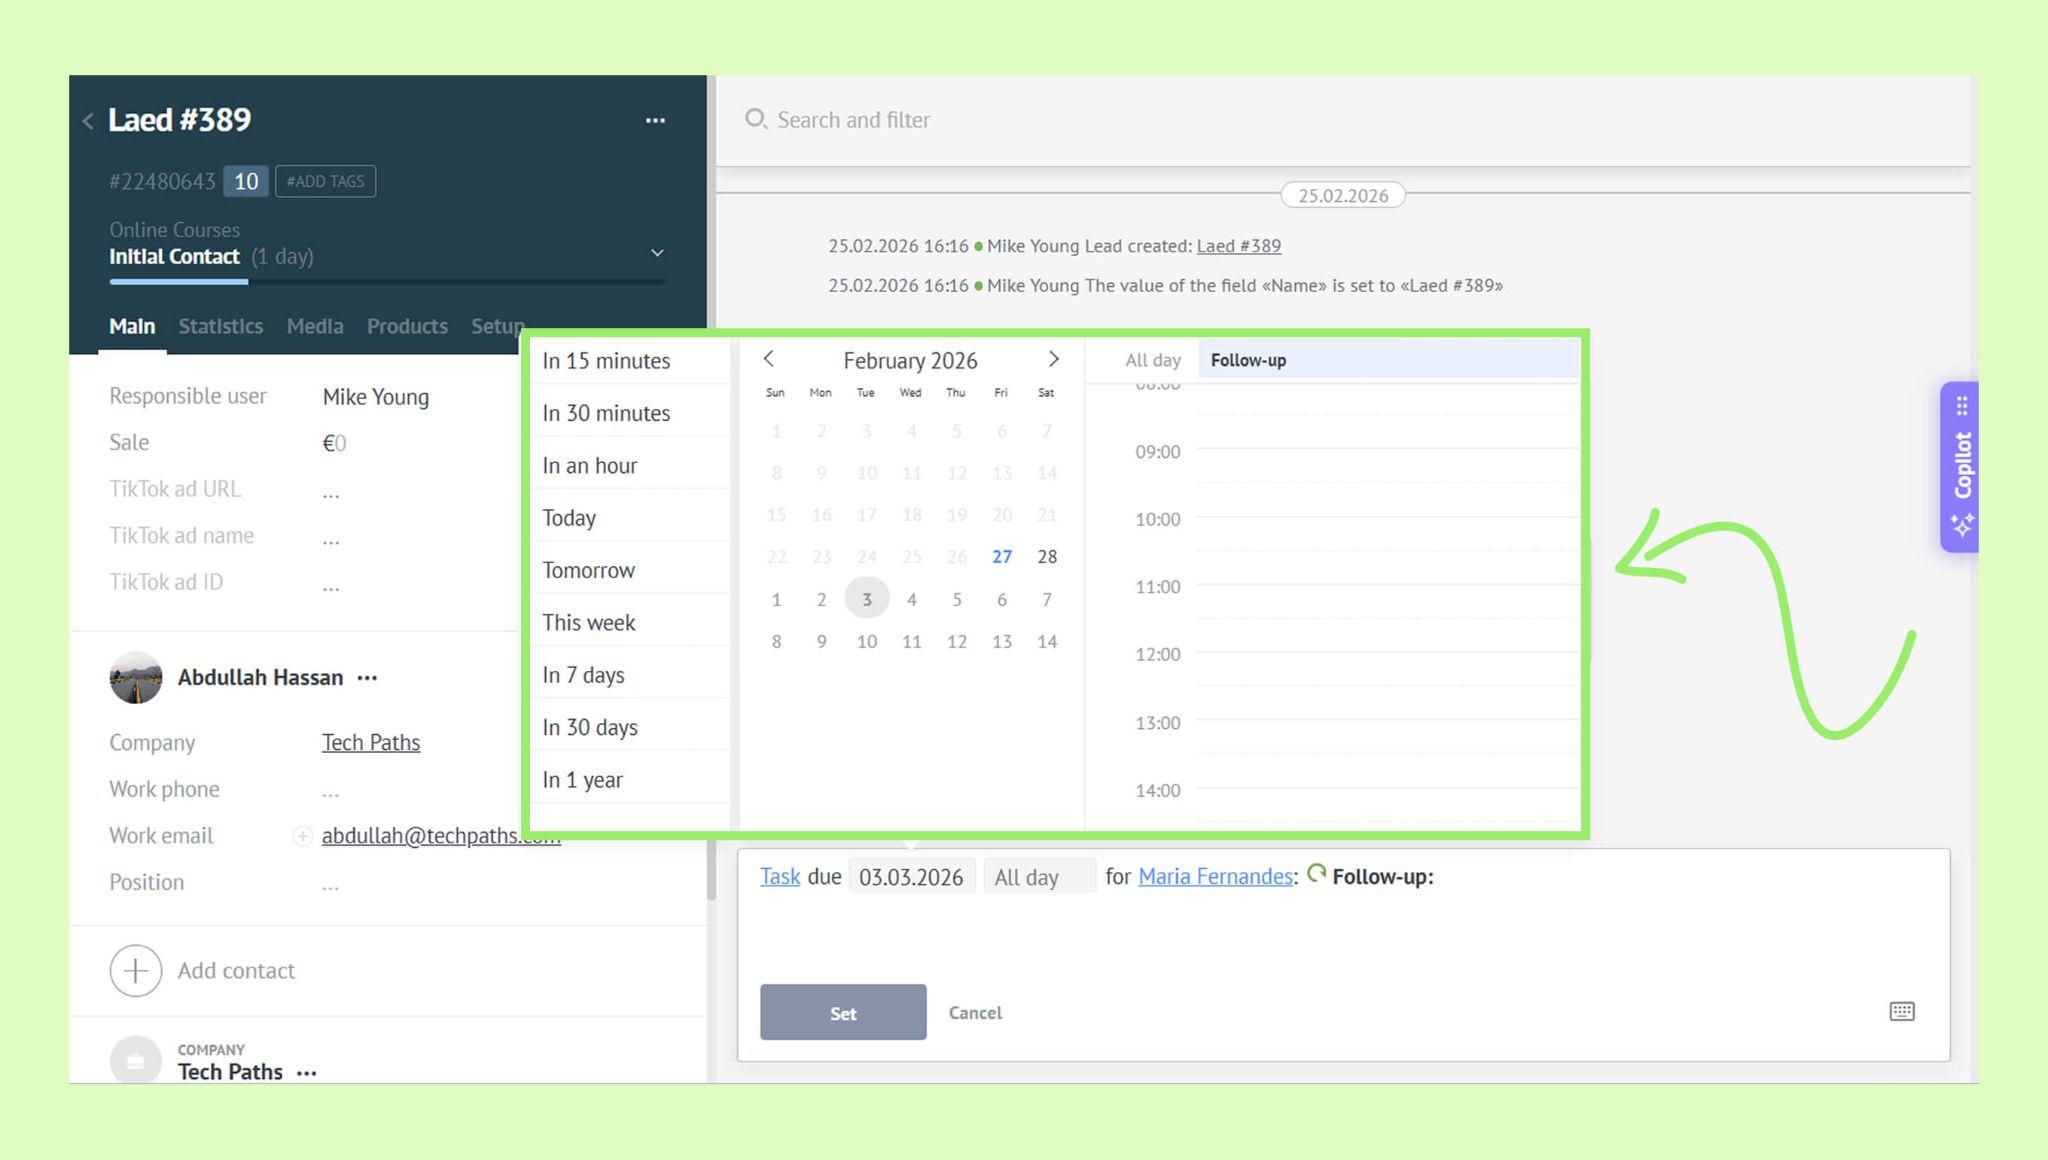
Set the deadline.
You can choose a pre-set deadline - In an hour, Today, Tomorrow, etc.
You can also set a specific date or date and time.
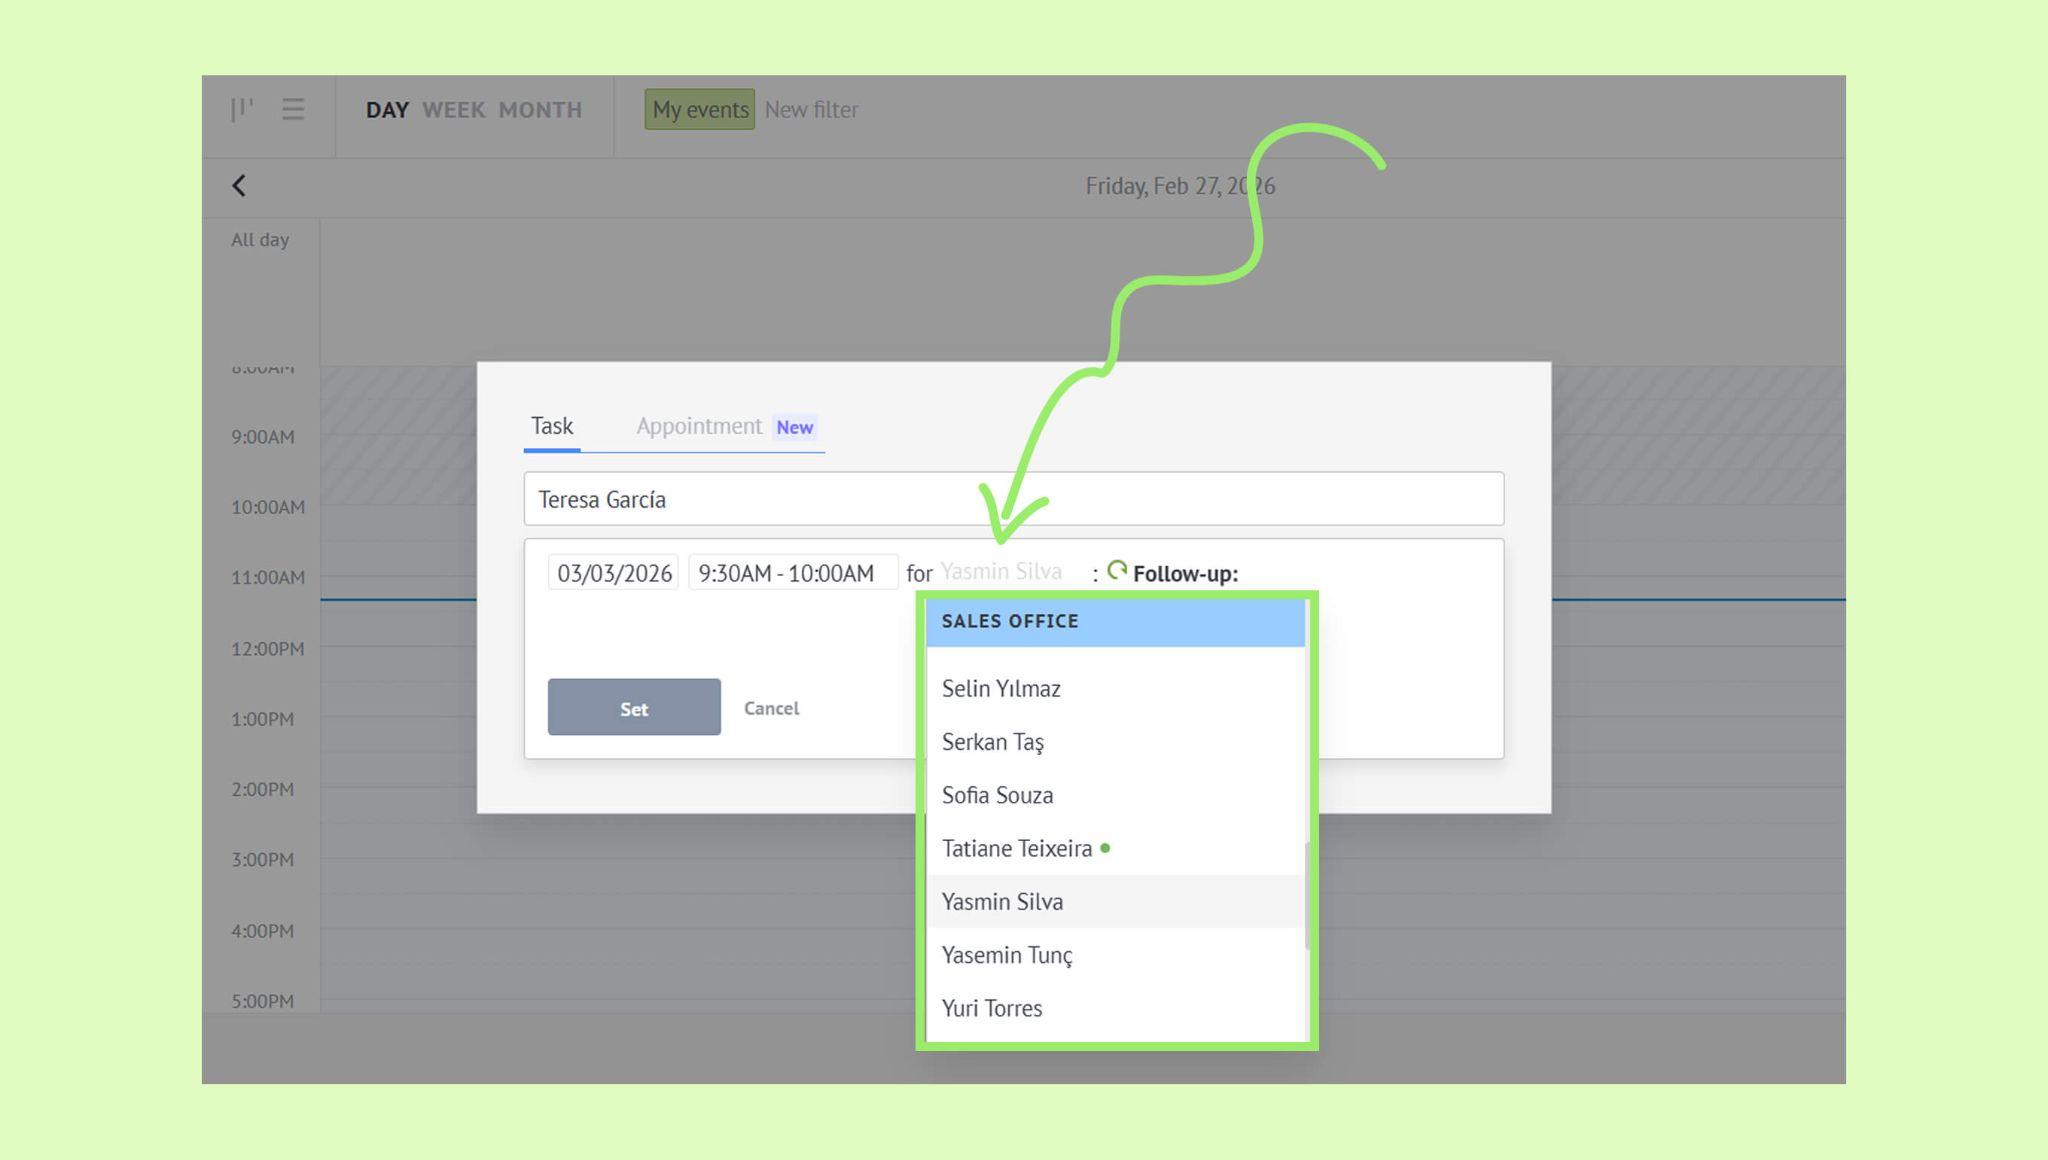
Click the assigned user’s name (default). → Choose a new responsible user if needed.
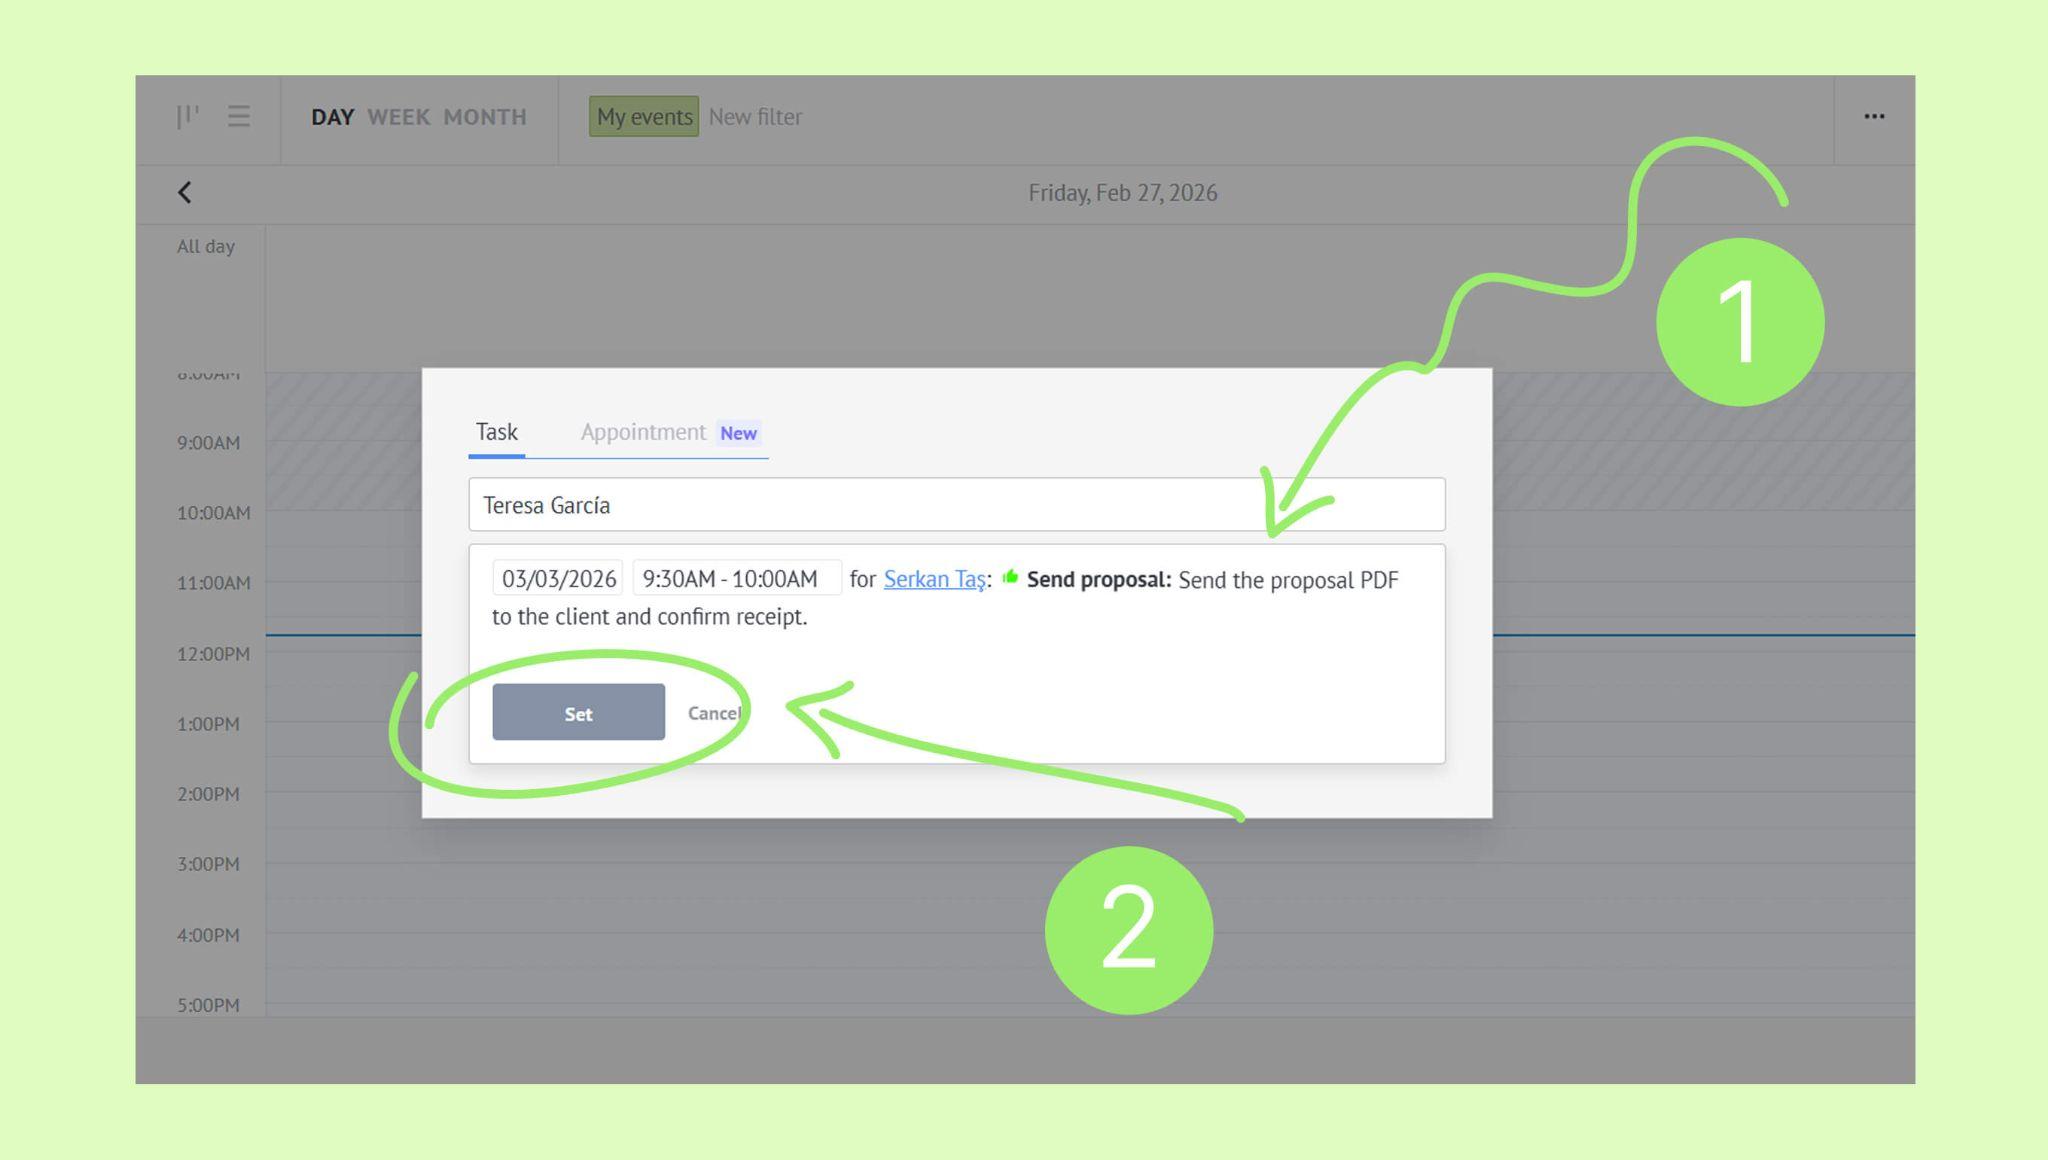
Click Follow-up (default) → Choose a task type.

Add a comment (optional).
Click Set to save the task.
Create a task from a lead profile
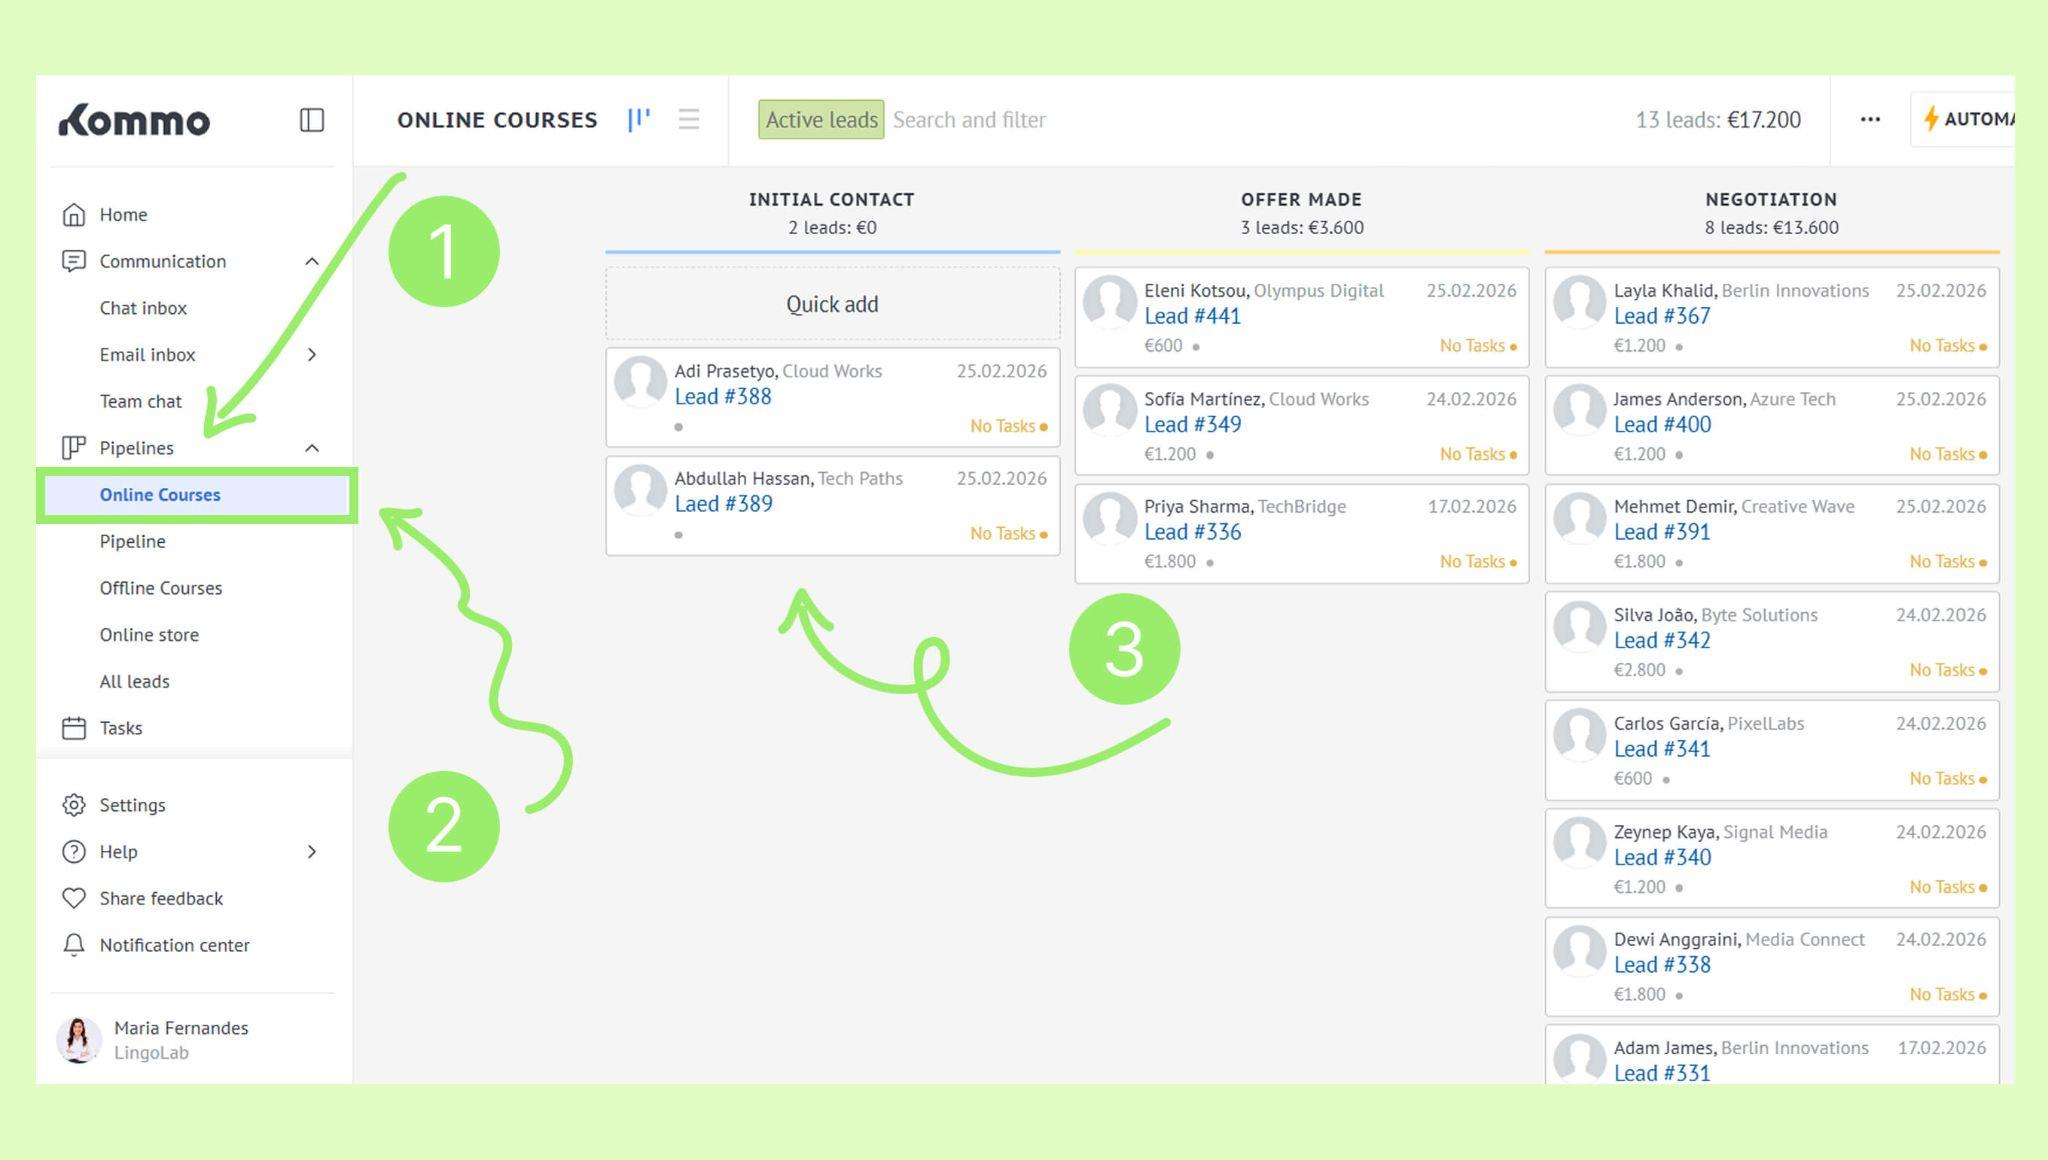
Go to Pipelines, select the pipeline, and open the lead.
Click Chat → Select Task.
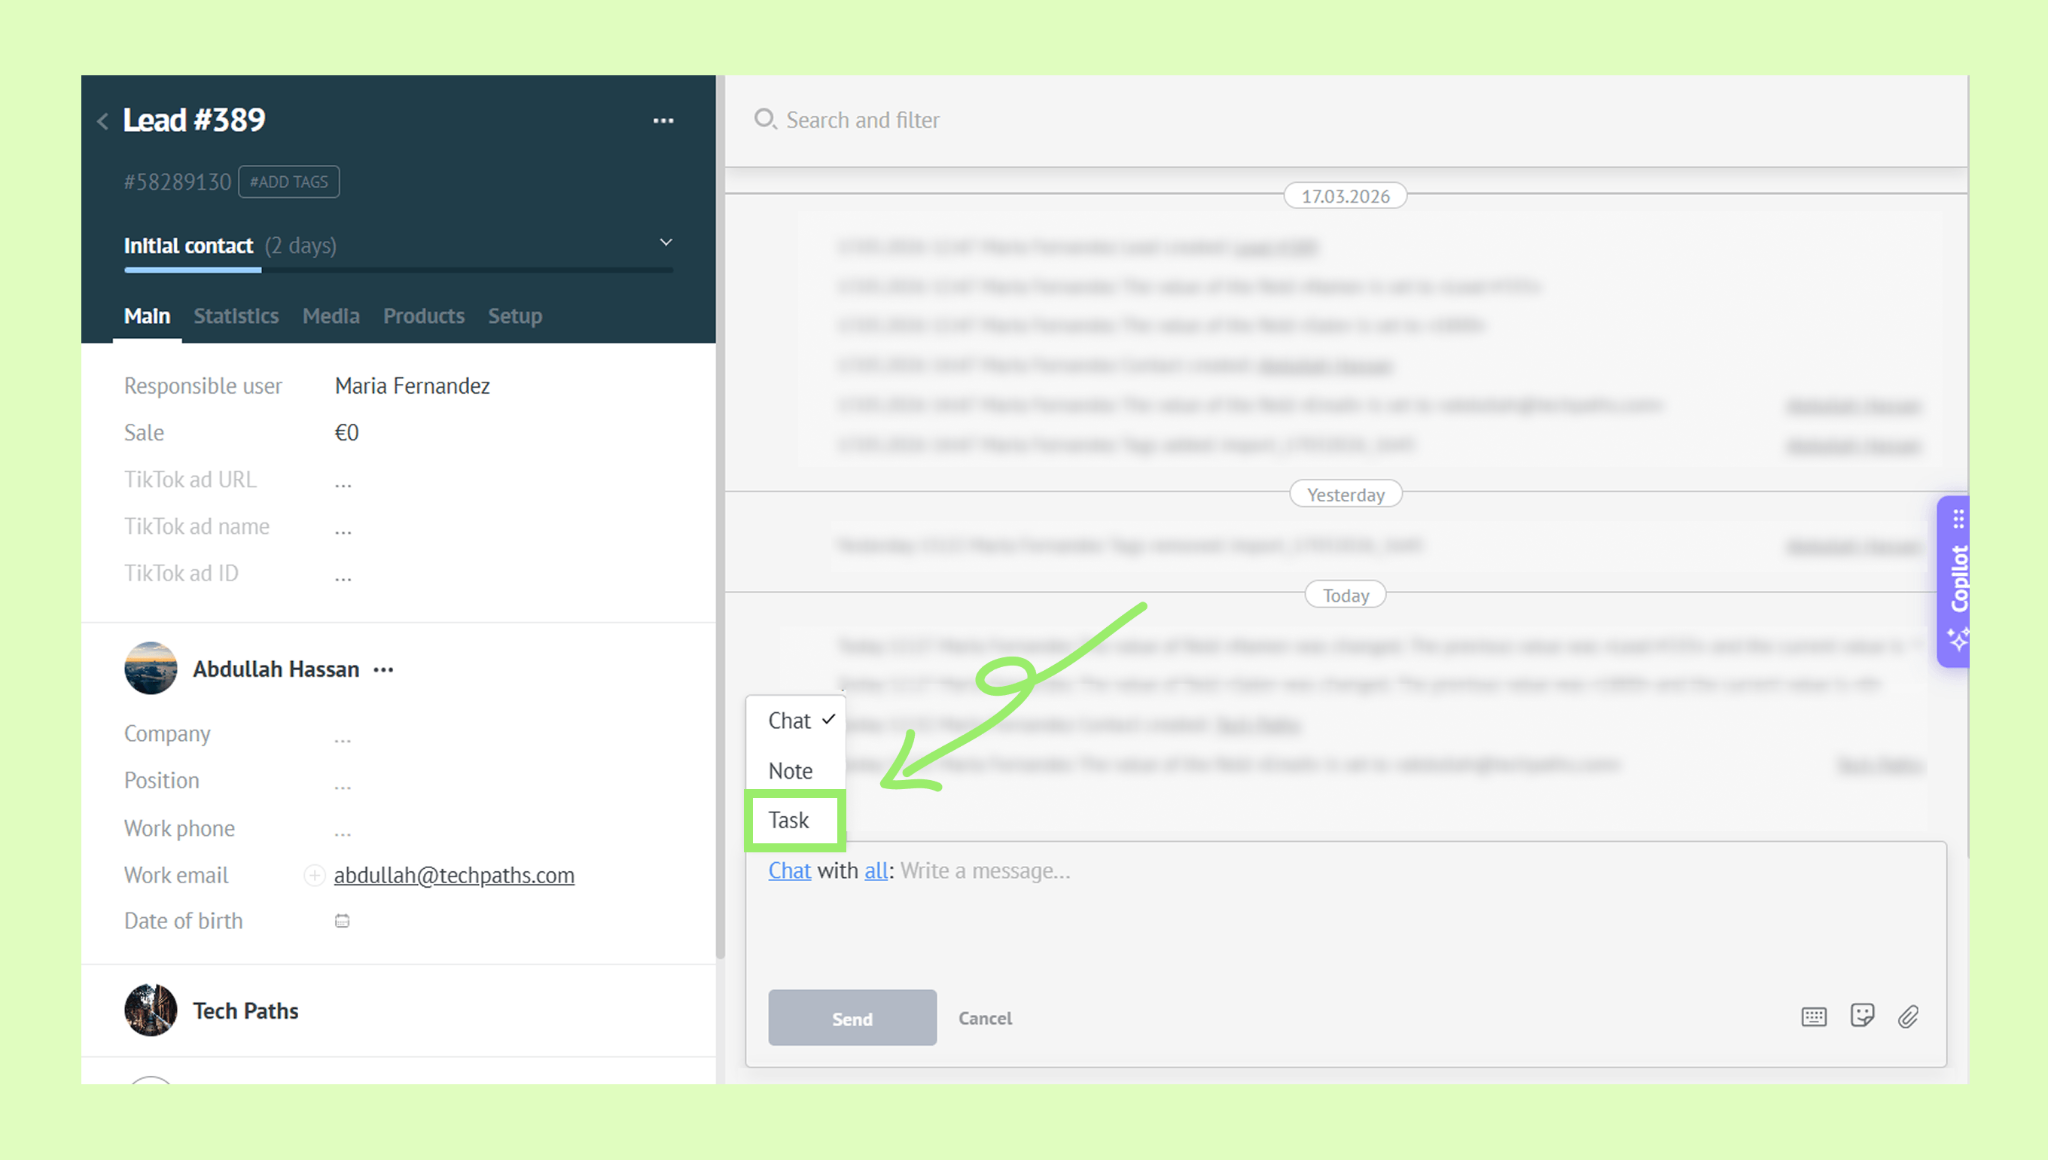
Note: If you haven’t added any tasks for this lead yet, you’ll see the message “No tasks planned, start by adding one”. To create a task, click Adding one.

The task form will open.
To set the deadline, click Tomorrow (default) -> Choose a pre-set option, a specific date, or a date and time.
If needed, click the assigned person’s name and select a different responsible user.

Click Follow-up and choose a task type.
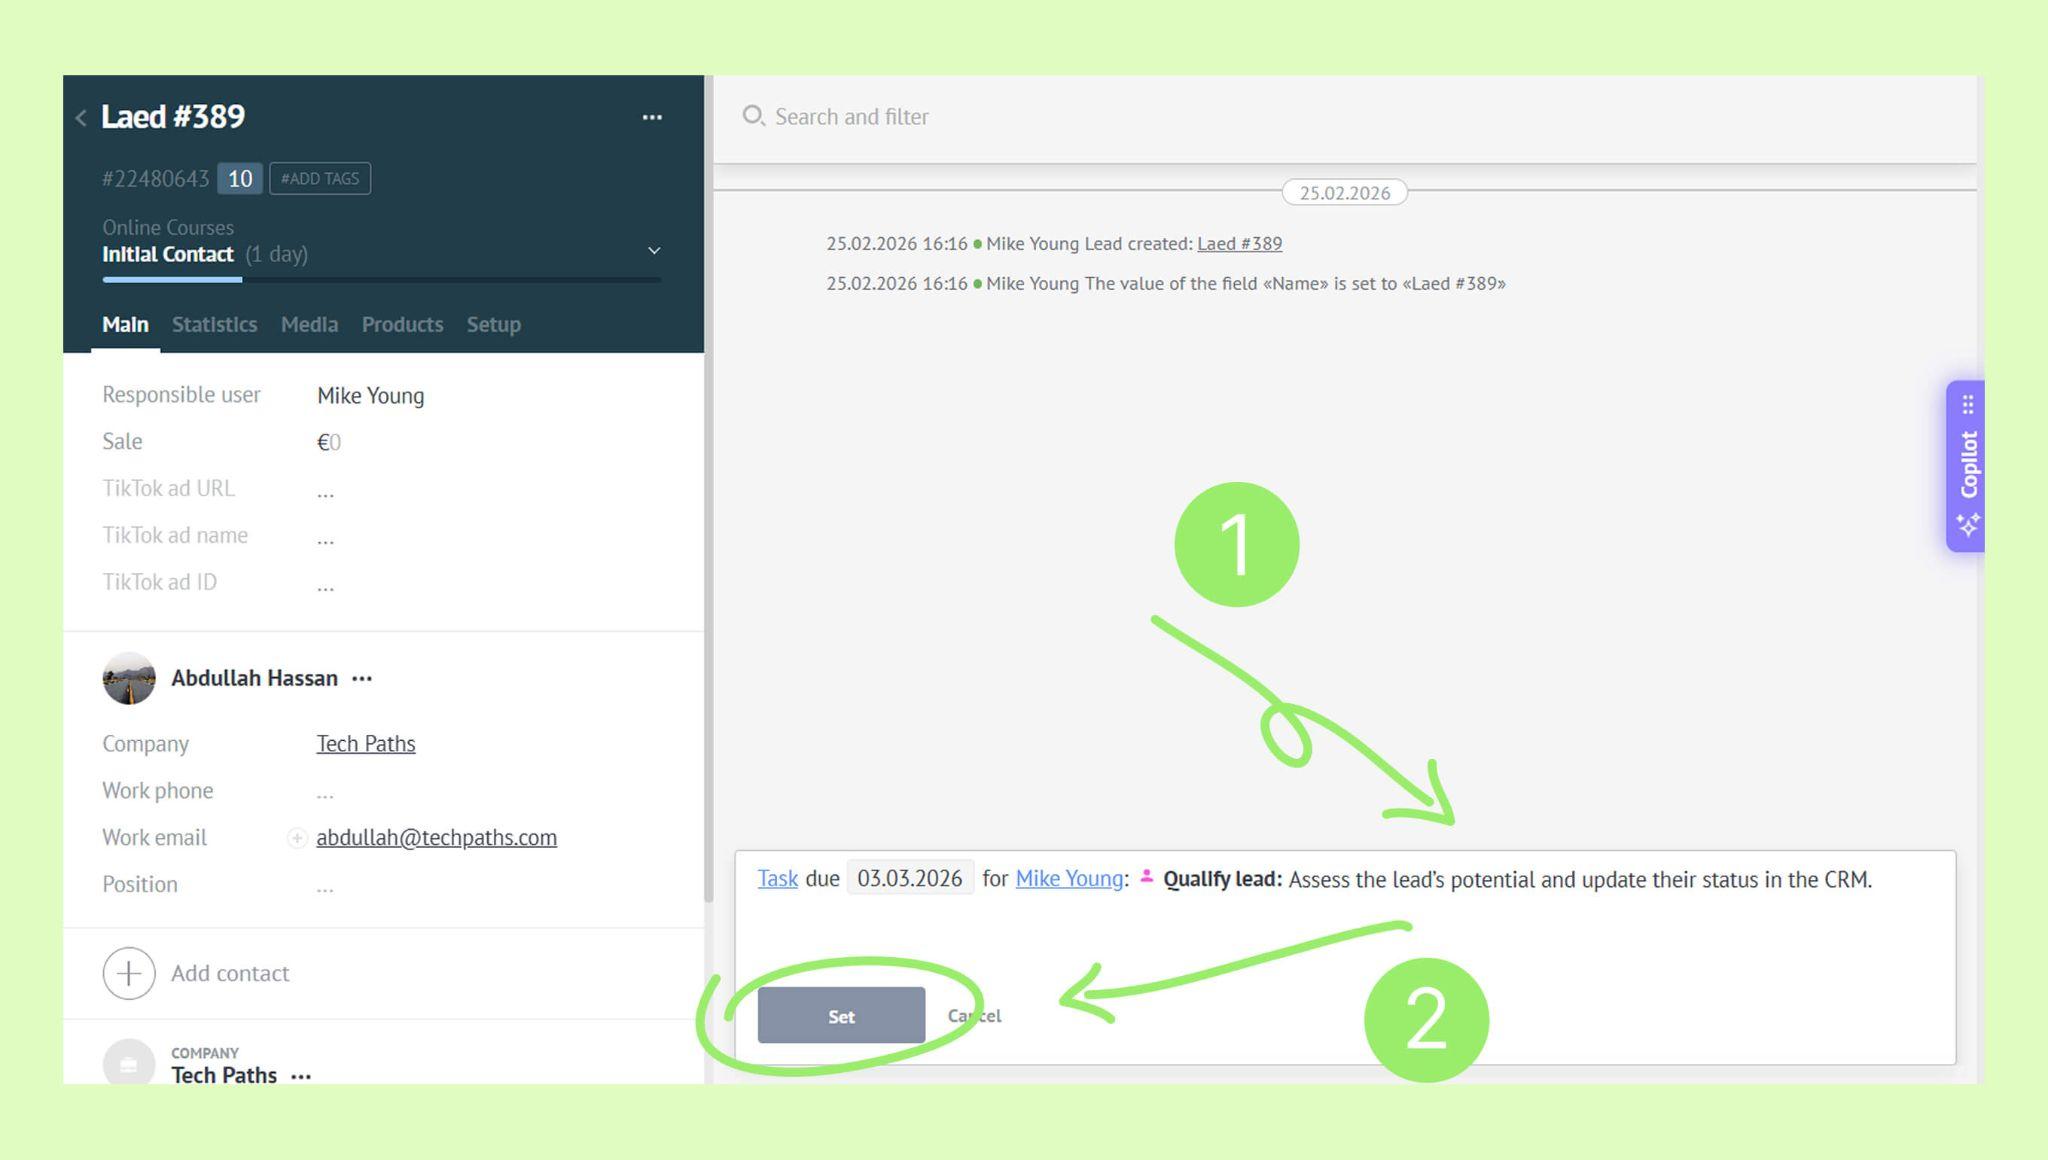
(Optional) Click the comment field and add a comment.
Click Set.
Set up automatic task creation
To reduce manual work, you can set up tasks that are created automatically.
Automated tasks for contacts and companies
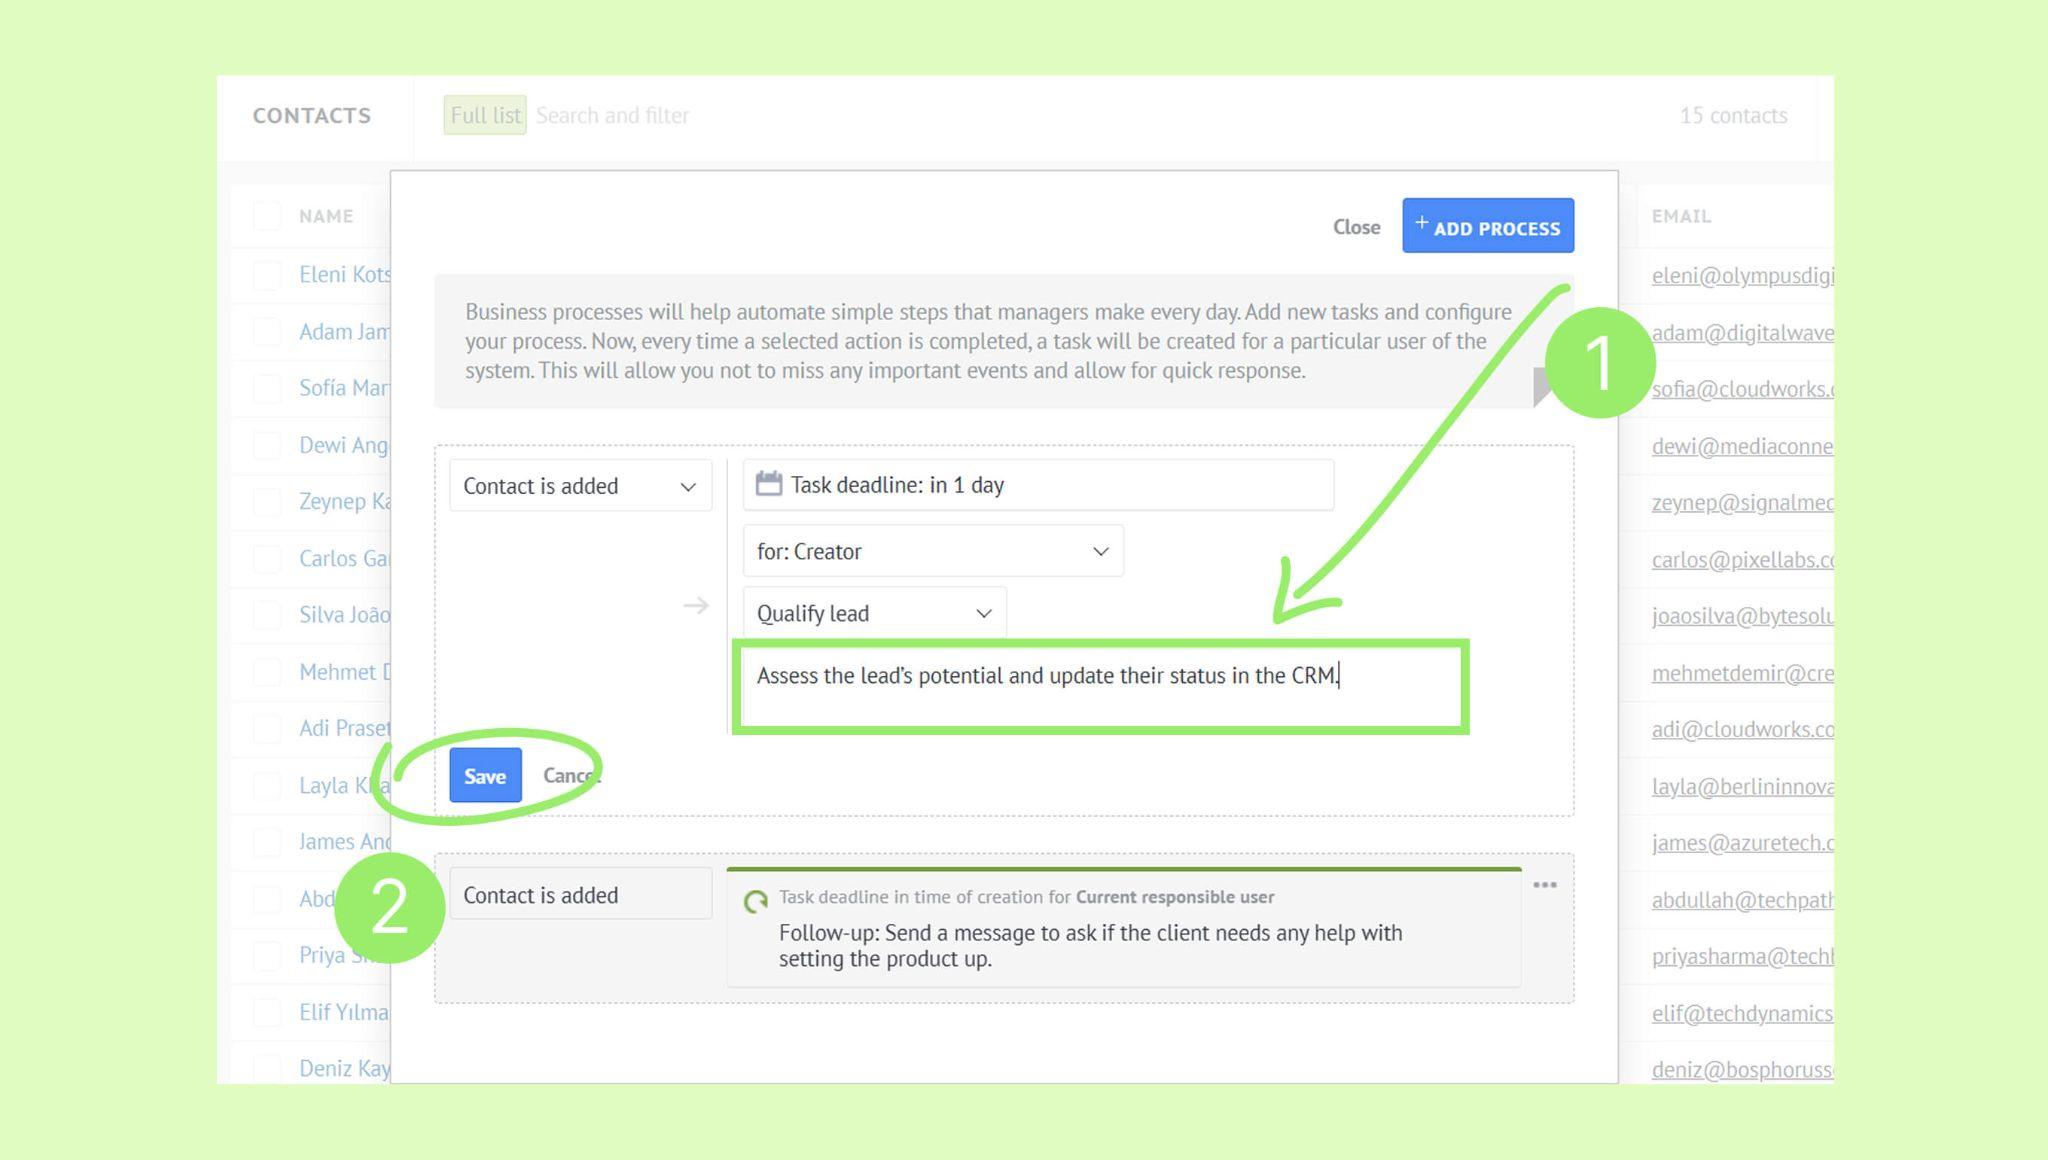
You can set a task that is automatically created every time a new contact or company is added. This can be done through business processes. To set it up:
Go to Lists → Contacts/Companies → … → Business processes.
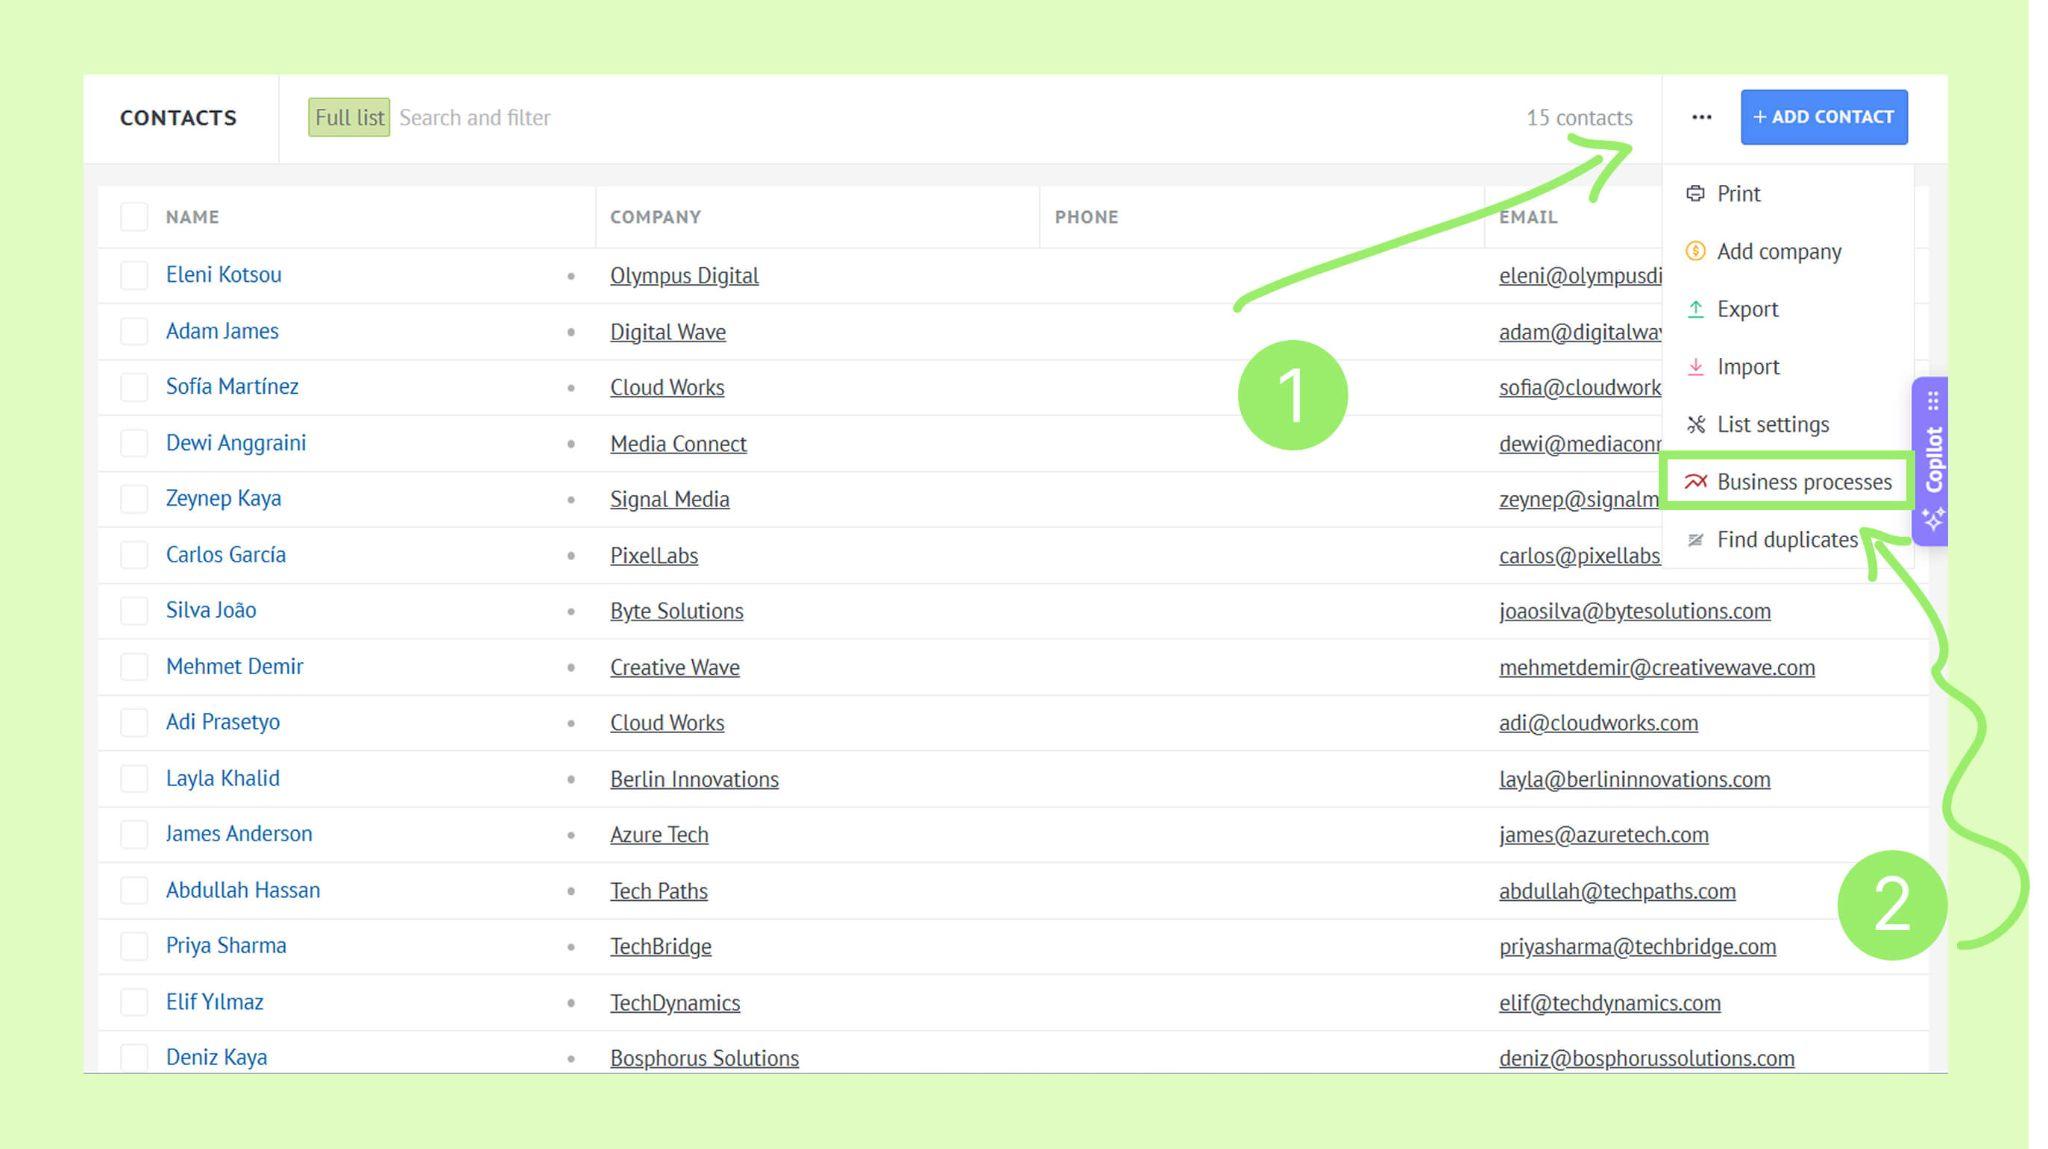
Click Add process.
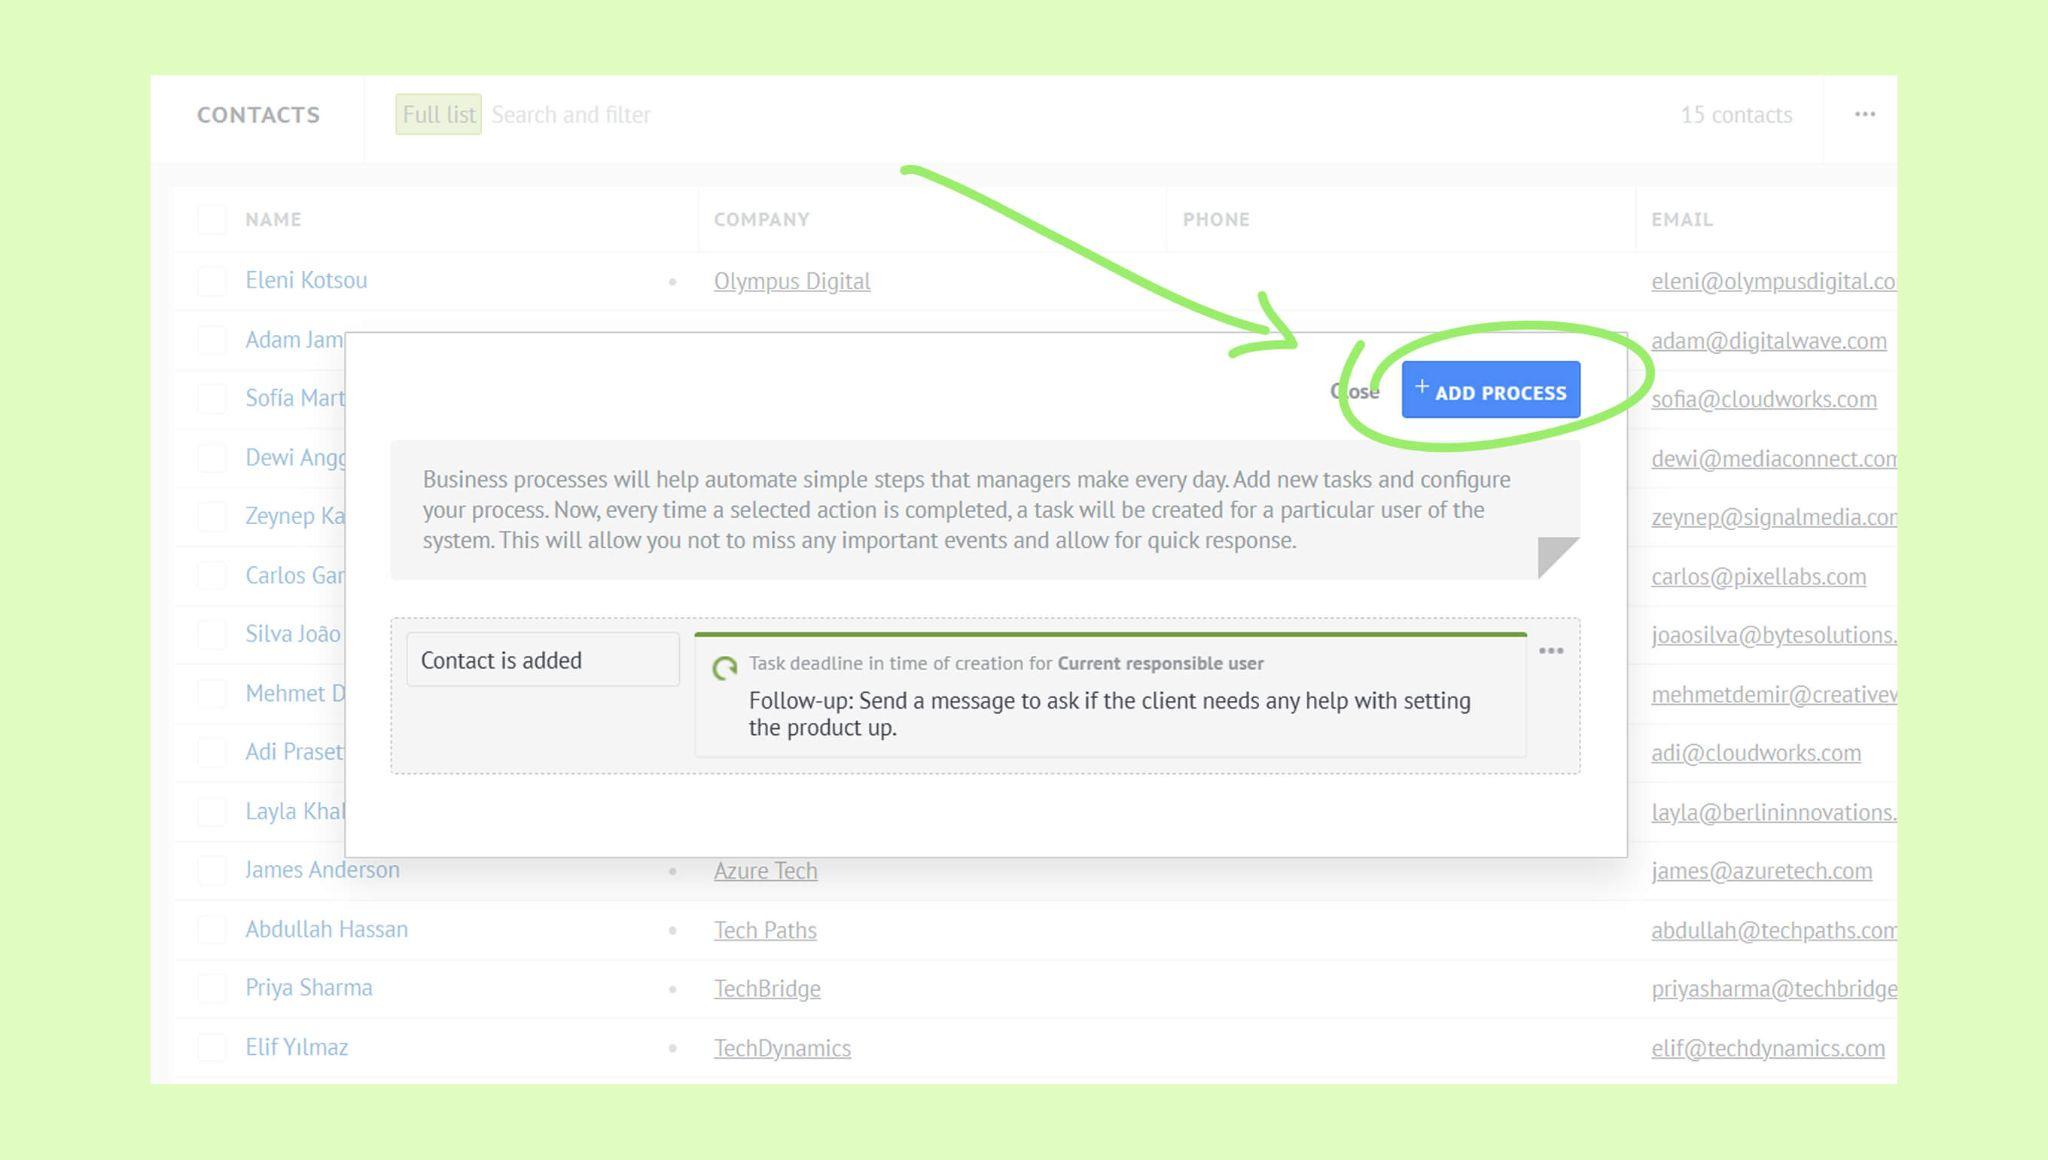
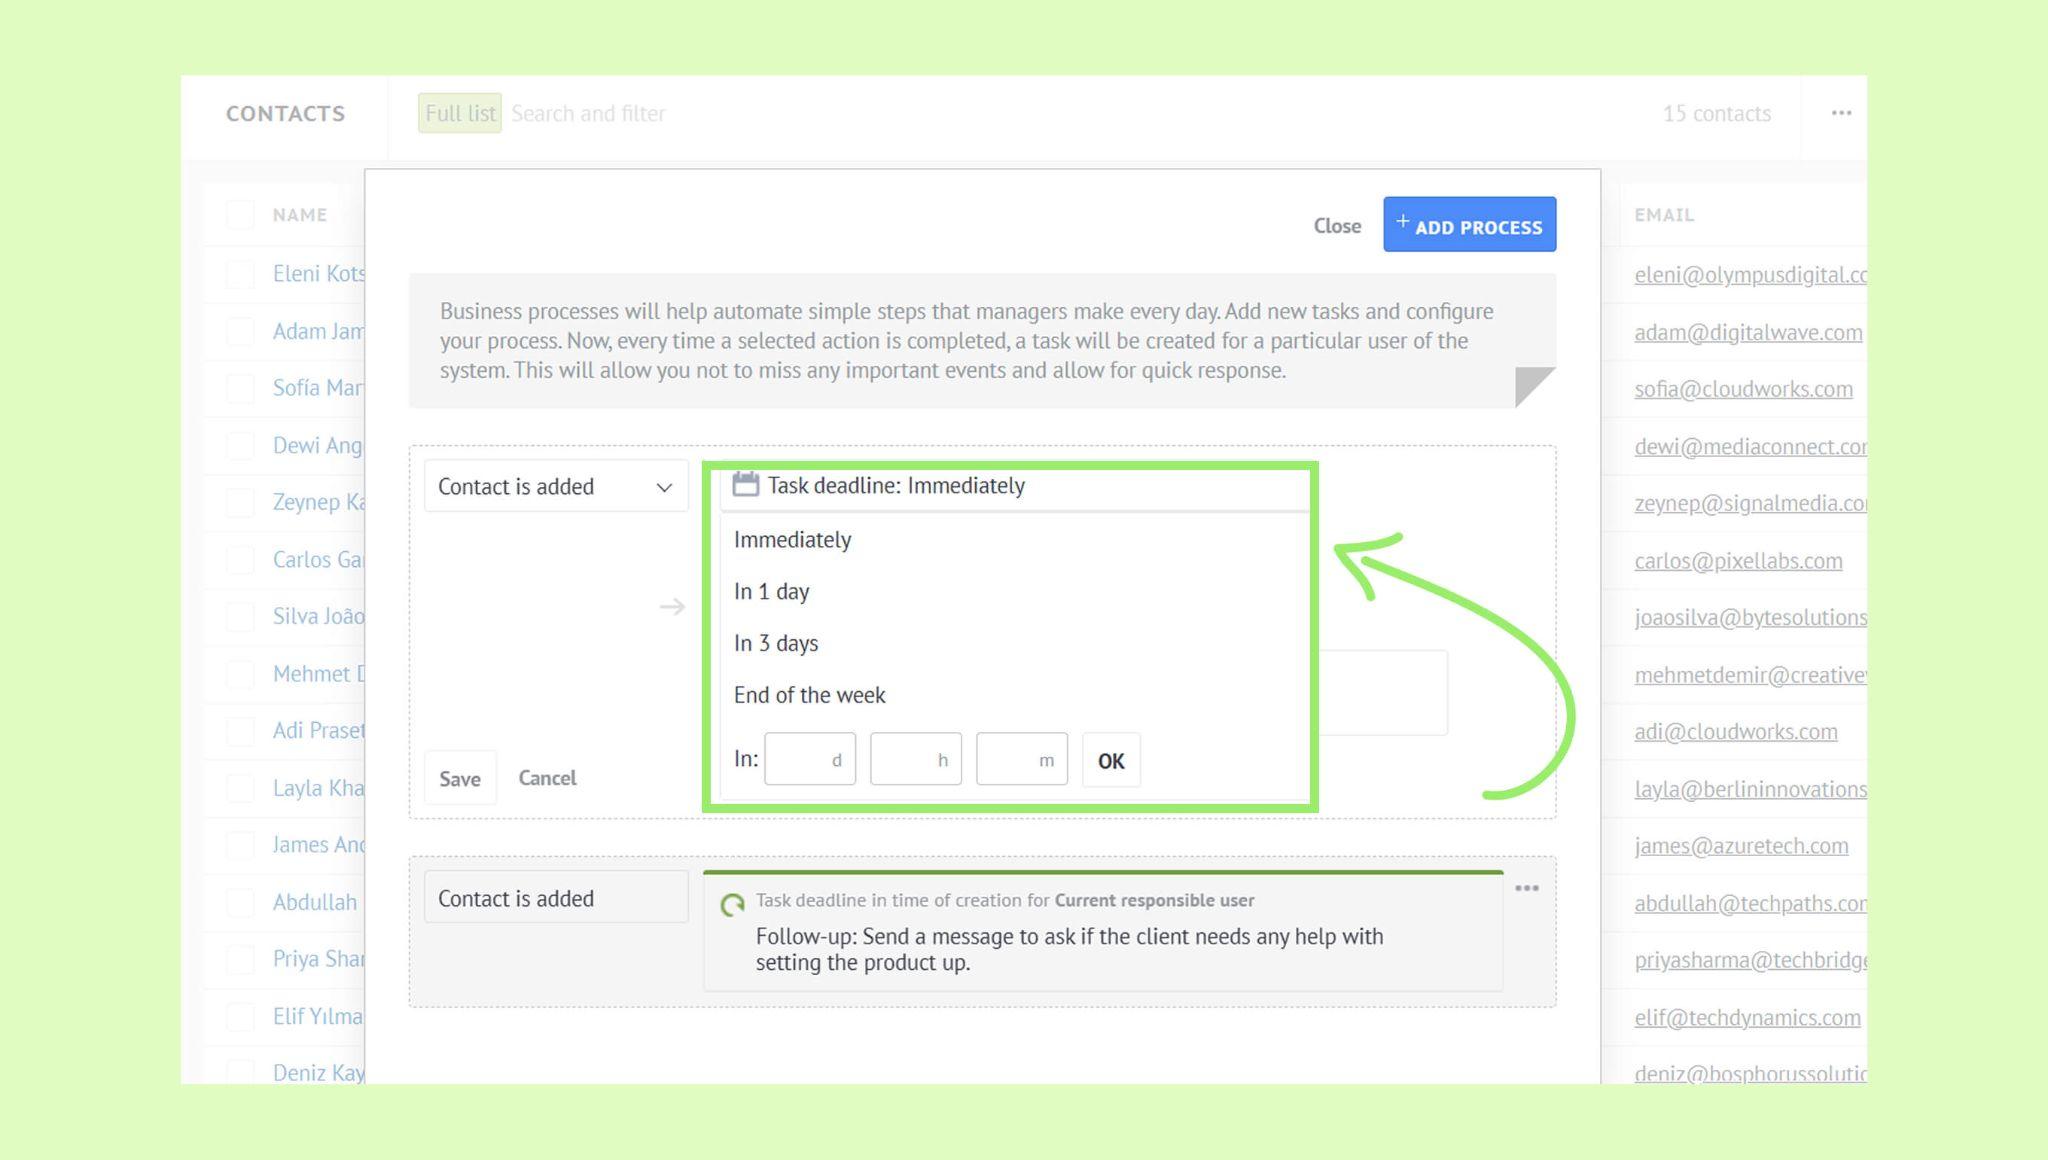
Click Task deadline: immediately (default value) → Set the deadline.
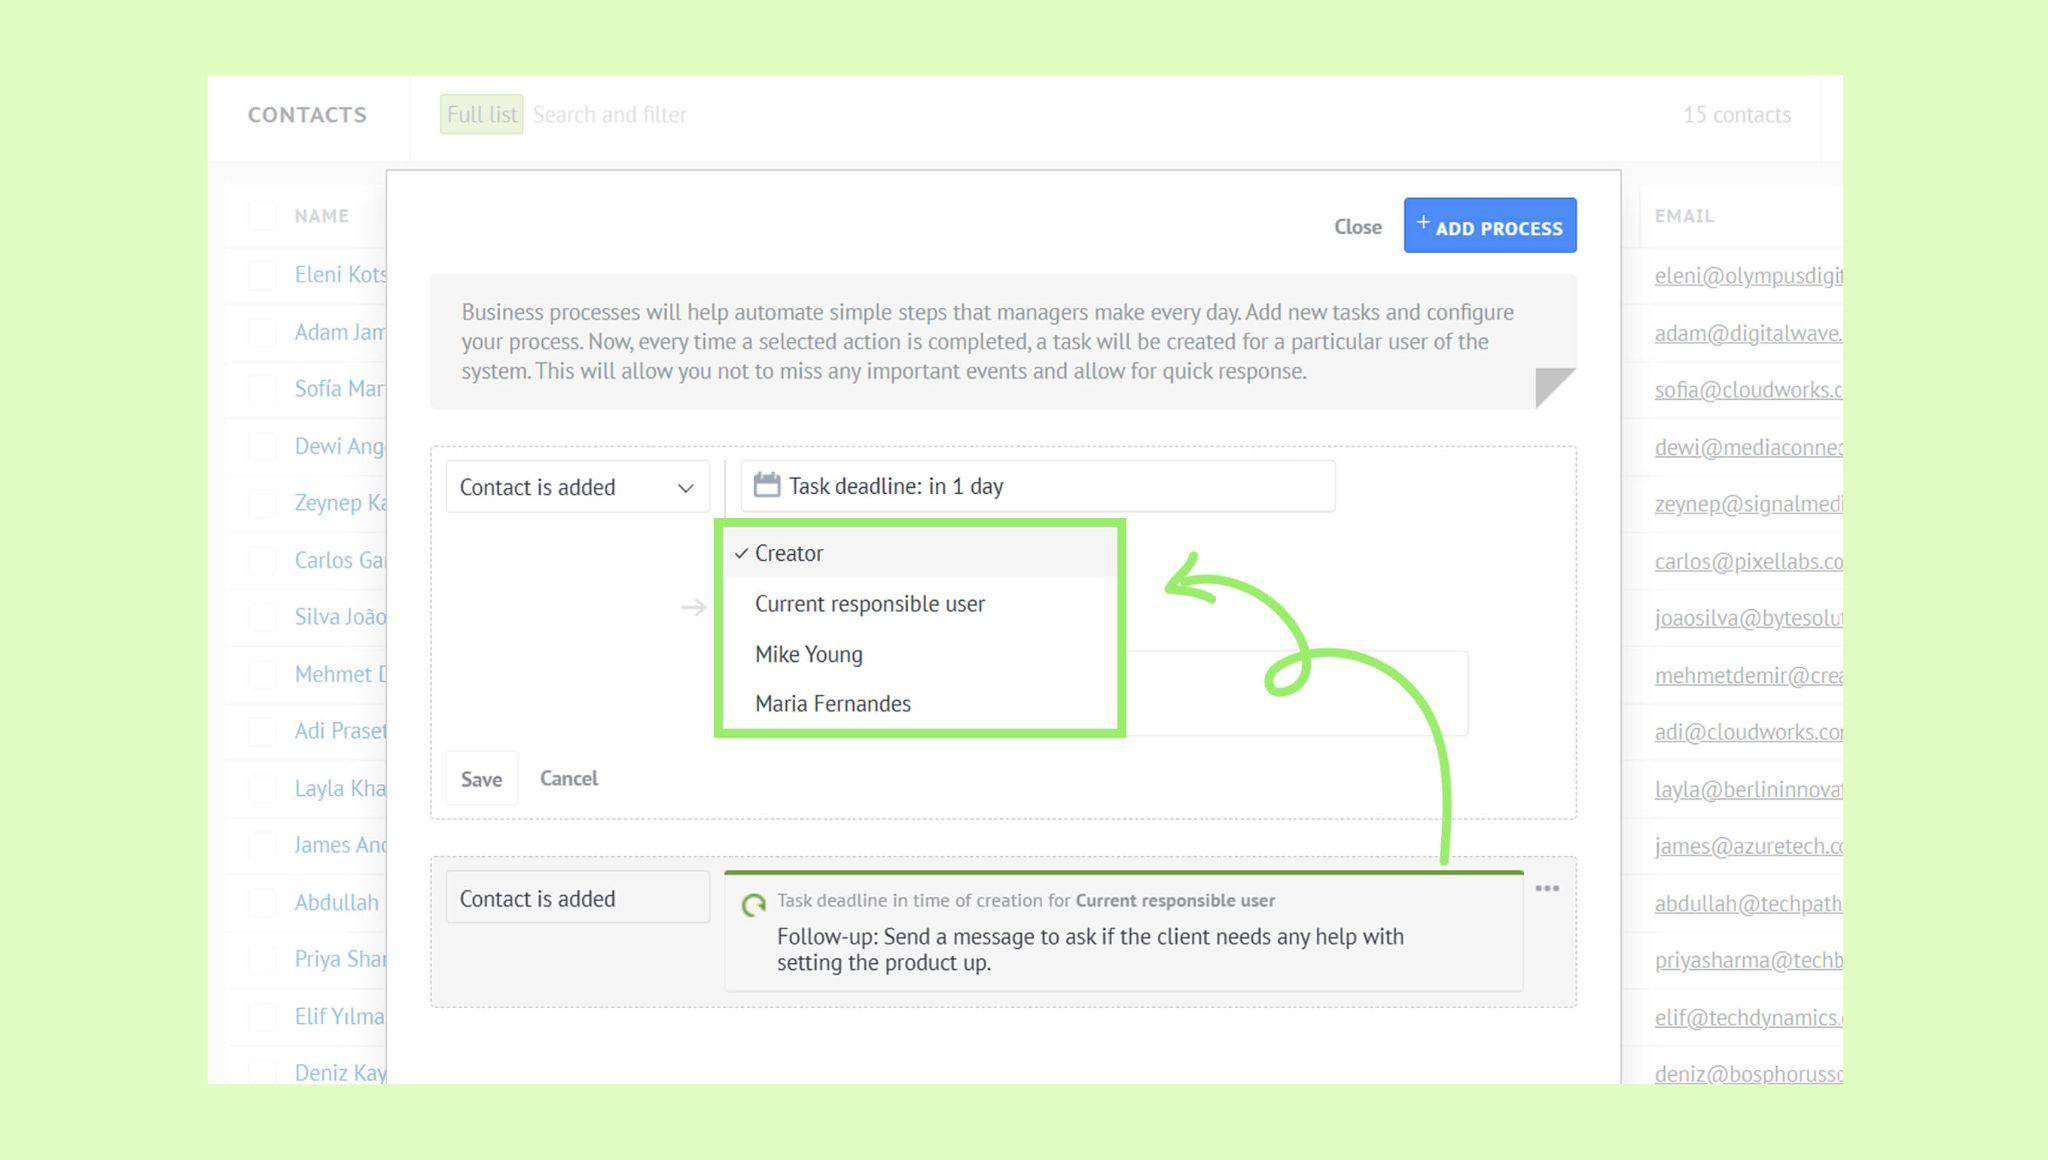
Click For: Creator (default) → Select the responsible user.
Click Follow-up (default) → Choose a task type.

Add a comment (optional). → Click Save.
Note: For contacts and companies, automated tasks are created only when a new record is added. Other actions cannot trigger task creation.
Automated tasks for leads
You can set up automated tasks for many actions related to leads. For example, when:
A lead moves to a new stage
An email from a lead is received
A new tag is added to a lead
And more
These tasks are set up using triggers. Learn more about triggers in the Set up digital pipelines triggers article.